The drum in my Candy washing machine isn't spinning.
 What happens after loading laundry into the drum of a Candy washing machine? The user sets the wash cycle, and the machine begins filling with water. Once the required amount of water has been filled, the motor starts and the machine begins washing, but after a while, the machine suddenly stops. Why isn't the drum spinning? Let's look into this complex question.
Initial actions
What should you do if your washing machine stops working? Don't panic in this situation. First, turn off the power and unplug the power cord. Then, prepare to drain the water. Drainage occurs through the filter hole. Place a container designed for collecting the water opposite the hole. Once the water has drained, you can remove the laundry from the drum.
When making a diagnosis, it's important to determine when the stoppage occurred. If it occurred during the spin cycle, the laundry will simply be damp and there will be no traces of detergent. If the blockage occurs during washing, all items in the drum will be covered in powder.
After removing the laundry, you can try to spin the drum manually. If this fails, a foreign object or a broken part is likely the cause. If the drum spins without much effort, the problem lies in the electronic system.
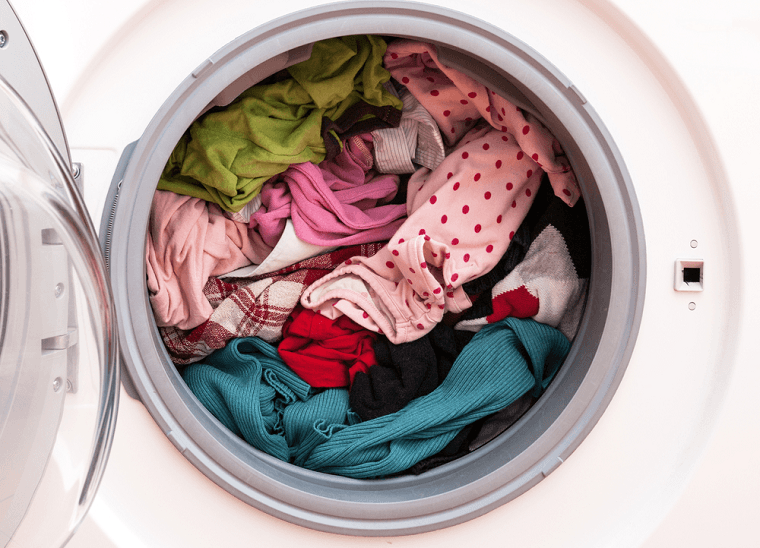
One more thing. Often, a woman overloads the drum, which can also cause it to stop during a wash cycle. In this case, you can separate the load into two batches and try restarting the machine.
Machines produced today are equipped with a sensor that monitors the weight of the loaded laundry. This data is displayed on the monitor.
Before making a "definitive diagnosis," it's necessary to check the hoses for any pinching, as well as the condition of the filter. In reality, there are many reasons why a Candy machine isn't spinning. We'll have to consider them one by one.
Foreign objects in the tank
Often, due to a housewife's carelessness, foreign objects end up in the drum, which can stop the drum from rotating at the most unexpected moment. An object lodged between the drum and the tank wall can easily cause serious damage. These problems require tank repair.
To search for foreign objects, it's a good idea to arm yourself with a flashlight and thoroughly inspect the drum. It's likely you'll find a button or something else that caused the machine to stop.
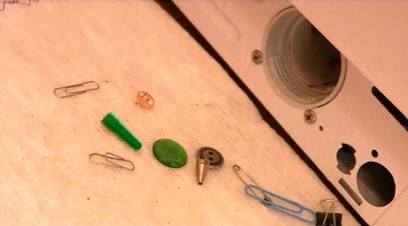
Removing foreign objects should be done with care. Many objects can accidentally get into the machine, and it's not always possible to see them through the drum openings. Removing small objects will require partial disassembly of the machine body.
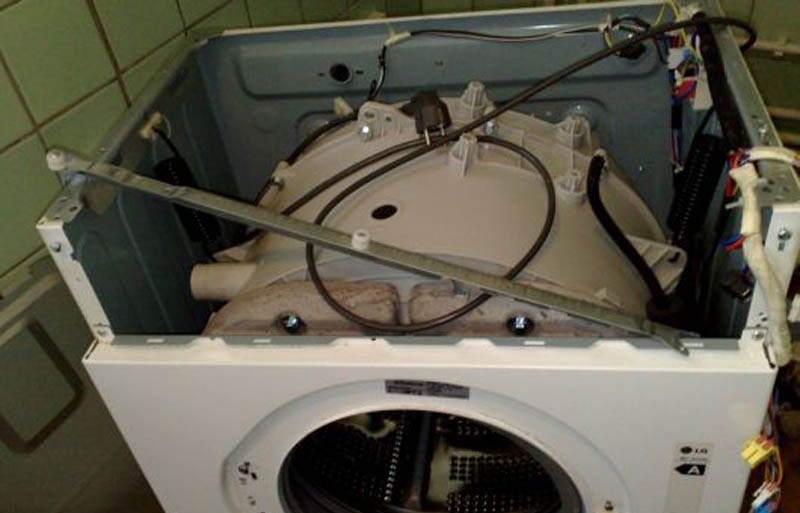
Disassembly sequence
The partial disassembly procedure doesn't seem very complicated. To ensure comfortable operation, the machine must be positioned so that it is accessible from all sides. Next, you need to:
- unscrew the bolts located on the rear panel and holding the top cover;
- push the lid forward with some force and then remove it;
- we unscrew the fasteners located at the back and remove the back wall;
- we remove the wiring from the heater, loosen its nut, and push the stud inside;
- very carefully remove the heating element.
Once removed, a hole is created through which you can continue searching for and removing foreign objects. If a foreign object is stuck in the upper part of the drum, you can spin it, which will release the stuck object downwards, allowing you to easily remove it.
Bearing failure
An emergency drum stop can also be caused by a faulty bearing. When disassembling the drum, check the integrity of the bearing and sealing cuff; these can be replaced immediately.
Wear can be detected by the sound of the machine. A worn bearing will produce grinding, clanking, and knocking sounds. Additionally, the machine will begin to vibrate heavily during the wash cycle. All of these indicate bearing wear and the need for replacement.
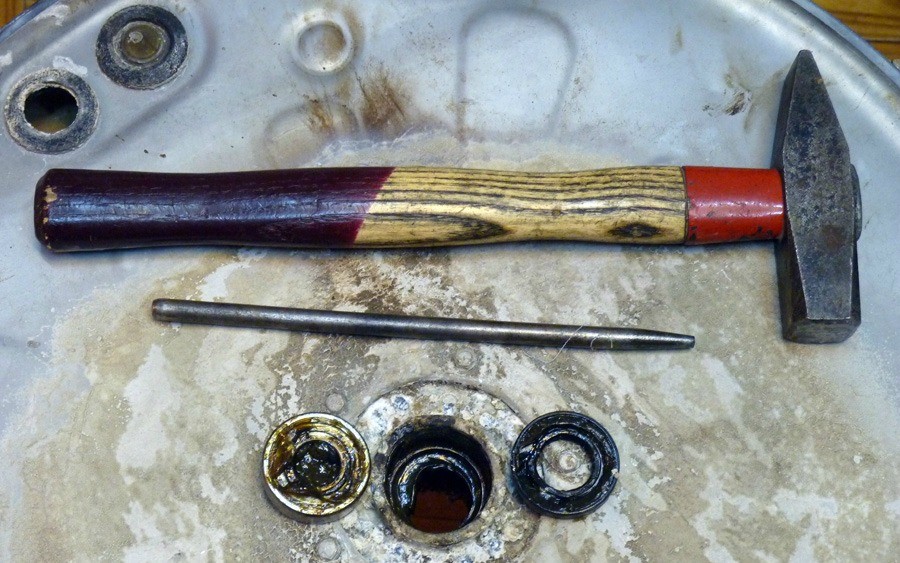
You can use improvised tools to remove the bearing. Once it's removed, apply grease to the bearing's location. Before removing the worn bearing, you must disassemble the washing machine. This procedure requires common hand tools. Use these to remove the front cover, dispenser, and control panel. Each of the blocks is secured with screws or plastic clips, which must be removed before removing parts and assemblies.
Once the front panel and other components have been removed, the rear and top covers can be removed. The counterweight is then removed. This is necessary to gain access to the bearing assembly.
When disassembling a washing machine, it is imperative to remove the hoses; in other words, remove everything necessary for free access to the bearing assembly and the junction between the drum and the tub.
Immediately before removing the tank and drum assembly, remove the electric motor from the housing. Now you can begin disassembling the tank-drum assembly. Once the assembly is removed, it's a good idea to move it to a workbench. Next, remove the bearing and seal, pack the grease, and install the new parts.
When assembling the drum, special care must be taken; the joint must be treated with sealant to prevent leaks.
Drive belt
To access the drive belt, you need to remove the rear panel of the machine. During operation, the belt may have slipped off the pulley; it will need to be replaced and the machine's operation checked. During operation, the belt may wear out, begin to slip, and eventually break. In this case, this part must be replaced.
When installing the belt in its original location, it's important to consider the type of engine used in the vehicle. If an asynchronous power unit is installed, a V-belt is most likely used. If a collector motor is installed, then poly V-belts are installed.
To install the V-belt, loosen the engine and move it slightly toward the drum. Then install the belt on the pulleys and return the engine to its original position. Use the adjusting screw to tension the belt. The belt tension should be tight; a sag of 5 mm is considered normal when pressing on the belt.
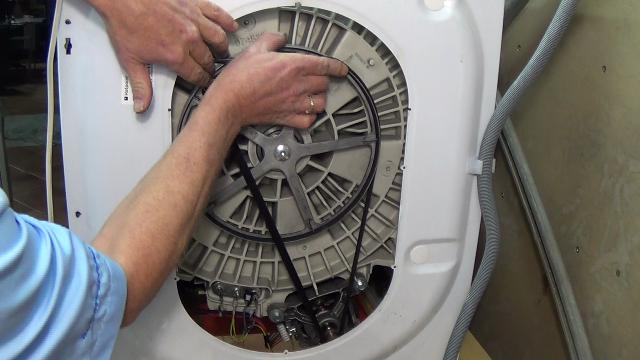
A poly V-belt's cross-section resembles a gear profile. Belt specifications are marked on its outer surface. The replacement method is identical to that of a V-belt. The tensioning force for a poly V-belt should be lower than that of a V-belt.
Pay attention to the engine
During operation, a situation arises where the brushes, due to wear, stop transmitting current to the rotor of the power unit. As a result, at some point the motor will simply stop. Therefore, it is necessary to periodically check their condition.
Important! When replacing brushes, use only those designed specifically for the installed electric motor model. Installing different brushes will sooner or later lead to motor failure.
To check the motor's condition, you need to remove the back panel of your "home assistant." Before doing this, disconnect the machine from the power supply.
- We disconnect the engine from the wires leading to it.
- After removing the unit, place it on its side so that the place where the brush is installed is on top.
- We unscrew the fasteners and remove the brush from the motor housing.

When replacing worn brushes, don't forget about the condition of the commutator. Over time, carbon deposits and scratches accumulate on it. To remove these, use "zero" abrasive paper or a stiff eraser. After removing the worn brushes, install new ones.
After assembly, the motor is returned to its place, the wires are connected, and the cover is replaced. Then, the washing machine must be tested for proper operation. Only then can it be put into operation.
The motors installed in this class of machines are highly reliable, and it takes considerable force to break one. However, sometimes a short circuit in the winding or a broken wire can occur in either the stator or rotor. The first sign of this is that the machine operates normally in idle mode, but when laundry is loaded into the drum and the machine is started, the circuit breaker trips and the power to the house is cut off.
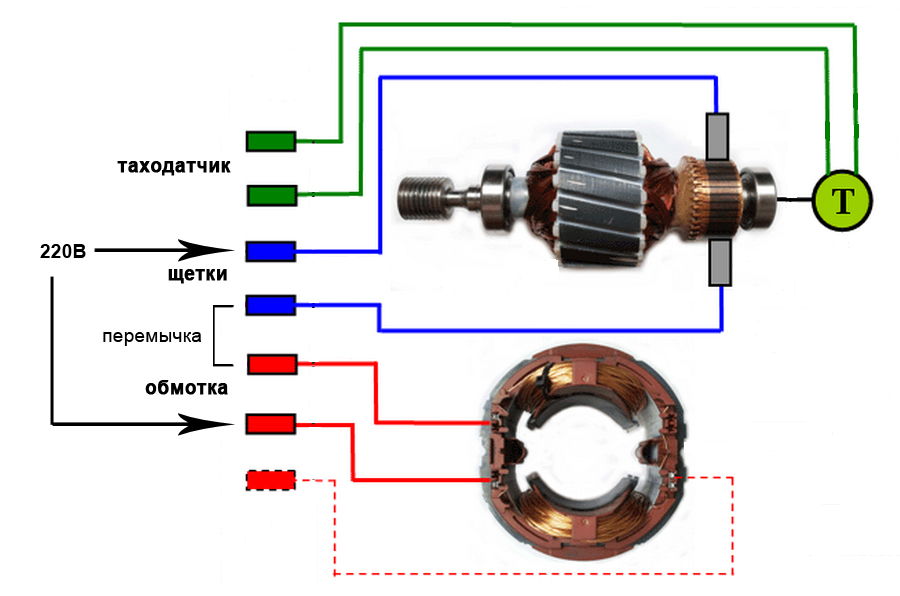
If the wires are shorted or broken, the drum simply won't rotate, but the machine will still make a humming noise. The motor in this condition can be repaired, but if an odor emanates from the engine compartment when the power is turned on, the motor will likely need to be replaced.
To check the condition of the power plant windings, a device called a multimeter or tester is used. We need to check the resistance on adjacent lamellas; the difference should not exceed 5 Ohms. We test the resistance on the winding. We place one probe on the unit and run the other probe along the stator. If the resistance is as high as possible, that's normal. If the windings are broken, the resistance will approach zero.
Prevention of breakdowns
If the problem has been resolved, steps must be taken to prevent it from occurring in the future. To do this, follow a few simple rules. In particular, before loading the drum, carefully check the pockets for any small items, such as a lighter.
You should also use a special mesh bag for loading small items, such as underwear. To protect electronics from power surges, it's advisable to connect the machine through a voltage stabilizerWhen placing laundry in the drum, try not to overload it.
Interesting:


1 reader comment
Add a comment
Headings
Washing machine repair


For buyers


For users


Dishwasher


How complicated is it!? If the drum and motor spin freely by hand, the most common cause is a capacitor in the motor circuit. I replaced it twice with similar ones. Then I installed an old Soviet 8 μF, 400 volt one, fortunately there's plenty of space there. And then I forgot about it.