How to glue a washing machine tub
 After repairing a non-separable tank, you need to figure out how to put it back together, which means replacing the drum and sealing the tank. More precisely, you need to glue the two halves of the tank together so that the entire assembly once again becomes a watertight monolith. To achieve this, you need to know not only what to use, sealant, or something else, but also how to glue it, and this is something that ordinary people and even some experienced mechanics often lack. We'll explore this issue in more detail in this article.
Why do gluing?
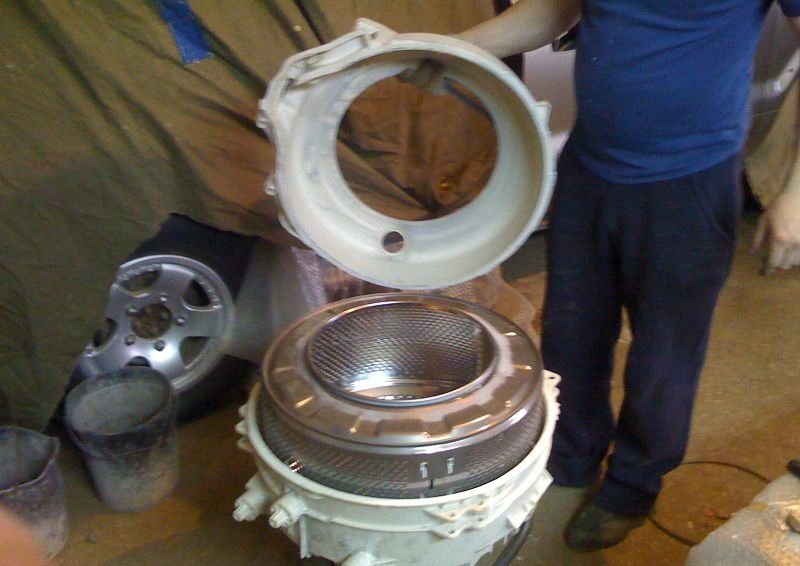
Automatic washing machine manufacturers, such as Indesit and Ariston, are playing a real trick on repairmen by making the drum of their machines non-detachable. The implication is that the user must replace the entire washing machine component just because of bearings or some other minor issue. While in Europe, someone might bother with such a chore, here they'll repair the component anyway, and the fact that it's non-detachable is unlikely to stop anyone.
The repair will be completed, but the problem will be how to restore the tank after such a repair, as we had to saw it in half to access the key components. The first thought was to glue the tank back together with sealant. But sealant, no matter how good, won't provide sufficient structural strength. Conclusion: to securely connect the two halves of a plastic tank, you need to screw them together with bolts and nuts, and seal the gap between the halves with sealant, ensuring a waterproof seal.
Experts advise against skimping on sealant. After all, it would be a shame to have to disassemble the washing machine's tub and reseal it if the joint between the two halves starts to leak.
If you are interested in more detailed information on how to implement DIY washing machine tub repair, read the article of the same name on our website. It describes in detail, including how to disassemble the tank and reassemble it.
Review of adhesives
We've generally covered why it's necessary to seal the washing machine's tub and drum. Now let's decide which sealant to use. Some users don't see this as a problem, noting that almost any modern sealant is good enough to provide reliable waterproofing, and there's no need to look for anything special. We beg to differ. It's important to consider the following:
- During operation, the tank and drum are subject to serious vibration;
- the tank will heat up and then cool down;
- Water will be poured into the tank, in some cases under pressure, which will also affect the sealed connection.
So don't pay attention to idle talk. It's much more effective to simply go to the store with the firm intention of buying the right sealant to seal your washing machine's tub and drum. And after the repair, you won't have any regrets or have to redo anything.
First, we need to study the list of the most suitable compositions that specialists have identified for us.
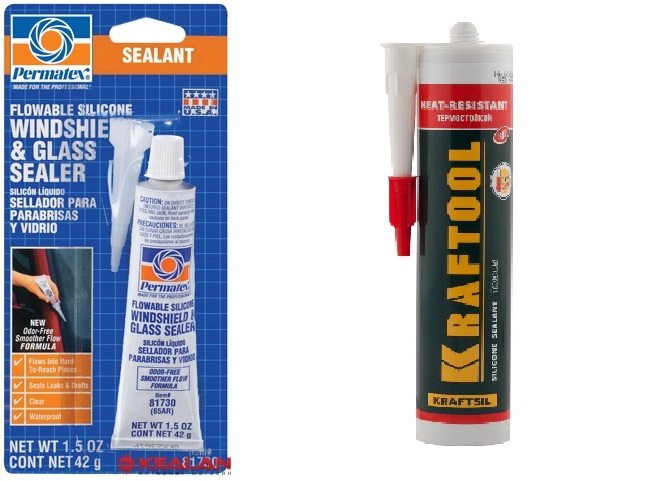
- Permatex 81730 is a sealant specifically formulated for sealing car windows, headlights, and other components. It's designed for harsh outdoor conditions, just what we needed. This sealant has proven itself to be excellent; our technicians often use it to bond the gas tank and drum after repairs—the results are excellent, with no leaks. The average cost of a 42g tube (the entire tube is used for the gas tank) is $3.
- Kraftool Highly Elastic Sealant: A highly durable sealant that can withstand temperatures up to 250 degrees Celsius and high vibrations, as it was originally created for sealing joints in engines, pumps, and fireplaces. It's a great way to seal the tank and drum of a washing machine after repairs are complete; it holds very well, even without bolts. Our technicians use it most often because it's high-quality, affordable, and one tube lasts for 3-4 applications. It costs $3.80.
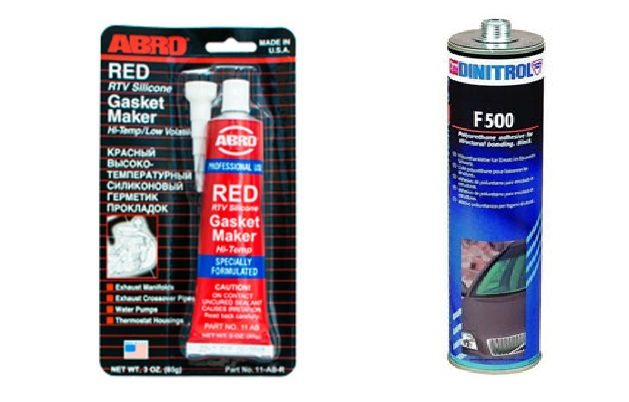
- This isn't a sealant, but a polyurethane adhesive. It's specifically designed for those looking for something truly powerful. This adhesive will securely join the halves of the tank and drum after repairs. It won't come apart, and you don't even need any bolts—2-3 hours and the bond is complete. Our technicians don't use it because it's expensive, and bolts are more familiar and convenient. You might have to disassemble the tank again later, but with this adhesive, you won't be able to disassemble it a second time; you'll have to saw it again. Price: $11.50 per 310 ml can.
- ABRO 11AB-R. An excellent, super-durable sealant suitable for virtually any, even the most challenging, conditions. Withstands enormous temperatures, mechanical and chemical influences. It's difficult to dissolve even with sulfuric acid, so a tight seal between the tub and drum of a washing machine can be easily ensured after a major overhaul. The average price for an 85g tube of sealant is $6.
In this case, any moisture-resistant sealant will not work, so study the above list carefully.
How to fasten the halves of the tank?
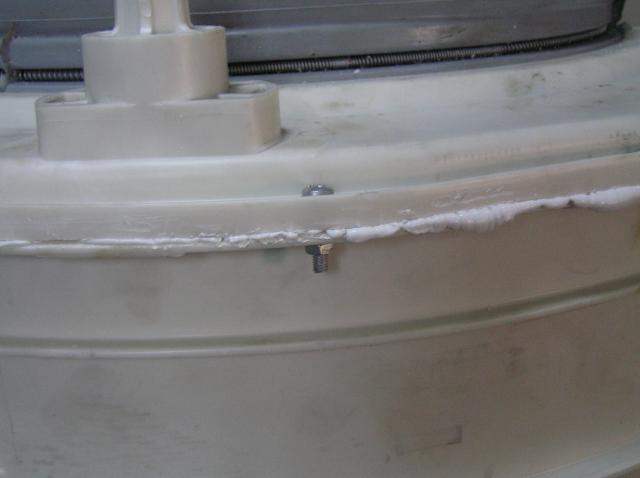
It's simple. If you've prepared the washing machine's tub and drum for reassembly after the repair, you won't have any trouble attaching the tub halves together. The trick is to drill 3-4 dozen small holes across the seam just before sawing the tank, so that after you break the tank into two halves and repair it, you can easily align the holes together and connect these halves perfectly.
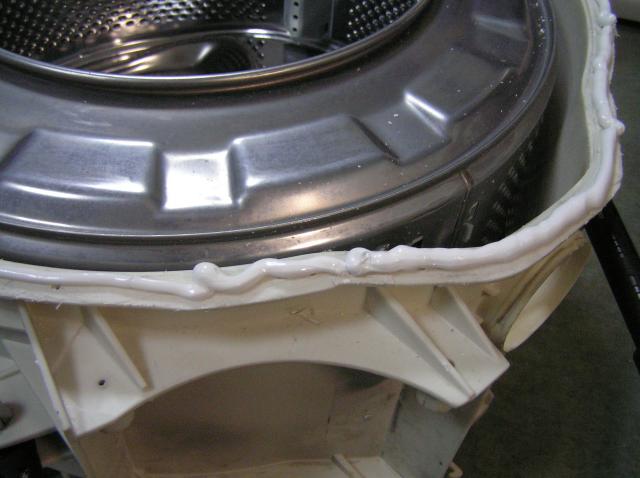
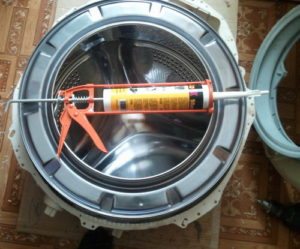
So now all we need to do is generously coat the joint between the halves of the washing machine's tub with sealant, join them, and bolt them together. Bolt them in immediately; there's no need to wait for the sealant to dry. It will dry in a couple of hours, but by then the sealant will have set sufficiently to seal out water.
Remember! Don't skimp on sealant, but don't apply too much, or you might end up gluing the drum to the walls of the tank when you wash it (just kidding).
In conclusion, if you properly bolt the halves of the non-separable tub together and seal the seam with the right sealant, you'll have no problems connecting your washing machine tub in the future. Happy repairing!
Interesting:


13 reader comments
Add a comment
Headings
Washing machine repair


For buyers


For users


Dishwasher


Hello, after assembling the tank and installing it in the washing machine, it's dripping a little and the water supply won't turn off. I removed it and greased it, but what should I do about the constant water supply? It worked fine before I took it apart.
Note the small container at the bottom of the drum with a fitting at the top. A thin hose runs from it to the pressure switch. During washing, pressure builds up in the container. Most likely, air is leaking through it, causing the pressure switch to fail to activate and shut off the water supply.
We also have a water intake, but we sealed the tray in the water regulator system, we disassembled it again, and found the error ourselves.
Thank you! Your information is important.
Hello, can I use DINITROL F 500 alone? Is it just that it won't stick the tank parts together?
Belife silicone sealant 50ml (white/transparent). Used it with screws, and the tank leaked. It crumbled like foam. Total failure!
Good evening. I didn't make any holes before disassembling the tank. Can I screw the halves together?
It feels great on them. Because when screwed in, the screw passes through a layer of sealant, which, after setting, acts as a locking agent. This prevents it from loosening due to vibration.
Please tell me, is the Zanussi vertical tank also non-detachable?
You don't need to disassemble it at all to replace the bearings.
Thanks for the tip. I did everything and it started leaking right away, thanks to the crap sealant. Now it's working with a new, decent adhesive.
Hello! Could you please tell me the part number for Kraftool sealant? I really enjoyed the article! Thank you!
Hello! What kind of sealant can I use if the tank is detachable, but the rubber seal is no longer new. Is it better to be on the safe side to prevent damage to the rubber?