How to clean the filter of an AEG washing machine?
 Regularly cleaning your AEG washing machine's filter will ensure long, trouble-free operation. Without cleaning, your machine will operate intermittently: water is more difficult to pump through dirty pipes, a clogged pump becomes overloaded, and the impeller often becomes clogged with hair. Ultimately, the washing machine will stop mid-cycle with a completely clogged drain. There's only one solution: preventative maintenance before the problem occurs. We'll explain how in detail.
What needs to be done first?
The filter cleaning procedure does not require major disassembly of the machine or other complex work. It's all quite simple – you just need to unscrew the element from the drainage system and clean it manually. The main thing is to follow the instructions and remember safety precautions.
The first step is to disconnect the appliance from its utilities: power and water. The second step is to prepare the work area. Remember that when you remove the filter, the remaining water in the tank will leak out. It's best not to be alarmed by the "gusher"; instead, lay down some rags and plastic sheeting.
When you unscrew the debris filter, water will flow out of the hole!
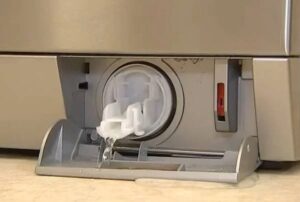
Next, we figure out where the filter is located. This shouldn't be a problem, as most washing machines, including AEG, have it hidden behind the access door. This is a rectangular or round panel in the lower right corner of the machine. It needs to be removed as follows: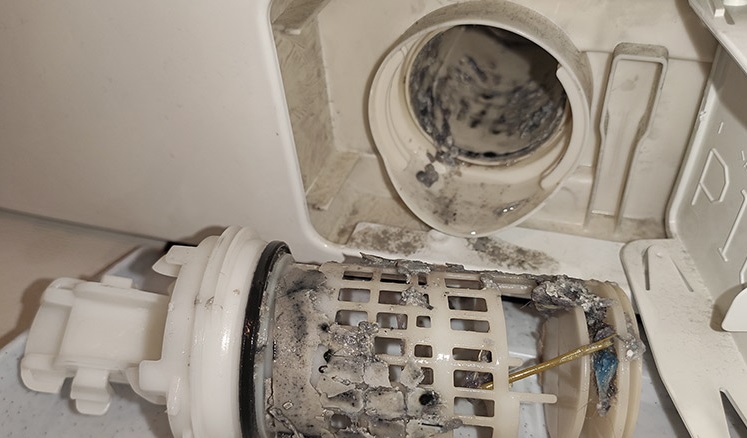
- take a flat-head screwdriver;
- carefully pry the door open;
- press the latches;
- move the panel aside.
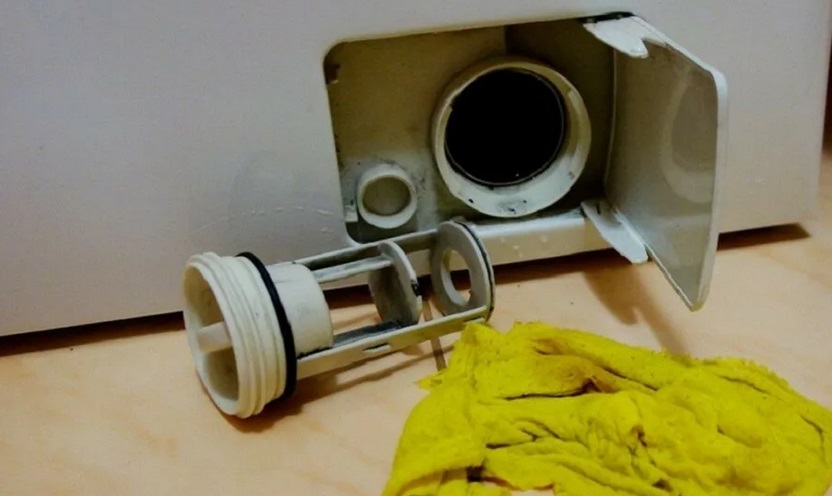
After removing the panel, you can see the entrance to the drainage system. We're looking for a round plastic cover, gray, black, or blue—the debris filter. Place the prepared container underneath it, and then begin removing the plastic element.
How does cleaning take place?
Once you've located the filter, we can begin removing it. The procedure is simple: grasp the protruding part of the cap and gently turn it counterclockwise. It's best to unscrew it slowly so the water drains slowly. Otherwise, a flood will spray out and splatter the entire bathroom.
When the stream of water becomes thin, you can unscrew the filter completely and remove it from the machine. The next step is a thorough cleaning. This typically requires several steps.
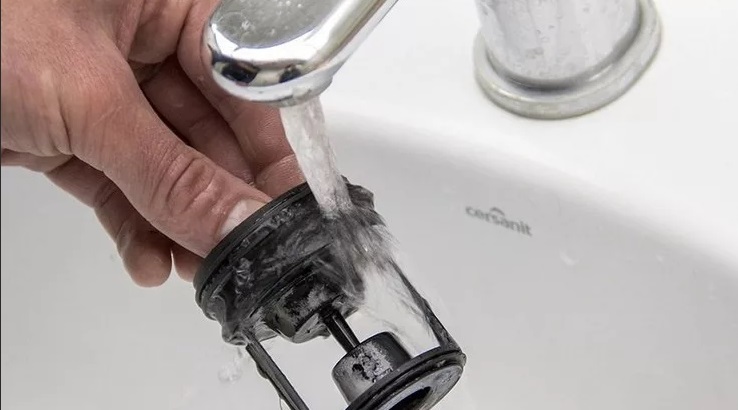
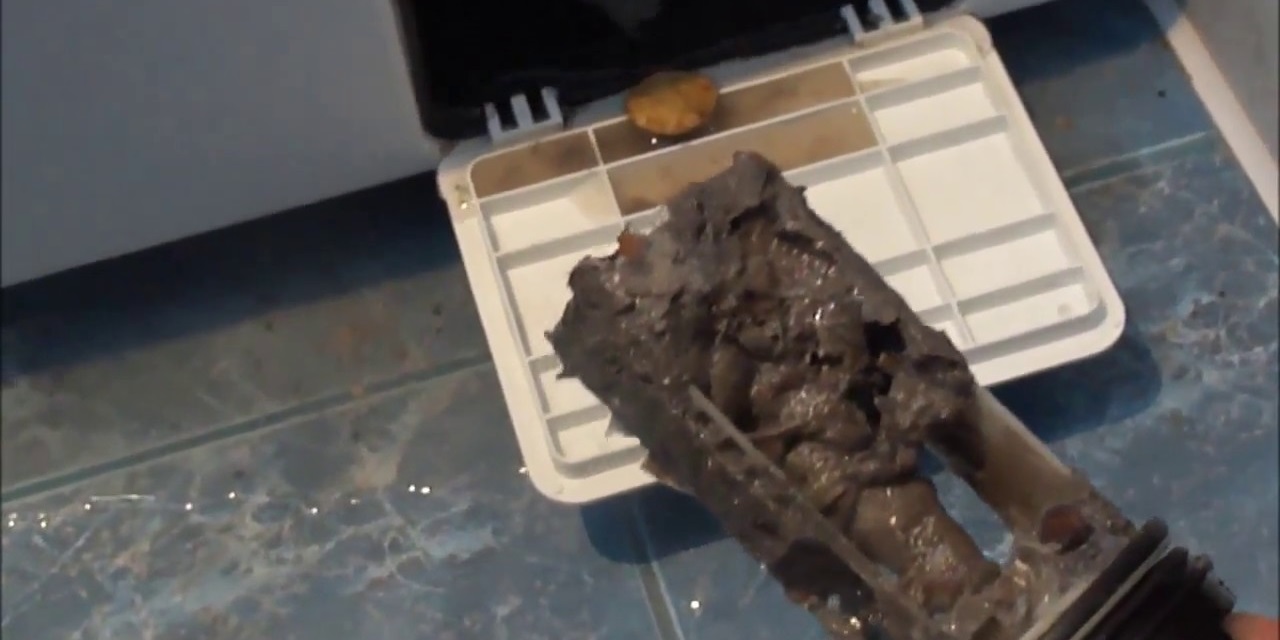
- Removing large debris. Manually rinse off any debris stuck to the plastic surface under the tap—hair, lint, stuck objects, keys, or coins.
- Removing limescale. Hard water and detergents leave a residue on the filter—a layer of hardened limescale and soap. You can remove stuck-on particles with an abrasive sponge, an old toothbrush, or by soaking it for an hour in a lemon solution.
- Final rinse. The clean filter must be rinsed under warm tap water.
Using boiling water for cleaning and soaking is strictly contraindicated. At high temperatures, the plastic, the main material of the nozzle, becomes severely deformed, and the rubber seal designed to ensure a watertight seal loses its elasticity. It's best to play it safe and wash only in warm or cold water.
It's recommended not to stop cleaning the filter. It's also worth cleaning the surrounding drain components. First, clean the "nest" from which the nozzle was unscrewed. The seat should be cleaned with a sponge soaked in soapy water, and if necessary, with a toothbrush. Be sure to shine a flashlight inside and remove any hair tangled around the pump impeller with a wire. Only then should the "dustbin" be screwed tightly into its grooves.
AEG machine manufacturers recommend performing preventative cleaning of the dust filter at least every 2-4 months. The interval depends on the frequency of washing. If the machine is used daily, it's best to drain it monthly. If less frequently, like once a week, three times a year is sufficient.
It is also important to consider the type of laundry being washed. Heavily dirty, worn-out and woolen items contaminate the filter faster due to debris, dust and falling lint. Cleaning also becomes more frequent if you have pets, whose hair gets into the AEG drainage system through the fabric and settles on the dustbin.
Never touched the filter
Don't forget to clean the dust filter. Many users are under the impression that their washing machine is always clean due to constant contact with water and detergent. This is not true – impurities from the water supply, limescale, soap scum, leftovers from pockets, and fabric particles accumulate in the machine and, if left uncleaned, can cause serious blockages. As a result, the machine either breaks down, performs poorly, or becomes hazardous to your health.
A dirty filter can cause clogs in the drain, pump failure, mold growth, and unpleasant odors.
A dirty filter can have several consequences, all of which pose risks to both the AEG and its owner.
- An unpleasant smell that comes from both the machine itself and the washed items. Dirt accumulates in the filter, and microbes multiply due to humidity and heat.All this leads to souring and stench.
- Mold. A damp environment is a breeding ground for fungus. This fungus, in turn, corrodes plastic and rubber and pollutes the indoor air, causing allergic reactions and other illnesses.
- Drainage problems. When emptying the drum, water necessarily passes through the debris filter. If it's too clogged, the liquid won't be able to drain into the drain at the same rate. The cycle will drag on, and the wash time will increase, eventually leading to the machine stopping completely.
- Pump failure. Many factors can cause pump failure. First, draining for too long will cause the mechanism to overheat. Second, a foreign object or hair will clog the impeller, stopping water pumping. Third, dirt will get inside the unit. All of these factors will require repair or replacement of the expensive part.
Cleaning the filter takes no more than an hour, especially if you don't let it get too dirty. This is the only way to keep the situation under control, protecting your machine and your health.
After the procedure the filter started leaking.
Cleaning a filter is considered a simple and quick procedure, but rushing the process and not following the instructions can lead to unpleasant consequences. One such problem is leakage. The danger is that the problem doesn't appear immediately, but rather after several cycles or even days. There are several possible causes for this.
- Incorrect installation. The filter head must fit snugly and evenly into its housing. This is the only way to prevent the threads from shifting and compromising the seal. Otherwise, water will leak through the gap and onto the floor, posing a hazard to both equipment and people.
- Defective. The rubber gasket on the filter has likely cracked due to prolonged use or been damaged during improper cleaning. In this case, the seal will not provide the required tightness, and the airtight seal will be compromised. You'll need to find a replacement rubber gasket or install a new dust collector.
- Stripped threads. Careless removal and installation can damage the grooves in the filter housing or the filter itself. It's understandable that the filter attachment won't fit tightly—water will leak through the resulting hole. This is especially true during the spin cycle, when the washing machine begins to vibrate, along with the drain trap. This can be corrected by repairing the "nest" or replacing the coil.
After cleaning the debris filter, you need to run the cycle and check for leaks!
Regularly cleaning the filter is an excellent preventative measure against drainage problems in your AEG. Just be sure to proceed carefully, follow the instructions, and adhere to safety precautions.
Interesting:


1 reader comment
Add a comment
Headings
Washing machine repair


For buyers


For users


Dishwasher


I followed the instructions, but I can't get the filter out of its socket. Can anyone suggest something I can do myself? Thanks.