Electrolux Washing Machine Diagnostics
 It's quite difficult to determine what's wrong with an automatic washing machine based on external signs. The same "symptom" can indicate problems with the pressure switch, the inlet valve, the drain system, and even the control module.
Fortunately, modern washing machines are equipped with a "service" mode. When activated, the machine begins a self-check and alerts the user of any problems it finds. Let's look at how to diagnose an Electrolux washing machine to narrow down the possible issues.
Characteristics and launch of diagnostics
Before disassembling the machine to inspect its internals and determine what exactly is broken, it is best to run a service test. Diagnostic mode is a built-in function on Electrolux washing machines with the EWM1000(+) control system. Using this program, you can independently, at home, check how smoothly the main components of the machine work.
Electrolux instrument panels with this control system are available in two variations: with vertical and horizontal key positions.
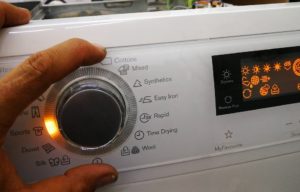
To understand how to properly enter diagnostic mode, you need to consider the type of dashboard you have. For washing machines with a horizontal dashboard, the procedure is as follows:
- set the programmer to the initial position (0 or OFF);
- Press and hold the "Start/Pause" and "Option" buttons on the panel;
- Turn the selector to the right, to the first position.
The indicator on the instrument panel should light up. This will indicate that the self-diagnostic mode has successfully started.
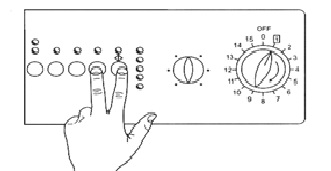
For Electrolux washing machines with buttons located vertically on the control panel, the procedure for activating the service mode is as follows:
- move the programmer to the initial position (0 or OFF);
- Press and hold the two keys located in the upper left corner of the dashboard;
- Turn the program selector knob to the first position.
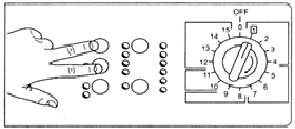
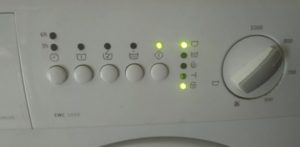
Option 2 of the control panel
A beep will indicate that diagnostic mode is activated. You can then proceed to check each washing machine component for proper functionality, one by one.
Stages of the test
Electrolux washing machines with the EWM1000(+) control type have nine test modes, two of which are reserved and not used for diagnostics. They are switched by turning the programmer knob clockwise. Let's look at what the washing machine does at each test stage.
Mode 1. Activated immediately, simultaneously with the service test. This mode is used to test the programmer, all buttons, and LEDs on the control panel. At this stage, you can check how smoothly the instrument cluster operates. When you press a key, the corresponding indicator should light, while other lights not associated with the selected buttons will continue to flash.
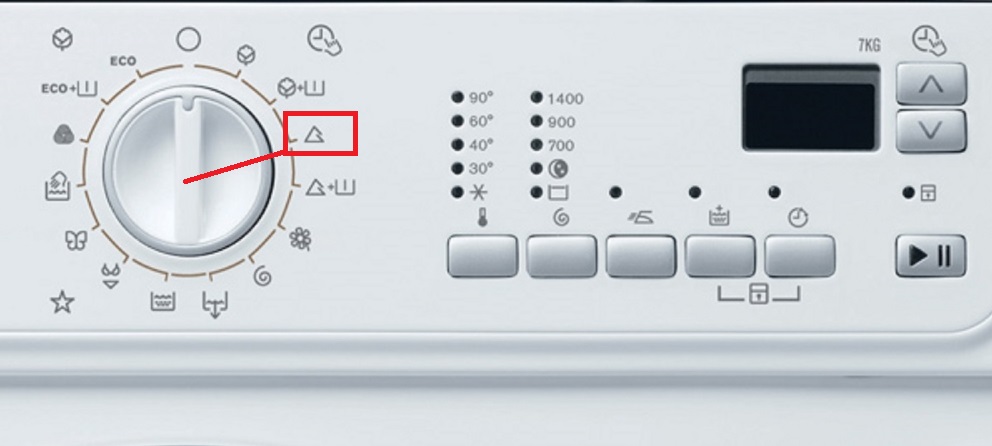
Mode 2. To activate it, turn the selector knob one notch to the right, to the second position. This stage tests the inlet valve, which allows water to pass through the powder compartment for the main wash. For a successful diagnostic, the following conditions must be met:
- the machine was connected to the water supply;
- The drum door was slammed shut.
The washing machine locks the door (if this is not possible, it records a corresponding error code), and the solenoid valve begins filling with water. A pressure switch monitors the water level. Wait 5 minutes before proceeding to the next diagnostic step.
Mode 3. At this stage, the machine checks how the valve "flows" water through the pre-wash compartment of the drawer. To activate this mode, set the programmer to position 3. It's also important for the test to run with the machine connected to cold water. The diagnostic process takes approximately five minutes.
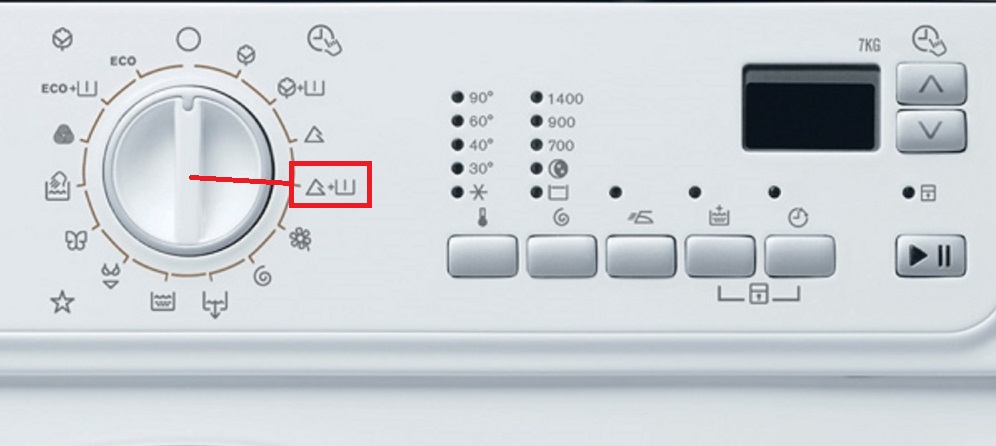
Mode 4. This is necessary for testing both solenoid valves. Water is poured into the tank through the rinse aid compartment. To activate this mode, turn the dial to position 4. For successful completion of the diagnostic phase, it is important that the valves, door lock, and pressure switch are functioning properly. Duration: 5 minutes.
Mode 5. Not applicable to Electrolux washing machines with the EWM1000(+) control type. It is reserved for automatic machines with three water inlet valves.
Mode 6. Allows you to check the heating element and thermostat. The programmer is set to position 6. At this stage of the diagnostics, the door is locked, and the tank is filled with water to the required level. The heater is activated, which should heat the liquid to 90°C. The element is given 10 minutes to complete this task. If the required temperature is not reached within the allotted time, the machine will record an error code indicating a malfunction.
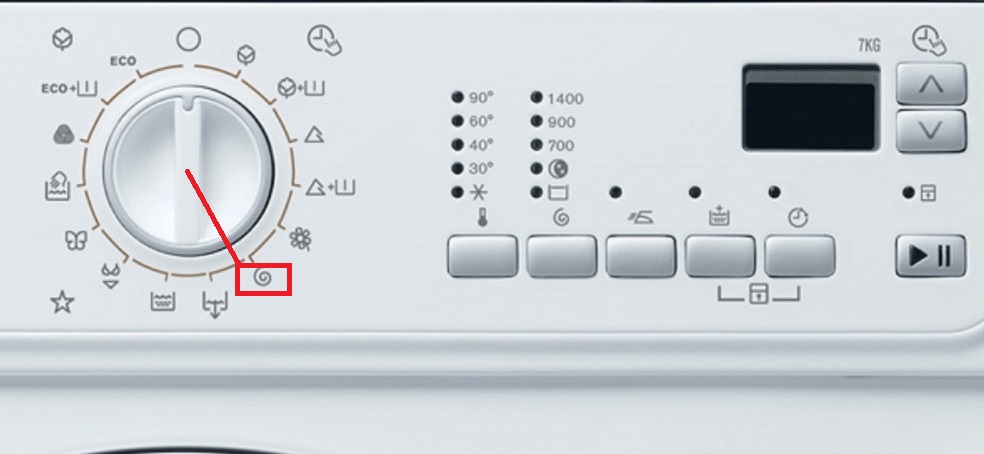
Mode 7. This is necessary for checking the washing machine's motor. The program selector knob is moved to position seven. The door remains locked. If there is not enough water in the drum to continue the diagnostics, the inlet valve opens again. The motor and drive mechanism are then activated. First, the motor spins the drum to 55 RPM—the same as during the main wash cycle. The rotation occurs both clockwise and counterclockwise. Finally, the motor accelerates the machine to 250 RPM.
Mode 8. This stage confirms the proper functioning of the drain pump and pressure switch (the sensor should monitor the absence of water in the system). To activate the test, turn the selector knob to position eight. The washing machine starts the pump. As liquid is drained from the machine, the motor engages. Here, the motor spins the drum to its maximum possible speed (the speed varies for each Electrolux model). Once the drum is drained, the diagnostic cycle is complete.
To exit the diagnostic mode, you need to turn off the machine, then turn it on and turn it off again.
This is how easy it is to check your Electrolux washing machine for faults yourself. During diagnostics, the machine records error codes in its memory. Let's figure out how to see what problems the equipment has detected.
How to display the last fault code?
 During the test, errors are recorded in the Electrolux automatic machine's memory. To view the last recorded code, turn the programming knob to position 10. The "End of Cycle" and "Start/Pause" LEDs on the instrument panel will flash.
To find the latest code, watch the indicator light flash. The first light indicates the tens, and the second indicates the ones of the encrypted error code. The flashes occur in a series, with a pause of 0.4 seconds.
There will be a longer pause between each series of flashes—2.5 seconds. By counting the number of flashes of the first and second LEDs, you can calculate the desired fault code.
If you lose count, you can wait for a long pause and start counting again. Once you've memorized the two numbers the machine indicates, open the manual and decipher the code. The manual describes the malfunctions each error indicates.
How to delete saved code?
You can independently identify the final error detected and clear the code from memory. Turn the programmer to position 10 and simultaneously hold down the "Start/Pause" and "Option" buttons for 3-4 seconds.
A continuous flashing of all the indicators on the control panel will indicate that the error code has been cleared. To clear all errors stored in the intelligent system, the procedure must be repeated several times. The number of "cancellations" will depend on the number of faults detected by the washing machine.
Interesting:


Readers' comments
Headings
Washing machine repair


For buyers


For users


Dishwasher


Add a comment