Where are the brushes located in a washing machine?
Washing machine brushes are an integral part of the motor's operation. They transmit current, and their interaction with the stator sets the motor in motion. Constant friction inevitably leads to wear, so brushes need to be replaced periodically. Where are the brushes in a washing machine and how do you change them?
Preparatory actions
Replacing the brushes is impossible without partially disassembling the washing machine, as they are located inside the motor housing. Experienced technicians sometimes replace the brushes without removing the motor, but this is unlikely to be possible for the average owner; it's inconvenient, so it's best to remove the motor. But replacing the brushes themselves is very easy and can be done by anyone. What will be required for this?
Two screwdrivers: thin and Phillips.
Pencil, felt-tip pen or marker.
8mm TORX key (commonly known as a star key).
Now you need to prepare the washing machine for subsequent disassembly. To do this, follow these steps:
disconnect the machine from the power supply;
turn off the water supply to the washing machine;
remove the inlet hose, first placing a container under the tube (when disconnected, water remaining from previous washes will flow out of the tube);
On the front panel of the washing machine, at the bottom, there is a small square hatch with a trash filter behind it. Remove it;
thoroughly clean the resulting groove from any accumulated debris and dirt.
The motor itself is located at the rear of the unit, so now you need to move your home assistant away from the wall, providing access to the rear panel, and you can begin searching for the motor and replacing the brushes.
We replace worn out parts
First, you need to remove the washing machine's body components. Which parts need to be removed depends on the brand of the machine (sometimes just the back panel is enough, while other times the motor is easiest to access through the bottom). Then, remove the drive belt by gently pulling the elastic band and turning the drum pulley.
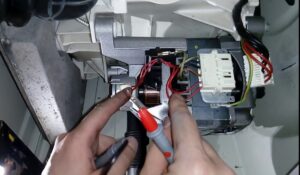
The motor wires and contacts need to be disconnected, but first, take a photo or sketch their locations on paper so you can reconnect them correctly later. Using a star wrench, remove the fasteners holding the motor in place, firmly grasp it, and begin rocking it to remove it from the housing.
Important! The motor is quite heavy, so be sure to weigh your weight or ask someone for help.
Now that the motor is removed, you can begin replacing the brushes:
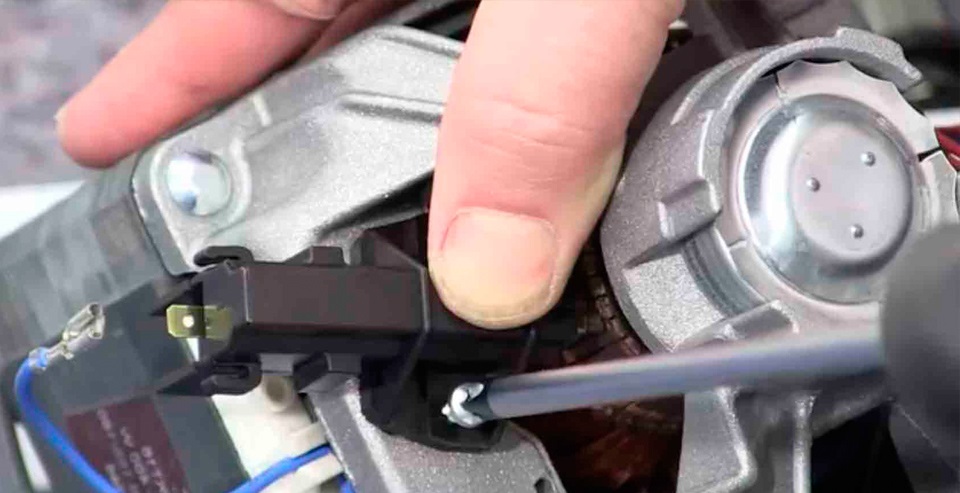
disconnect the brush wires;
move the contacts down;
Stretch the springs one by one and remove each brush;
take a new part;
place the tip into the groove;
compress the springs and install them there;
secure the electric brush with the contact by moving it upwards;
connect the cable.
There are only two brushes, and replacing the second one is done in exactly the same way. After repair, replace the motor and reassemble the washing machine, following the same steps in reverse order. When tightening the drive belt, first place the rubber band on the motor shaft and then on the drum "wheel."
When replacing the brushes, the washing machine may initially produce unusual noises or an unpleasant burning smell. This is normal and is due to the brushes' graphite rods rubbing against the motor stator. The problem resolves itself after a few cycles. If you're concerned about the wash quality or suspect something might have gone wrong, run an empty wash cycle to check.
 Washing machine brushes are an integral part of the motor's operation. They transmit current, and their interaction with the stator sets the motor in motion. Constant friction inevitably leads to wear, so brushes need to be replaced periodically. Where are the brushes in a washing machine and how do you change them?
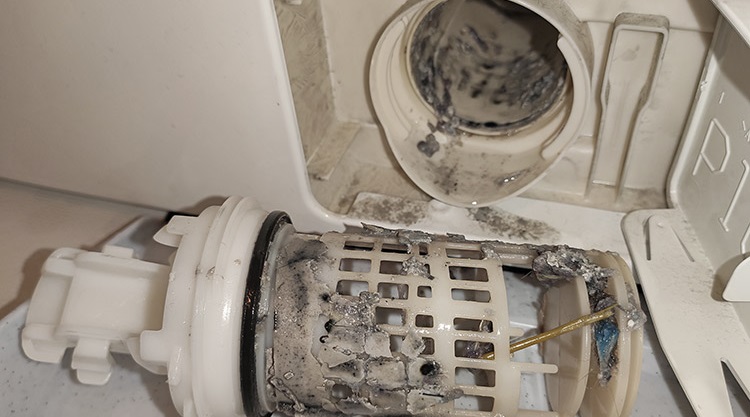


Add a comment