Pottery wheel from a washing machine
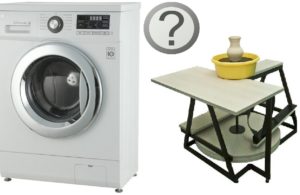 A pottery wheel is an expensive proposition for a beginner. The most basic wheel from a foreign manufacturer costs around $500. That's why our craftsmen were tasked with making a pottery wheel out of a washing machine, so that the project could be completed at home. Both a drum-type and a activator-type machine can be used as a base. But first things first.
We prepare everything necessary
Let's look at making a pottery wheel using an activator washing machine as an example. You can even buy one, and if you have an older, working one, you'll save another $15 or so.
Important! The activator in the washing machine must be positioned horizontally on the bottom of the machine, without tilting.
Besides a washing machine, we'll need about a dozen other essential parts, without which we can't make a pottery wheel ourselves. Specifically:
- a piece of moisture-resistant plywood;
- the simplest microcircuit that regulates engine speed with a switch;
- moisture-resistant varnish and paint;
- White spirit;
- custom-made wheel;
- plastic medicine bottle;
- any switch;
- insulating tape;
- silicone sealant;
- tin for soldering;
- bolts, washers, nuts and self-tapping screws.
Besides the materials, you'll also need a few tools, which are best prepared in advance. Nothing special, just:
- felt-tip pen;
- wooden ruler;
- a hacksaw with fine teeth, suitable for metal;
- sharp knife;
- set of screwdrivers and keys;
- pliers;
- multimeter;
- soldering iron.
We make a circle and protection
We're starting to remake our primitive washing machine ourselves. It's not a huge upgrade, but it will save you several hundred dollars. So, let's start by partially disassembling the body of the activator washing machine to determine the location of the most important parts - the motor, electrical system, and drive mechanism. We will remove the drive belt, pulley and other parts with our own hands to expose the shaft.
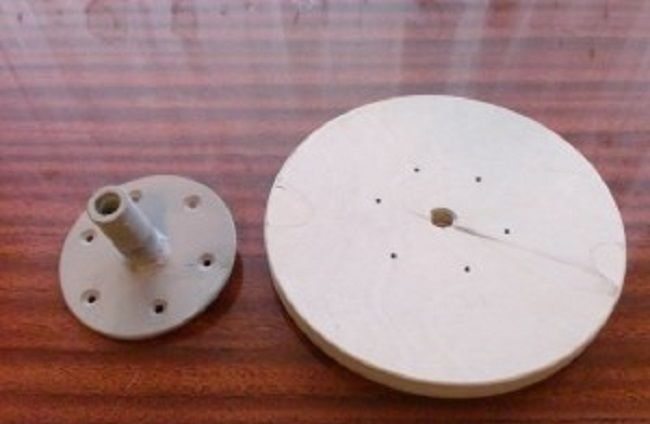
At this point, we've encountered our first difficulty: we have a shaft, some kind of drive mechanism, and a motor, but we don't have an impeller to which the rotating wheel will be attached. What can we do? We have no choice but to measure the shaft and order an impeller from a lathe. The lathe should machine something similar to the part shown in the picture below.

We won't provide dimensions, as they are strictly individual and will depend on the size and type of washing machine being reworked. We carefully paint the machined part and then set it aside for the time being.
Before painting, the part must be carefully sanded by hand, removing traces of rust and dirt.
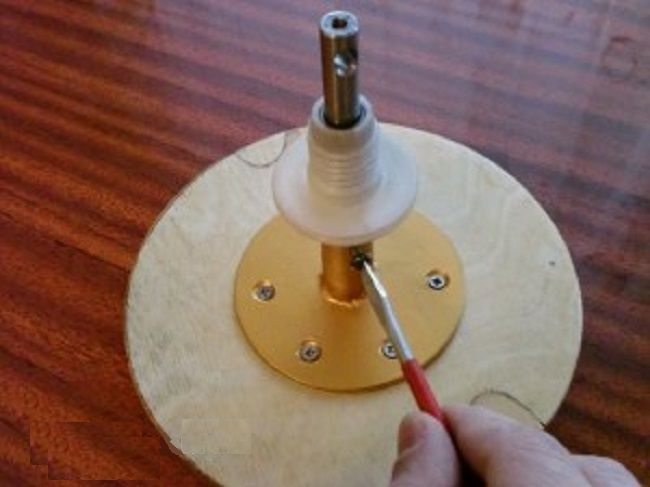
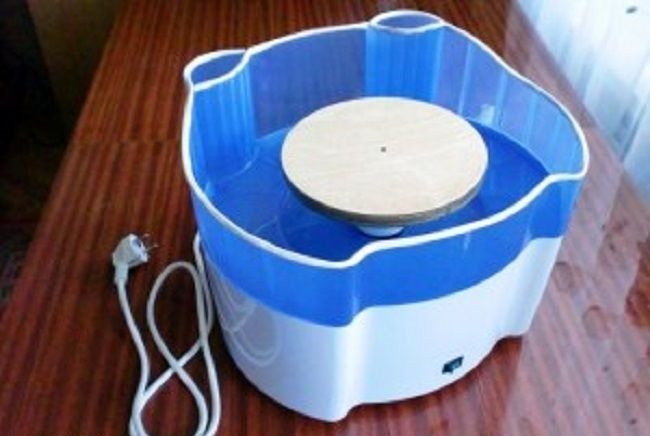
Now we need to cut a circle out of a piece of moisture-resistant plywood, as shown in the picture below. We soak the circle with varnish, which we pre-mix with white spirit; the clay blank will be placed on this circle.
We'll assemble the two parts of the wheel and slide the wheel onto the shaft, thus preparing the part for installation on the drive mechanism. The working part of the wheel, which will hold the rotating workpiece, must be well-centered. Otherwise, the workpiece will rotate unevenly, leading to problems when making clay objects.
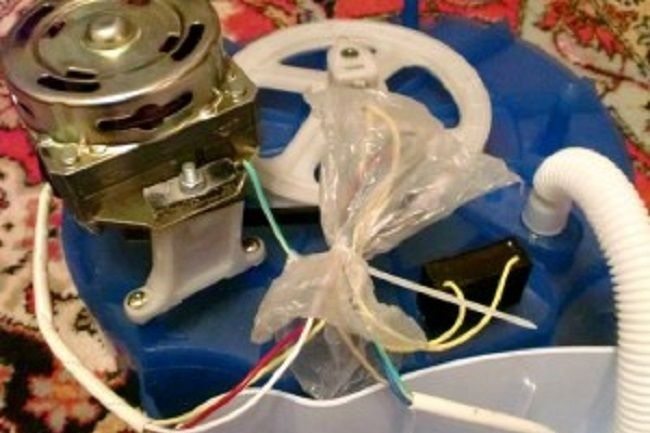
Next, we need to protect the drive mechanism from moisture and corrosion. To do this, take a regular plastic vitamin or medicine bottle and place it on the shaft, then securely attach the improvised part with a nut. At this point, we can stop assembling the working part of the pottery wheel and move on to the washing machine body.

We won't need most of the washing tub, so we take a hacksaw and cut it down without mercy, leaving only the bottom with the activator and the low edges. That's all for the pottery wheel body and the moving mechanism; now comes the hard part: connecting the motor and the electrics.
Connecting the engine
About that, How to connect a washing machine motor We've written about this process many times in other publications on our website. However, we'll describe this process again, taking into account the specifics of converting a washing machine into a household pottery wheel.
First, we need to determine the identity of each wire protruding from the washing machine's actuator-type motor. It's best to do this using a wiring diagram, but if you don't have one handy, you'll have to resort to trial and error. We need to find the following wires:
- engine speed controls (if any);
- going to the stator winding;
- two wires going to the brushes.
We disconnect the power supply wire and install a switch on it. We cut a slot for the switch in a convenient location on the housing. We carefully insulate all wires. If possible, you need to put a rubber sleeve on each wire or, at worst, wrap each wire with electrical tape.
Next, we install and connect the motor speed control device. This device is connected to the power supply wire and two motor speed control wires. After that, we replace the pulley, attach the drive belt, and insert and secure the shaft with the impeller. Then, we assemble the housing, seal the groove with sealant to prevent water from getting in, and that's it, the electric pottery wheel assembly is complete.
In any case, the engine speed will have to be reduced, otherwise, at a speed of 500-700 rpm, the clay blank, under the action of centrifugal force, will fly into the wall.
In conclusion, we'd like to point out that you can assemble an excellent electric pottery wheel for beginners without any special tools or technical knowledge. The key is desire, tools and materials, and, of course, hands that never get bored. The rest is a matter of technique—good luck!
Interesting:


Readers' comments
Headings
Washing machine repair


For buyers


For users


Dishwasher


Add a comment