Disassembling a Samsung washing machine
 There may be several reasons why a user might need to disassemble a Samsung washing machine. We won't delve into the specific circumstances that prompt this process, but rather provide guidance on how to do it correctly. It's crucial to begin the job with a thorough understanding of the process and basic safety precautions. The steps and sequence for disassembling a Samsung washing machine will be described in detail in this article.
Before starting work
Disassembling a washing machine isn't as complicated as it might seem at first glance. You can do the entire job yourself, without the need for professional help. Particular attention should be paid to preparation for the upcoming process. So, what should you do during the preparatory stage?
- De-energize the household appliance.
- Drain the remaining water from the tank and pipes.
- Prepare a set of tools.
- Select the location where the disassembly will take place.
The location for all procedures should be chosen carefully. First, it should be spacious enough and well-lit. The unit contains both large and small parts; free space will be required for storing large parts of the machine and for free movement around the unit. Let's discuss in more detail what tools you need to prepare. The kit is completely standard; there's no need to search for any "outlandish" gadgets. You'll need:
- screwdrivers of various sizes;
- heads of different diameters;
- pliers;
- small hammer.
During the process, you'll need a few rags, a special WD-40 solution (it'll help remove any stubborn nuts), sealant, and CV joint grease. A smartphone with a built-in camera would also be helpful; capturing photos of the work progress and the contact points will make reassembling the car easier.
Removing external elements
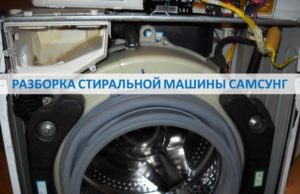
 When disassembling a Samsung washing machine yourself, it's crucial to strictly follow the instructions. The first step is to remove the top cover. This is quite simple: go around the back of the machine and remove the two bolts holding it in place.
Set the removed cover aside so it doesn't interfere with further operations. With the top of the machine removed, you can see its internal components. To inspect the pulley or drive belt, carefully slide the counterweight toward you.
The next step is to remove the detergent dispenser tray. While holding the container's latch, pull it toward you. You can now begin removing the seal—the cuff that encircles the hatch. Take a screwdriver, slightly pry up the retaining ring and remove it from the cuff. The key is to do this carefully and slowly, as the rubber band is quite fragile and can tear if moved too quickly. The seal is tucked inside the washing machine so it won't get in the way.
In the third step, you need to remove the panel located underneath the front wall of the housing. This will allow you to easily access the drain filter and the emergency drain hose.
The cover is held in place by small clips and is fairly easy to remove.
Let's begin removing the electronic module. It's also quite simple. Loosen the mounting screws, press the latches with the tip of a screwdriver, and gently pull the control unit away from the washing machine body.
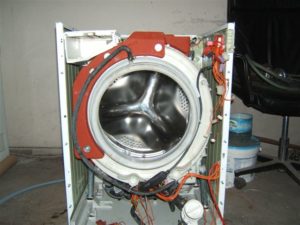
The front panel of the Samsung washing machine is now accessible. To detach it from the body, you'll need to remove seven retaining screws. Once the front panel is removed, the removal process is complete.
We take out the internal parts
Next, follow the instructions to remove the drum and tub from the washing machine. This is the most labor-intensive part of disassembling the washing machine; it's best to do it with a family member's help rather than alone. Before removing the tub, be sure to disconnect the power wires connecting it to the heating element and the tubes leading to the tub. Then, disconnect the electrical wires from the machine's motor.
 Next, remove the counterweights and set them aside. Finally, after completing all the steps listed above, you can remove the tank and drum. Disconnect it from the shock springs. Once you have removed all the shock absorbers, you can call an assistant and together remove the reservoir. There is very little left to do - separate the washing machine motor from it, having first removed the drive belt.
I'd like to pay special attention to situations where a bearing needs to be replaced. This type of repair is considered complex. Before attempting it, you should realistically assess your capabilities and knowledge in this area.
The difficulty lies in the fact that most washing machine models have a non-detachable tank, a single piece. To disassemble it, you'll have to saw it apart, seal it, and then glue it back together. If you're lucky and the manufacturer has a detachable tank for your particular washing machine, everything will be much simpler—just unscrew the retaining screws and separate the two halves.
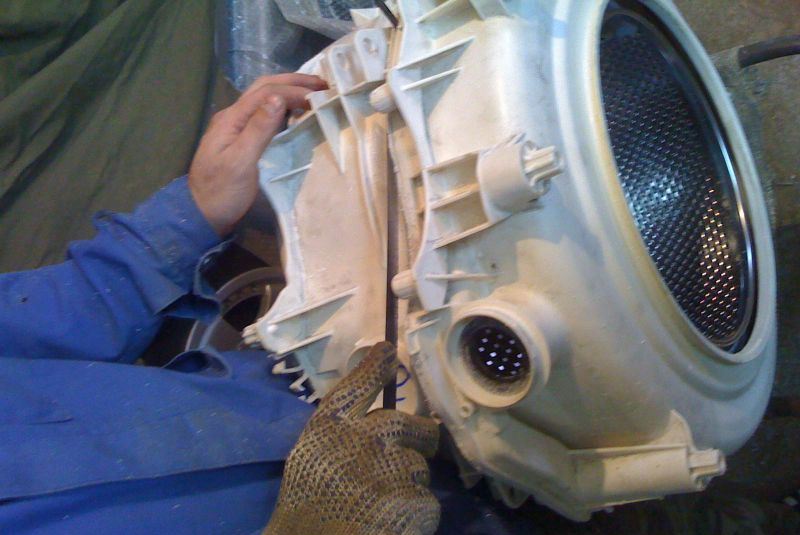
By separating the tank into two halves, you'll gain access to the drum, which contains a bearing on its shaft. A special puller is used to remove it, but if you don't have one, you can gently tap the part off with a hammer.
After the bearing is removed, the shaft seat must be cleaned and carefully inspected for wear. If there are no abnormalities, a new bearing can be installed.
Important! When disassembling a washing machine, it is essential to record the progress of the operations. More complex tasks, such as bearing replacement, are best left to professional repairmen.
After reading this guide, you can confidently begin removing the parts of your washing machine. With the necessary tools and some basic repair knowledge, you can disassemble your washing machine without any problems.
Interesting:


Readers' comments
Headings
Washing machine repair


For buyers


For users


Dishwasher


Add a comment