How to properly remove a bearing from a drum
 A grinding noise when the washing machine is running at full speed or water leaking from the bottom of the machine may indicate the need for bearing replacement. Removing this important part of a washing machine can be difficult for a novice, as it requires a certain amount of skill. It's best to first understand the process theoretically, and then assess your capabilities and implement it in practice.
Preparing tools for work
To remove the bearing from the drum of a washing machine, you won’t need any special tools, except for a puller, carefully grasping the bearing race and removing it from the shaft. Generally, a set of simple tools that most men have at home is sufficient. Depending on the specific model and brand of the machine, you may need:
- screwdrivers;

- pliers;
- spanners (17 and 19 mm)
- socket wrenches ranging in size from 7 to 13 mm;
- rubber hammer;
- 6mm hexagon;
- sealant and lubricant (for example, Silicon-Fett lubricant or Litol-24 lubricant);
- chisel;
- puller.
Don't rush to buy a puller; make sure the bearing doesn't need replacing. Otherwise, damaging the bearing race with a hammer won't be a big deal. If you absolutely must have a puller, buy a universal puller that fits different bearing sizes; you'll need it later.
Removing the tank from the car: instructions
To install the tub and drum, begin by disconnecting the power to the machine and turning off the water supply valve. To remove the drum, you'll need to disassemble the washing machine body. To do this:
- Park the car so that there is free access to it from all sides.
- Remove the top cover of the machine by unscrewing the two Phillips-head bolts from the back.
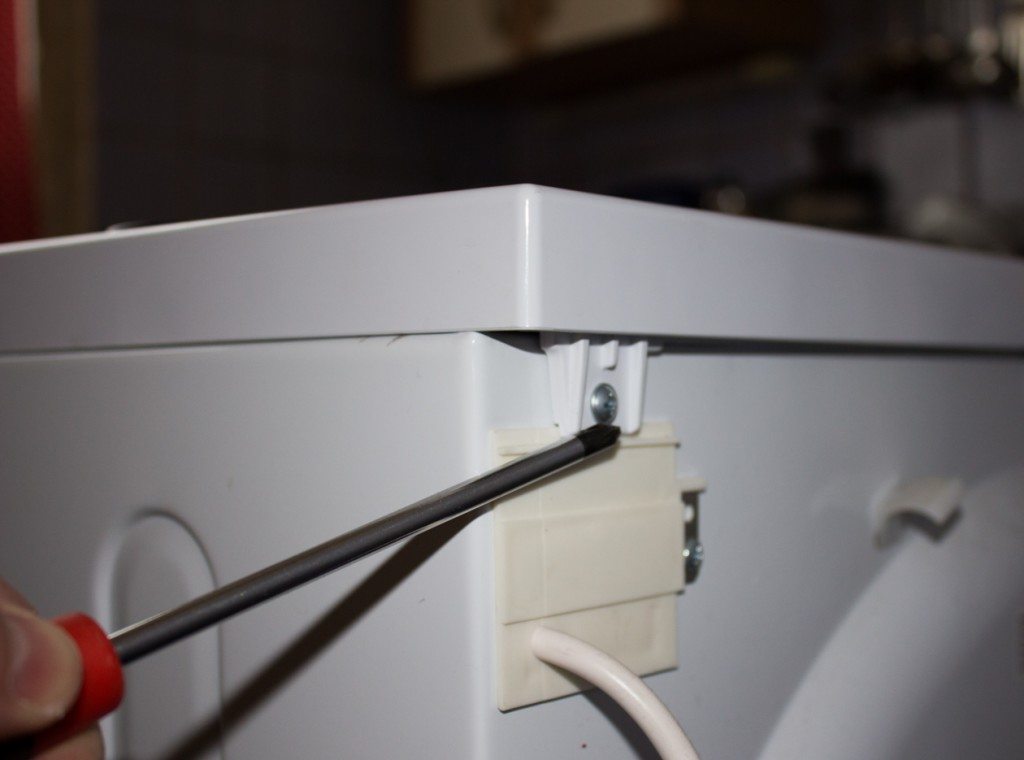
- Remove the powder and conditioner tray.
- Unscrew the bolt located under the tray.
- Remove the lower front part of the machine body.
- Unscrew two more bolts located underneath it.
- Remove the clamp from the hatch and remove the rubber cuff from the body.
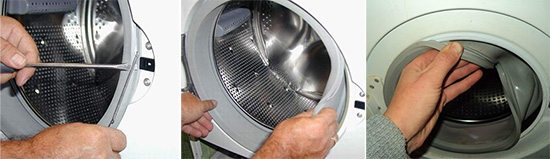
- After pressing the hatch locking device, detach the front part of the housing.
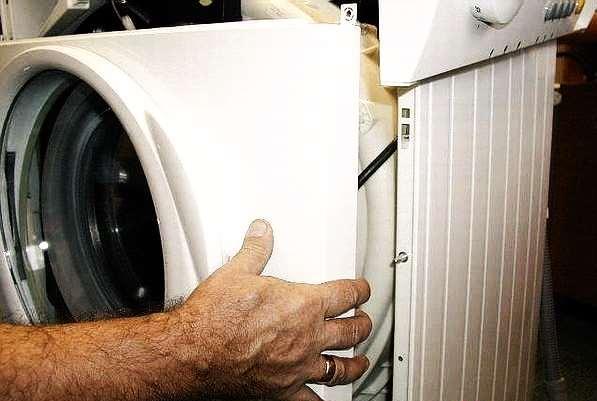
- Now unscrew the back of the machine body
- Remove the belt.
- We find and disconnect the wires from the heating element.
Important! When disconnecting wiring and other components, be sure to properly secure them to the camera. This will make reassembly easier.
- Disconnect the pipe going from the pump to the tank.
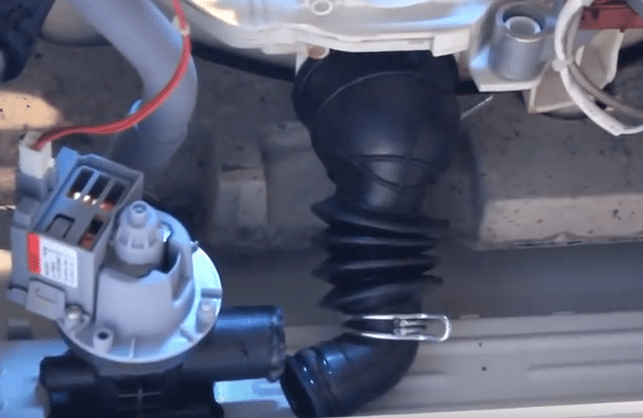
- Remove counterweights.
- Unscrew the two bolts holding the engine and remove it.
- Remove the shock absorbers and springs holding the tank.
- Now you can take out the tank.
Note: To more effectively loosen rusted bolts, use a lubricant such as WD-40.
Removing the tank from the car isn't easy, but we've outlined the basic steps. Removing the tank and drum is described in more detail in the article. How to disassemble a tank.
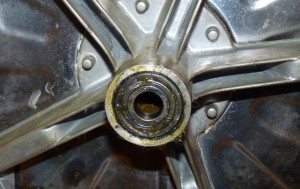
Removing the bearing
Having pulled the tank with the drum out, we proceed to disassemble it and directly remove the bearings. If grease leaks onto the drum cover, this confirms the need to replace the seals and bearings. So, the tank consists of two parts connected together. The connection can be either glued or bolted. Glued connections must be carefully sawed through. Bolted connections are easier. Once the tank is disassembled, follow these steps:
- We unscrew the drum pulley with a special star key or with a chisel and hammer.
Please note! The bolt is quite difficult to remove, so you need a high-quality tool and extreme caution to avoid stripping it.
- Using rocking movements, we remove the pulley from the drum screw; the bearing is located underneath it.
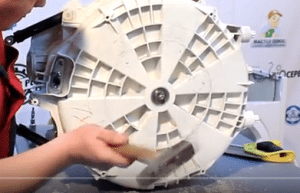
- We knock the drum shaft inward, thereby separating the tub and the washing machine drum. You can replace the shaft with the old one first to prevent damage to the original shaft from hammering. There are bearings on the inside and outside of the drum.
- Insert a metal rod under the bearing race and tap it out in a circle with a hammer. A special bearing puller can be used.
A bearing puller allows you to remove a bearing quickly without damaging its race. This may be necessary when the bearing is intact but the shaft it sits on is damaged. Bearing pullers come in a variety of shapes, especially since there are a huge number of them available. To remove a bearing from a washing machine drum, you need a puller with jaws shaped so that when pulling the bearing, the load on the inner race is minimal, while the load on the outer race is minimal.
Usually the small bearing is removed first, then the large one. Remove the seals before the bearings; it's a good idea to replace them along with them. That's it, the bearings are removed, and you can now install the new components and reassemble the machine in reverse order. When installing new seals and bearings, be sure to lubricate them to prevent water ingress. Lubrication will also reduce friction between machine parts, extending its life.
Note: When purchasing a new bearing, check the exact markings on the inner race. This will ensure you purchase a bearing identical to the old one.
Should I change the bearings?
When the first signs of bearing failure appear, you should immediately think about repairing the car. Continued use could lead to more serious damage, such as deformation of the universal joint, which would be significantly more expensive to replace. If bearing failure leads to water leakage, the heating element could burn out, and the electronic system would be ruined forever.
When a bearing breaks, don't panic and think about spending big on a new appliance. Even a repair at a service center will cost no more than $20, and doing it yourself will be several times cheaper. This part, like the seals on washing machines, breaks quite often. Some experts recommend replacing them every five years or at least lubricating them.
So, if the removal process was not entirely clear, watch a video on how to replace a bearing in a washing machine.
Interesting:


1 reader comment
Add a comment
Headings
Washing machine repair


For buyers


For users


Dishwasher


Great! Everything is clear. Now I can change it.