Asko washing machine errors
 Asko washing machines can automatically detect system malfunctions and notify users. If the control module detects a malfunction, the corresponding error code is immediately displayed on the screen. All you need to do is open the machine's manual and decipher the code. This will help you determine the system failure and how to restore the machine to working order. We'll list the main error codes for Asko washing machines and discuss the malfunctions they may indicate.
What errors does Asko technology detect?
The self-diagnostic system found in modern washing machines often comes to the rescue, helping users identify the cause of a malfunction. The explanation of all error codes is provided in the washing machine instructions. Asko. If you notice an error on the display, you should immediately look in the instruction booklet.
On Asko models, the same errors can be indicated by different codes.
For example, to indicate that the tank is not filling, some Asko models will display the code E02, while others will display F12. Still others may simply display the phrase "Water inlet fault." That's why it's so important to consult the manual. For those who don't have the user manual, we'll go over the main error codes stored in Asko automatic washing machines.
- E01/Motor/Motor fault. The error is caused by a problem with the drive chain. You'll need to check the belt, diagnose the motor, Hall sensor, and reverse relay, and ensure the wiring in the area is undamaged. If all of these components are found to be in good condition, the next step is to inspect the control board.
- E02/F12/Water Inlet Fault/Unable to Supply Water. This error message appears on the display if the tank cannot fill to the required level. First, make sure the water supply to your home hasn't been shut off. Check to see if the shut-off valve is open. Further diagnostics should also include checking the inlet valve, inlet hose, mesh filter, and pressure switch. A faulty control module could also be the cause.
- E03/F11/Draining fault. This code indicates a lack of drainage. The pump is unable to pump water out of the tank. In this situation, it's worth checking the debris filter, drain pipe, or drain hose for clogs. Also, be sure to inspect the pump—it may have burned out or become clogged with debris. A faulty pressure switch, which is incorrectly detecting the fluid level in the tank, could also be the cause.
- The E04 error indicates that the water supply to the system is slow and insufficient. The code appears on the display if the tank doesn't fill to the specified level within a certain amount of time. Check the water pressure in the water supply line. If so, clean the inlet hose, inlet filter, and connections.

- E05 appears when the water in the tank gets hotter than it should. This could be caused by a faulty heating element, a malfunctioning thermostat, or a damaged circuit board.
- This error, on the contrary, indicates that the water has not reached the set temperature. You should also check the heating element, temperature sensor, and wiring in the area. Lastly, inspect the control module.
- Disbalance. This indicator appears on the display when the drum is unbalanced, for example, when laundry is clumped together. Simply redistribute the laundry evenly in the machine.
- F10/Over Flow/Overfilling. This error indicates a water overflow. In this case, you'll need to check the inlet valve and pressure switch. If the pump doesn't start when the tank is full, it should also be inspected. As in other situations, the control module may be the culprit.
- Thermistor fault. Indicates damage to the temperature sensor. The thermistor will need to be replaced. If the wires are loose, simply reconnect them.
- Pressure sensor error. Indicates a problem with the pressure switch. The level sensor needs to be diagnosed.
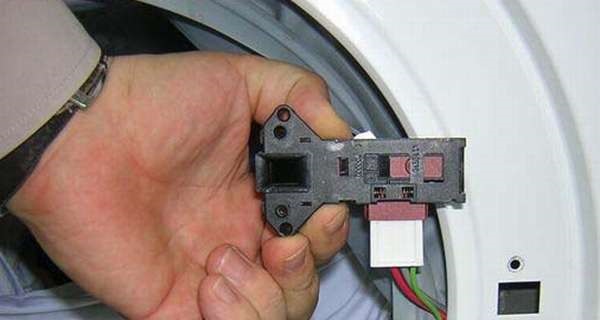
- Door lock fault. Indicates that the door is not closed properly. Press the hatch against the frame. If this doesn't help, test the door lock.
- Foaming. The "brain" stops the wash cycle due to an excessive amount of foam in the drum. To resolve this error, run a rinse cycle and avoid using more detergent in the future.
If your Asko washing machine is still under warranty, don't try to repair it yourself. It's best to call a service center immediately and arrange a free diagnostic and repair.
Troubleshooting Tips
By decoding the error code displayed on the display, you can decide whether you can carry out the repair yourself or whether you will need to call a specialist. There is nothing complicated in clearing the elements of the drainage system from blockages, replacing the pressure switch or heating element, or tightening the drive belt. Asko washing machines are prone to common problems. We'll explore the most common issues owners of this brand encounter and provide tips for repairing your machine yourself.
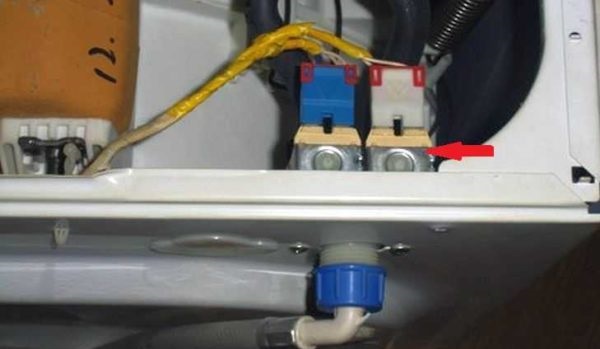
- The inlet valve is faulty. This component regulates the flow of water into the tank. When the valve fails, the machine fails to fill, or, conversely, too much liquid is added. To access the solenoid valve, simply remove the top panel of the housing. The sensor cannot be repaired; it will need to be replaced.
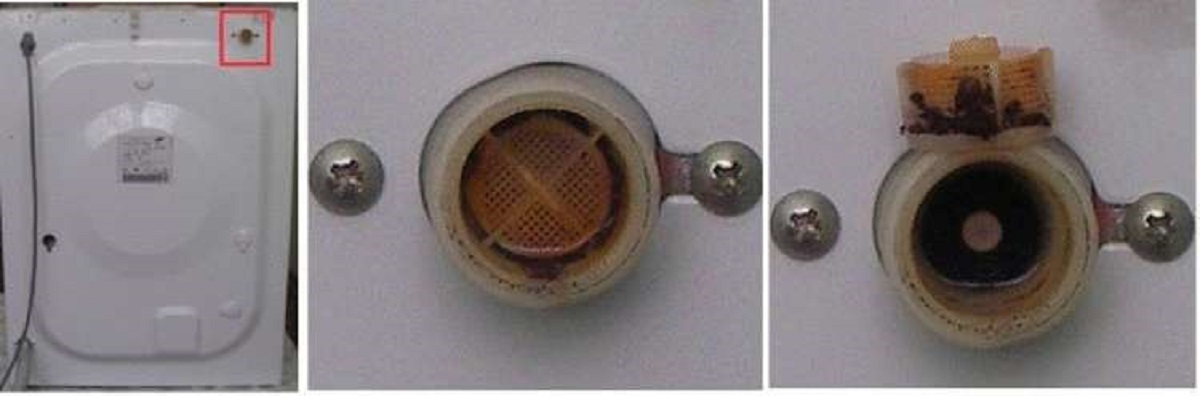
- The inlet filter is clogged. This is the mesh screen installed where the inlet hose connects, before the inlet valve. Use pliers to remove the filter element, then clean and rinse it, and then replace it.
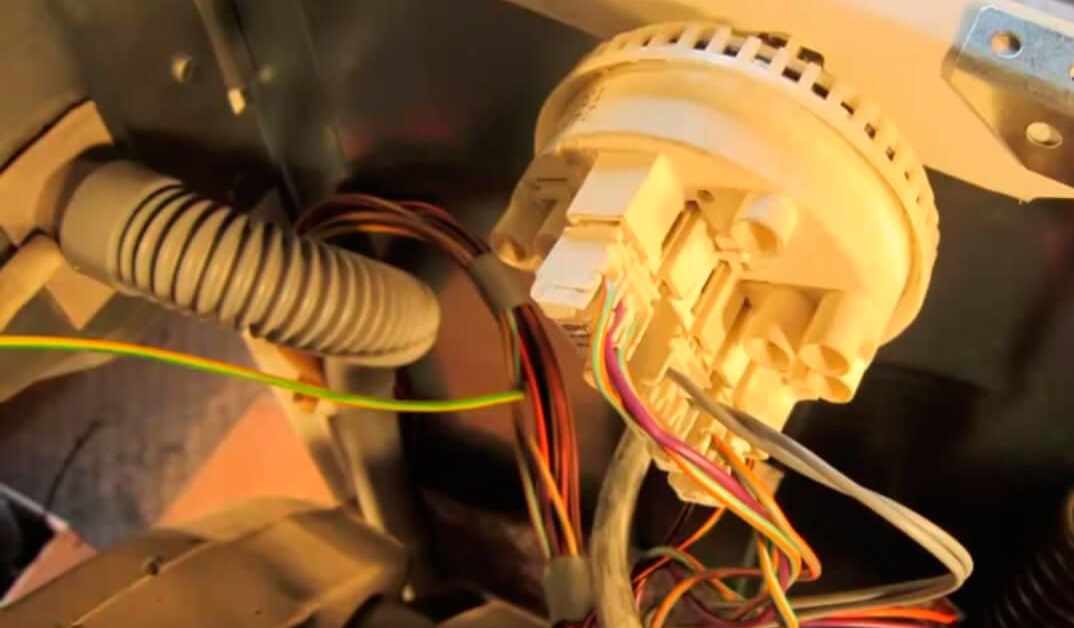
- The pressure switch is malfunctioning. It's also located just under the top cover of the housing. To check the device, disconnect the tube from the level sensor and blow into it. If you hear clicking sounds, the element is working properly. "Silence" indicates the pressure switch is faulty. Diagnostics can also be performed using a multimeter. A "burned out" component cannot be repaired; only replacement will solve the problem.
- The door lock isn't working. In this situation, the machine's door won't lock, and the machine can't start washing because the system isn't sealed properly. You can try repairing the locking mechanism or installing a new one.
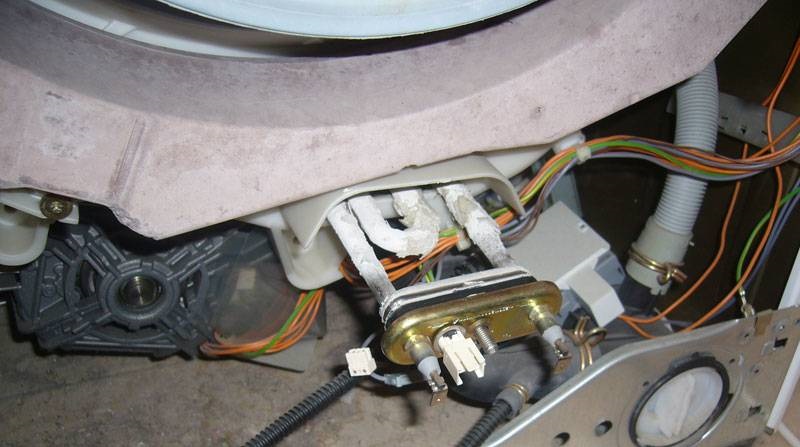
- The heating element has failed. Scale buildup on the element's surface impairs its thermal conductivity, causing it to overheat and burn out. Replacing the tubular heater is very simple: remove the back panel of the housing and locate the heating element (in Asko, it's located in an unusual location—on the side of the tank). Then, disconnect all power wiring, loosen the nut, and remove the element. Then, replace the working part.
- The thermostat has stopped working. The temperature sensor is located on the heating element and can also be checked with a multimeter. The thermistor cannot be repaired; it will need to be replaced.
In most cases, you can repair your "home assistant" yourself.
The most important thing is to strictly follow the instructions and observe safety precautions. Difficulties may arise during more serious repairs, such as replacing bearings. It's best to entrust control module diagnostics only to specialists; tinkering with the electronics yourself is not recommended.
Interesting:


Readers' comments
Headings
Washing machine repair


For buyers


For users


Dishwasher


Add a comment