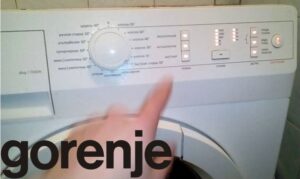
All the lights on my Gorenje washing machine are flashing.
 Gorenje automatic washing machines are considered among the most reliable. But even the highest-quality equipment can fail. Such breakdowns are caused by external factors, such as normal wear and tear, improper operation, or power surges.
What should you do if all the lights on your Gorenje washing machine are flashing? What problem do the illuminated indicators indicate? Can you fix the problem yourself, or will you have to call a technician? Let's take a closer look.
What is this problem?
Blinking of all the LEDs on the dashboard of Gorenje washing machines is rare. Typically, in this situation, users are confused, unable to understand what's wrong with the device. If all the indicators are flashing, the washing machine control module is most likely faulty.
Typically, the capacitors located on the control board fail. Sometimes the cause is oxidized contacts or damaged module tracks. In any case, a diagnostic of the unit will be required.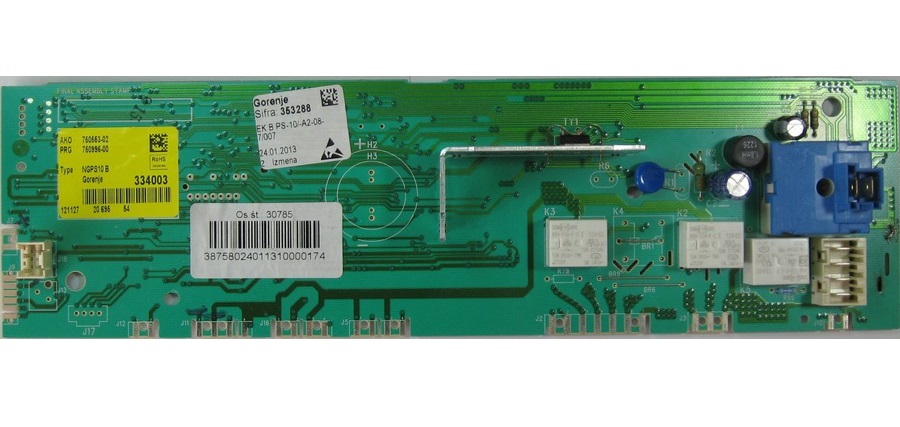
This type of breakdown is far from simple. Those unfamiliar with electronics and unfamiliar with soldering will need to call a technician. With basic knowledge, you can try to fix the problem yourself.
Replacing the entire control module is very expensive. Repairing the board is much cheaper. It's necessary to identify the damaged area and replace the broken semiconductors. Let's figure out how to do this.
Troubleshooting
If all the lights on the Gorenje washing machine's dashboard are flickering, it means that the control module is not functioning properly. The first thing you need to do is diagnose the board. To do this, you need to remove it from the machine body.
In front-loading machines, the circuit board is located directly behind the dashboard. Finding the module isn't difficult. As an example, let's look at how to remove the electronics from a vertical-loading machine.
Before you begin disassembling the washing machine, be sure to de-energize the equipment.
Unplug the power cord and turn off the valve that supplies water to the washing machine. Next: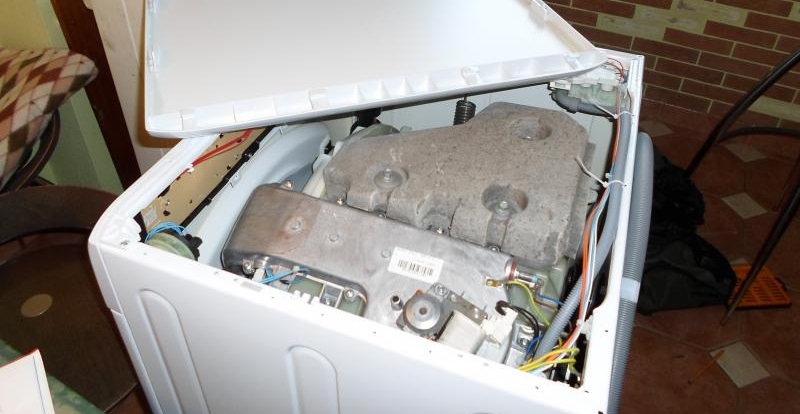
- unscrew the bolts holding the control panel (the fasteners are located at the back of the case);
- Remove the hex screws holding the control board;
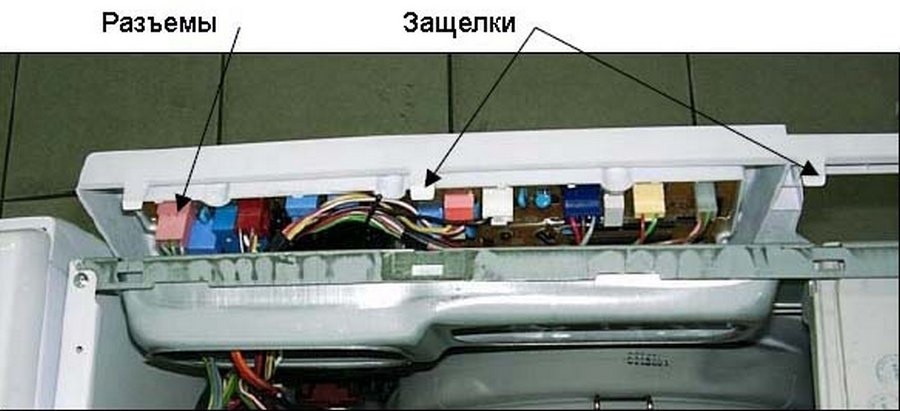
- take a photo of the wiring diagram for the module (to avoid mistakes during reassembly);
- carefully disconnect all wires from the electronic board;
- Remove the control module from the washing machine.
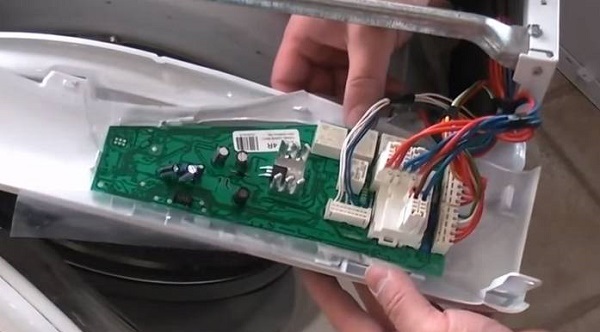
Now you need to carefully inspect the board. Pay particular attention to capacitors C16, C17, and C20. Damaged semiconductor elements often swell. Burn marks may also be visible on them.
To check the capacitors on the control board, you will need a multimeter.
Dried-out semiconductors are visually indistinguishable from healthy ones, but they won't work. Therefore, to identify damaged capacitors, a tester is essential. Each suspect component is tested with a multimeter.
Once the culprit is identified, carefully remove it from the board. Next, look at the component's markings. Replacement capacitors are identical.
The 680 μF capacitor C17 can be replaced with a 1000 μF semiconductor. This difference won't be critical. The working element is soldered back into place. After that, all that's left to do is reassemble the machine in reverse order and run a test wash.
What else could have broken?
Flashing indicators don't always indicate a faulty circuit board. Technicians note several other issues that a flickering instrument cluster can indicate. Other possible causes:
- the water drained from the tank by gravity;
- the heating element is out of order;
- the engine broke down;
- the drain pump is damaged;
- the command apparatus (KSMA) stopped functioning.
The heating element is a weak point in all washing machines. Hard tap water and user negligence are to blame. The heating element becomes coated with scale, and if the machine is not maintained, the limescale layer will become so thick that it will impair the element's thermal conductivity.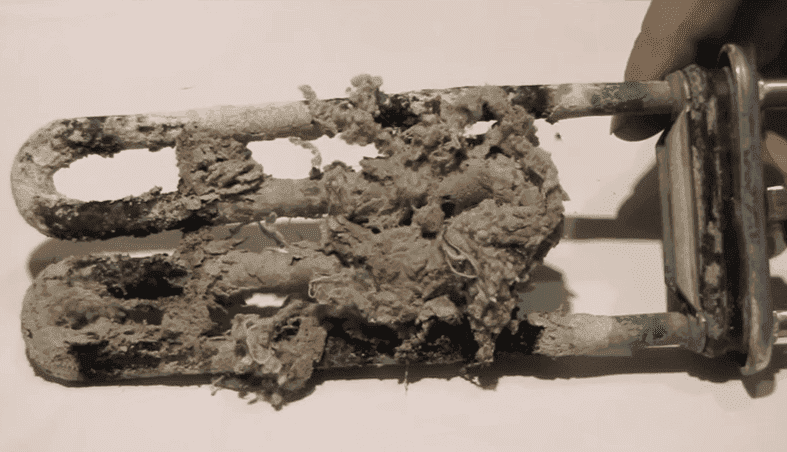
The heating element can also fail after running several high-temperature wash cycles in a row. The heater's functionality can be checked with a multimeter. Replacing the element is easy; you can install the new part yourself.
Gorenje washing machine motors rarely fail. The most common cause is worn-out brushes. In this case, simply install new graphite brushes. They are always replaced in pairs.
A much more common cause is a broken or clogged pump. In this case, the machine typically freezes when attempting to drain. Hair and threads often become tangled in the impeller, or a foreign object becomes lodged between the blades. Sometimes debris gets inside the drain pump, causing it to malfunction.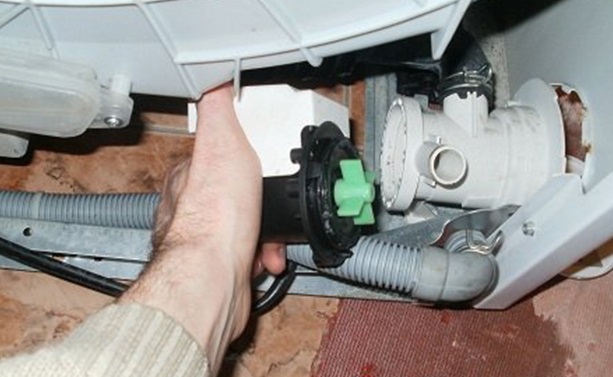
If a blockage occurs, simply cleaning the pump or impeller is sufficient. If the pump is burnt out, the only solution is to replace the part. This element is located at the bottom, under the washing machine tank, in the debris filter area.
It's extremely rare for the control unit to fail in Gorenje washing machines. It's practically a "lifeless" part. However, if other faults have been ruled out, the control unit should also be checked.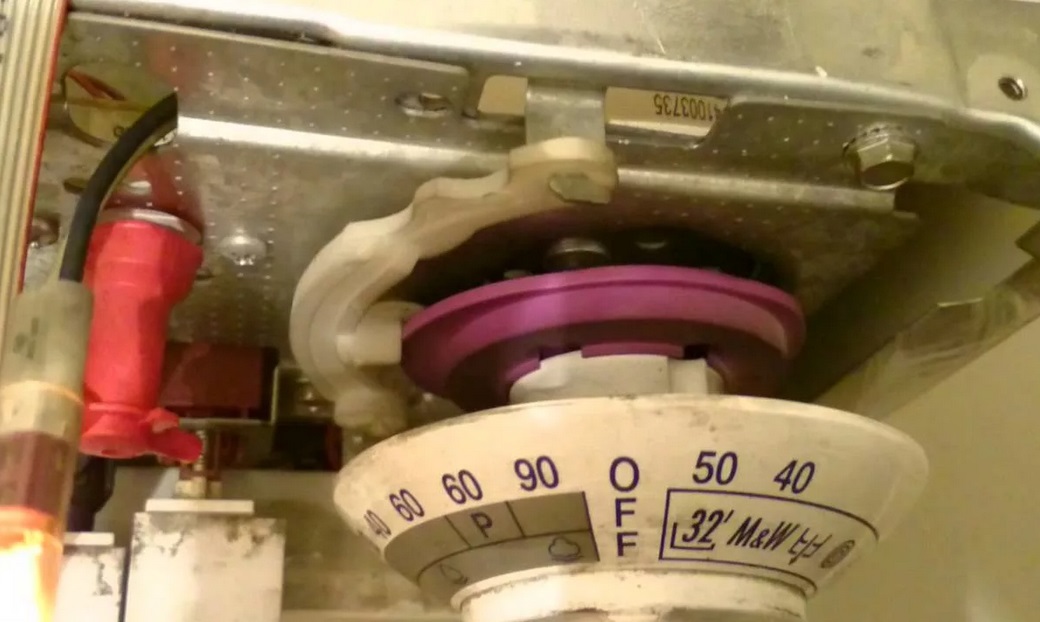
The contacts in the control unit can burn out. To fix this, simply clean them and reconnect them. Sometimes a gear breaks, requiring replacement. The control unit itself is located behind the instrument panel.
If you notice all the lights on your Gorenje washing machine's dashboard are flashing, don't rush to say goodbye to it. In most cases, the problem can be fixed without significant financial outlay. So, first, run a diagnostic, eliminating one possible fault after another. If you can't identify the problem, contact a service center.
Interesting:


Readers' comments
Headings
Washing machine repair


For buyers


For users


Dishwasher


Add a comment