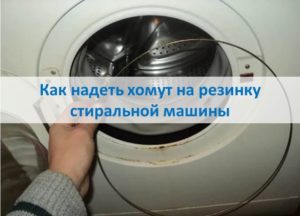
How to put a clamp on a washing machine rubber band
Water leaking from the washing machine drum is both unsafe and troublesome. But replacing the rubber seal on the hatches yourself and clumsily attempting to reattach the clamp to the seal often leads to this very situation. To avoid leaks and other related problems, don't act haphazardly. It's better to understand the intricacies of this type of work beforehand. We'll discuss these in detail below.
Installing the inner clamp
If you're having trouble installing the clamp, it's likely they were successfully removed beforehand. Then you'll likely notice that the sunroof seal is secured by two metal brackets, an outer and an inner one, which are firmly attached to the rubber seal at the factory. This is the challenge of installing them—it requires considerable effort, patience, and skill.
But the order of actions depends on the type of clamp used. There are also two of them:
screw-on ones have a special screw that is loosened when put on and tightened at the end;
Spring springs must be stretched by hand, applying a lot of force, and only after they have settled will the spring shrink to its original size on its own.
The second option is considered more troublesome, since it is quite difficult to “seat” the retainer in the special grooves the first time. It is better to “practice” with the old cuff first: often, when tightening with a screwdriver, the new seal is damaged. The rubber band has to be replaced again, which will negatively impact the family budget. The procedure for the internal spring clamp is as follows:
tuck the edges of the cuff into the drum;
we unscrew the hatch lock by unscrewing two screws on the front part of the housing;
insert a flat-head screwdriver into the lock and hook the latch onto it;
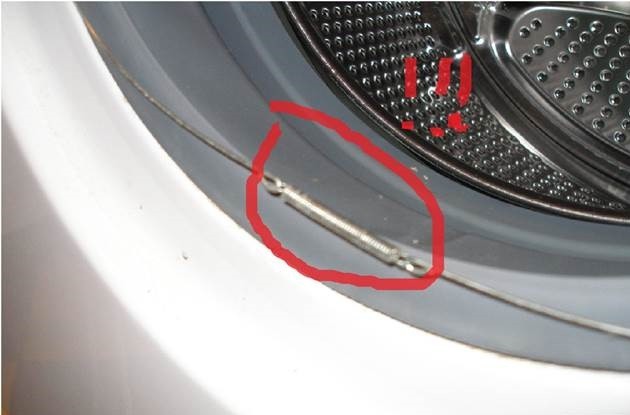
We tighten the spring along the entire perimeter with another screwdriver, starting from the hook point;
we return the lock and cuff to their original position.
We act differently with a screw ring.
Remove the top cover of the washing machine.
We unscrew the screw to a suitable diameter.
We insert it into the designated place so that the screw is on top.
We “reach” the screw from above and tighten it until it is optimally fixed.
Important! The type of holder does not depend on the brand and manufacturer of the washing machine, so you can choose the one that is convenient for installation.
It's worth noting that older models of automatic machines don't allow for clamp adjustment using screws and springs. In such cases, the ring can only be tightened using round-nose pliers.
Installation of external clamp
Installing the clamp on the washing machine's rubber band from the outside is even easier: the mounting area is completely unobstructed. The procedure remains the same. Place the spring ring on one side, hook it on the opposite side with a screwdriver, and tighten it into the designated grooves. It's important to carefully check the installation to ensure the markings on the collar and housing align and the holder fits snugly into the recess. The procedure for the spring-loaded type also remains the same:
unscrew the screw as much as possible and loosen the ring;
we place it over the elastic band along the outer edge;
tighten the screw.
Let's take a closer look at tightening. It's important not to overtighten the bolt, otherwise the threads will be damaged, the clamp will fail, and you'll have to find a new one. Another danger is the possible loss of the ring from its seat and the formation of a distortion. Which will require re-unwinding and re-planting.
If a screw is difficult to turn or constantly "pops out," don't try to force the slot by applying more pressure. Lubricating the fastener's threads with WD-40 can solve the problem. Simply screw the fastener in and out a few times to distribute the lubricant along its entire length, then continue tightening.
It's entirely possible to secure a clamp to a washing machine's gasket yourself if you follow the instructions provided and proceed with extreme caution. It's best to call in an extra pair of hands and discuss the repair procedure in advance.
 Water leaking from the washing machine drum is both unsafe and troublesome. But replacing the rubber seal on the hatches yourself and clumsily attempting to reattach the clamp to the seal often leads to this very situation. To avoid leaks and other related problems, don't act haphazardly. It's better to understand the intricacies of this type of work beforehand. We'll discuss these in detail below.
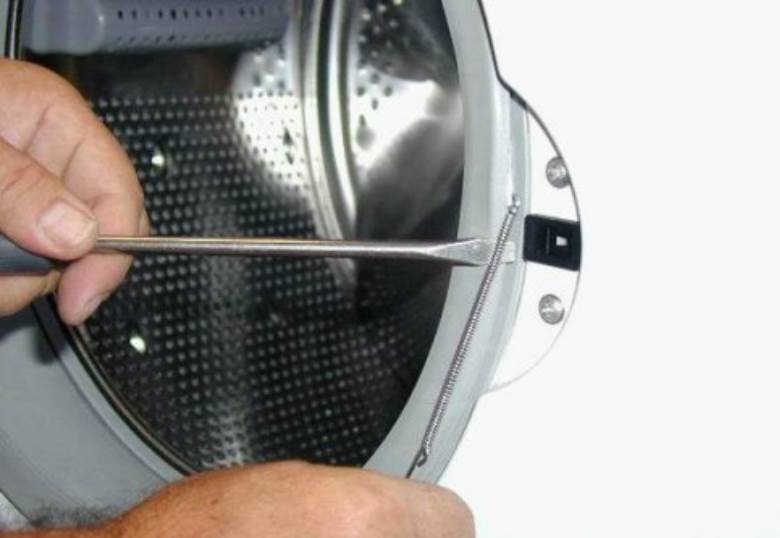


Yes, exactly, and I didn’t even realize about the trick with the lock 🙂