How to put a spring on a washing machine drum?
 When replacing the door seal, users often need to attach a spring to the washing machine drum. This spring is not quite the usual term for a spring. It refers to one of the two clamps (the inner one) that secures the seal to the washing machine's drum. Not everyone can tighten the clamp correctly the first time. In this article, we'll explain how to do it as simply as possible.
How is this part installed?
There are many ways to tighten a spring onto a cuff, but most of them are labor-intensive and time-consuming. Through trial and error, both regular users and professionals have discovered the most ergonomic and simple method for tightening a clamp onto a cuff.
Many washing machines have removable front panels, such as those from Bosch, LG, and Samsung. If it is possible to remove the front wall, experts recommend doing so, as this will significantly simplify the process of installing the clamp. However, disassembling the seal is not necessary; you can replace it without it. Since the front part of many washing machines is not removable, let's look at how to install the clamp on the seal without this step.
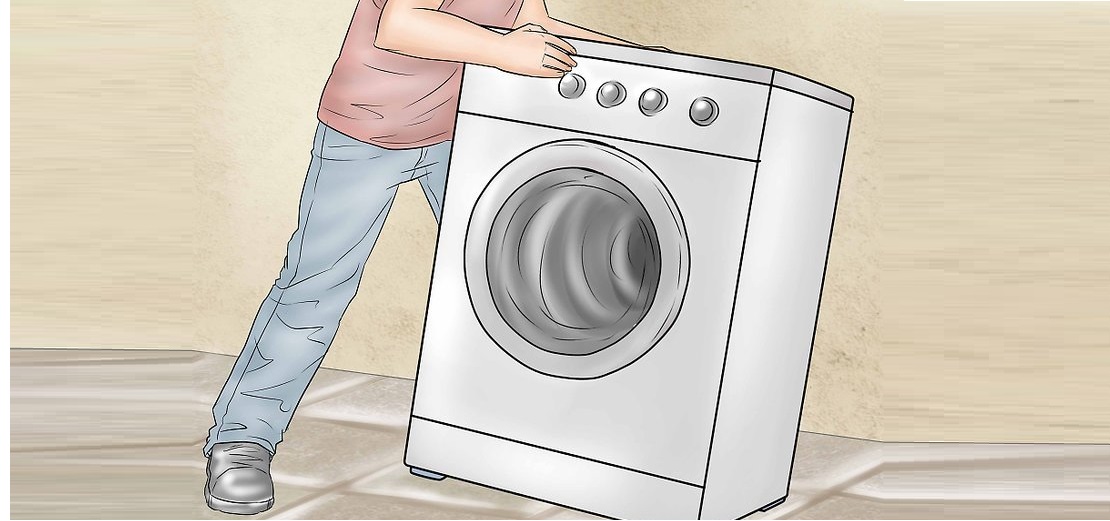
- Tilt the washing machine back at about 45 degrees and lean it against the wall. This will allow more room to work with the spring and seal.
- Place the cuff on the washing machine tank.
- To put the spring on, it is advisable to fold the cuff inside the tank, but not all cuffs can be folded, and it is difficult to fix them in this position, which can interfere.
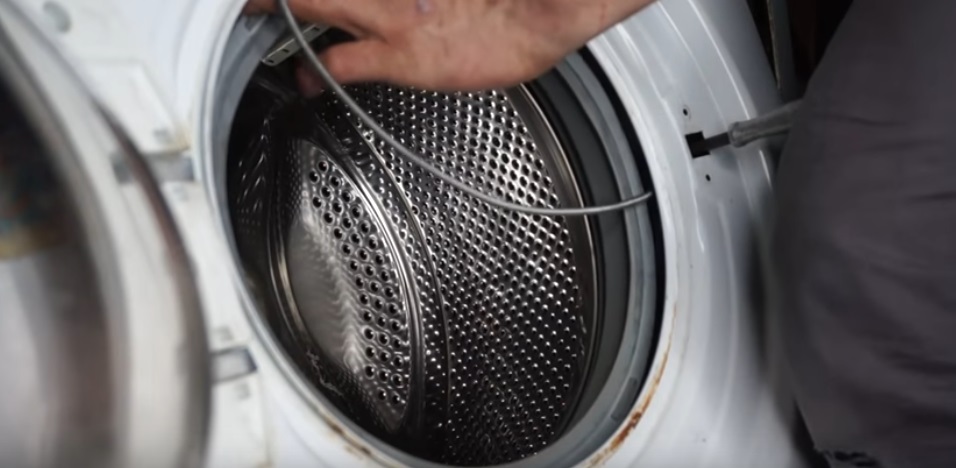
- Now you need to unscrew the hatch locking device. It is secured with two screws to the right of the hatch. Remove the screws.
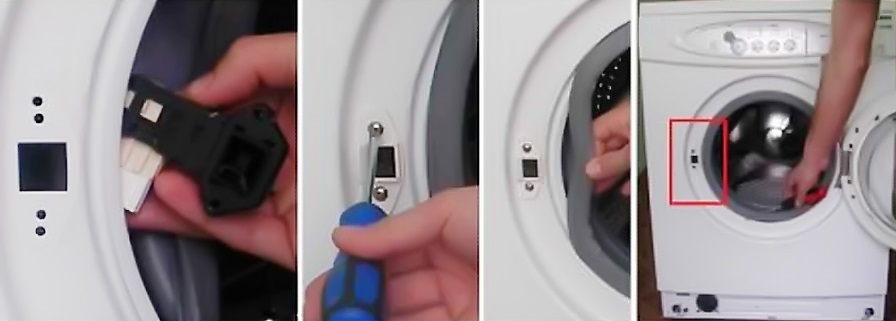
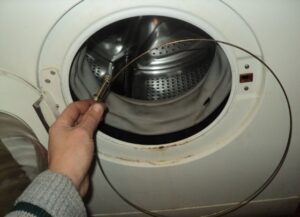
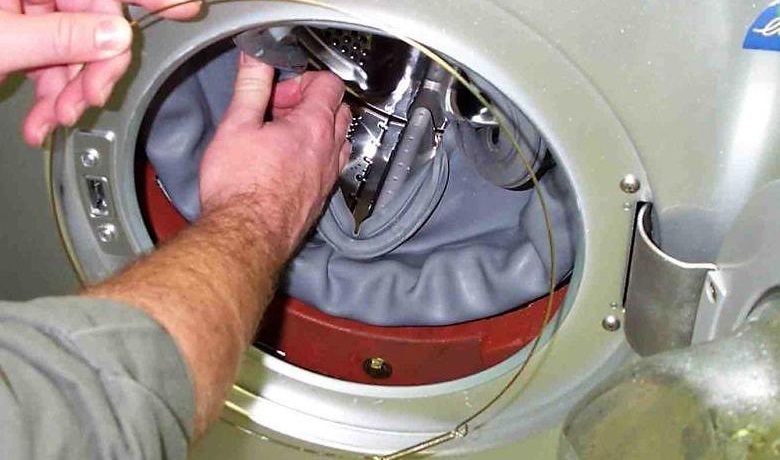
- Now take the spring and screwdriver. Place the screwdriver in the hole in place of the door lock, with the end positioned inside the tank. Hook the spring with the screwdriver.
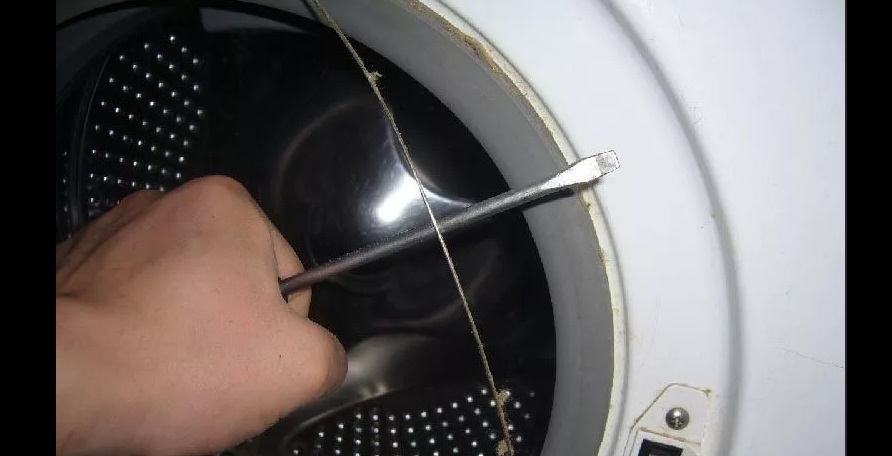
- Next, holding the screwdriver handle from the outside with your foot, tug on the spring to make sure the screwdriver is holding it well.
- While still holding the screwdriver, insert the spring directly into the groove of the seal. Move in a circular motion, pulling the spring under the seal. Having the seal turned back will be very helpful here, but if not, you'll have to bend it back manually as you go.
Important! Be prepared for a lot of force to be applied; by the end, the spring will be so tight that you'll have to work hard to get it into the groove.
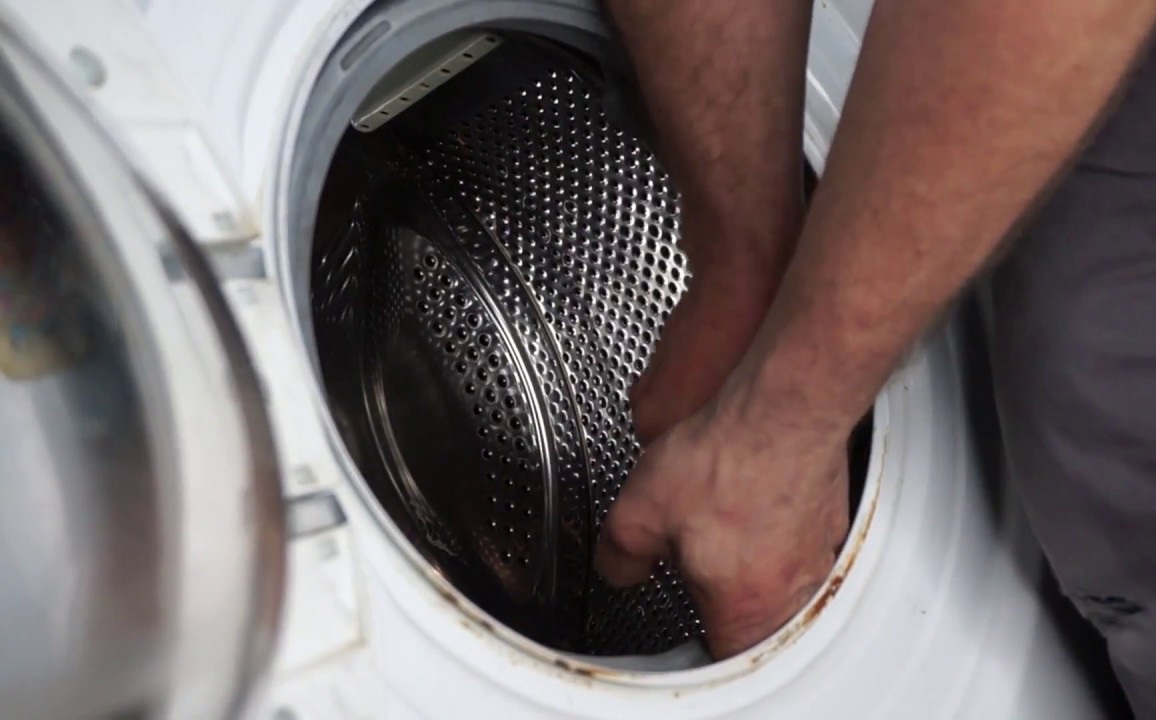
Once everything is ready, you can take out the screwdriver and secure the cuff with the outer clamp. Then, return the car to its original position, and that's it.
The cuff does not always need to be changed
A common reason for replacing the seal is damage to its lower section. Water begins to leak into the hole, eventually causing the machine to leak. However, in this case, it is not at all necessary to replace the cuff; you can move it so that the hole is located at the top, the problem will be solved, and you will not have to spend money on a new part.
Some people try to twist the seal directly on the tank by opening the hatch. This won't work, as the part is secured with two clamps: an inner and an outer one. You'll have to perform certain manipulations before moving the seal.
- Bend back the edges of the cuff at the hatch wall. You'll find a metal or plastic clamp there. Hook it in place and move around the perimeter until you find the fastener.
- Loosen the fastening so that the outer clamp no longer holds the rubber band.
- In the same way, but on the other side of the cuff, find the inner clamp.
- Use a screwdriver to pry it up, find the fastener and loosen it, but it is not necessary to remove the spring.
- Rotate the rubber band so that the gap is at the top of the hatch.
Now tighten the clamps in reverse order: first the inner one, then the outer one. Feel the seal with your hands to ensure the rubber seal and both clamps fit correctly in the groove. Close the washer door. If there are no problems, everything is done correctly.
Please note! Removing and installing the clamps is quite difficult and time-consuming, but if you try to turn the cuff over without taking care of the fasteners, you risk completely tearing the elastic.
Choose your repair tools carefully. Avoid sharp screwdrivers and other objects that could make the hole in the seal even bigger. Turning it over won't help, and you'll have to buy a new seal.
Interesting:


1 reader comment
Add a comment
Headings
Washing machine repair


For buyers


For users


Dishwasher


Today, three of us spent a whole hour trying to install this spring. Nothing worked.