Error E4 on a Samsung dishwasher
 An unexpected E4 error message from a Samsung dishwasher indicates that the float sensor in the tray has been triggered. The Aquastop system detects a leak, intelligently switches the machine to emergency mode, and initiates the drain. What should you do in this situation? How can you reset the code and fix the problem? What could be causing the leak? Let's explore the details.
How to interpret E4?
Sometimes users misinterpret this error code. The Samsung dishwasher manual also includes the 4E code, which indicates a water fill problem. However, in our case, this is a misinterpretation, as E4 appears on the display just after the dishwasher has filled successfully.
If you see the E4 error on your Samsung dishwasher display, you will have to check the leak sensor located in the tray.
The sensor could be triggered by either a true or false alarm. You'll need to look inside the Samsung dishwasher's tray. If there really is water inside, you need to look for the leak.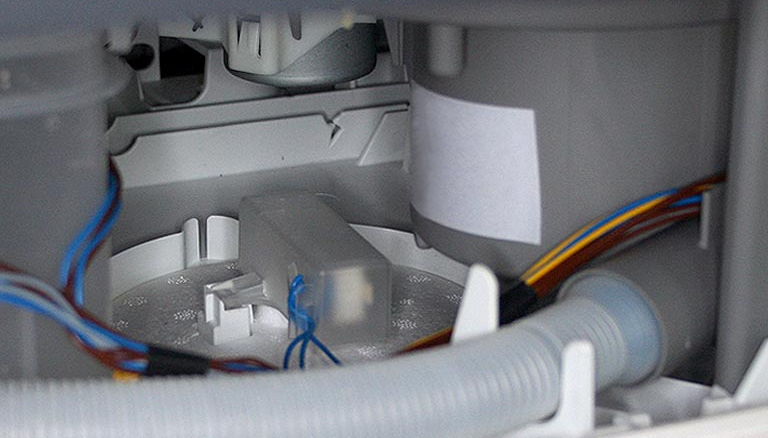
If the sump is dry, the float contacts may be stuck. This is most often the cause of false sensor activation. In this case, cleaning the oxidized components will help.
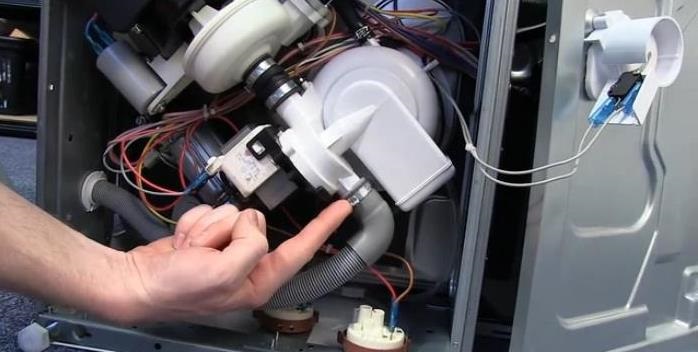
The pump on most Samsung dishwashers isn't secured with additional bolts, but rather by a single clip. Over time, this fastening tends to loosen, causing play. Therefore, the real cause of the sensor activation is often a leak between the pump and the snail of the dishwasher.
There's a rubber gasket between the pump and the volute. Due to looseness, the seal wears out faster and begins to leak water. Liquid ends up in the tray, triggering the Aquastop sensor and displaying the E4 error. How can I restore my dishwasher to working order? Let's take a closer look.
We are restoring the connection between the pump and the snail
To access the drain pump of a Samsung dishwasher, you'll need to partially disassemble its housing. First, disconnect the power to the dishwasher. If the E4 error occurs, the dishwasher automatically starts draining, so there will be no water in the bin.
Next, remove all contents from the dishwasher: dishes and baskets. Then, disconnect the dishwasher from the water supply and drain and remove it from its niche. After this, you can begin disassembling. The next steps are:
- drain the water from the tray by tilting the machine backwards;
- place the dishwasher on the floor;
- Unclip the latches that hold the bottom of the dishwasher;
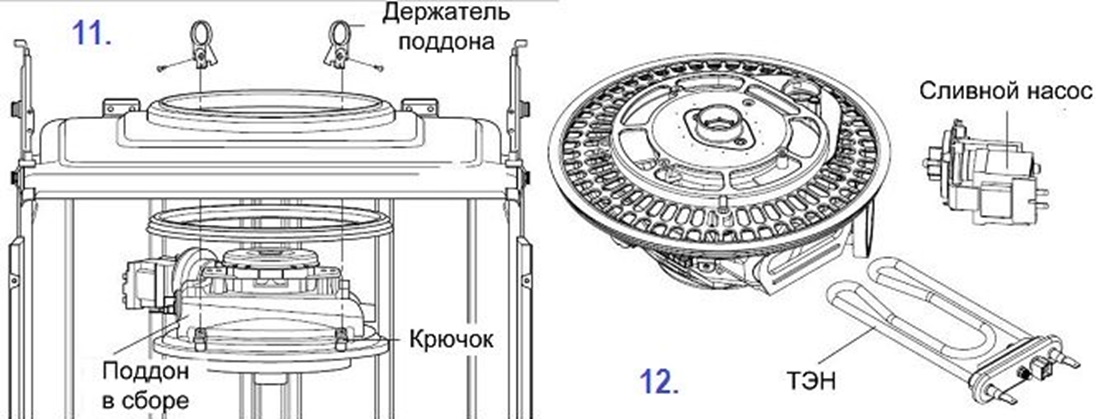
- remove the pan, having first disconnected the float sensor connector;
- find the pump, disconnect all wires and pipes from it;
- turn the drain pump counterclockwise half a turn and pull it out of the machine body;
- inspect the rubber seal of the pump.
There are two possible solutions. The first is to simply install a new rubber seal. However, keep in mind that due to play, the seal will wear out again in a couple of years, requiring the repair to be repeated. The second is to not only replace the gasket but also secure the pump to prevent premature wear of the O-ring.
Of course, it's best to not only install a new gasket but also secure the pump. Here's the next step:
- purchase a similar rubber seal;
- place the new gasket in place of the old one;
- using a thin drill, 1.5 cm in diameter, make several holes in the pump body lugs and corresponding places on the snail;
- screw the screws into the drilled holes;
- Install the pump back into the dishwasher body.
This will provide additional support for the drain pump. This will eliminate any play and prevent the rubber from wearing out prematurely. After this, simply replace the drain pan, connect the leak sensor, connect the machine to the utilities, and run a test cycle.
The siphon gasket is leaking
Another possible cause of error E4 is a leaking siphon gasket. When the seal between the siphon and the hopper is damaged, water begins to leak into the machine tray. The solution is to replace the rubber seal. You can order new parts online for your specific Samsung dishwasher model.
It is recommended to additionally treat the area where the rubber seal is installed with a moisture-resistant silicone sealant.
The algorithm of actions will be as follows:
- de-energize the dishwasher and disconnect it from communications;
- remove the machine from the niche in which it is installed;
- remove the lower and upper baskets and cutlery tray from the dishwasher;
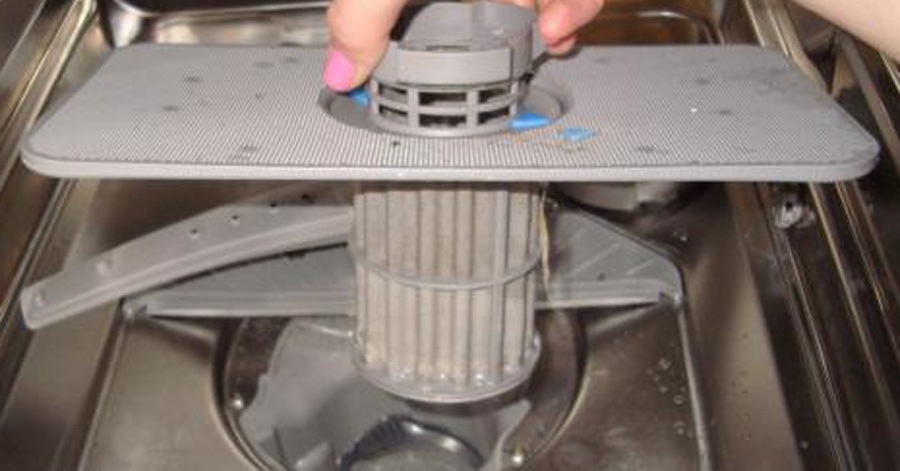
- remove the waste filter from the machine (the glass remaining in the bin is the dishwasher siphon, which ensures the drainage of waste liquid into the sewer);
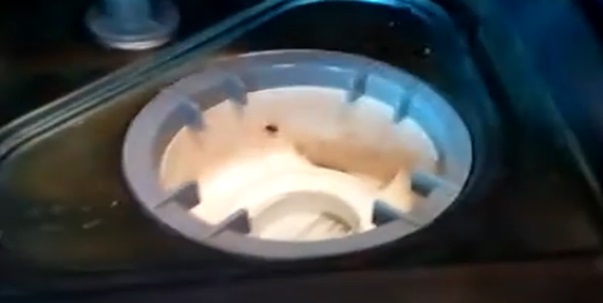
- remove the plastic cover from the siphon and the seal itself;
- Turn the machine over and remove its tray, having first disconnected the contacts of the float sensor;
- turn off and remove the recirculation pump from the machine;
- unhook the drain hose;
- disconnect and remove the drain pump (it is secured with two bolts);
- remove the siphon from the dishwasher;
- Treat the area where the sealing rubber is installed with sealant;
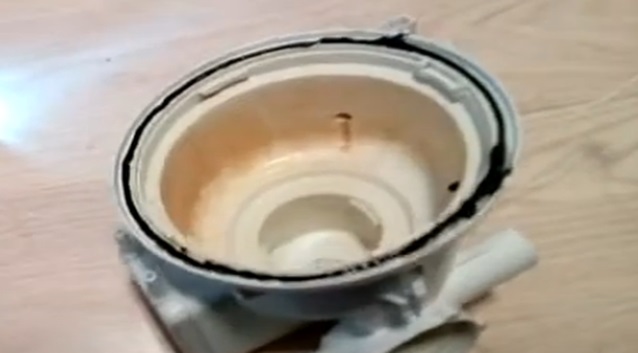
- put the gasket back in place, coat the seal on top with sealant, wait 10-15 minutes;
- attach the siphon to the tank and secure it with the previously removed plastic cover;
- put the circulation pump and pump back in place;
- connect the drain hose;
- place the tray, connect the leak sensor;
- Return the machine to the upright position.
You need to wait for the sealant to set. Therefore, it's best to wait at least 24 hours before using your Samsung dishwasher for the first time after this repair. If everything is done correctly, the E4 error message will no longer appear on the display.
Sometimes the error code is displayed not because of a leak, but because the control module is malfunctioning. A semiconductor on the board is damaged, causing the self-diagnostic system to provide inaccurate information. It's best to call a specialist to diagnose and repair the electronic unit.
Interesting:


Readers' comments
Headings
Washing machine repair


For buyers


For users


Dishwasher


Add a comment