Error F01 in a Leran washing machine
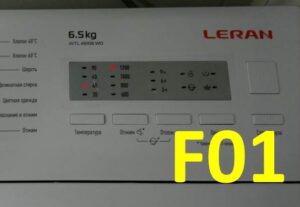 Progress never stands still, so it's now easy to figure out why your household appliances suddenly stopped working properly. Error F01 in a Leran washing machine occurs when there's no water filling the drum to begin the cycle, preventing the wash from starting. Let's explore the reasons why water isn't filling the drum and how to fix them at home.
Possible reasons for the code to appear
Before attempting to troubleshoot the problem yourself, you need to conduct a thorough diagnosis to understand why the F01 error code appeared in the first place. Such an error could have occurred either due to a simple bend in the inlet hose or due to a failure of the CM control module. Let's list the main reasons why the water filling function in the Leran "home assistant" fails.
- Damaged inlet valve. If this is the problem, the malfunction will be evident even before the error code is generated. Initially, you may notice that the detergent isn't being completely rinsed out of the dispenser, which indicates a damaged valve. To test the element, apply 220 volts to the solenoid valve. If the component closes with a distinctive click, everything is OK. Be sure to check both valves, and if both fail to respond, replace them.
- Clogged inlet screen. One of the most common situations is a simple clogged filter screen. This will cause a loud buzzing noise, and it will take significantly longer for the water to fill.
- The coarse filter is clogged. The solution to this problem is similar to that described in the previous point – thoroughly clean the filter of all contaminants.
- Damaged pressure switch. This component monitors the water level in the system, so if it fails, the control module will not be able to receive information about the amount of liquid collected in the tank. You need to perform a simple sensor test by disconnecting the pressure switch tube and blowing into the wire. If you hear one or two clicks, the component is working properly; if not, the pressure switch will need to be replaced.
Just in case, double-check the pressure switch wire, as it could be clogged with fabric fibers or cobwebs if the washing machine has not been used for a long time.
- Control module failure. The washing machine's most important component, also known as the "brain" of the system, often suffers from damaged triacs. If these components have burned out, you don't need to replace the entire control module; you can simply install new triacs on the board. Doing this yourself is not recommended; it's best to entrust the work to a service center.
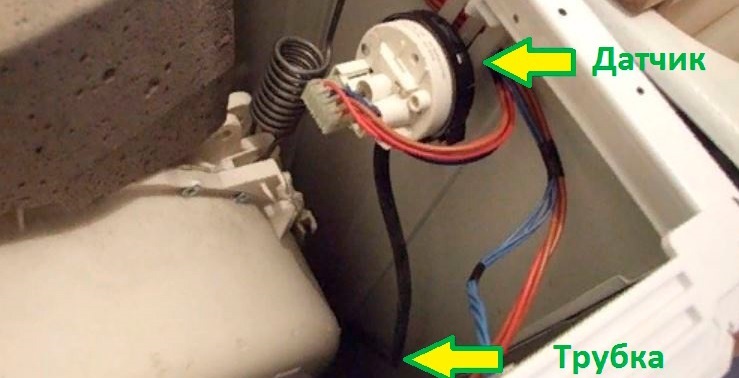
- Damage to the hose connecting the pressure switch and the appliance's water tank. Over time, the hose loses its seal, allowing air to leak.
- A poorly closed hatch door. In this situation, repairs aren't even necessary, since if the door isn't closed tightly, the door locking system won't engage, and the control module won't allow the door to begin its operation.
- Pump failure. Finally, the lack of water intake could be due to a damaged drain pump. While it can be repaired, it's much easier to simply replace the pump.
As you can see, there is only one error code, but there are so many reasons for its occurrence that it is impossible to figure out the problem without detailed diagnostics.
We are looking for a problem
If you decide to troubleshoot the problem yourself, first disconnect your Leran washing machine from all power sources. Don't skip this step, as it's a standard safety precaution. If the drum isn't filling with water, but the machine is making a loud humming noise, follow our instructions.
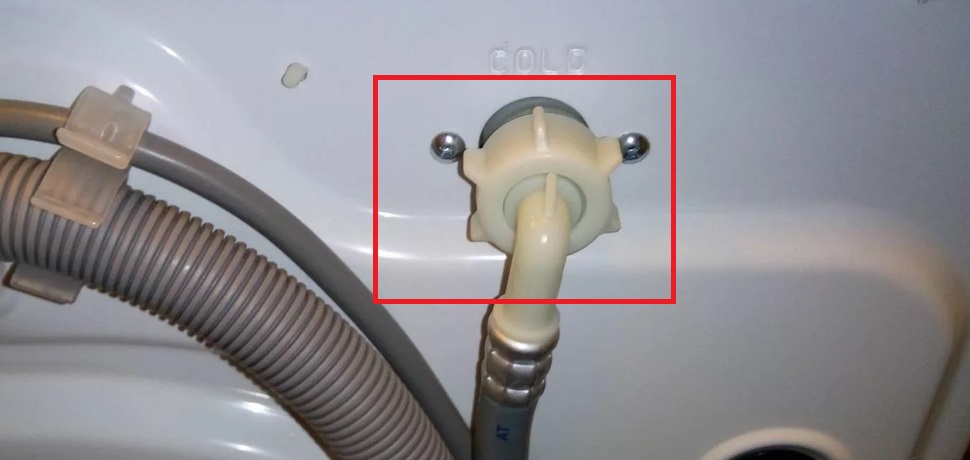
- First, make sure the shutoff valve is open and water can enter the system. Close it to prevent it from interfering with the system during diagnostics and repairs.

- Disconnect the inlet hose from the device and drain any remaining waste liquid from it.
- Check the filler hose for damage and that it is not kinked.
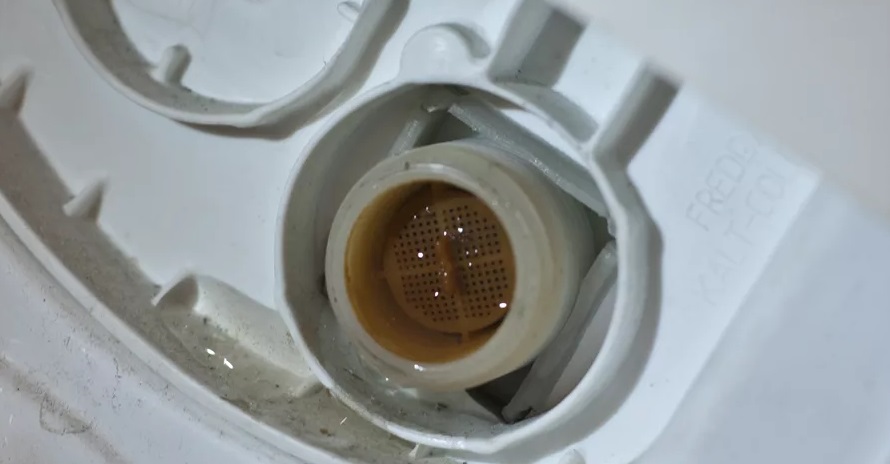
These are the first three steps to take if your water isn't filling. Once you've confirmed that everything is in order, carefully inspect the filter element located inside the inlet hose. To check the mesh, do the following:
- remove the hose;
- Examine the valve system in which the filter is installed. The filter has a special indentation that needs to be secured with pliers and gently pulled towards you to remove the filter element;
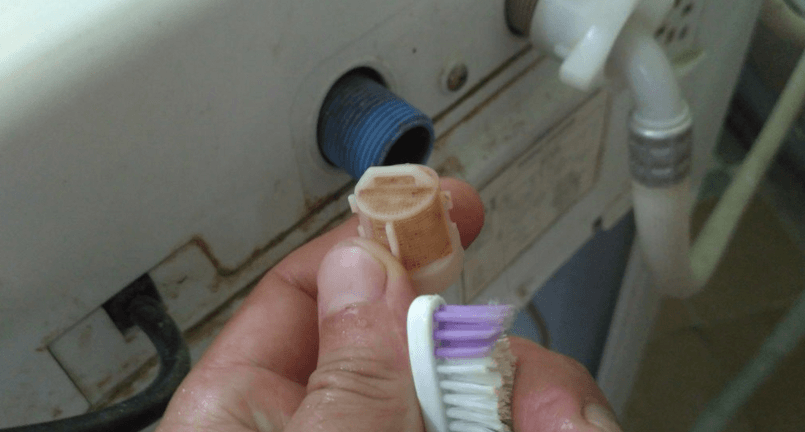
- rinse the filter under a powerful stream of hot water;
- install the mesh in place using the same pliers.
The final diagnostic step is checking the coarse filter, which is most often installed after the faucet. This procedure is a bit more complicated than the previous one, as you'll need two wrenches to simultaneously hold the connection to the valve and unscrew the bolt. Once everything is ready, place a basin under the faucet to avoid flooding the floors or the neighbors below. The powerful water pressure will clean the filter of any impurities.
Replacing the intake valve
Any repair to an expensive "home helper" seriously impacts the family budget, which is why many try to solve the problem at home. This makes sense, especially if the fault code F01 appeared due to damage to the water supply valve. What to do in this case?
- Disconnect the Leran washing machine from all communications.
- Remove all hoses attached to the back of the machine.
Place a container of water under the connection point, as liquid accumulates in the hoses.
- Remove the cover of the device by first removing the fasteners.
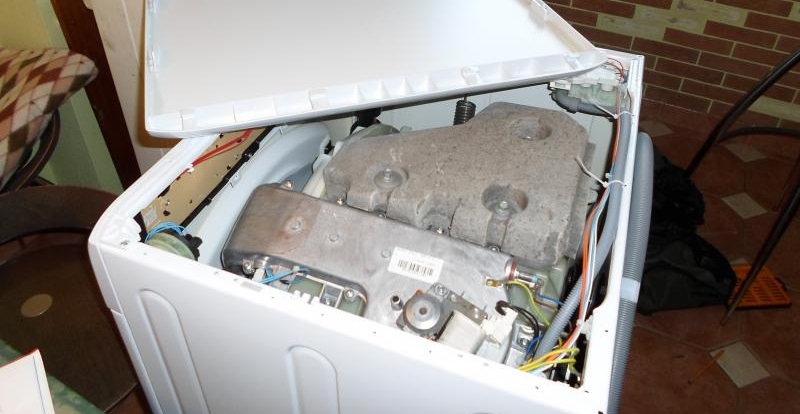
- Take a photo of the correct connection of the wires to the valve, so that you have an example at hand later, disconnect the wiring.
- Using pliers, remove the fasteners from each of the four hoses, placing a container of water underneath them beforehand. It's also a good idea to take a photo of the correct hose placement.
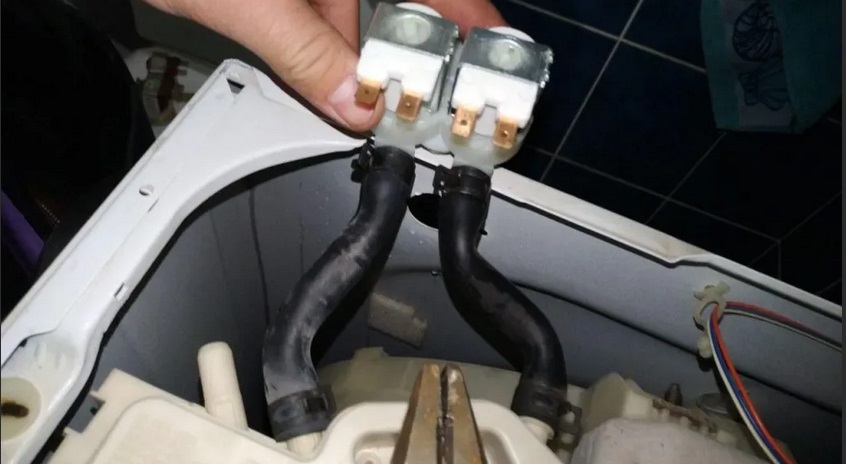
- Remove the screw securing the valve.
- Remove the damaged solenoid valve from the CM.
- Place the new valve in place of the old element and secure it with a bolt.
It's best to buy genuine Leran parts rather than generic ones. To do this, you'll need to either remember the exact model of your washing machine or take the damaged valve to the store as an example.
- Reconnect the hoses you removed in the previous steps and then secure them with clamps.
- Connect all the wires to the element using the photograph.
- Replace the top panel of the washing machine, securing it with screws.
- Connect the hoses to the rear panel of the CM.
At this point, the repair is complete, and all you have to do is connect the appliance to the power supply and water supply, open the shut-off valve, and run a test run.
Interesting:


Readers' comments
Headings
Washing machine repair


For buyers


For users


Dishwasher


Add a comment