How to reverse the dryer door
 Users often need to reposition their dryer door. This is typically required when stacking a dryer and washing machine. Many manufacturers offer this option. Let's look at how to reposition the door and what steps are required.
Changing the door opening side
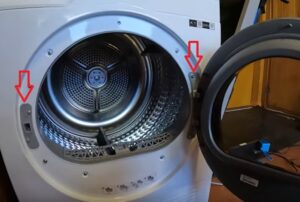
Finding out whether your dryer's door can be reversed is easy. You can either consult the equipment manual or carefully inspect the area around the loading door. Many models of dryers also have hinges or guides on the opposite side for attaching the door and lock.
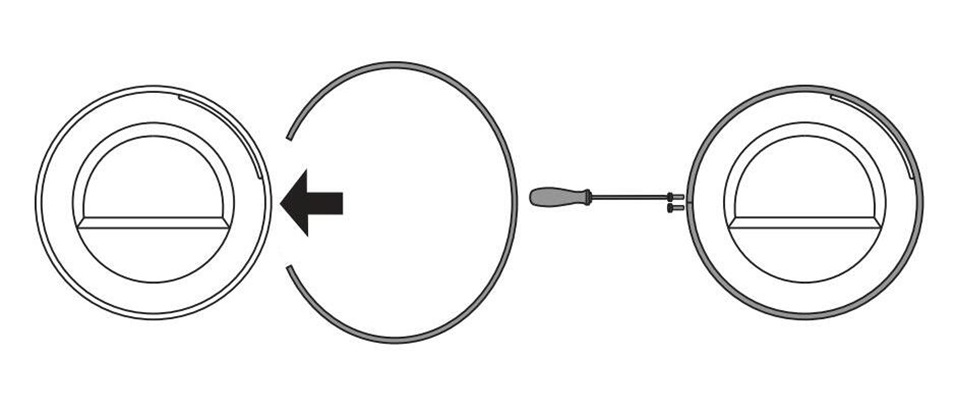
You can rehang the dryer door yourself, without the help of a professional.
You'll need a screwdriver for this job. The procedure is as follows:
- de-energize the device;
- open the dryer door wide;
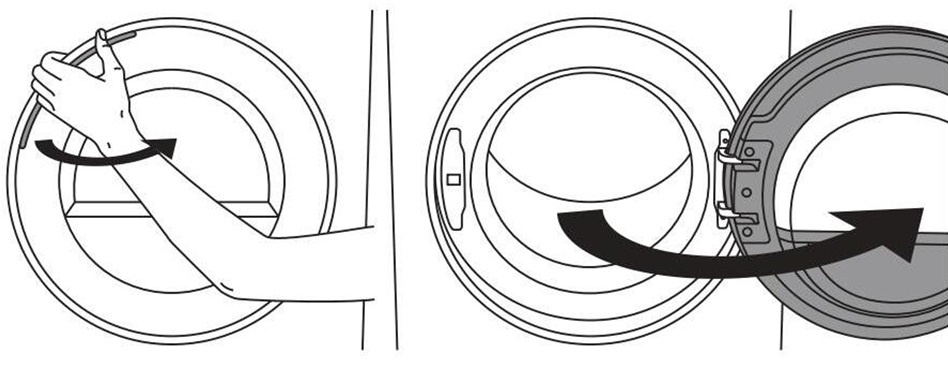
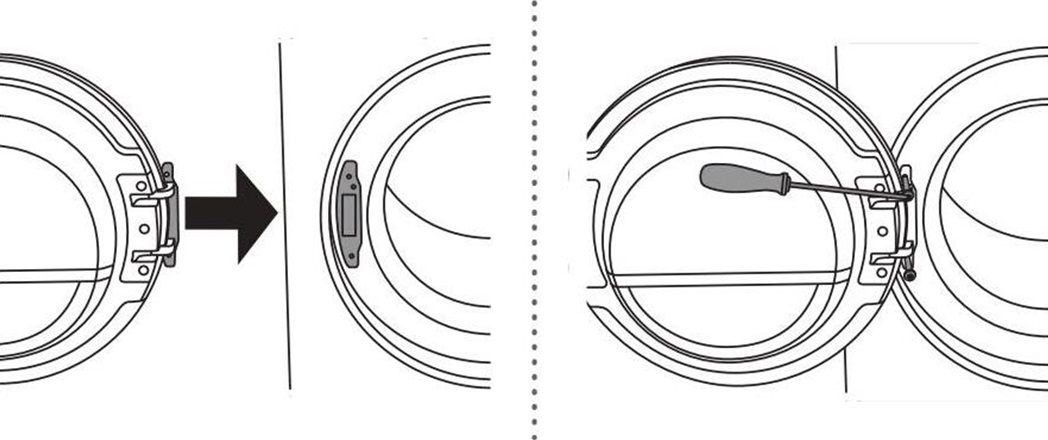
- unscrew the screws and remove the sash;
- Use a screwdriver to unhook the door lock plug and unscrew the screw on the locking device;
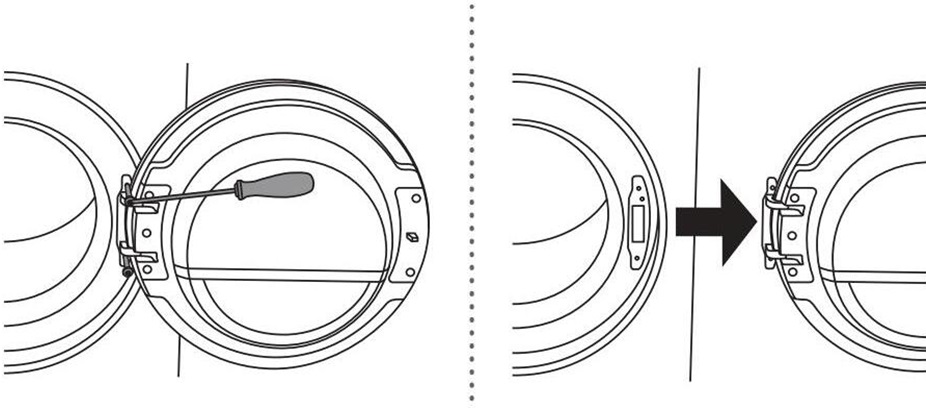
- Push the lock up slightly and remove it;
- move the lock to the opposite side, to fix it, press it down;
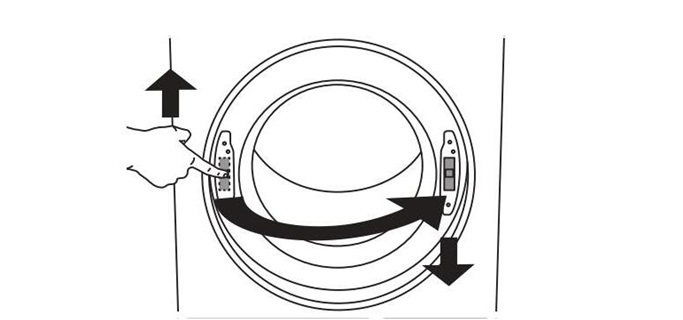
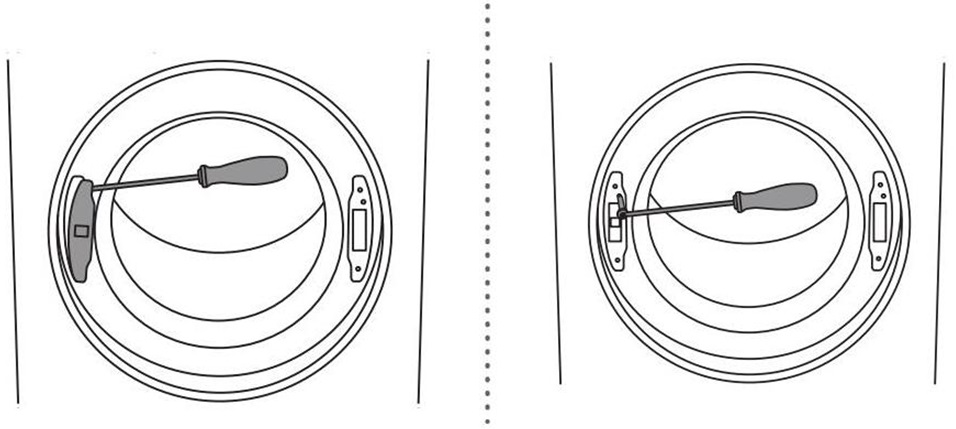
- secure the lock with a screw and put the plug back in place;

- unscrew the hinge of the door leaf and the latch, swap them;
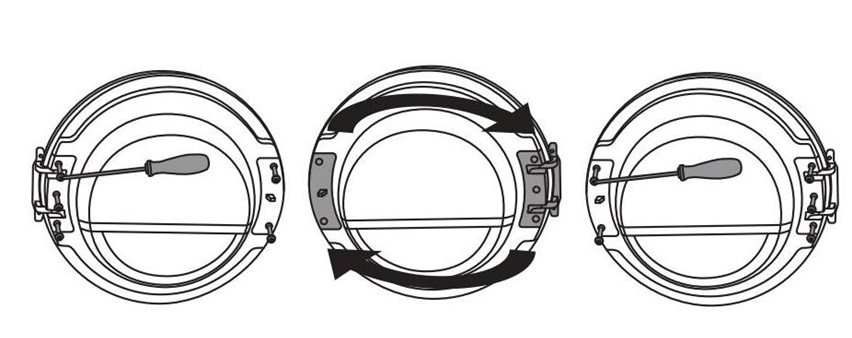
- unscrew the plastic door rim and remove it;
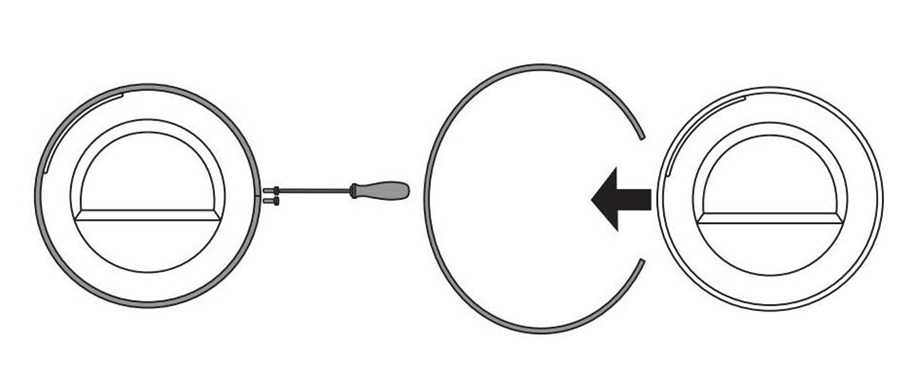
- Turn the outer glass of the door 90 degrees so that the door opening marking is on the other side;
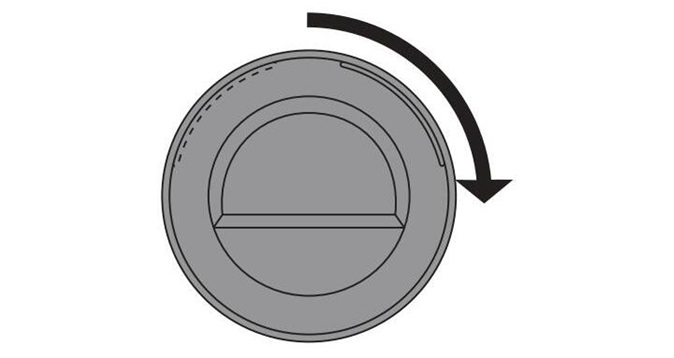
- turn the door rim 180 degrees, put it back in place and tighten the screws;
- Hang the sash on the hinge and secure it with screws.
Basically, the user will simply have to swap the hinges and lock. If the dryer has a reversible door, this won't be a problem. Don't forget to change the position of the door glass, either.
Before rehanging the door, make sure the dryer's location is correct. Ask yourself if the dryer can be easily connected to a drain and electrical outlet, and if the room is adequately ventilated. Once you're confident in your decision, move the hinges.
Clean your dryer regularly
The lifespan of a tumble dryer directly depends on how well the user follows the basic operating instructions and the manufacturer's recommendations. First, it's essential to clean the appliance regularly. Second, don't exceed the maximum load weight.
What does cleaning a dryer involve? First, I'd like to point out the appliance's heat exchanger—it needs to be cleaned at least once a month. Dust and other debris trapped inside reduces drying efficiency and increases cycle time.
How to clean a dryer heat exchanger:
- de-energize the equipment;
- wait until the machine cools down (if it was running before);
- Cover the area around the dryer with dry rags to prevent any residual water from the machine from spilling onto the floor;
- get to the heat exchanger hatch, it is located in the front, at the bottom of the machine (it can be on the right or left, depending on the model);
- open the sash;
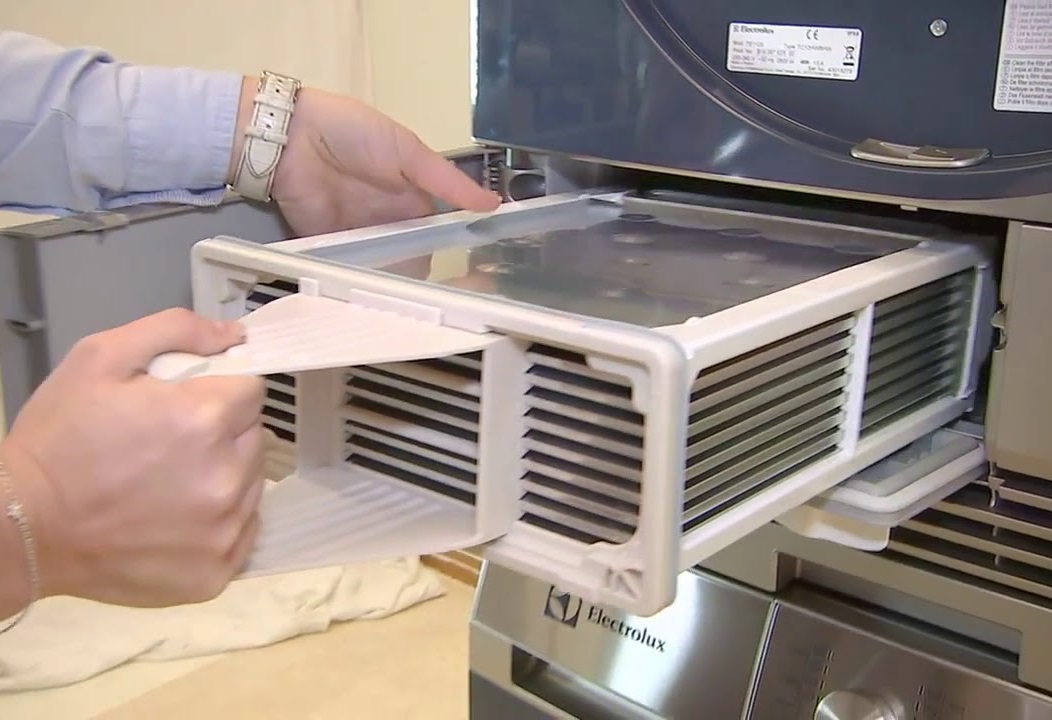
- Turn the block levers towards each other – this is necessary to remove the top cover of the part;
- carefully remove the heat exchanger filter;
- Clean the element from debris and dust, rinse it under running water.
If the element is heavily soiled, clean it with a soft sponge. Avoid using sharp or abrasive tools, as they may damage the heat exchanger. It's important to remove dust and debris not only from the element itself but also from its seal.
There's no need to wait for the cleaned heat exchanger to dry. The main thing is to let all the water drain off, and then you can put the part back in place. Replace the element and secure it with the protective cover and locking levers.
It's also essential to clean the lint filters. They're located in plain sight, directly behind the dryer's loading door. You can easily spot clogged elements.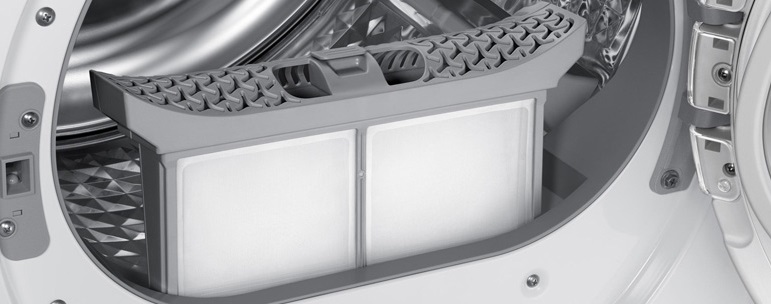
Dust accumulates in them, making cleaning the lint filters easy. Simply pull out the trays and remove all the "dust plates." Then, rinse the containers under running water.
The frequency of cleaning the heat exchanger and lint filter directly depends on how often the user runs the dryer.
It's also important to air out the dryer after each use. This will prevent mold or odor from forming in the dryer chamber. It's also a good idea to wipe the dryer walls dry after the final cycle.
Cleaning the heat exchanger, and especially the lint filters, is easy. No specialized knowledge or tools are required. A standard screwdriver will suffice. The job will take about 20 minutes, so don't be intimidated by the process. A machine clogged with dust won't dry clothes effectively, and it will also overheat, which is unsafe.
Where does so much dust come from in the dryer?
Periodic cleaning of the dryer is necessary because lint, dust, threads, and hair constantly accumulate in the machine. All of this ends up in the dryer along with the clothes. Dirt is unavoidable, even if the machine is loaded with clean, washed laundry.
A clear example is drying clothes outdoors. If you shake a freshly washed shirt, you can see dust coming off with the naked eye. Also, clean, wet laundry always contains threads, pet hair, hair, and lint.
All this debris, instead of getting into the air and then into the lungs of household members, collects in the dryer. The lint filter can become clogged after just a couple of drying cycles. After 5-6 working cycles, the tray will become critically full and will need to be completely cleaned.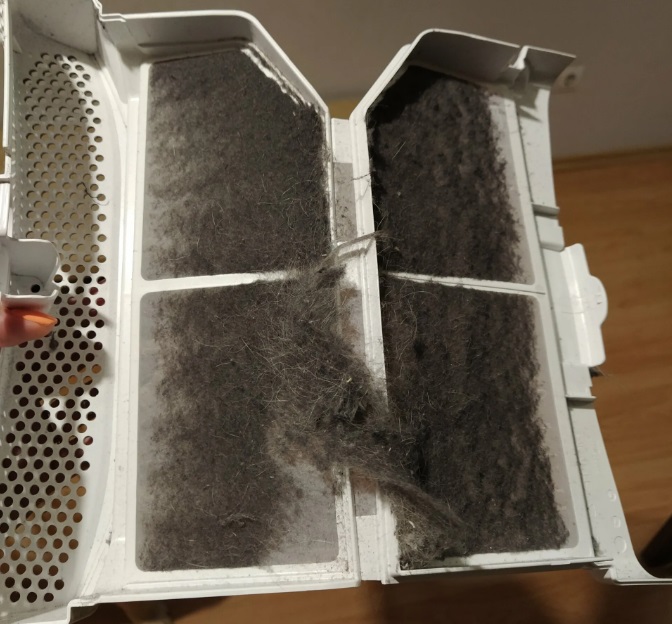
Therefore, dryer manufacturers recommend cleaning the lint filter after each use. This will help extend the appliance's service life. This frequency eliminates any negative scenarios.
Cleaning the filter element is simple. Simply remove the tray and empty it. Then, place the lint filter under running water and wipe it with a sponge or cloth. Then, replace the container.
So, don't worry about dust accumulating inside your dryer. That's how it should be. This prevents small debris from getting into the air and into your lungs. And it poses no danger to your expensive equipment, as long as you remember to clean the lint filters and the machine's heat exchanger regularly.
Interesting:


Readers' comments
Headings
Washing machine repair


For buyers


For users


Dishwasher


Add a comment