DIY feather plucking machine from a washing machine
 How many poultry farmers haven't cursed the time when they have to slaughter birds en masse and then process the carcasses before selling them? The worst part is the feather removal process—plucking. It's all well and good if you have 30-40 birds to pluck, the whole family gathers together, does the unpleasant work, and that's it, but what if you have 300-400 birds to pluck?
This kind of manual labor will remind you of hard labor. So you'll be tempted to think about making your own feather-plucking machine from washing machine parts—and it wouldn't be such a bad idea!
How does a plucking machine work?
A homemade feather plucking machine works just like expensive factory-made equipment, although it may look a little less aesthetically pleasing. It works as follows.
- The capacious tank is completely studded inside with rubber beaters – special elastic pins with a thread at the end.
- The bottom of the tank rotates at high speed and beaters are also inserted into it.
- We throw a pre-scalded chicken, duck, goose or quail carcass into the tank, and then turn on the feather plucking machine.
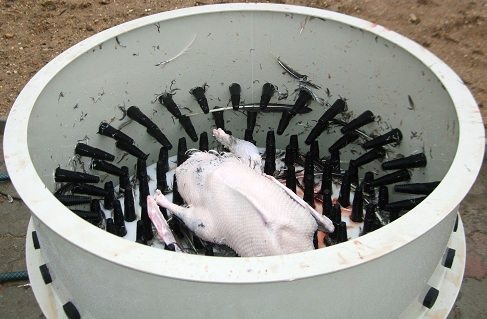
- The bottom of the machine's tank begins to spin rapidly, and the carcass inside begins to jump like crazy.
- During these jumps, the carcass hits the rubber beaters intensely, and the feathers fly off.
- After a few minutes of such jumping, the carcass is almost completely free of feathers, leaving only the smallest feathers on the wings, tail and legs, which will have to be removed manually.
Does such a feather plucking machine make a farmer's job easier? Not exactly. In 1 hour of operation, such a machine processes up to 30 broiler carcasses without any grueling manual labor.So, get your golden fingers out of your pockets and let's work together to create a homemade feather plucking machine, which we'll make from some washing machine parts.
Be careful! Some people think that birds are damaged by hitting the pluckers. In fact, carcasses that go through a plucking machine are 100% marketable.
Preparing the details
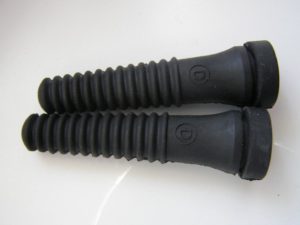 The first obstacle to building a feather plucking machine yourself is the beaters. Where can I get such specialized rubber parts, or how can I make them? We struggled with this for a long time, couldn't find anything suitable, and finally decided it was best to order the beaters. Custom-made ones won't be exactly cheap, but we can reassure you—they're the biggest expense when building a feather plucking machine. The rest can be sourced almost for free.
However, you need to be very careful when ordering here, as the billets for carcasses of different sizes are also different. The largest beaters are for turkey and goose carcasses, and the beaters for broilers are slightly smaller. Next come the beaters for smaller birds, and the smallest ones are for quails.
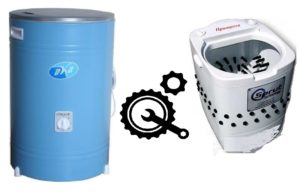
While we wait for the rubber parts, we can work on the washing machine. For the feather-plucking machine, we'll use an obsolete single-tank Oka washing machine. There's only one requirement: the washing machine must be fully functional. We'll be doing minimal modifications to the washing machine ourselves. The only thing we absolutely must do is relocate the motor and control wiring, located under the wash tank, outside the machine body. We'll discuss this in more detail later. Here's what we'll do.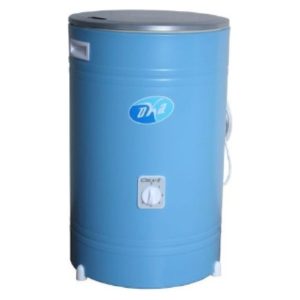
- We remove the washing machine motor.
- We dismantle the activator and the drive mechanism.
- We take out all the electrical components and put them away neatly so that later we can understand what goes where.
The washing machine parts are ready. Now we need to find a long rubber hose and attach a shower head to it. This device will come in handy later, once the feather plucking machine is operational. We'll also need a few tools:
- open-end wrenches of different sizes;
- small adjustable wrench;
- ratchet with a set of heads from 8 to 30 mm;
- drill;
- Bulgarian;
- step drill;
- pliers;
- hammer;
- measuring instrument;
- multimeter;
- marker.
Well, the bills have finally arrived, let's get started assembling the feather plucking machine ourselves. We'll try to describe the entire assembly process to make it easier for you to navigate when building your own machine.
Assembling the machine
Various online craftsmen suggest making a feather plucking machine out of a plastic barrel, studding it with beaters and constructing a drive mechanism. In our case, it's simpler, since the Oka washing machine already has a drive, an actuator that replaces the rotating base, a motor, and some kind of control. But there's a problem.
We will punch a fairly large number of holes in the bottom and activator of the washing machine, into which we will insert rubber beaters. Moreover, between the beaters we will drill holes to drain water and remove feathers and down. Since the motor and electrical components are located directly under the bottom of the washing machine, all the water and feathers will end up directly on them—we can't let that happen. Here's what to do.
- We make a motor housing from a suitable-sized plastic box. We make a sturdy base for it from a metal angle.
- We connect the engine to the control electrical system and test its operation. Learn more about this. How to connect a washing machine motor, you can read in the article of the same name on our website.
- We construct a stable base for the washing machine's tub using metal angles. The bottom of the tub should be at the same height from the ground as the tip of the motor shaft.
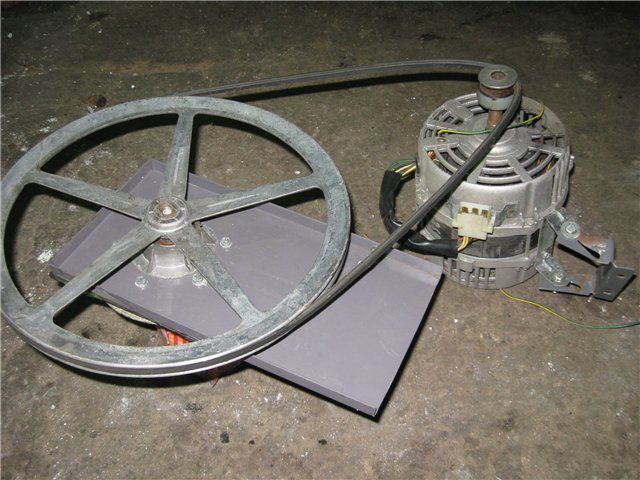
- We take two pulleys and a drive belt from an automatic washing machine. We attach one pulley to the motor shaft, and the other to the actuator shaft, and then connect them with a belt.
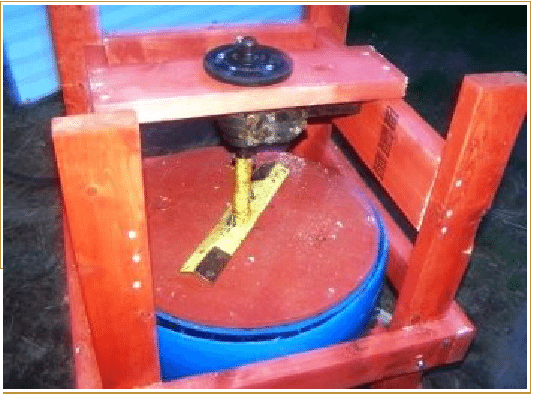
The belt must be tensioned well, and the box with the engine and the washing machine tank must be firmly secured to the ground.
- We are checking how the mechanism will work. Our task is to ensure that the engine, via a belt drive, rotates the activator without it falling off due to vibration. Note that the vibration of the tank in which the carcass will rotate will be noticeably stronger.
- Now comes the most difficult stage of making a feather plucking machine with your own hands – installing the rubber beaters.
- Using a step drill, we make holes that are 3-4 mm smaller in diameter than the diameter of the beaters.
- We'll make slightly larger holes between the holes for the beaters to allow water to drain and feathers to be discarded. Later, we can make a flat tray out of tin and place it under the plucking machine's tank to collect the feathers and water, but there will still be a lot of dirt.
- We lubricate the beater holes with machine oil and then begin inserting the beaters into them. It's a very unpleasant job, but the results are worth it.
- The final touch: Attach the hose with the shower head to the edge of the plucking machine's tank, ensuring the head points into the tank.
Irrigation system: necessary or not?
So, the homemade feather plucking machine is ready. It's time to conduct a general test and pluck the first bird automatically, and also discuss whether a watering system is necessary for a feather plucking machine or whether dry plucking is better. Let's not just speculate, but pluck two broilers of the same size. We'll water one while the machine is running, and the other will be plucked dry.
We turn on the feather plucking machine's motor, and the activator begins to rotate along with the beaters. We drop in the pre-scalded broiler carcass and turn on the water, which shoots a thin stream into the machine's tank, drenching the flailing carcass. Within two minutes, the carcass is almost completely feather-free.
During the cleaning process, water and feathers fly everywhere, so it is best to carry out this procedure somewhere outdoors.
We turn off the water and the motor, and remove the cleaned chicken. We take the second scalded chicken and throw it into the tank. This time, we won't turn on the water. We start the motor and wait for the results. Three and a half minutes pass, the chicken thrashes against the beaters, and quite a few feathers fall off, but many, even the larger ones, remain on the chicken. Conclusion: watering clearly helps to better clean the carcass of feathers, which means it cannot be done without.
In conclusion, it's entirely possible to make a feather plucking machine from a used washing machine, especially if you've got a suitable one like the Oka. Good luck!
Interesting:


3 reader comments
Add a comment
Headings
Washing machine repair


For buyers


For users


Dishwasher


Could you please tell me where you ordered these bills? Can I have the address?
Aliexpress.
How to drill holes and what is the best way?