How to clean the filter in an Atlant washing machine?
 Every washing machine needs regular cleaning, and the Atlant is no exception. Particular attention should be paid to the filters, which bear the brunt of the load, collecting all the debris that gets into the machine. If you neglect the filters for too long, the machine will stop filling and draining water. Cleaning the drain pump filter and the inlet filter mesh in the Atlant washing machine is easy. Simply follow the clear and simple instructions.
We act step by step
The Atlant washing machine, like any other automatic machine, has two filters: an inlet strainer and a drain coil. The former is located in the inlet hose and removes impurities, rust, and sand from the water supply. The latter is located in the drainage system and collects debris that enters the drum along with the laundry.
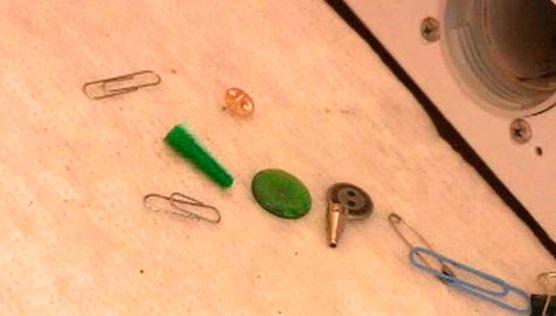
If the mesh filter becomes dirty over a long period of time, it's recommended to clean the drain spiral at least once every three months. This is because hair, lint, threads, as well as coins and hairpins, fall into the drum and settle in the drainage system along with the laundry. Over time, the debris increases, the hole becomes clogged and stops letting water through. Fortunately, the "trash" does not allow this "treasure" to go further and block the pump or impeller.
Anyone can clean a coil, and the procedure itself takes no more than half an hour. The key is to remove the filter correctly and remember to take safety precautions. Here are the instructions:
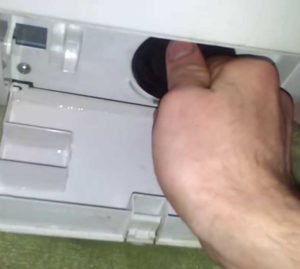
- we find a technical hatch located in the lower front part of the hull;
- we detach the bow from the body using a screwdriver or a knife;
- we move the machine away from the wall and tilt it back so that the front legs are 5-6 cm off the floor;
- place a container, for example a basin, under the filter (even when the drum is empty, some water remains in the pipes and tank, which will spill out onto the floor when the filter is unscrewed);
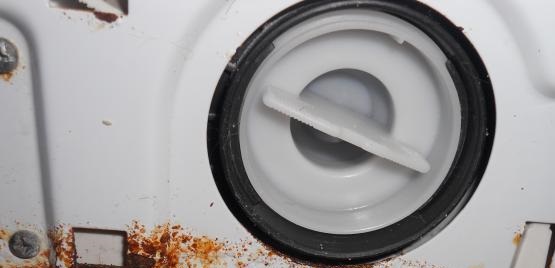
- Taking hold of the protruding part, unscrew the filter clockwise.
After removing the filter, we begin cleaning it. First, remove any large debris by hand, then rinse the nozzle with soapy water. Don't forget the filter seat, which should also be thoroughly cleaned of scale and debris. Don't be lazy and pay attention to the pump: shine a flashlight through the opening, remove any hair tangled around the impeller, and wipe the pump with a clean cloth. Reinstall the filter in the same manner, but in reverse order.
Do not remove the filter immediately after a high-temperature wash – the residual water will not have time to cool down and may cause burns!
After cleaning the debris filter, you can clean the inlet filter. Disconnect the inlet hose from the housing, locate the filter mesh, and remove it with tweezers or pliers. Rinse the part under the tap and then replace it.
After cleaning the filters, run a test wash. Select the "Rinse" program and observe the machine's behavior. If there are no problems with filling or draining, then everything has been done correctly. If leaks occur, you will need to unscrew the debris filter again and tighten the fasteners.
Removing stubborn stains
If the filters were last cleaned a long time ago, simply rinsing the attachments under water isn't enough. Removing rust or thick scale deposits will require more advanced cleaning techniques. The key is to be careful not to overdo it and to choose the right cleaning products to avoid damaging the plastic and rubber seals.
For light plaque buildup, toothpaste and laundry soap will do the trick. Apply the solution to the coil and brush thoroughly. For more advanced cases, there's a more effective method: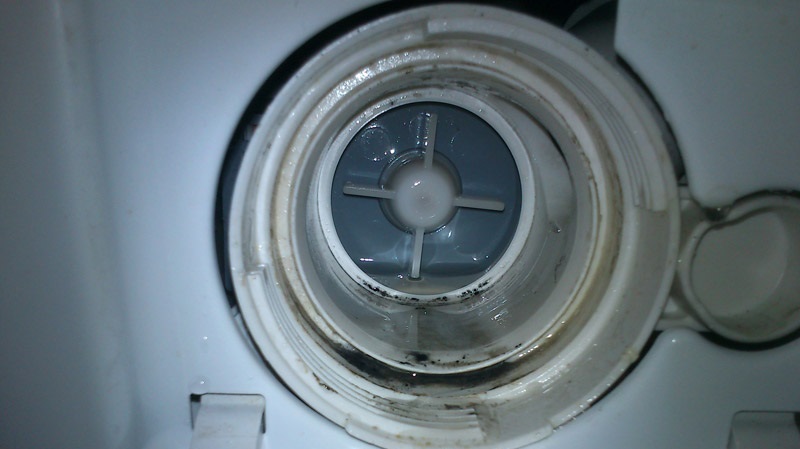
- dissolve 20 g of soda and 50 g of citric acid in a liter of warm water;
- immerse the filter in the solution for 15-30 minutes;
- take it out, wipe it with a cloth and rinse it in cold water.
Do not wash the drainage filter in hot water – high temperatures will cause the material to deform!
Instead of home remedies, you can use special store-bought solutions. Some recommend running a high-temperature cleaning cycle before removing the dust filter to make the manual cleaning of the coil easier. In any case, be careful with the dosage.
Problems with filter removal
But filter removal isn't always straightforward. Rarely, but it does happen that foreign objects, such as hair, coins, or hairpins, get caught in the drain and block the filter, preventing it from unscrewing freely. Sometimes, the filter attachment becomes stuck to the washing machine body due to a thick layer of limescale or widespread rust.
If the filter does not unscrew according to the diagram described earlier, then you will have to work a little harder. There are three working methods by which you can remove even a firmly stuck coil. However, it is better to act consistently and start with the most gentle, first one, gradually increasing the pressure.
Before unscrewing the drain filter, the washing machine must be de-energized and disconnected from the water supply and sewerage system!
- Tools. If you can't unscrew the filter by hand, try using pliers. Grasp the protrusion and twist the nozzle. Gradually increase the pressure to avoid breaking the coil.
- Tapping. If the filter doesn't turn at all, doesn't turn all the way, or doesn't come out of the hole after being unscrewed, try a different approach. Tilt the unit back, lean it against the wall, and tap the drain cover and nearby areas with your fist several times. The spiral is likely blocked by a stuck object, which may dislodge after tapping.
- The Pump Route. If the first two methods don't work, you'll have to resort to the most labor-intensive approach—removing the filter from the pump side. You'll need to reach the pump, unhook it from the volute, and push the coil out through the open opening.
The design of Atlant washing machines allows for pump removal through the bottom, significantly simplifying the task. Simply turn the machine over onto its right side, remove the tray, and, using a flashlight, locate the pump. It's easiest to locate it by the filter, as the part is located directly behind it.
Trying to remove a stuck filter is only worth it if you have the desire, strength, and experience. Those less tech-savvy should avoid experimenting and instead contact a service center at the first sign of trouble. Otherwise, you could worsen the situation and damage the attachments.
Interesting:


Readers' comments
Headings
Washing machine repair


For buyers


For users


Dishwasher


Add a comment