How to clean a Bosch washing machine from dirt?
 Any appliance requires regular maintenance, and washing machines are no exception. While some stains are visible to the naked eye, others are discovered deep within the machine during cleaning. There are many areas vulnerable to dirt—from the body and drum to the gasket, detergent drawer, and dust filter.
Don't forget about cleaning: clean your Bosch washing machine from dirt inside and out, preventing breakdowns and poor washing results. We'll explain in detail how to do this faster and more efficiently.
Where are waste accumulations localized?
Despite constant contact with water and detergents, washing machines inevitably become dirty. Even the so-called "clean" liquids contribute their share of dirt: limescale from the tap water settles on the hoses and heating element, and soap remains as a film in the dispenser and drum. The situation is aggravated by debris and lint falling from things, as well as high humidity and room dust.
Boschs get dirty everywhere, inside and out, but certain areas are especially vulnerable to debris accumulation. Pay particular attention to the drain filter, seal, pump, detergent drawer, and the bottom of the tank.
Experts recommend a comprehensive cleaning of your washing machine every six months!
- Drain filter. Also called a debris filter, it traps 90% of the debris that enters the washing machine. This includes dirt, accidentally dropped items, hair, threads, and paper. It should be washed at least once every six months.

- Hatch seal. The rubber seal has several folds where debris from items, soap scum, and water accumulate. If the seal isn't regularly wiped dry and cleaned of dirt, it will turn black, become moldy, and develop an unpleasant odor.
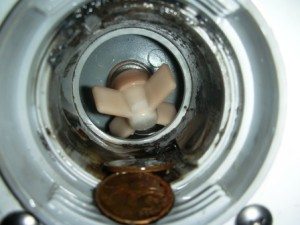
- Pump. The pump impeller captures the remaining 10% of the load after the drain filter—hair, lint, and other debris sticks to the blades, blocking the machine's operation. If there's too much dirt, the machine malfunctions, making washing impossible.
- Powder dispenser. Undissolved detergent often remains in the drawer, where it, along with dust and limescale from the taps, settles on the walls of the bin and hardens. Mold also often "populates" the drawer.
- The bottom of the tank. The bottom of the tank is where debris from the drum "falls," and where soap scum and residual water also settle. Reaching these "treasures" can be difficult, but it's important not to neglect cleaning the bottom.
Knowing the dirtiest spots in your washing machine makes it easier to organize the cleaning process and speed up the process. It's best to move from the simplest tasks, such as cleaning the filter, tray, and seal, to the more complex ones, such as the pump and tank. Everything is relatively easy to do—any homemaker can handle it.
Let's start with the "trash can"
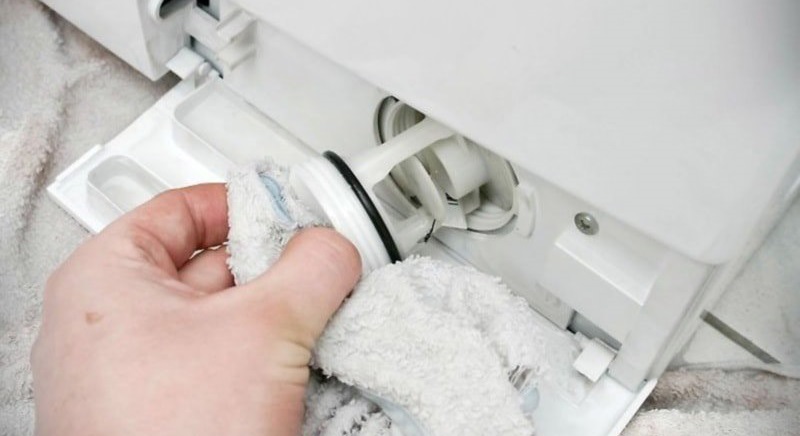
On Bosch washing machines, the drain filter is hidden in the lower right corner behind a rectangular access hatch. Accessing the waste bin is easy: pry open the door with a flathead screwdriver and release the plastic latches. All that's left to do is find the black plug and begin cleaning the nozzle. Here's how:
- disconnect the washing machine from the power supply;
- lean your body back so that your front legs are raised 5-7 cm above the floor;
- place a container under the trash filter (the remaining water in the tank will be poured into it);
- Find the emergency drain hose, pull it out and drain the water into a container.
Not all Bosch models have a dedicated drain hose. Without one, completely emptying the tank requires a different procedure—unscrewing the dust container. Here's the instruction:
- take hold of the protrusion on the cork and twist it from right to left;
- if the part does not feed, generously treat it with WD-40 lubricant;
- remove the nozzle;
- inspect the vacated hole for dirt and debris (it is better to shine a flashlight through it and thoroughly clean the seat);
- clean off any debris stuck to the nozzle and rinse under the tap;
- return the "trash can" to its place, screwing it in until it stops;
- close the filter with a decorative hatch.
Ideally, the dust filter should be cleaned every three months. An unscheduled cleaning is recommended after washing knitted woolen items. If you have pets (cats or dogs) in the house, the dust filter should be cleaned monthly.
Let's pay attention to the tray
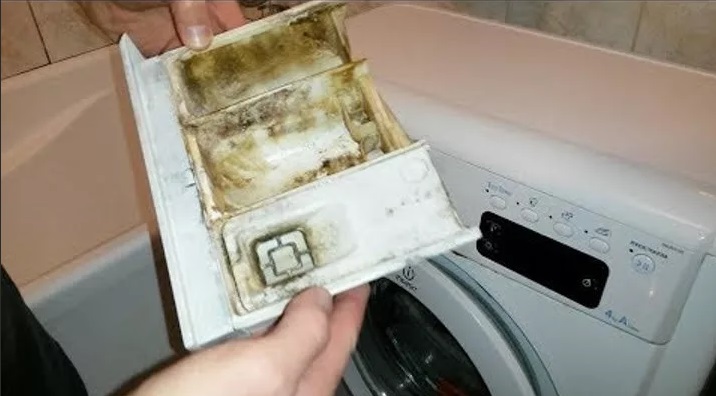
The Bosch detergent drawer also gets dirty frequently. Unrinsed detergent hardens over time, clinging to the walls of the drawer. The longer the tray is left uncleaned, the thicker the plaque becomes. The consequences are dire: the nozzle becomes clogged, and water and granules don't leave the dispenser, leading to leaks and poor washing results. To avoid this, pay close attention to the detergent drawer after each wash.
You can clean the powder dispenser from heavy dirt using citric acid, vinegar or baking soda.
The dispenser is easy to remove. Here's how:
- take hold of the handle;
- pull towards yourself until it stops;
- we press the special “tongue” located in the center;
- we pull out the tray.
Often, simply rinsing the bin under warm water is enough to remove any remaining detergent. If you're cleaning it for the first time in a while, you'll need to start with soaking. Prepare a citric acid solution and soak the tray in it for 1-2 hours. Then, scrub the sides with a toothbrush, rinse, and wipe dry.
The tray is easily reinstalled. Simply insert it into the special guides and push it in until it stops.
The "main" elastic band
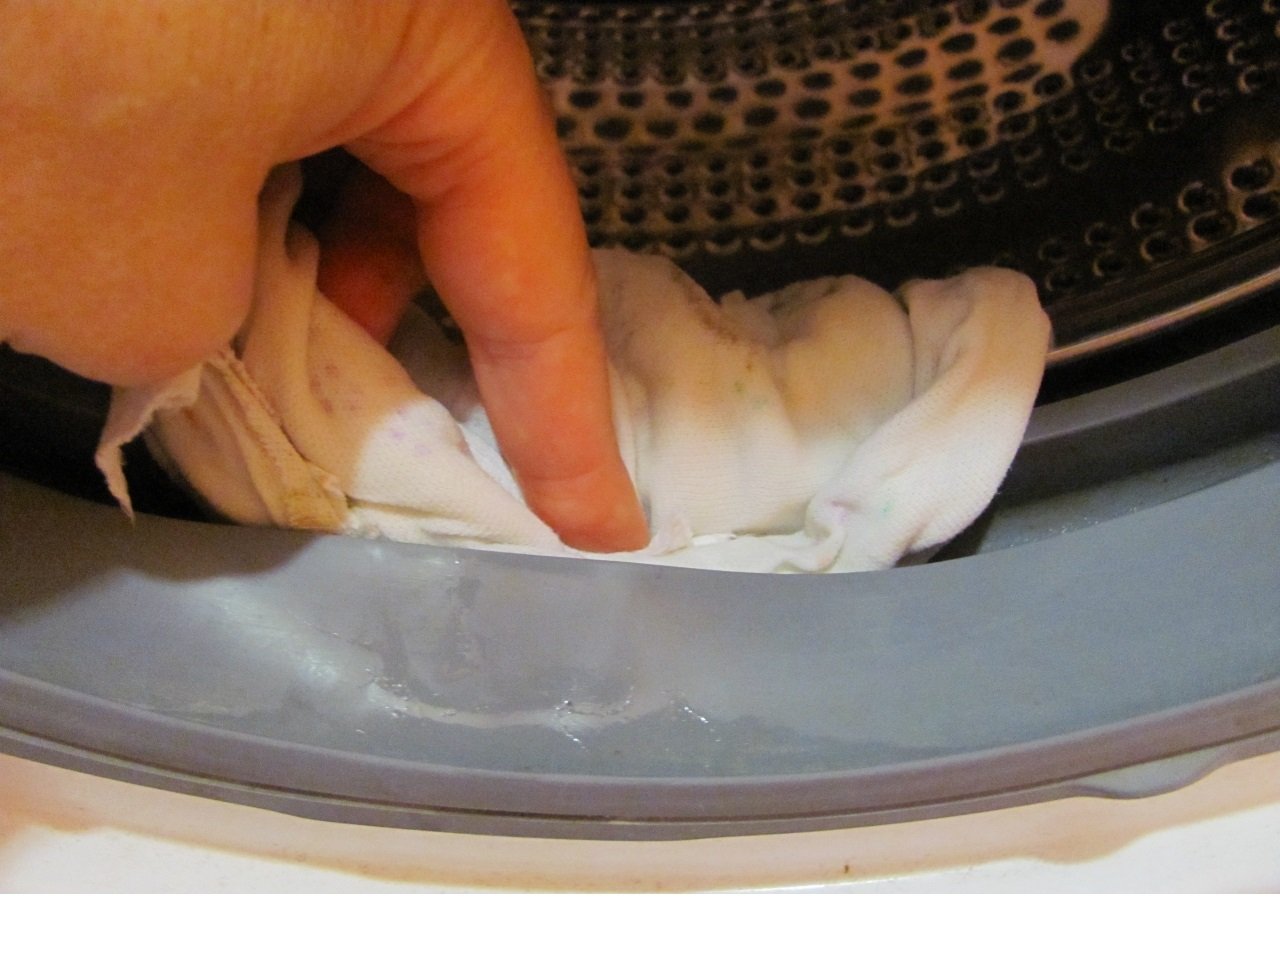
The lower folds of the door seal can accumulate a lot of debris, from hair and soap to a stuck child's sock. Leaving these in the seal is a bad idea, as high humidity and lack of air conditioning will lead to mold and odor. It's best to check the drum after each wash, unfold the seal, and remove any excess debris.
A more thorough cleaning is recommended periodically:
- treat all the folds of the cuff with bleach;
- close the hatch door;
- leave the product to “work” for at least 30 minutes;
- then rinse with water by hand or run a quick wash;
- then wipe dry.
Instead of bleach, you can use a baking soda or lemon solution to clean the seal. Just avoid caustic acids, which can corrode the rubber seal. Don't forget about personal safety by using gloves and safety glasses.
Let's get to the pump
Accessing the pump is more difficult—you'll have to partially disassemble the circuit breaker and the pump itself. First, disconnect the washing machine from the power supply, water supply, and sewer system, then move it away from the wall. Then, proceed as follows:
- remove the powder receptacle;
- unscrew the two screws hidden behind the tray;
- loosen the bolts around the perimeter of the instrument panel and disconnect the board from the housing (there is no need to completely disconnect the module, it is enough to hang it on the side or place it on top);
- pry up the technical hatch door and move it to the side;
- remove the outer clamp from the cuff and tuck the rubber inside the drum (there is no need to completely pull the seal off – it is very difficult to put it back);
- disable UBL;
- detach the front panel from the washing machine;
- drain the water from the machine.
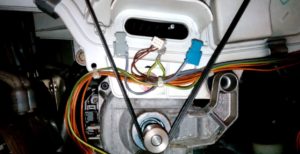
Now we locate the drain pump at the bottom of the unit, unscrew the bolts holding it in place, disconnect the wiring, and, rocking it, remove it from the machine. Then we begin cleaning: remove hair and threads from the impeller, and clean any dirt from the drain surface and the adjacent volute. Next, we disassemble the part and clean the internal components.
The cleaned pump is reassembled and returned to its place, securely fixed on the snail. If during installation you notice that the impeller is loose or slipping off the shaft, then you should not try to secure it with sealant or glue.It is safer to replace the pump completely.
Dirt in the tank
Cleaning the drum shouldn't be part of your regular cleaning routine. It's only necessary in extreme cases, such as when replacing a bearing or when a foreign object gets stuck in the machine. In other cases, cleaning the bottom isn't necessary.
If you decide to completely clean the machine, you'll need to remove the heating element and manually scrape debris from the bottom of the tank through the opening. We recommend following this procedure:
- de-energize the machine;
- turn off the water;
- drain the water through a hose and filter;
- move the washing machine to the center of the room;
- remove the back panel of the case;
- take a photo of the heating element to record the location of the wires;
- release the wiring from the terminals;
- disconnect the thermistor;
- unscrew the central nut;
- push the bolt inside;
- swing the heating element and remove it from its seat.
We reach into the empty hole with a rag and clean the bottom of any debris. Then, we put everything back in place, reversing the process.
Interesting:


1 reader comment
Add a comment
Headings
Washing machine repair


For buyers


For users


Dishwasher


Are the ribs in the drum removable for cleaning?