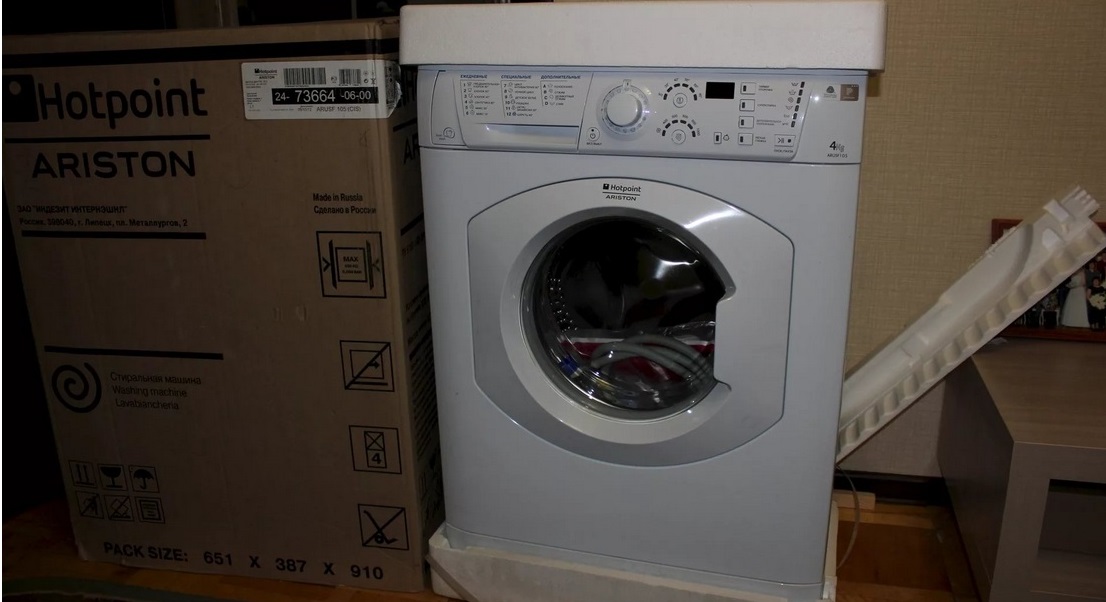
The next step after purchasing an Ariston washing machine is installation and connection. This includes choosing a location for the machine, unpacking, reading the instructions, connecting the utilities, and running a test wash. Anyone can handle all this: just arm yourself with the right tools and recommendations. The latter shouldn't be a problem. We offer step-by-step instructions for connecting an Ariston washing machine.
We will carefully select the location
The first task on the list is choosing the optimal location for the washing machine. Ideally, placement is decided before purchase, as this factor significantly influences the machine's dimensions and specifications. For example, if you want to install the machine in a cabinet, under a sink, or as part of a kitchen cabinet, consider narrow models with removable lids; otherwise, full-size units with a large capacity are suitable.
Washing machines are most often installed in the bathroom, either next to the toilet or under the sink. In larger rooms, the machine is installed in a separate closet or alcove. However, this is a personal choice: owners adapt to their preferences and available space. However, all options share a significant drawback: increased humidity, which reduces the lifespan of the washing machine. The upside is that utilities are nearby, so connecting them is hassle-free.
Washing machines are often housed in the kitchen. Most housewives hide their appliances in the cabinets, while others place the washing machine next to the vanity. The advantages of placing the kitchen in the dining area are obvious: there is more free space, ventilation, access to utilities, and a lower humidity level. There are also disadvantages, such as the need to store detergents and dirty laundry away from food, which complicates the washing process.
If there's no room in the kitchen or bathroom, a hallway or storage room is a good choice. While odors and humidity aren't a problem here, connecting the machine to the water supply and sewer lines is a hassle. The bedroom has similar pros and cons.
In fact, it doesn't matter what the room is called. Any room can accommodate a washing machine, as long as it meets a few requirements.
Utilities. Ideally, the distance between the selected location, the pipes, and the electrical outlet should not exceed 1-1.5 meters. Otherwise, the costs associated with connecting the appliances will increase.
Level floor. The manufacturer recommends installing the washing machine on concrete, tile, or other hard surfaces. Avoid placing the machine on an unstable surface.
Adequate square footage. Equipment should not be placed close to furniture or walls.
When choosing a location for Ariston, you need to be guided by the relevant standards and requirements.
It's important to understand that not all machines need to be connected to centralized utilities. Alternatively, they can be connected to the water and sewer system: by installing a water intake from a cistern or barrel, and draining into a sink or toilet. The main thing is to ensure the machine operates properly. Once the optimal location has been selected, we begin installation.
Preparing the machine
It is not enough to simply plug the machine into a socket and connect it to the water supply and sewerage system. Every purchased washing machine requires a number of preparatory steps, without which you cannot start washing. The following mandatory steps are involved:
study the factory instructions (it contains a decoding of the icons, a list of components, all the requirements and connection nuances);
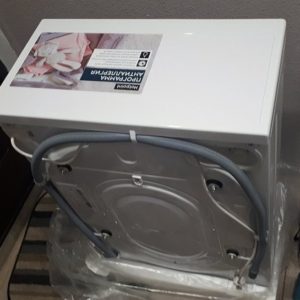
unpacking the machine with the removal of all protective films, gaskets, ties, foam blocks;
removing the transport bolts (this is done according to a specific diagram, which is given in a separate article);
It is prohibited to operate the washing machine without removing the transport bolts!
inserting plastic plugs into the holes freed from the transport bolts (included in the kit).
We begin installing the prepared machine. We carefully move it to the designated location, leaving space behind for subsequent connections. Then we begin connecting the utilities: drain first, then water supply and electrical. Don't forget to level the frame—we'll cover that in more detail later.
Sewage disposal
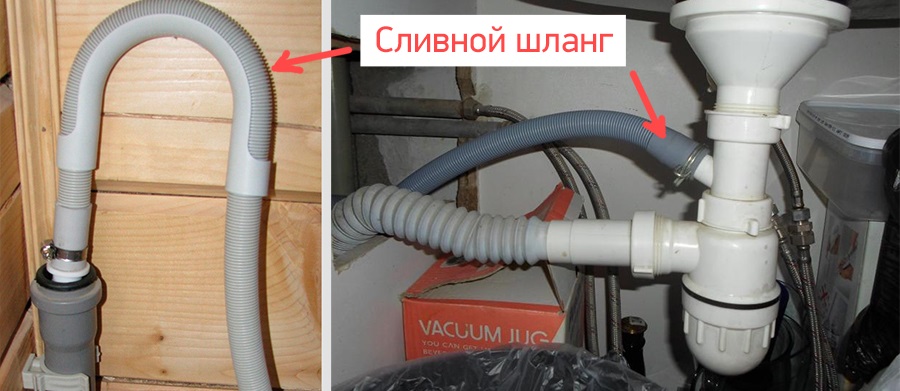
There are several ways to organize water drainage. The simplest and fastest is to lower the end of the hose into the bathtub, sink, or toilet. The waste water from the washing machine will be pumped into the plumbing and removed through the existing sewer system. However, it's best to use this method only at the initial stage: a long hose looks untidy, is prone to slipping, and dirty water leaves a distinctive residue on ceramic tiles.
It’s better not to be lazy, but to install a drain through a siphon. The instructions supplied with the washing machine will definitely include a section on connecting to the sewer system, which will outline all the requirements. In particular, don't overlook the recommended bend height, which ranges from 50-70 cm. Each Ariston model has its own minimum, so don't neglect this parameter. After checking the standards, install the siphon, attach the hose to it, and secure it with a clamp.
For owners of Ariston equipped with a check valve, any bend height of the drain hose will be suitable.
There's a third option: connect the washing machine's drain hose directly to the sewer pipe. To do this, you'll need to purchase a special rubber gasket and place it between the metal and the hose. Be sure to secure all joints with clamps and seal them with sealant.
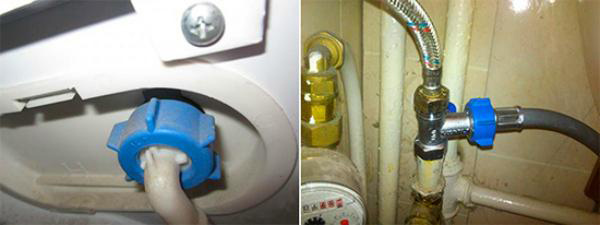
Water supply
Next up is the water supply. The connection diagram here is the same regardless of whether the water supply is centralized or domestic. In either case, the setup follows the same procedure:
take the inlet hose (comes with the Ariston, differing from the drain hose in its smaller diameter, but sometimes it has to be purchased separately);
go around the machine and find the water intake tube at the top;
attach the curved end of the hose to the found tube;
cut a proportionate hole in the water pipe;
insert a tee into the pipe with a separate line going to the washing machine;
connect the hose to the tee;
tighten all fasteners and clamps.
Plastic nuts are tightened only by hand, without using wrenches or pliers!
When installing the water supply, use a sealant. The joint must be treated with a water-repellent agent. After connecting, visually inspect the connection for leaks. If water drops appear on the hose, the connection is not secure.
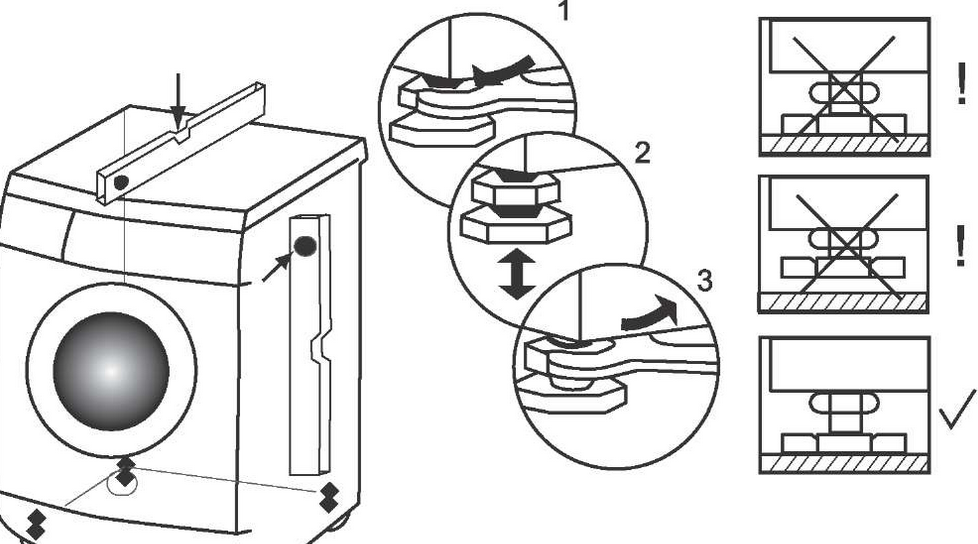
Positioning the machine correctly
After connecting to the water supply and sewerage, we position the washing machine in its chosen location: push it closer to the wall, lift it under the sink, into a niche, or into a cabinet. However, don't plug it in or start the wash cycle—the machine first needs to align itself. An unstable unit will “jump” during operation due to increased vibration, which will lead to damage to the equipment, including a fatal outcome.
Perfectly level floors are rare, so grab a building level and begin the process:
place the level on top of the washing machine;
monitoring the level indicators, adjust the legs to the desired height;
We check the stability (it is enough to push the machine lightly to the side; a stable machine will not move);
we fix the adjustment;
we put anti-slip attachments on the racks;
It is prohibited to use an unstable Ariston washing machine!
Ariston should not jump or clank when washed. Slight vibration is allowed, which increases during spinning.
Finishing touch"
The Ariston installation concludes with connecting it to the power grid. This is simple: just plug the power cord into the outlet. The key is to take your time and assess the wiring's readiness for the increased load.
The wiring is ready to turn on the washing machine if:
there is grounding;
an RCD is included in the circuit;
The socket is protected from moisture by a special cover.
After connecting to the power supply, run a test wash. This "blank" cycle will wash away the factory lubricant and allow you to assess the quality of the installation.
 The next step after purchasing an Ariston washing machine is installation and connection. This includes choosing a location for the machine, unpacking, reading the instructions, connecting the utilities, and running a test wash. Anyone can handle all this: just arm yourself with the right tools and recommendations. The latter shouldn't be a problem. We offer step-by-step instructions for connecting an Ariston washing machine.
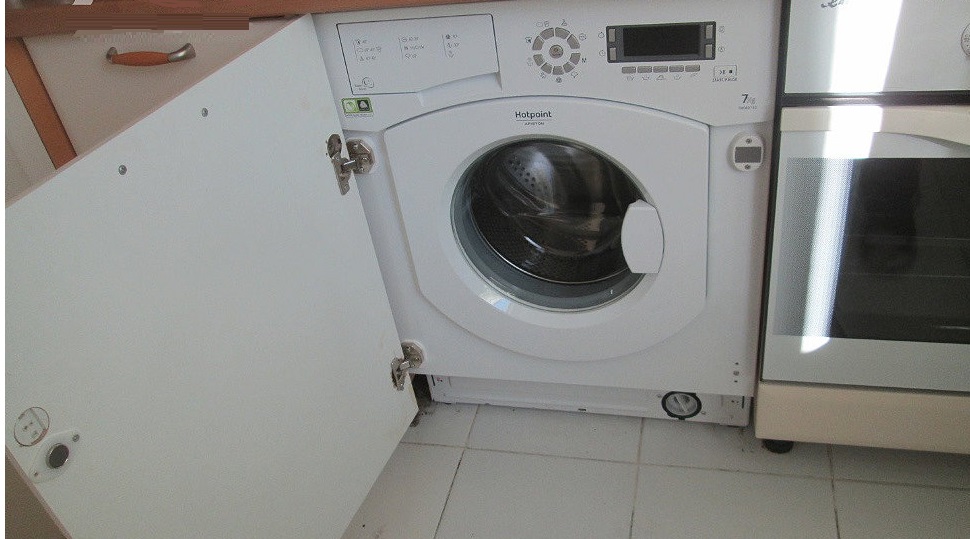


Add a comment