How to connect a Beko washing machine
 Contrary to popular belief, you can prepare and install a washing machine without the help of an expert. Connecting a Beko washing machine yourself is easy if you follow the detailed instructions and take your time. First, unpack the appliance, carefully read the user manual, carefully select a location for your new "home assistant," connect the utilities, and only then perform a test run. All of this requires a minimal set of tools, which every homeowner should have, and a few hours of free time. Let's break down each connection step.
Let's get ready for work
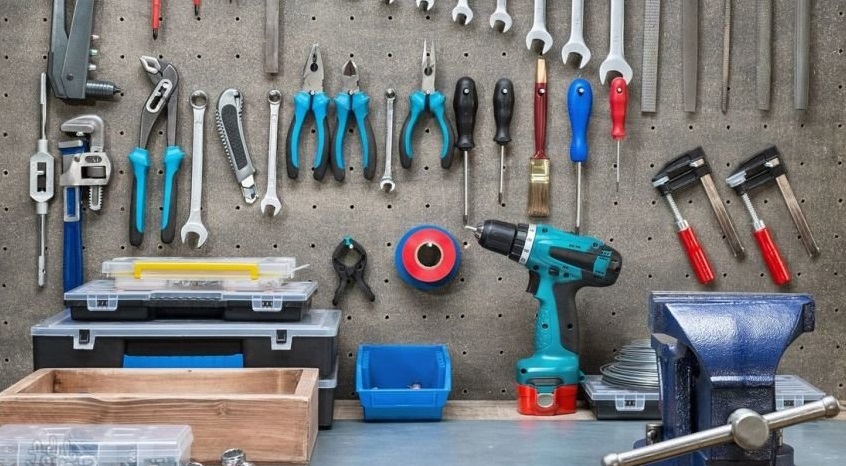
To install a Beko washing machine yourself, you first need to gather all the necessary tools for installation. The list is quite short.
- Scissors with a knife for opening packaging cardboard.
- Wrench or pliers.
- Screwdriver.
- A drill, if you need to drill holes in your kitchen cabinets to install a built-in washing machine.
- Construction level.
Before you begin connecting, it's also worth familiarizing yourself with the safety precautions that will help you install household appliances safely. The list of recommendations is short, but it's important to consider each point during installation.
- Do not begin dismantling your old washing machine until you have disconnected the equipment from all utilities.
- This also applies to the installation of your new "home assistant" - do not start working if the machine is connected to the water supply and electricity.
- Place the unit only on a level and stable surface that can withstand heavy weight.
Never place washing machines on carpeted surfaces, as this will negatively impact airflow to the electrical components located underneath the unit, leading to overheating and failure of key components.
- Be sure to check your household appliances for damage after transportation, as well as for completeness.
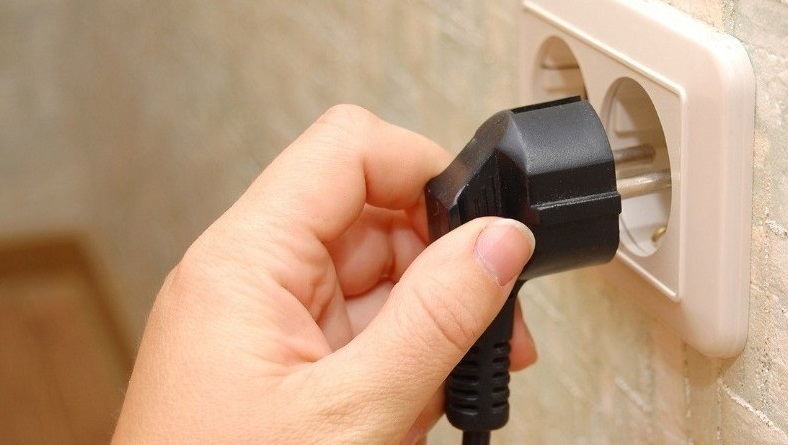
- Prepare a grounded outlet for the washing machine in advance, which will be protected by a fuse and will fully comply with the requirements specified in the official instructions for the washing machine.
- Do not connect your "home helper" via extension cords, and also carefully ensure that the power cord is not pinched, for example, by the washing machine itself, accidentally placed on the cord during installation.
- If a different plug needs to be used for the socket, a plug with a 13 A fuse must be used.
- Never touch the plug when your hands are wet. Also, don't pull the plug out of the socket by grasping the wires instead of the plug itself.
As you can see, the list of rules and recommendations is very simple, so it is easy to remember and follow.
Removing an old washing machine
If the washing machine was purchased to replace an outdated version, then you first need to dismantle the unnecessary equipment. Check the water and power supply again to ensure that the equipment is disconnected from the utilities. If we are talking about a built-in model, then you need to remove all fasteners from the furniture, and then take out the machine itself.
Remember that laundry machines are extremely heavy, so move them carefully to avoid straining your back and damaging the machine and flooring. It may be easier to move the machine if you tilt it slightly backward and place an unwanted rug or towel under its feet. This will make it relatively easy to move the machine by gently pulling the rug toward you.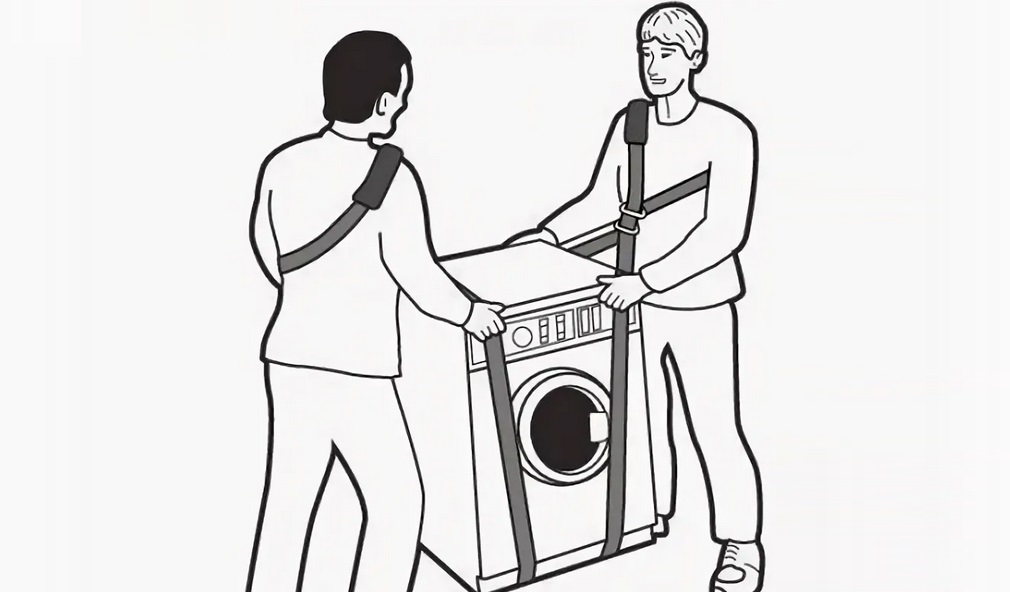
After these simple steps, you can access the back of the washing machine to disconnect the cable and the inlet and drain hoses. You'll need a wrench or regular pliers for this.
Be sure to place a large basin or bucket under the water supply tap to lower the hoses into it, which may contain residue from the used liquid after the last working cycles.
If you plan to recycle your appliances rather than sell them or transport them to your dacha, you'll need to check the recycling regulations applicable to your region. Don't forget to hire movers, as moving your old appliances yourself can be challenging.
Unpacking the machine and removing the shipping materials
Before unpacking, make sure there's plenty of space in the kitchen or bathroom where your new washing machine will be located. If securing space is a problem, it's best to unpack elsewhere.
Carefully open the washing machine's box using scissors or a knife. Be careful when cutting the cardboard to avoid accidentally scratching the machine's body. After removing the cardboard, remove all the foam padding, which is needed to protect the machine during shipping.
Several components are used to protect the washing machine during transport. One of them is a foam block placed directly underneath the washing machine. It can be removed by tilting the machine back onto its rear feet, removing the adhesive tape, and then removing the foam block.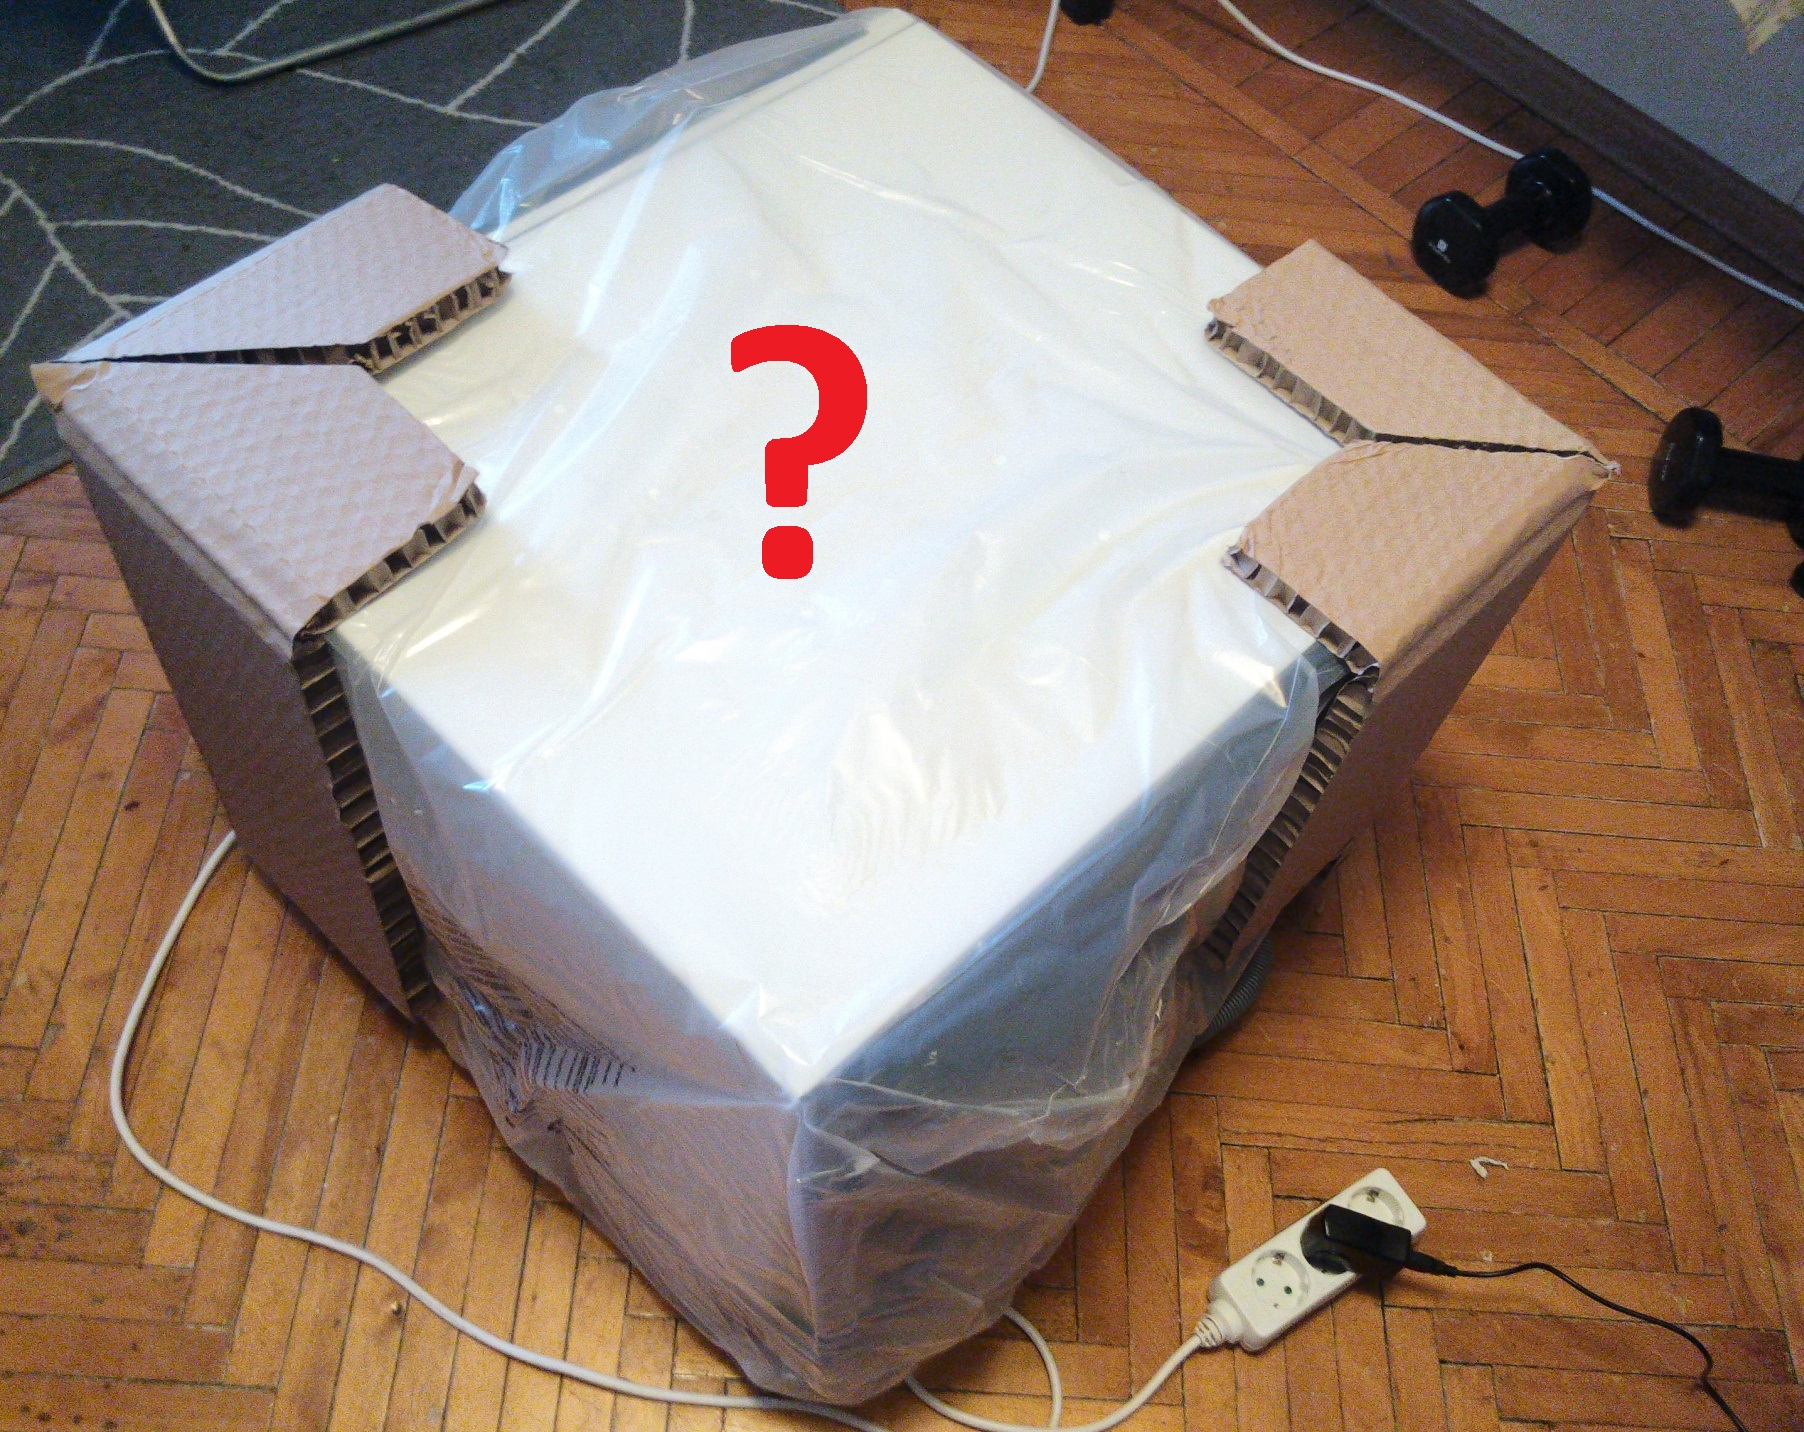
The manufacturer also always installs special locks on the back of the unit that lock the drum in place during shipping. These locks must be loosened with a wrench and then removed.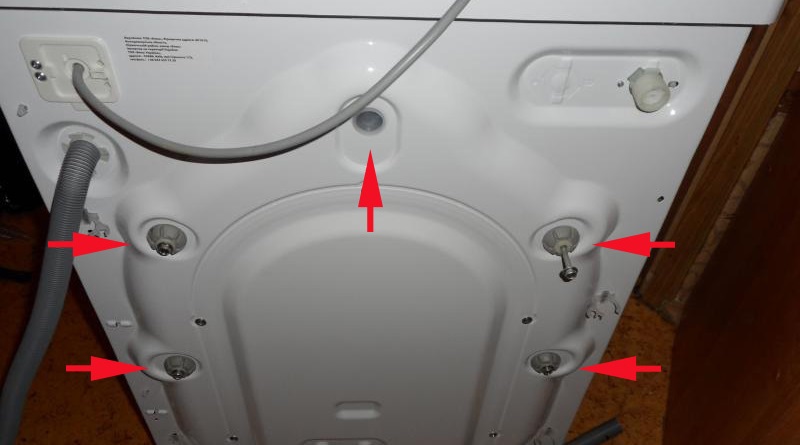
It's best not to throw them away, as you may need them for future transport if you decide to move your "home helper." Replace the bolts with the plastic plugs that come with the appliance.
You also need to remove all stickers from the washing machine body, as over time they become more and more firmly fixed in place, making it increasingly difficult to remove them completely.
Once the appliance is removed from its packaging, check the list to ensure all spare parts and accessories required for installation are included. The manufacturer typically places these in the drum. The list typically includes the official instructions, a container for liquid detergent, a measuring cup for detergent, an inlet hose, a hose bracket, and plastic plugs designed to replace the shipping bolts. Be sure to contact your local hardware store if anything on the list is missing—it may have been lost during shipping or simply forgotten at the warehouse.
Installation and connection of new equipment
When you need to replace an old machine with a new one, everything is much simpler, because you already have a place prepared for the appliance. If this is your first washing machine, you will most likely have to drill holes for hoses and wires, especially if it is a built-in model. What should be done?
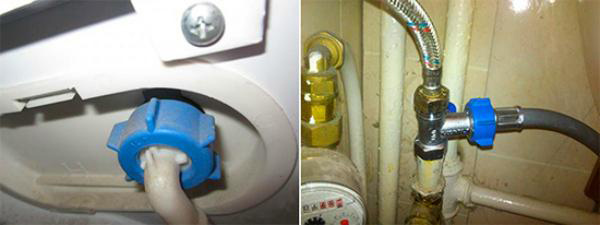
- First, connect the inlet hose to the housing using a 90-degree bend, then tighten it by hand. Using a wrench or pliers is not recommended for this procedure, as excessive force may damage the fragile connection.
- Now release the drain hose and power cable from the clamps provided by the manufacturer.
- The plug housing must be inserted into a special compartment located at the rear of the washing machine. Remove the plug and close the plastic cover.
- Connect the filling hose to the body, which should also be screwed on independently without using tools.
- At this stage, you can turn the water back on in your house or apartment.
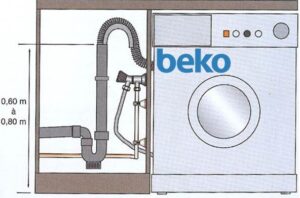
- Next, you need to prepare a drain hole. If one is already made, simply insert the end of the drain hose into it. Push the hose into the drain approximately 12 centimeters to ensure the treated liquid flows into the sewer.
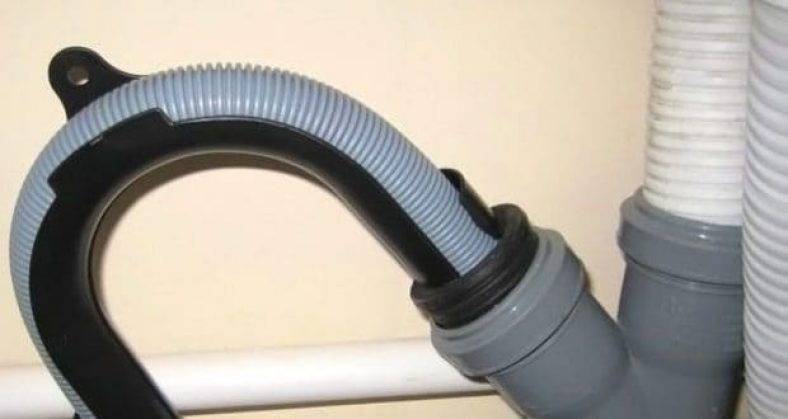
- If such a drain hasn't been prepared and isn't planned, you can connect the hose to the drain under the sink. There, on the U-shaped bend of the pipe, you'll find another hole for connecting the drain hose. If the washing machine was previously connected to the drain in this manner, you'll find a pre-made connection there. However, if this is your first time installing a household appliance, you'll need to purchase this part from a hardware store and then install it.
- Make sure the plugs and stoppers are removed from the fitting and U-bend, then connect the hose to the drain pipe. Be sure to secure the connections with a metal clamp to ensure the hose is securely in place.
Regardless of the method of connecting the drain hose, the hose itself must be located at a height of 40-100 centimeters from the floor, which can be achieved by fixing the hose to a special bracket installed in the wall.
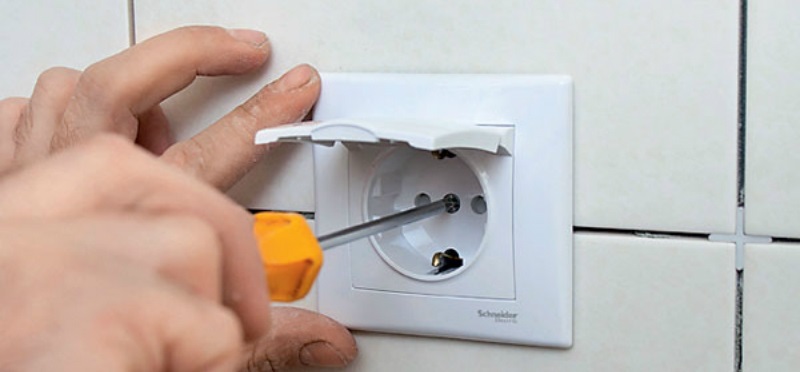
- Now you can connect the equipment to the power grid by plugging it directly into the outlet, without using extension cords. The switch itself must be connected to a circuit breaker.
- If the power cable is faulty, don't try to repair it; it's best to buy a new one or seek help from a repair technician.
- Place the washing machine on a level surface and make sure that the wires and hoses are not pinched by anything.
- Be sure to level the unit using a spirit level, which can be accomplished using the adjustable feet. They can be easily adjusted manually or with a wrench.
If the machine is not level, it will bounce and even change position during the spin cycle, which can damage the floors and the "home helper" itself.
At this point, the installation is complete, and all you have to do is perform an idle work cycle to evaluate the equipment and the correctness of its installation.
Test run of the machine
The final step is to check the work done. All you need to do is select a short wash cycle and run it without any dirty clothes or household chemicals. In this case, it is important for us to check not the quality of the wash, but the absence of leaks, strong vibrations, and extraneous suspicious sounds. Be sure to consult a service center specialist if you notice any abnormalities in the operation of your Beko washing machine.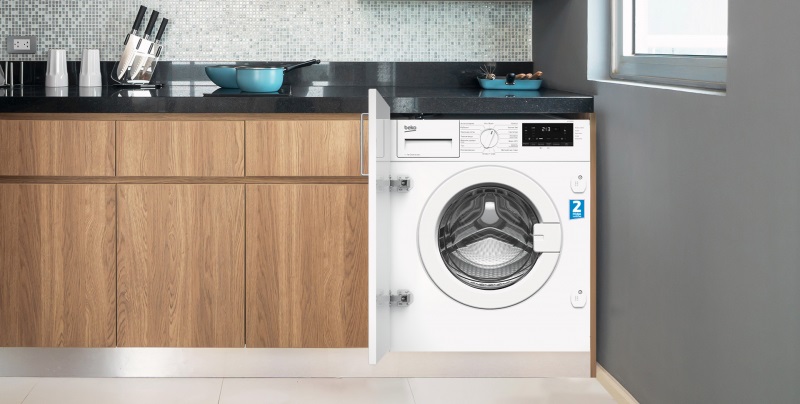
This completes the installation. Be sure to read the manufacturer's instructions for proper loading instructions and safety precautions to ensure the longevity of your appliance.
Interesting:


1 reader comment
Add a comment
Headings
Washing machine repair


For buyers


For users


Dishwasher


Unfortunately, contrary to the recommendations given, the washing machine in the photo is standing directly on an electrical cable, and even on the very same extension cord that the author strictly warns against using.