How to connect a Hansa washing machine
 Finding and purchasing a new washing machine is an extremely important step, but the difficulties don't end there, they're just the beginning. This is because delivering and then properly connecting a Hansa washing machine is even more challenging. This is why users often entrust the wiring and installation of their "home helper" to professionals. Moreover, the manufacturer threatens to void the warranty if the buyer connects the machine themselves. If the user manual doesn't include such a warning, you can save money by installing it yourself using our detailed instructions.
We unpack and inspect the equipment
Any household appliance costs a lot of money, so you shouldn't approach the purchase frivolously. Be sure to inspect the equipment before purchasing it in the store, as it may have dents, chips, scratches, and other visible defects. Next, open the door and try spinning the drum in both directions. It should rotate almost silently with a slight strain. You should also ask a consultant to test the washing machine's control panel, which requires the machine to be plugged in. If the control panel lights up and responds normally to the programmable knob, then everything is fine.
Next, you should ensure the safe delivery of the appliance. It's best to pay for shipping directly to the store where you purchased the machine. This is not only fast but also safe, as you'll be insured against any potential problems during transport. If you decide to transport the washing machine yourself, ensure the box is securely fastened in the vehicle. Remember that after you pay and refuse delivery, you will be fully responsible for the appliance.
Carefully check the integrity and completeness of the washing machine in the store, especially if you are buying a display sample.
But even if you use store delivery, you'll still need to keep a close eye on the item. Don't sign the delivery form until you've inspected the washing machine. Here's how to do this: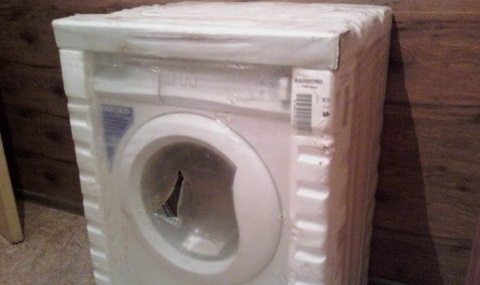
- carefully open the cardboard box;
- Carefully examine the machine body for cracks, scratches and other damage;
- connect the machine to the power supply and make sure that the instrument panel responds to your actions;
- Make sure that the drum contains all components, warranty card, user manual and other papers;
- Only if all points have been checked, sign the transport service documents.
If you are dissatisfied with anything that was inspected during the inspection, do not sign the acceptance certificate under any circumstances. In this situation, you have every right to compensation or a full replacement of the washing machine. Send the delivery service employees back to the store and wait for the seller to either refund the money for the damaged product or provide a replacement.
We remove the tank clamps
If everything is OK with the machine, then you can proceed with the connection. But even here there is an important clarification: first you need to wait a few hours until the machine reaches room temperature, especially if the transportation took place in winter. Once the time has passed, you can install the appliance in its designated location and proceed to reading the official instructions. This is a mandatory step in installing a washing machine, as the documentation not only describes everything in detail but also clearly illustrates it with easy-to-understand illustrations.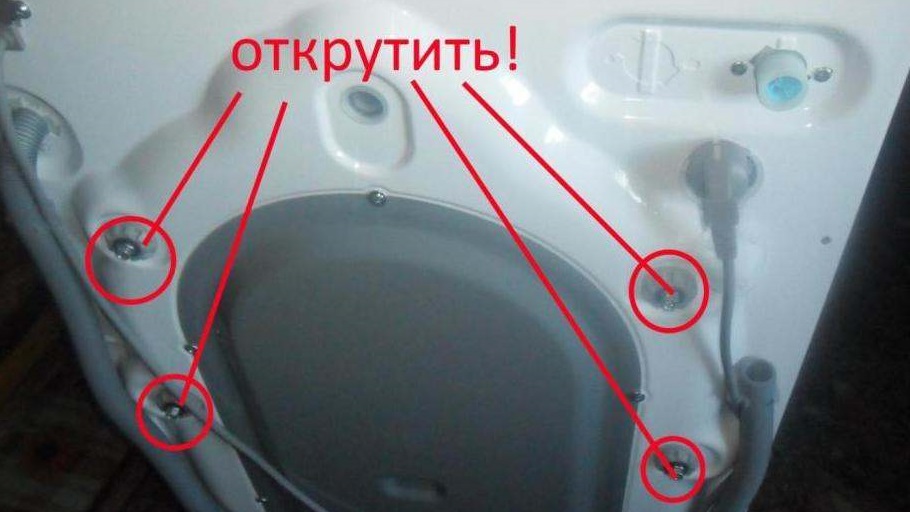
The user manual explains that the first step in preparing your "home helper" is removing the transport bolts. These bolts are essential for safe transportation, as they securely hold the suspended drum in place to prevent damage during transport. However, operating the washing machine with the transport bolts in place is strictly prohibited, as doing so will quickly cause the washing machine to malfunction. This is because the electric motor will attempt to spin the locked drum, which will quickly damage the cylinder, motor, shaft, and other key components.
Running your washing machine with the shipping bolts in place will void the manufacturer's warranty, so be sure to remove the shipping bolts before using your washing machine for the first time.
Removing the bolts is very easy—the process is described in detail in the user manual. Simply use pliers to remove the top portion of each fastener, attach a suitable wrench, turn counterclockwise, remove them, and store them for future use, should the appliance be transported for repairs, to the country, for sale, etc. Finally, the resulting holes should be covered with the plastic plugs included with the washing machine.
What will the machine stand on?
It is better to find the optimal location for the machine at the stage of choosing the device itself. This is primarily due to the dimensions of the household appliances that need to be installed in the room. This is especially true when a built-in model is required to be placed in a kitchen unit, where it will fit perfectly and will not protrude.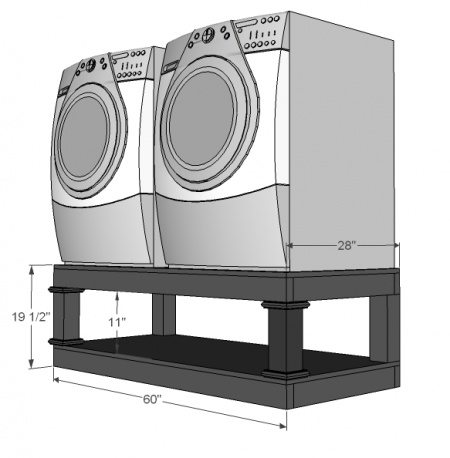
It's also necessary to provide connections to all utilities, so it's best to choose a location with a nearby riser or siphon. Avoid extending hoses, as this is unsafe, and instead choose a convenient location to avoid having to extend hoses or purchase new corrugated tubing. Also, there should be a power outlet, preferably with moisture protection, near the potential installation location of the "home helper." Finally, it's crucial to install the machine on a suitable floor.
- The best floor for a washing machine is tile or concrete.
- A worse option, but still acceptable, is a wooden covering, pre-reinforced for a heavy washing machine.
- The worst possible option is unstable laminate or even parquet, which can swell at the slightest leak.
Once the household appliances are installed in their place, you should begin connecting and adjusting them using a building level.
Power supply of the SM
It is best to start the connection from the electrical network. It's a good idea to take care of this before purchasing your "home assistant" so that you already have a ready-made outlet located no further than 1.5 meters from your appliance. Typically, Hansa brand equipment is supplied with exactly this type of power cord.
Never use extension cords, as this is very dangerous not only for electrical equipment, but also for the user.
It's also important to ensure the quality of the electrical outlet, which must be grounded. Ideally, it should be a separate 220-volt outlet, protected from moisture, and wired to match the washing machine's power consumption.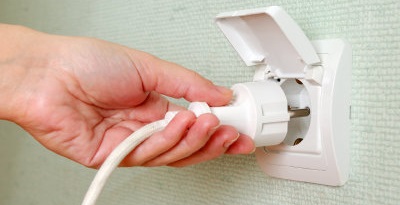
Be sure to ground the outlet yourself. Plugging a washing machine into an ungrounded outlet puts you and your family members at risk, as they could be electrocuted if the machine's casing is damaged.
Cold water supply
The next step is connecting to the water supply. Most often, the machine's inlet hose is connected to a cold water supply, although some models can be connected to a hot water supply. This option is possible, but it's best avoided, as it will clog all the filters and hoses much faster. Furthermore, hot tap water is harder than cold water, meaning clothes won't wash as well.
It is safer to open the water supply valve only before washing and close it after finishing the work.
It's best to entrust the water heating to a heating element installed specifically for this purpose. Connecting the appliance to hot water will only accelerate the heating element's failure due to the thick layer of scale that forms with hard water. Therefore, it's best to use the standard connection method, via a cold water riser. This is very easy to do, especially if a washing machine was previously installed in the room.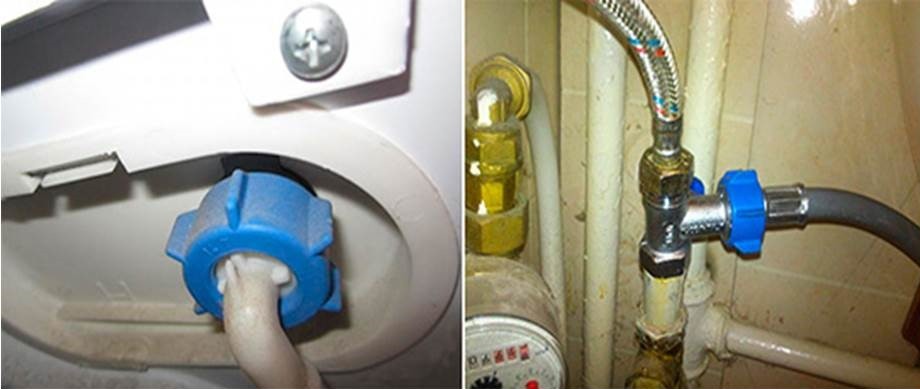
- Connect the filling hose to the prepared outlet point.
- Tighten the clamp tightly with your hands.
- Open the tap and check if water is leaking at the joint.
If there was no laundry appliance in the room before, you'll need to shut off the water supply to the house and install a drain in the pipe. Be sure to measure the system pressure to ensure it meets the minimum requirements specified in the Hansa washing machine user manual. It's best to entrust the installation of a new drain to professionals, especially if you've never had this type of experience before.
Discharge of waste from the SM tank
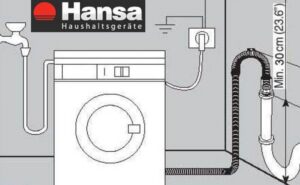
Finally, it remains to ensure the drainage of waste liquid. The easiest way is to lower the drain hose into the toilet or sink so that the used water goes down the drain that way. But this method is not only inconvenient and unsightly, but also unhygienic, as waste will contaminate the plumbing, and the drain hose will constantly dangle under the feet of family members.
It's much better to do everything correctly and connect the drain hose to a trap or sewer pipe. Attach the hose to a special tee and tighten it carefully with a clamp. Also, be sure to ensure the hose bends properly using a wall clamp and position it at least 50-60 centimeters above the floor to prevent waste liquid from flowing back into the machine after use.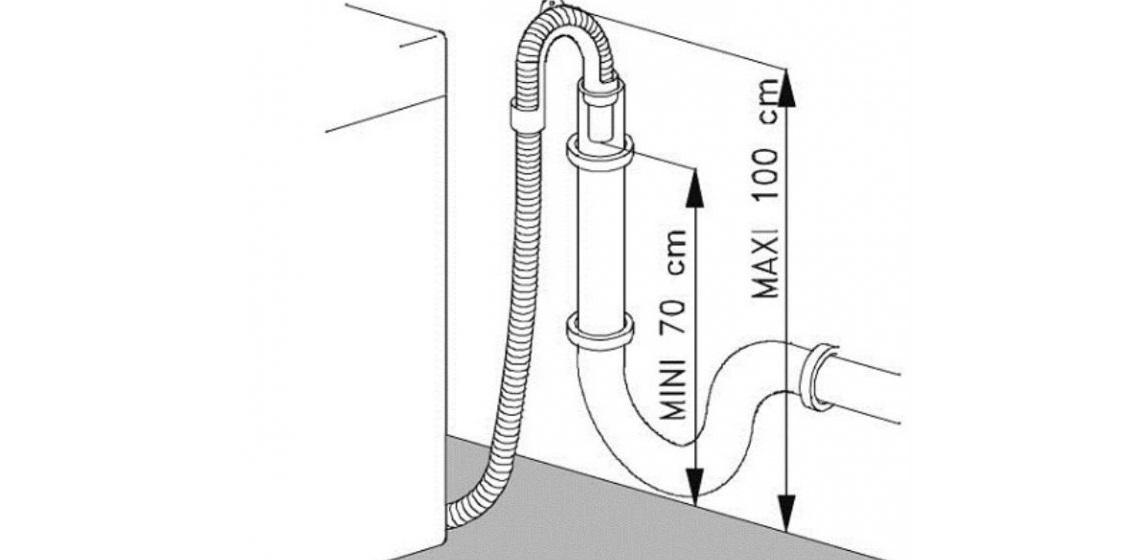
The final installation step before the test run is to level your "home helper" with a spirit level. Place the level on the appliance lid and adjust the feet until the washing machine is perfectly level. This will reduce vibration and prevent system imbalance during washing and spinning. Only then can you run a dry cycle to check the installation and functionality of your Hansa washing machine. Only after this dry run can you put the appliance into full operation.
Interesting:


Readers' comments
Headings
Washing machine repair


For buyers


For users


Dishwasher


Add a comment