How to connect a Miele washing machine
 Initial installation of a washing machine is a simple process that can be completed without the help of a service center technician. To connect a Miele washing machine yourself, you only need a basic set of tools and detailed instructions outlining all the safety precautions and important installation details. In this article, we've compiled the basic recommendations to help a new user set up their "home assistant" on their own.
Where will the car be located?
Before you begin preparing any household appliances, you need to decide where to install the equipment. It is better to do this before purchasing the machine, so as not to make a mistake with the dimensions. For example, in a spacious bathroom, it makes sense to install a full-size Miele washing machine with a front loading type of laundry, in a small room it is better to place a compact washing machine with a top loading type, and finally, built-in washing machines are intended for the kitchen and furniture set.
Laundry machines are most often placed in the bathroom, near the toilet, sink, or directly under the vanity. This isn't a fixed installation rule, as placement primarily depends on the room's size, design, and the homeowner's preferences. The main disadvantage of installing a washing machine in the bathroom is increased humidity, while the main advantage is its convenient location near all utilities.
The second most common place in the home for washing machines is the kitchen. Here, the appliance is typically built into the kitchen cabinetry or simply placed flush against the base cabinets. The undeniable advantage of the kitchen area is good ventilation and relatively low humidity, especially compared to the bathroom. One drawback is the food odors that can settle on freshly washed clothes.
Finally, the third option for placing a "home helper" is a hallway or pantry. The advantage here is that there's no humidity or strong cooking odors. The disadvantage is that pantries and hallways are usually far from essential utilities. In any case, the most important thing is not the intended use of the room where the appliances are installed, but its suitability for installing the washing machine. The room should be prepared with:
- A strong and level floor covering. This is necessary to ensure the washing machine stands as level and stable as possible. Therefore, it's best to install the machine on concrete or tile, but not laminate or other wood surfaces, which may bulge after a leak.
- Conveniently located utilities. This includes an electrical outlet, sewer outlet, and water supply connection. Ideally, all of these should be no more than one meter from the washing machine.
Do not rush to connect the equipment until you are sure that the intended installation location is actually suitable for installing the washing machine.
Equipment doesn't always need to be connected to a centralized water supply. For example, if you're in a summer house, the machine's drain hose can be routed into a deep basin or simply outside, and the water for the cycle can be drawn from a canister or cistern if there's no water supply. Therefore, the most important thing is to prepare the conditions for the unit's operation.
Preparing the equipment
Don't rush to connect the device to all utilities immediately after it's delivered to your home. Let the equipment sit at room temperature for a few hours after being outside. It's also crucial to thoroughly read the official user manual, as it describes all safety precautions and installation instructions. It is advisable to remove the machine packaging without a utility knife to avoid accidentally scratching the body. Remove all cardboard packaging, film, foam, tie wrap and other packaging material required for shipping.
Pay special attention to the shipping bolts that hold the washing machine drum in place during transport. If you forget to remove them and start a cycle, the machine will quickly fail, damaging key components. Such damage will void the warranty, forcing you to either pay for expensive repairs out of pocket or buy a new washing machine.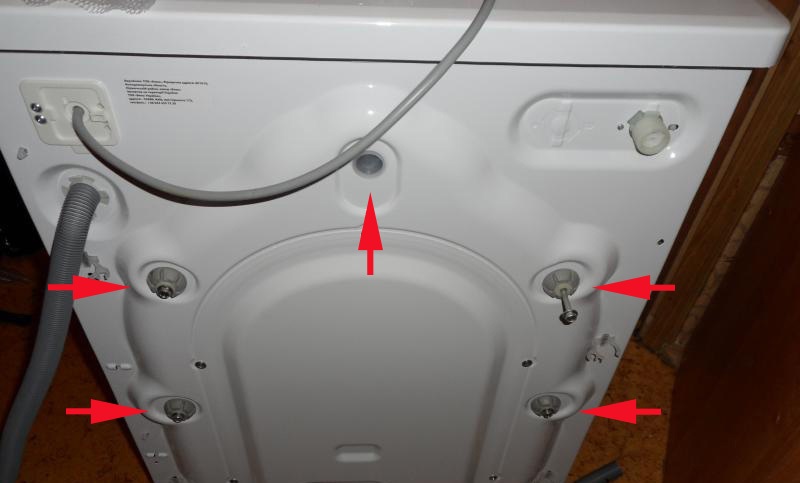
The easiest way to remove the bolts is with a wrench or pliers—the transport locks are usually located on the back of the washing machine. Remove the screws and replace them with the special plastic caps included with every Miele washing machine.
The most expensive SM Miele models are equipped with special transport tubes instead of shipping bolts. To remove them, locate the two hatches on the back panel, roughly in the middle, on the right and left, and open them. Hook the hook of the wrench into the opening of the tube and turn the tube counterclockwise half a turn. Hook the wrench into the tube and pull it out. Do the same with the second tube.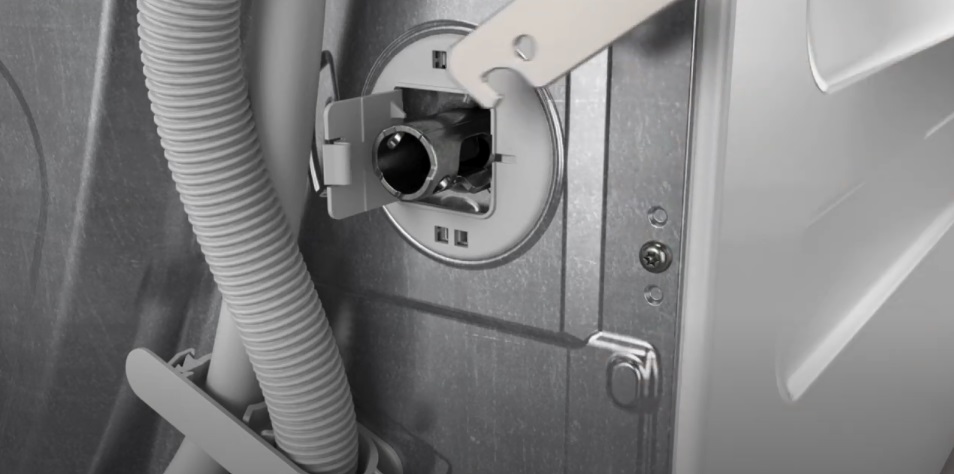
Only now can we begin preparing the appliance, moving it to its future location so that the rear of the unit remains accessible. First, we'll prepare the drain, then the water intake, then level the appliance using a spirit level, and finally, connect it to the power supply.
To the sewer
The most basic method of draining waste water is to install a drain hose in the bathtub, sink, or toilet. This is simple and quick, but unsightly and unhygienic, as dirty water will remain on the walls of the crisp white ceramic, requiring regular manual removal. Therefore, it's best to install a drain hose through the trap.
Carefully read the manual, which has a separate chapter on the nuances of connecting the washing machine to the sewer.
One of the most important recommendations for installing a drain is the height of the drain hose bend. It is generally considered to be raised 50-60 centimeters above the floor. You need to secure the trap under the sink or bathtub, attach the drain hose to the bend, secure it with a clamp, and check the connection for leaks.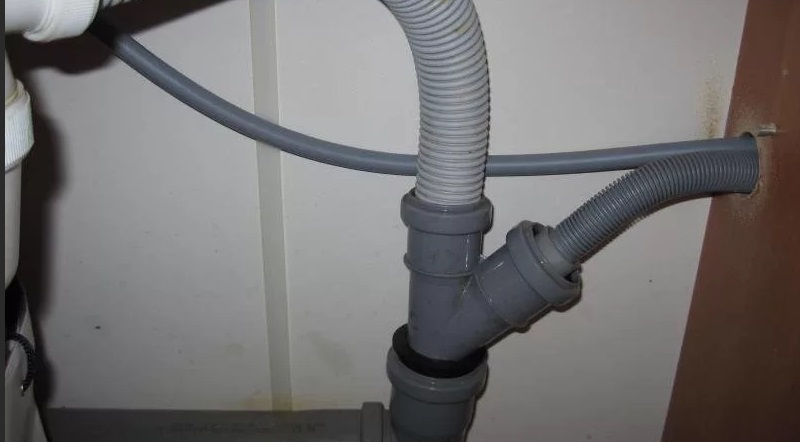
It's also possible to connect the hose directly to the sewer pipe. In this case, you'll need to purchase a special rubber gasket, install it at the joint, and connect the drain hose, making sure to secure it securely.
Connecting to water
Now we need to move on to connecting the water supply. If you have previously used an automatic washing machine, then there is already a connection in the room. If not, you will have to organize it yourself according to our instructions.
- Take the inlet hose.
- Connect its curved end to the pipe installed on the back of the washing machine body.
- Make sure the polypropylene water pipe is closed, cut it where the tee will be installed, solder ¾-inch nuts, and screw on the tee to create a connection point for the washing machine. Only solder the pipe dry!
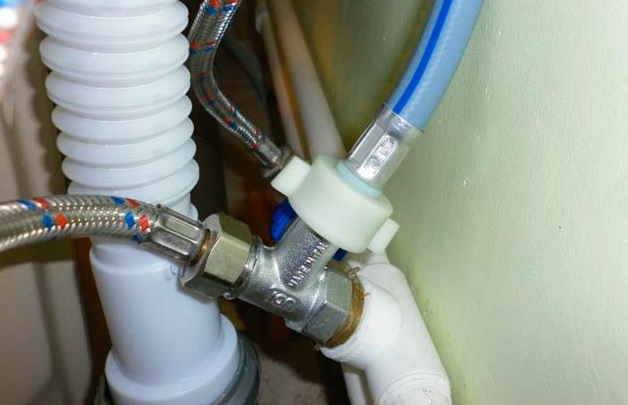
- Install the filling hose into the tee tap.
When installing a tee faucet or special outlets with water protection, be sure to use silicone sealants with increased water resistance.
Carefully examine the connection you've made. It's crucial that there are no water drops or other signs of a leaky connection. If you suspect a leak, it's best to take the time to rework the connection.
The equipment must stand level.
Once the washing machine's connection to the water supply and sewer system is complete, install it in the designated location. Don't start the cycle; first, make sure the appliance is level. If it's not perfectly level, your "home helper" will not only vibrate excessively during the wash and spin cycles, but also hum excessively, bounce, and even shift position. For further adjustments, you'll need a standard spirit level.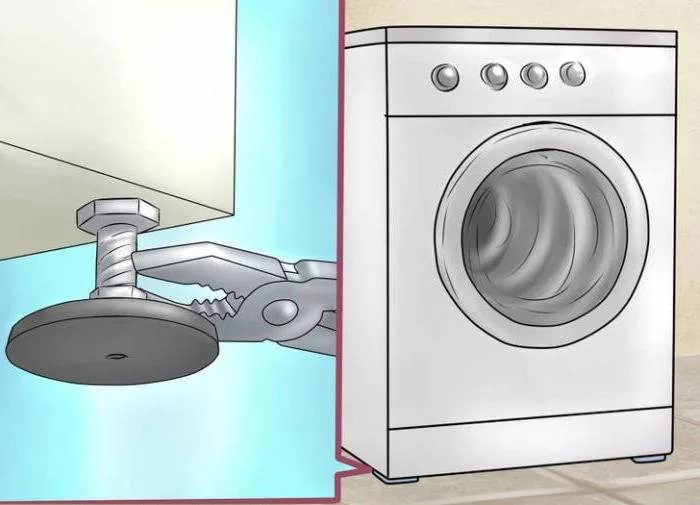
- Place the spirit level on the lid of the Miele washing machine.
- Using the level as a guide, tighten the legs of the unit.
- Afterwards, try pressing on different corners of the machine to check whether it rocks or not.
- If everything is ok, then tighten the nuts on the CM legs.
Experts advise against washing clothes in a machine that's not stable on the floor. Due to increased vibration, such washing can damage not only the machine's body but also its internal components. For additional stability, place a special anti-vibration mat under the washing machine, which will also reduce noise during the washing and spin cycles.
Power supply of equipment
Finally, we move on to the electrical network. Under no circumstances should you connect the washing machine to the mains using an extension cord, as this is contrary to safety regulations. Such demanding appliances require a dedicated grounded outlet with water protection. It's also advisable to install a residual-current circuit breaker with a 10 mA cutoff current if installed in a bathroom, and a 30 mA cutoff current if installed in a dry area. This protection will protect your expensive washing machine from sudden power surges.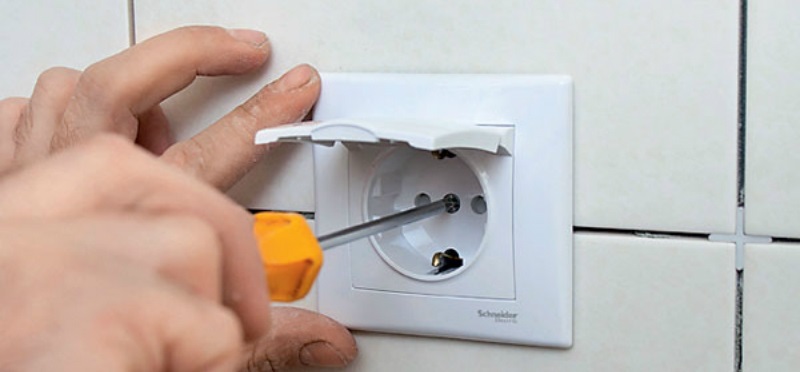
Only after all these steps have been completed will your new "home assistant" be ready for use. Be sure to test its functionality with a test cycle without laundry. Closely monitor the washing machine's operation to promptly detect any leaks or other problems related to improper installation or manufacturing defects.
Interesting:


Readers' comments
Headings
Washing machine repair


For buyers


For users


Dishwasher


Add a comment