How to connect a dryer to the sewer system?
 You can connect your dryer to the sewer yourself. Of course, you can skip this entirely and drain the condensate manually after a few drying cycles, but this method isn't entirely convenient. Modern appliances can immediately discharge the evaporative product into the drain—so why not take advantage of this opportunity? Let's look at how to properly connect the drain hose.
We organize drainage for the dryer
A dryer's drain hose is thinner than a washing machine's. However, the principle of connecting it to the utilities is the same. One end of the drain pipe is screwed to the body of the device, the other is connected to a siphon or tee cut into the sewer riser.
The procedure for connecting the dryer to the sewer is as follows:
- inspect the rear wall of the dryer body;
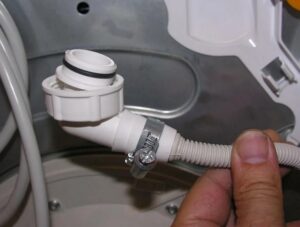
- Find the recess where the hose protrudes. The end of this hose is attached to a fitting—meaning, by default, the machine is set to drain condensate into a container;
- unhook the inner hose from the fitting;
- Take the drain pipe that comes with the dryer;
- connect the drain hose to the fitting;
- Connect the other end of the drain hose to a siphon or tee installed in the sewer pipe.
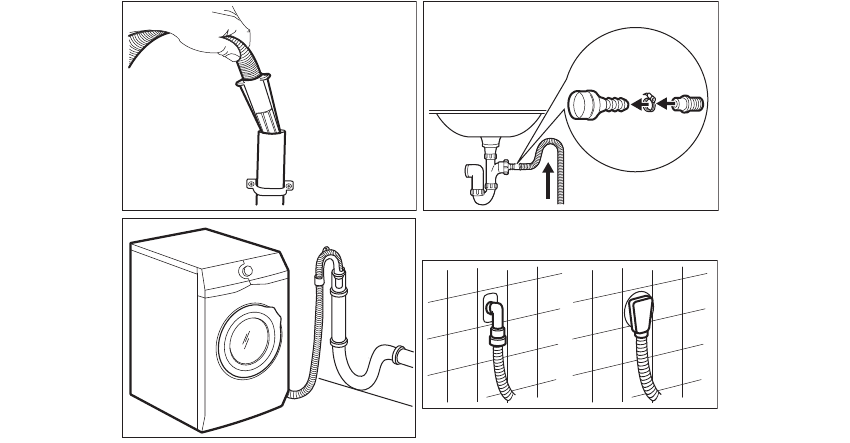
It's easier to connect the dryer drain hose to a trap fitting (for example, one installed under a sink or bathtub). If this isn't possible, you'll have to install a tee fitting into the sewer pipe. A sleeve will then be required to connect the corrugated hose; you can purchase one at a specialty store. It's important that the connection point doesn't leak.
An even simpler method is to avoid connecting the drain hose to the trap and simply secure it to the edge of the bathtub or sink using a special clamp. A dryer doesn't drain as much water as a washing machine, so there's no need to worry about the hose coming loose and flooding the surrounding area.
Modern condensation dryers do not need to be connected to a sewer system; in this case, the water will accumulate in a special container.
Where and how to install a power outlet for a dryer in the bathroom?
The next important step in installing the dryer is connecting it to the electrical network. When both a dryer and a washing machine are located in the same room, a separate outlet will have to be provided for each appliance. When both units are connected to one point, a network overload and short circuit may occur.
For connecting washing and drying equipment, it is better to purchase sockets with the highest level of moisture protection.
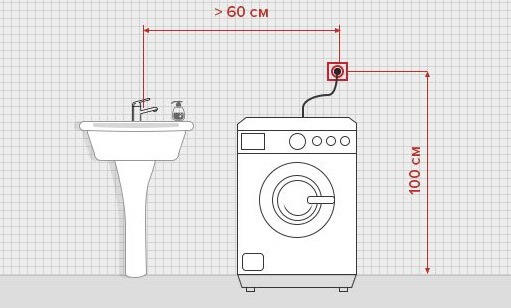
Be sure to consider the exact location of the electrical outlets. Ideally, they should be located close to the washer and dryer, but away from the shower, sink, bathtub, or heated towel rail. Ideally, the outlets should be located near the entrance, as this area receives the best ventilation.
For safety reasons, electrical outlets must be placed on the wall at least 25 centimeters above the floor. This height can be 40, 50, or even 90 cm, but the main thing is to ensure they are located no lower than the established minimum.
The ideal option is to provide a separate power line for the washing machine and dryer. First, draw a diagram of how the wiring will be routed. At this stage, the wire length and cross-section are calculated. It's important to be accurate in these calculations, as the equipment places a significant load on the power line.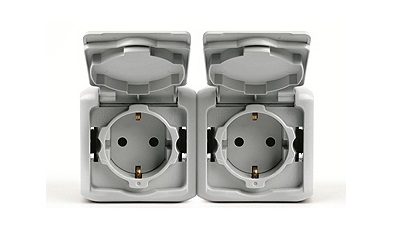
The algorithm of actions for selecting wires will be as follows:
- Determine the wattage of your washing machine and dryer. This information is included in the appliance's manual and is sometimes also written on the appliance body;
- Consider what other devices and their power ratings you might be connecting to this outlet;
- Find out how much power different wire sizes and thicknesses can handle. For example, a 1.5 mm cable can easily handle 4.1 kW, making it more than enough for a tumble dryer. However, experts recommend buying extra wire, in this case at least 2.5 mm.
Once you've determined the required cable, you can begin planning the wiring route. Here are some important considerations:
- It is important to avoid “wet” areas, that is, walls near the bathtub, shower stall, and washbasin;
- It is better not to lay wires along load-bearing walls - they are usually reinforced, and this will complicate the chasing of the surface;
- It is advisable to plan the shortest route to avoid overspending of materials;
- must not intersect with other power lines;
- It is better not to arrange boxes for wires, as they can be dangerous in a damp room.
Be sure to install a residual-current device (RCD) or circuit breaker in the circuit section to protect equipment from power surges if necessary. Experts typically recommend purchasing a device with a 10 or 16 amp cutoff current for outlets used for dryers and washing machines.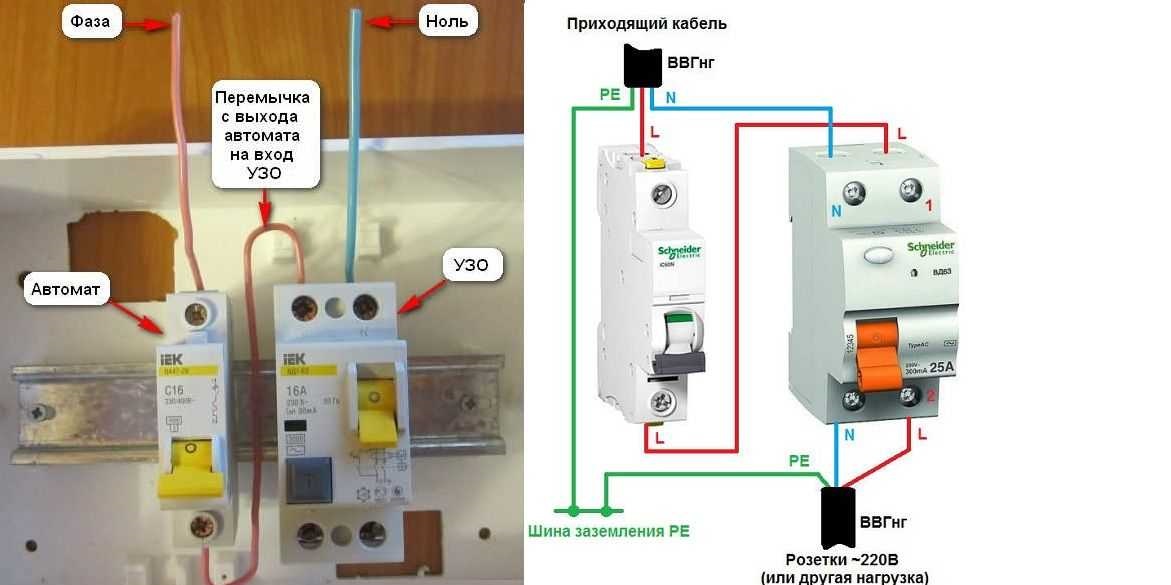
Once you've completed the design, planned the cable route, and purchased the necessary components, you can begin installing the outlets. The procedure is as follows:
- Using the plan as a guide, mark the wall. Indicate where the electrical outlet will be located and draw lines that will need to be cut to accommodate the wiring.
- using a hammer drill and a socket box, drill holes for future sockets;
- cut grooves in the walls along the marked lines, creating a niche for laying the cable;
- Install a residual-current device (RCD) in the electrical panel leading to the bathroom. Make sure the outlet is de-energized at this point.
- connect the wire to the RCD;
- start pulling the wire along the groove to the sockets;
- Place a little cement mortar into the recess under the socket and place the socket box on top;
- secure the cable to the wall, then lead the wire cores to the already made socket box;
- insert the “inner filling” of the socket into the socket box and secure the structure;
- connect the wire cores to the corresponding contacts of the socket;
- Install the outer "shell" of the socket.
This completes the installation. Next, the installed sockets are tested for functionality. If everything is working properly, the grooves in the wall can be closed.
In fact, connecting a dryer to the utility lines isn't all that difficult. A separate power line isn't always necessary. If the room already has outlets, the job is much simpler.
The same applies to drainage. Condensation dryers can only be powered by a power outlet, requiring the user to periodically drain the accumulated condensate from a special container. However, even a homemaker can connect the drain hose to the trap, so it's best to spend 10 minutes during installation and arrange for drainage.
Interesting:


Readers' comments
Headings
Washing machine repair


For buyers


For users


Dishwasher


Add a comment