Replacing the bearing in an Electrolux washing machine
 Replacing a bearing in an Electrolux washing machine has its own unique features, but generally speaking, it's the same as performing similar repairs on other brands. The main difference is that Electrolux washing machine drums are detachable, meaning the replacement process is much quicker and doesn't require any sawing. In this article, we'll discuss the signs that distinguish a broken bearing from other types of failure, explain how to access the broken part by disassembling the entire machine, and explore the nuances of removing the damaged bearing and installing a new one.
Signs of breakdown
Replacing a bearing in an Electrolux washing machine is a very labor-intensive job, requiring complete disassembly. This work should only be undertaken if you are certain that the bearing, and not some other component, is broken. This can only be definitively confirmed by partially disassembling the washing machine, but indirect signs can be used to establish this with a high degree of certainty. The main sign of bearing failure is knocking, grinding and other extraneous noises during washing and spinning.
It is better to replace the bearing even if the seal is simply damaged.
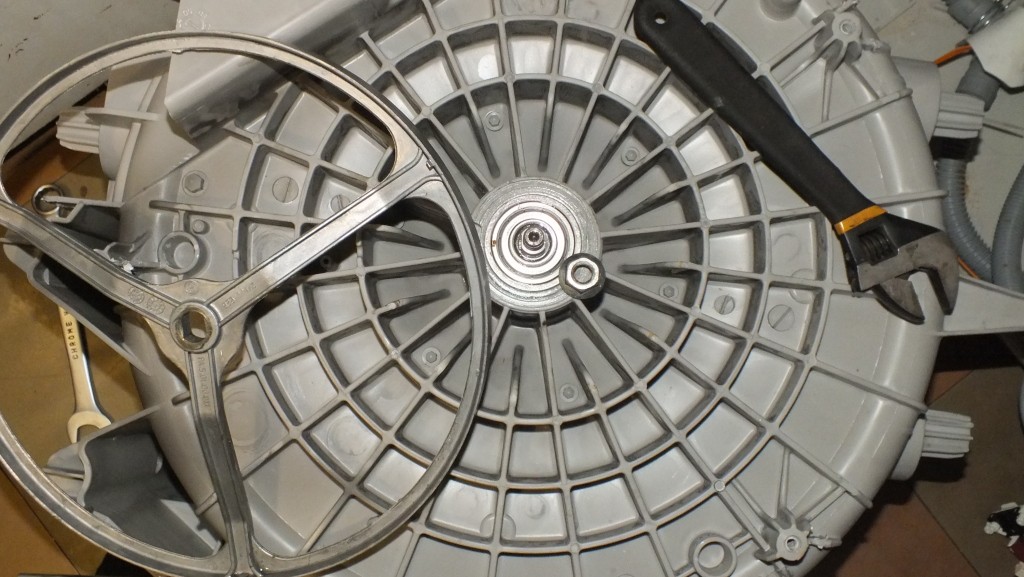
The knocking and grinding noises should be quite loud, and if this is the case, you should inspect the rear wall of the tank near the large pulley. A damaged bearing will inevitably reveal itself with dirty oil stains, and if you find this, repairs are inevitable. For this job, we'll need a fairly simple tool: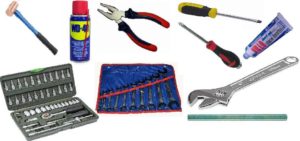
- screwdrivers (flat, Phillips);
- pliers;
- rubber mallet;
- metal pin;
- ratchet with a set of heads;
- awl;
- hammer;
- 16mm bolt;
- Automotive bearing puller;
- WD-40 liquid;
- silicone sealant.
We'll also need to get some bearings. To do this, you'll need to write down the model number of your Electrolux washing machine and take it to the parts store. The seller should know what bearings are installed.
How to get to the broken part?
If you're disassembling an Electrolux washing machine for the first time, you'll likely encounter the problem of removing its casing. The problem is, the casing of this machine appears to be solid. No, at first glance, everything seems fine: there are numerous fasteners at the back and front that seem to hold the lid, rear panel, and front panel in place. But when you start unscrewing the screws one by one, you find you've made no progress in removing anything except, perhaps, the top casing—the casing remains as solid as ever. It seems simply impossible to disassemble this machine.
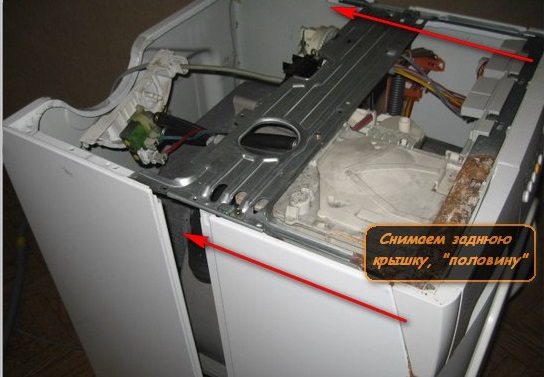
In fact, the Electrolux washing machine's frame is disassemblable, but it's disassembled in an unusual way. It essentially consists of two halves: the front panel with a portion of the bottom and sides, and the rear panel with a portion of the bottom and sides. To remove the rear panel, you need to not only unscrew the fasteners but also pry up special latches located along the perimeter of the seam (the joint between the two halves of the frame).
Before removing the rear housing, remove the plastic plug holding the inlet hose and flow-through filter, otherwise it could be torn off. Be careful with the power cord as well.
In addition to the latches, the Electrolux washing machine's housing halves are held in place by screws. These are screwed into the edges of the wide crossbar that connects the two side panels. Remove the screws, then slide the rear housing half back without obstruction. Next, proceed as follows.
- We hook it with a screwdriver and remove the clamp of the hatch cuff.
- We take the edges of the cuff and wrap them inside the hatch.
- We remove the pressure switch, not forgetting about its tube, and disconnect the pipe coming from the powder receiver.
- We remove the drive belt, remove the wires from the engine and from the heating element.
- We unscrew the engine, remove the pump and drain hose.
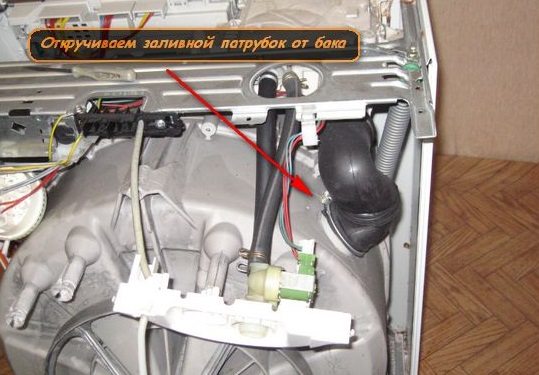
- We remove the filler pipes that we disconnected earlier.
- We unscrew and remove the counterweights.
- We remove the fasteners that hold the front panel, and then remove it together with the electronic module. It won't be possible to remove it completely, since the many wires that go to it will get in the way. But there is nothing wrong with it hanging on these wires, you just need to be more careful.
- We take out the shock absorber mounts and unscrew the shock absorbers.
If nothing else prevents us from removing the drum from the machine body, then carefully grasp its sides and pull it back. If all goes well, the drum and drum will simply fall out. So, we've removed the washing machine's main unit, now we need to disassemble it to finally get to the bearings.
Removing the washing machine bearing isn't too difficult, but we haven't gotten to it yet, and the main obstacle at this stage is the large pulley still bolted to the back of the tub. We take a star-head screwdriver and try to unscrew the bolt.
We're unlikely to get it right the first time, as this fastener is very tight at the factory, and it also tends to stick over time. So, without further ado, spray it with WD-40 and wait 20-30 minutes. Next, take a wooden block, place its end against the bolt head, and tap the other end several times with a hammer. After that, try unscrewing the bolt again; it should work. Pull the pulley off and set it aside. Now, unscrew the screws holding the tank halves together and disassemble the tank.
If the tank doesn't come apart immediately after unscrewing the screws, insert a flat-head screwdriver into the gap between the halves and pry it out a bit. Just be careful not to damage the fragile plastic edges, or you'll end up having to replace the tank.
Part replacement process
To work on the bearing, start from the inside of the tank. Use a flat-head screwdriver to pry up the seal (or any remaining seal) and remove it. Use pliers and a screwdriver to pry the retaining ring out of the old bearing, then soak the bearing in WD-40. Now turn the tank half over, take the metal pin you prepared earlier, and use it as a drift to carefully tap out the bearing.
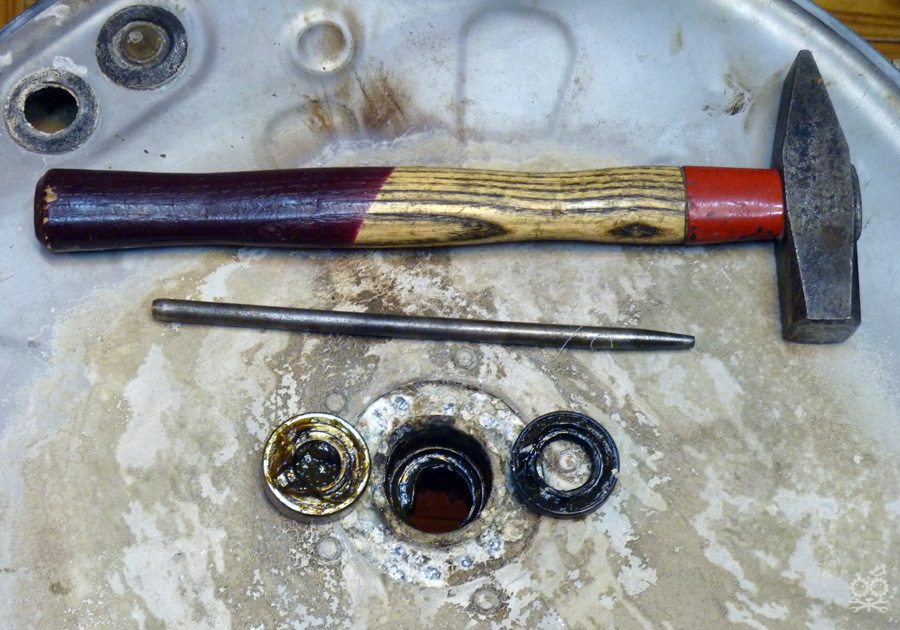
First, using fine sandpaper and then a regular rag, we clean the area for the new bearing. Using a mallet, tap the new bearing into place. If it doesn't seat right away, use a wooden block and a hammer, but don't hit it too hard.
Install the retaining ring, remembering to lubricate it with special bearing grease. Add a small amount of special grease to the bearing and remove any excess with a clean, dry cloth. Install the seal, and then proceed to reassemble the Electrolux washing machine in reverse order. If you need more information on how to do this, replacing a bearing in a washing machine Zanussi, you can read about it in the relevant publication.
In summary, replacing a bearing in an Electrolux washing machine is a complex and labor-intensive job that will undoubtedly take a lot of time and effort. If you're unsure, it's best to entrust this task to professionals. Good luck!
Interesting:


2 reader comments
Add a comment
Headings
Washing machine repair


For buyers


For users


Dishwasher


My Zanussi ZWD 5106 has two 204 bearings in the back. But the one near the drum has fallen apart. How do I get it out?
With your hands