After several years of active use, some users notice that the drum begins to wobble. Unfortunately, this problem can't be fixed by simply tightening the fasteners. The cause of the wobble is usually more serious, sometimes requiring costly repairs.
Let's figure out how to tighten the drum in a washing machine so it stops wobbling. What should you do first? We'll explain what problems can cause it to become loose.
Is there really any play in the drum?
A slight amount of play in the drum is normal. It's built into the washing machine when it's manufactured. In this case, the washing machine won't make any extraneous noises other than a slight hum as the drum rotates.
If the drum play is accompanied by a loud knock or other extraneous sounds, it could indicate a breakdown of the washing machine.
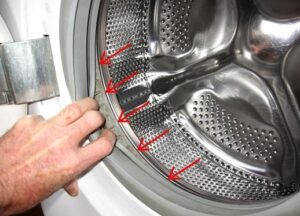
If your washing machine starts making a lot of noise during the wash cycle, you'll need to troubleshoot. First, open the door and, holding the drum, move it back and forth. Then, rotate the drum clockwise and counterclockwise. If these movements are accompanied by loud clanking and grinding sounds, there's a problem.
It's impossible to determine the cause of the malfunction without disassembling the machine. Therefore, for further diagnostics, you'll need to look inside the machine. Most often, drum play and loud noise during operation are caused by:
problems with counterweights;
damage to shock absorbers;
wear of bearings and seals;
wear on the drum hub.
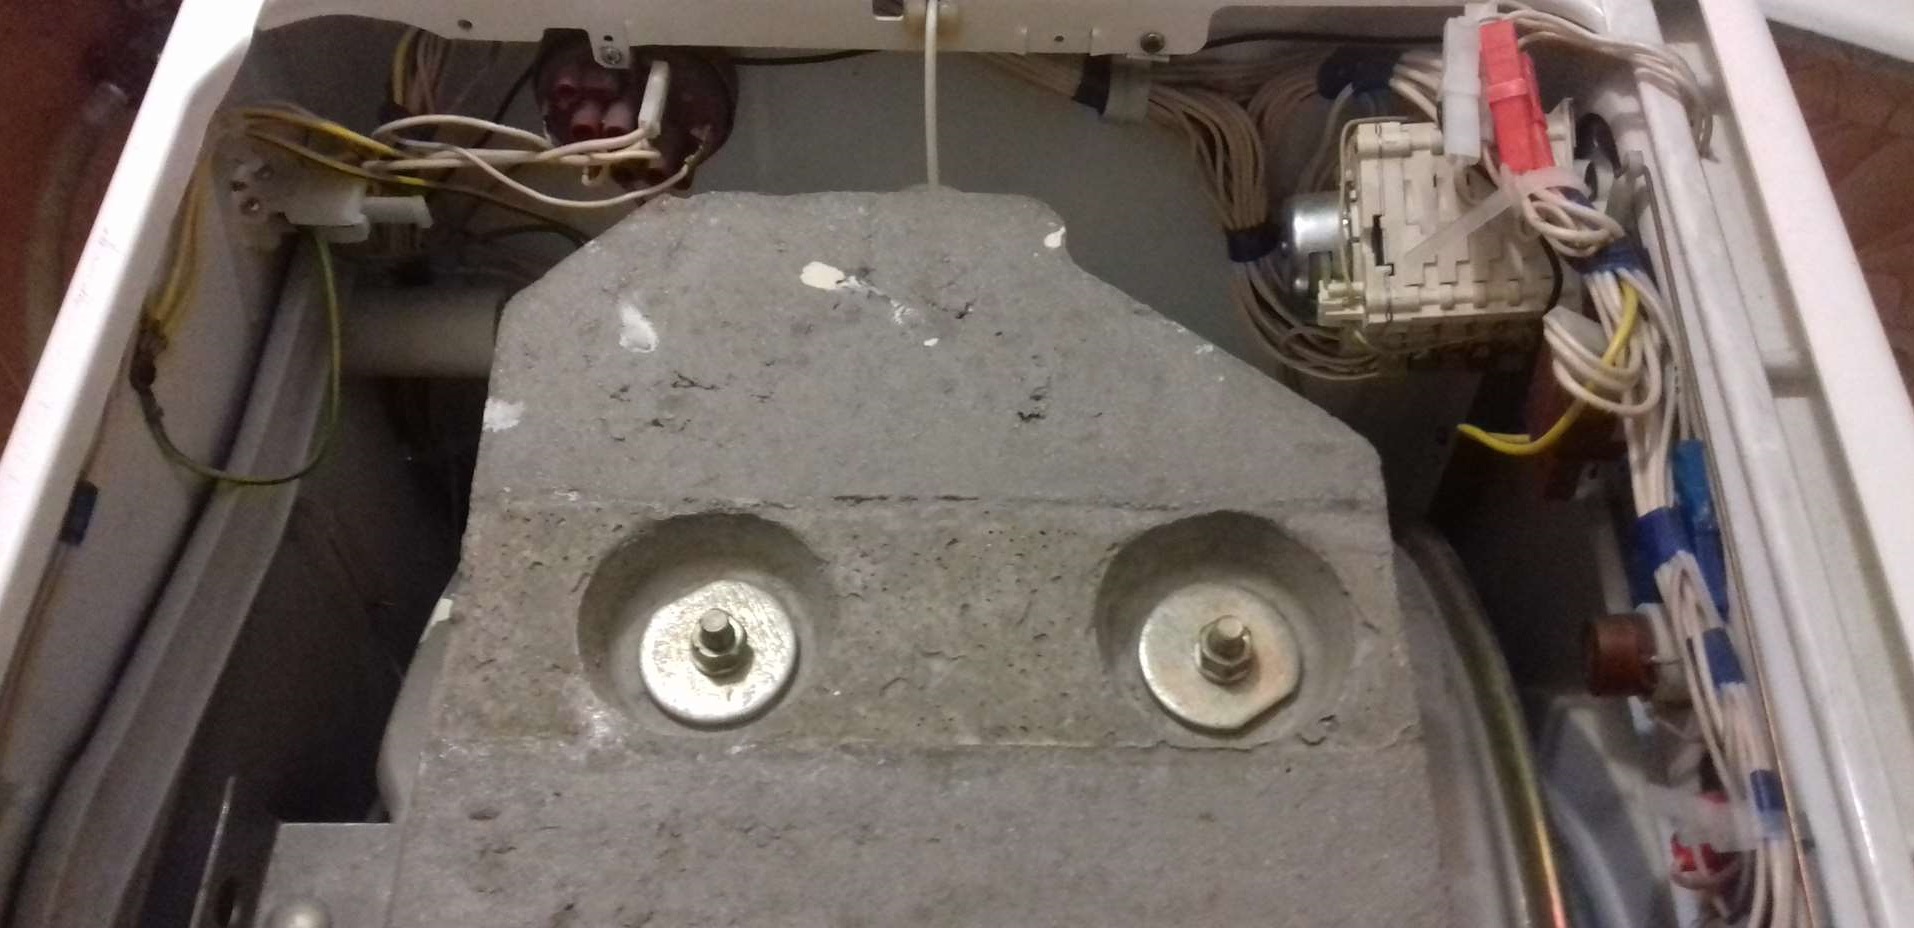
Counterweights are concrete blocks whose primary function is to dampen vibrations. Over time, these weights can wear out and become ineffective. This causes the tank to wobble, and a loud banging sound is caused by the tank striking other internal components.
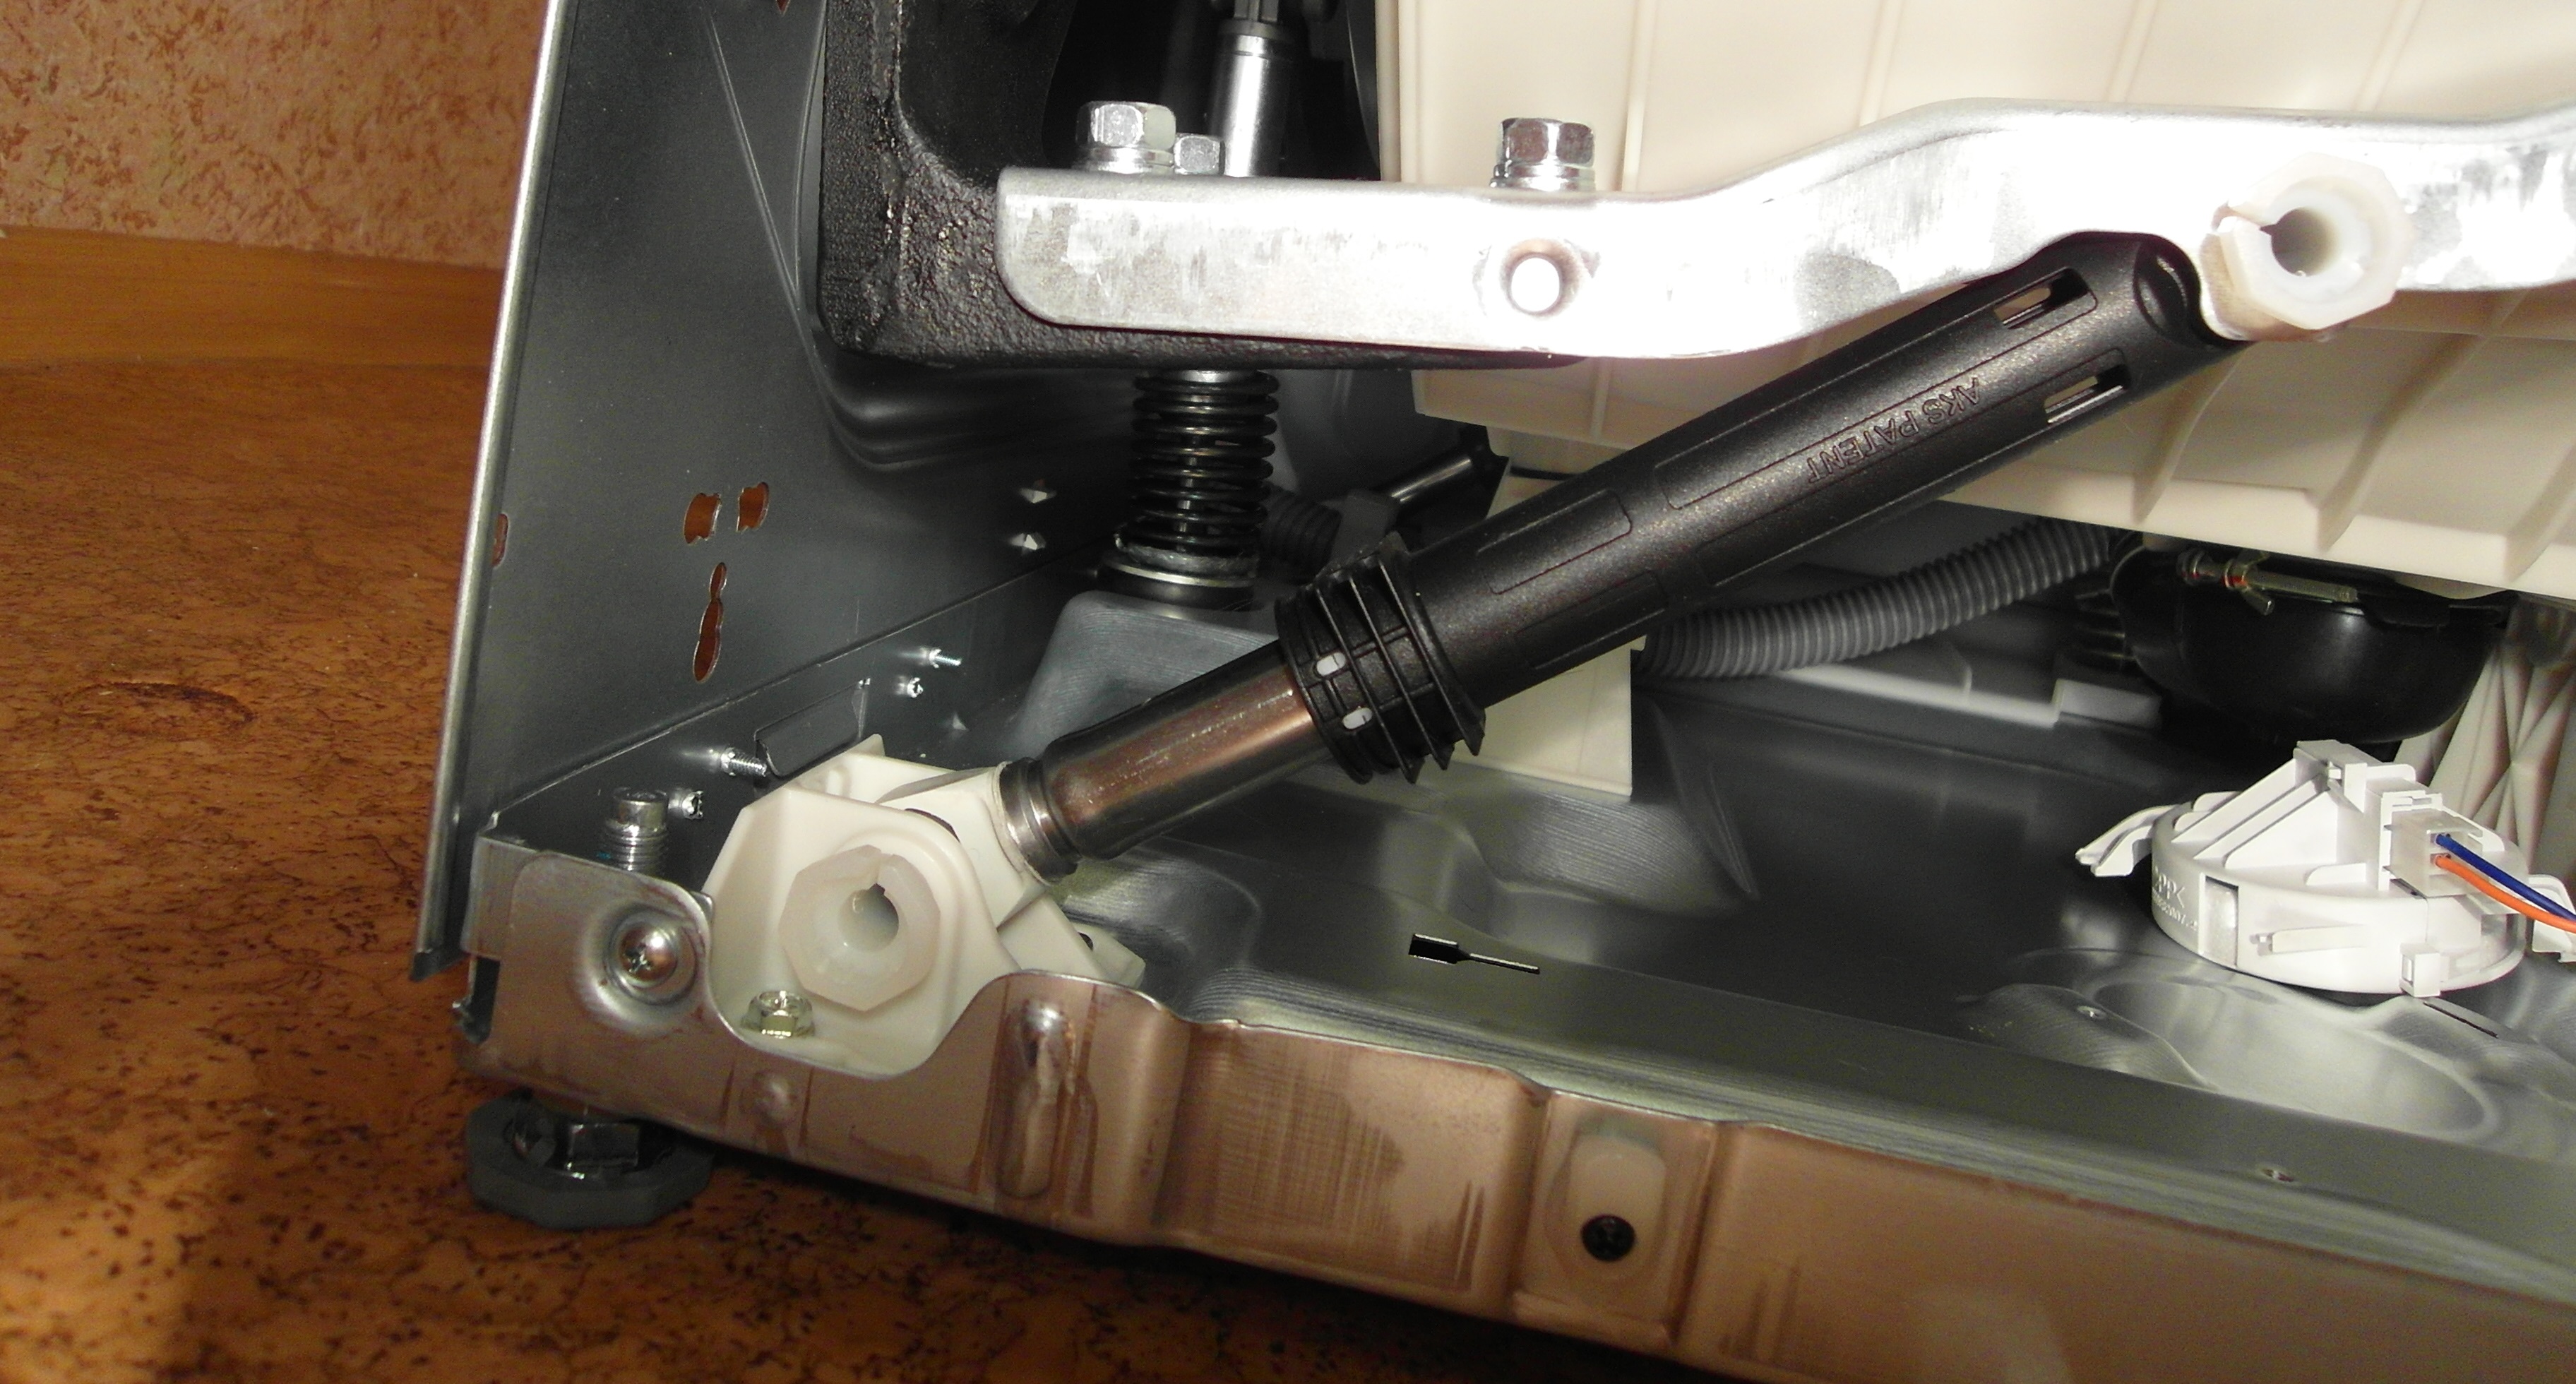
If an inspection of the springs and shock absorbers reveals faulty components, replacement will suffice. Similar components can be purchased at specialty stores. Installing the shock absorbers requires disassembling the car and laying it flat on the floor.
In most cases, the cause is still undamaged shock absorbers or counterweights. Most often, play in the washing machine drum is a consequence of wear on the bearings and seal. Let's figure out how to check the unit and repair the washing machine.
Replacing the bearing and seal
To access the bearing assembly, you'll have to almost completely disassemble the washing machine, remove the tub, and split the plastic container in half. This is a fairly labor-intensive process, so before attempting the repair, you should realistically assess your capabilities. You'll need the following tools:
two screwdrivers (Phillips and slotted);
screwdriver;
hammer;
punch;
pliers;
socket heads of different sizes.
Automatic washing machines can be equipped with detachable and cast tanks.
If your washing machine has a non-detachable drum, you'll have to cut it apart. Therefore, please prepare the following additional items:
drill with a diameter of 3 mm;
marker or pencil;
hacksaw for metal.
Before disassembling the washing machine, be sure to turn off the power and disconnect it from the water supply and sewer system. Then, move the machine to the center of the room to allow access to all sides of the machine. The next step is as follows:
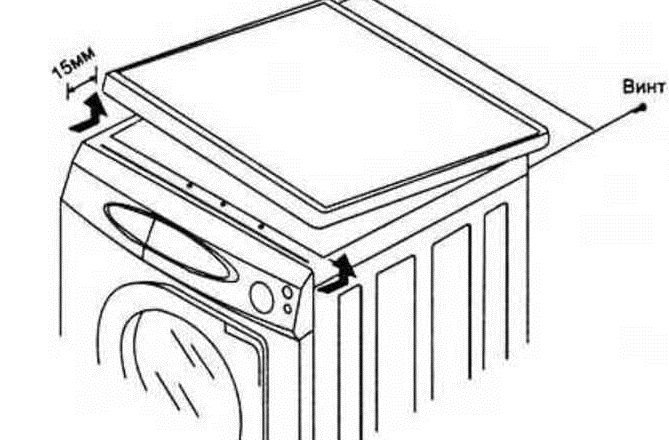
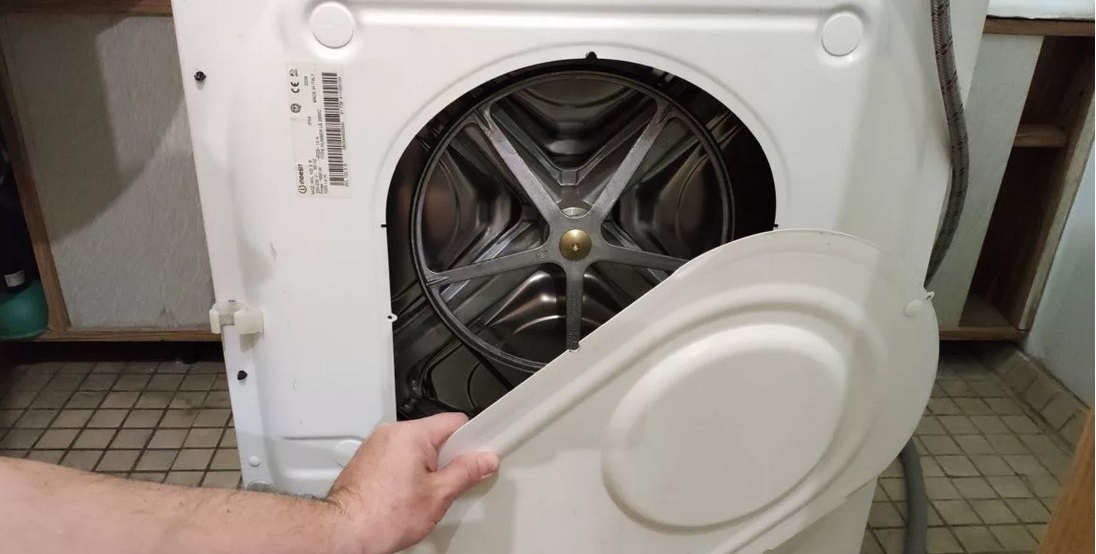
remove the top cover of the washing machine (it is secured with two screws located on the back of the case);
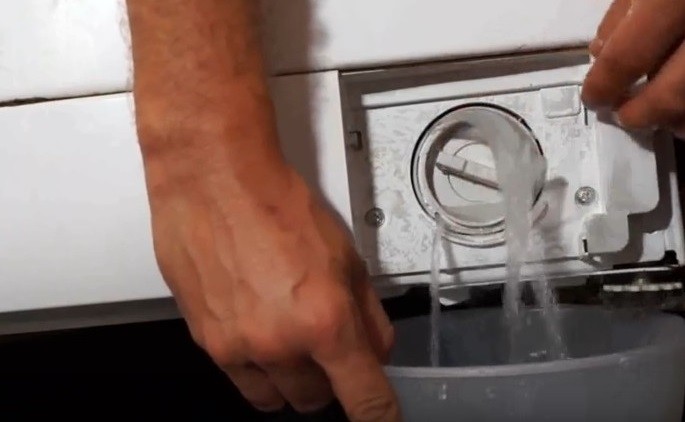
drain the remaining water from the system by unscrewing the waste filter (it is hidden behind the lower false panel or technical hatch);
detach the drain and filler hoses from the rear wall;
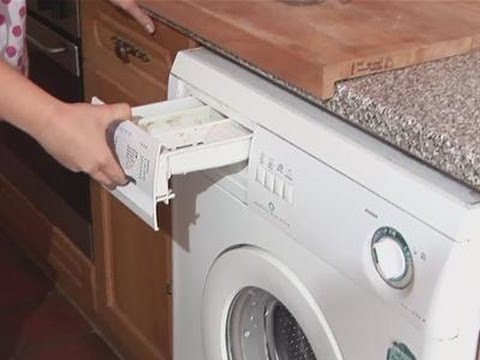
remove the powder compartment from the machine;
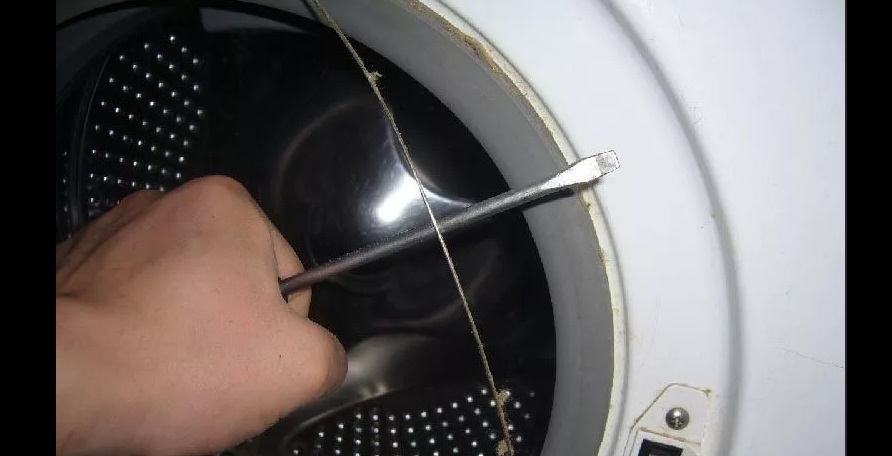
open the drum door, remove the outer clamp holding the hatch cuff;
insert the sealing rubber into the drum;
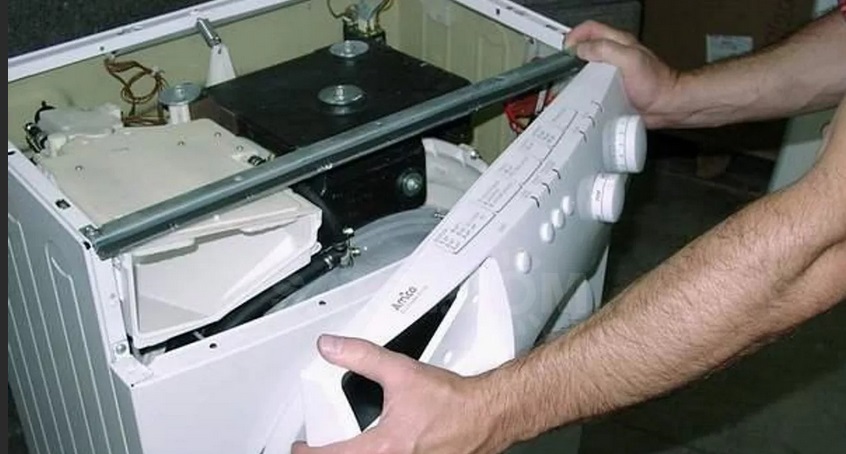
remove the bolts securing the instrument panel;
carefully disconnect the wires from the control panel and move the instrument panel aside;
remove the bolts holding the door lock, reset the lock contacts;
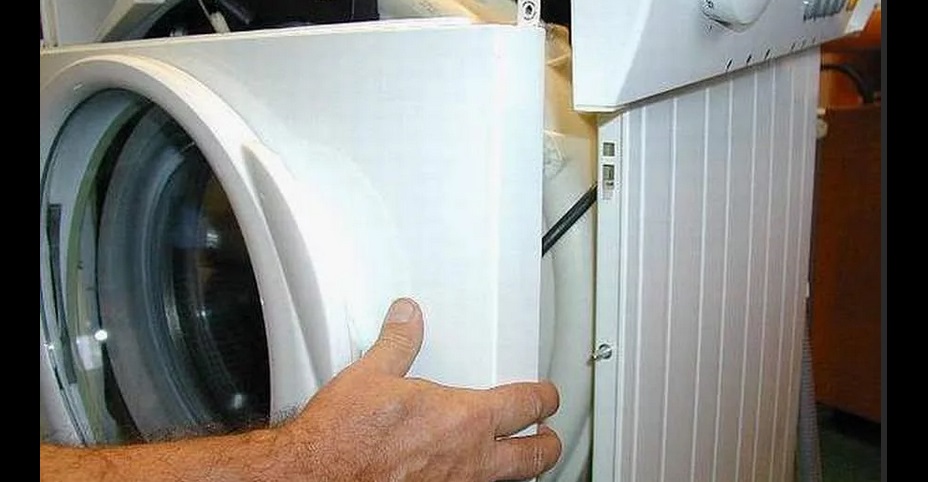
Unscrew the screws securing the front panel of the washing machine;
remove the front wall of the automatic machine;
Unscrew the two screws holding the metal frame of the instrument panel located on top of the housing and set it aside;
remove the upper and lower counterweights (these are concrete weight blocks);
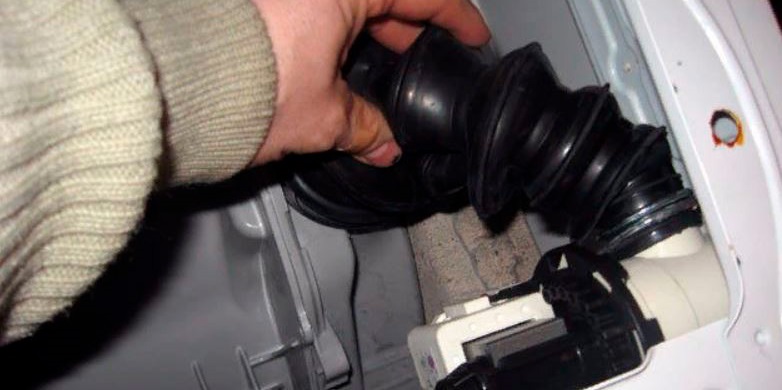
disconnect all pipes from the tank;
Unscrew the screws that secure the back panel of the washing machine and remove the wall;
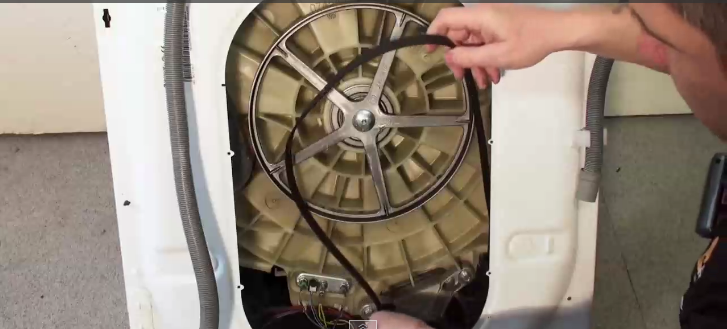
remove the drive belt from the drum pulley;
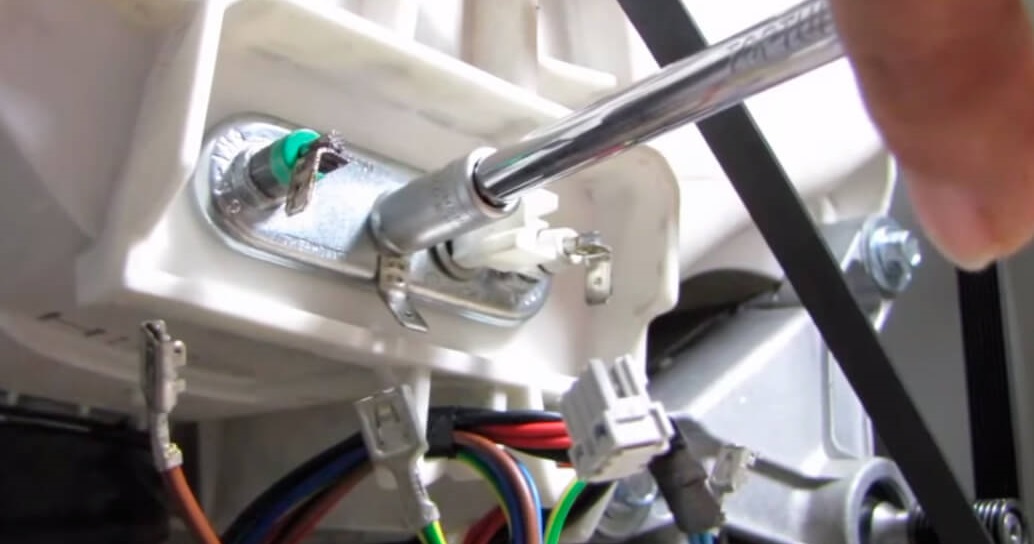
remove the heating element by loosening the nut holding it and disconnecting the wiring;
Disconnect the wires from the electric motor.
To avoid mistakes during reassembly, be sure to take photos of the original component locations, contact connection diagrams, etc. If even one wire is incorrectly connected, the machine will not function properly.
Now there's nothing stopping you from removing the tank. All that's left to do is loosen the shock absorbers, remove the springs, and remove the unit from the washing machine housing. Next, inspect the tank to determine whether it's removable or not.
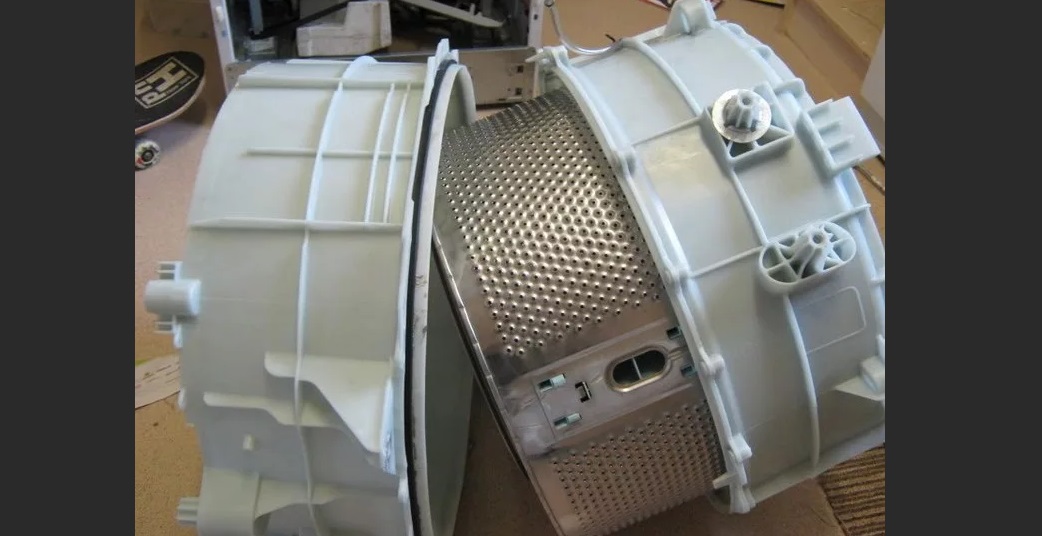
If the tank is detachable, separating it in half is very easy. To do this, unscrew the drum pulley mounting bolt and undo the locking devices (bolts or latches) located around the circumference. After this, the tank will "split" into halves.
With non-separable tanks, you'll have to work hard. These tanks are cut with a hacksaw along the weld seam. Once the repair is complete, the halves are secured with waterproof silicone sealant and bolts.
The rest of the work is done on the half of the tank that contains the drum. The metal container must be removed and set aside. You'll be left with the plastic part, which contains the bearings and seal in the center.
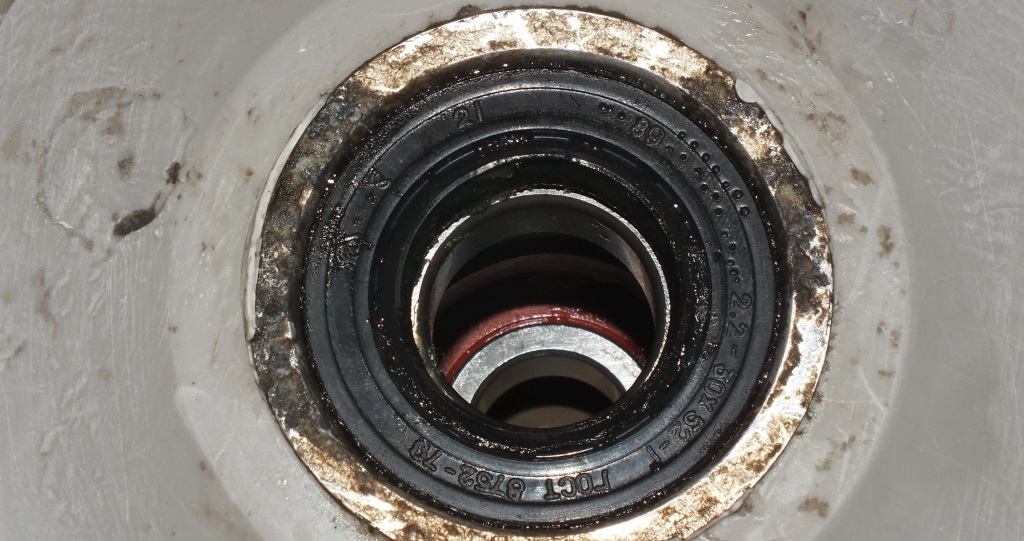
The seal can be removed with a standard flat-blade screwdriver. Don't worry about tearing it—the rubber seal is not reusable. The bearings are knocked out of the tank using a hammer and a punch. It is important to act carefully so as not to damage the landing "nest".
Before installing new bearings, be sure to clean the bearing surface of any rust, dirt, and shavings. Press the metal rings into place using a hammer and drift. Place the seal on top.
It is advisable to treat new bearings and seals with a special waterproof grease - this will extend their service life.
Next, the washing machine is assembled. First, the drum is installed and the pulley is secured. Next, the tub halves are joined. For security, even if the tub is detachable, it's best to seal the edges with a water-resistant silicone sealant.
After replacing the drum in the housing, you can reinstall the parts removed during disassembly: the heating element, drive belt, counterweights, panels, etc. It's best to tighten all hoses with new clamps. Once finished, run a test wash and observe the machine. The noise and knocking should stop.
If there is a problem with the bushing
Bearing and seal replacement doesn't always go smoothly. You might encounter an unexpected problem, such as wear on a drum bushing. This will prevent the installation of new components. How can you fix this problem yourself?
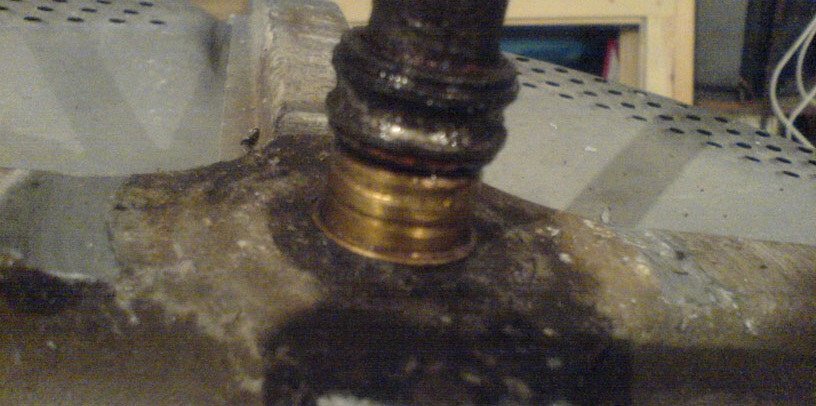
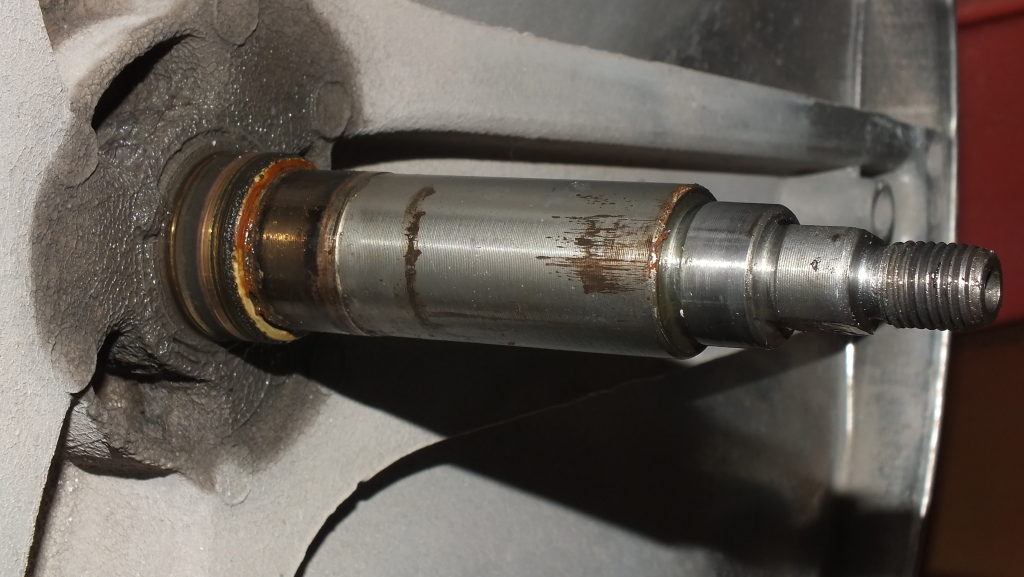
If the drum cross bushing has visible grooves, you'll need to address them. Otherwise, the new seal won't be able to seal the unit properly, water will leak into the bearings, and they'll fail even faster. How can I address these grooves?
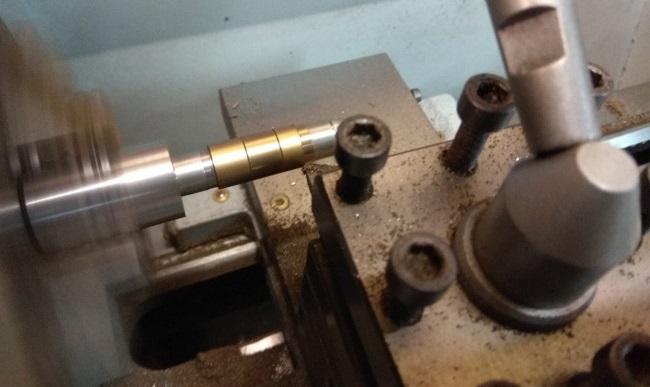
Here, you need to focus on the bushing's wear percentage. If the wear is minor, grinding the metal with a "zero" grinder will be sufficient. If the grooves are quite extensive, the part will need to be reground.
It's important to understand that after machining the bushing, its diameter will decrease. Therefore, a slightly smaller seal will be required. For example, instead of a 30 mm seal, a 28 mm ring may be needed. It's important that it fits snugly on the drum bushing.
If the drum spider bushing is severely damaged, consider replacing the part. Repair kits for various washing machine models are now available in stores. Spare parts can also be ordered online.
Therefore, it's entirely possible to fix a washing machine's drum play at home, without the need for a professional. The key is to follow the instructions carefully. Once you correctly identify the cause of the problem, it's easy to fix.
 After several years of active use, some users notice that the drum begins to wobble. Unfortunately, this problem can't be fixed by simply tightening the fasteners. The cause of the wobble is usually more serious, sometimes requiring costly repairs.
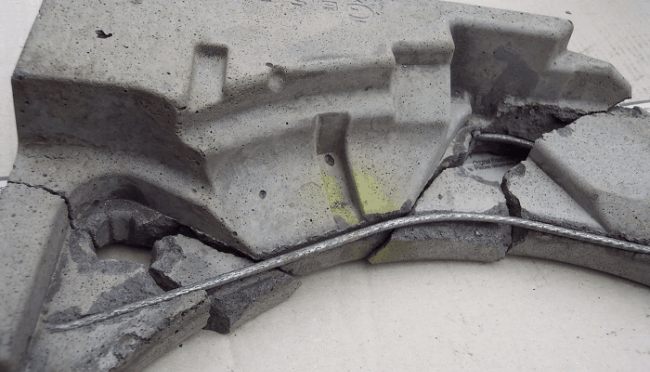


Add a comment