Replacing a bearing in a Zanussi washing machine
 A Zanussi washing machine, made in Italy, is a fairly reliable machine, but even it can break down. If you're reading this article, you've already discovered that the bearings in your "home helper" have broken. You don't want to call a repairman, so you've decided to do the repair yourself. We hope our instructions on how to replace a bearing in a Zanussi washing machine will help you get the job done.
Getting ready for work
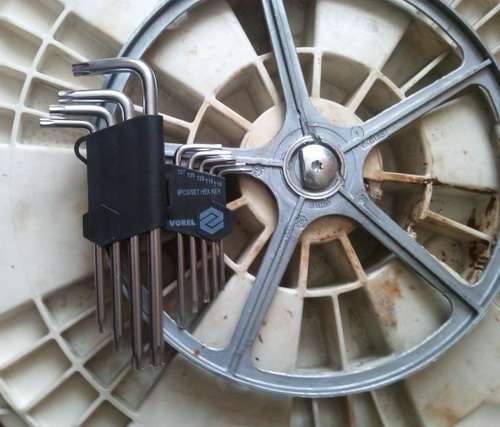
Without the right tools, replacing bearings in a washing machine is unlikely. The list of required parts is quite extensive, which often discourages novice mechanics, who conclude that it's cheaper to call a specialist than to buy all the screwdrivers and other tools. While this may be true, if you're determined to learn this craft, you'll have to buy a few things. And these tools are necessary, they will come in handy more than once. So, prepare:
- flat and Phillips screwdriver or screwdriver;
- bits and an adapter for them;
- pliers and round nose pliers;
- heads and 8 mm Allen key;
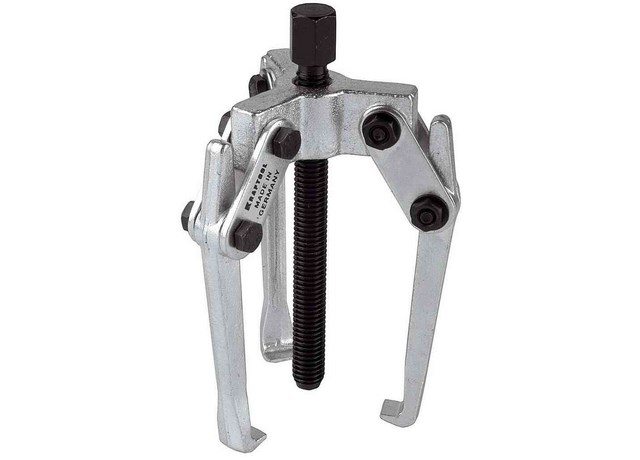
- a hammer and a 14-16 mm bolt 15-20 cm long to knock out the bearing, but you can also get a special puller;
- sealant to cover all the cracks when assembling the tank;
- WD-40 liquid.
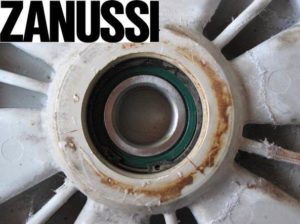
Buy bearings and seals by size. You can find the size by checking your washing machine model or by knocking the part out of the drum. The number and size will be written on the side.
Once you've gathered your tools and parts, prepare the washing machine itself. Disconnect it from the power supply and move it to a suitable work location. A lot of space will be required, so if the equipment is in the bathroom, it will obviously have to be moved into the hallway or transported to the garage for the duration of the renovation.
Car repair
Zanussi washing machines have their own characteristics that must be taken into account when replacing this part. We'll describe the process in detail.
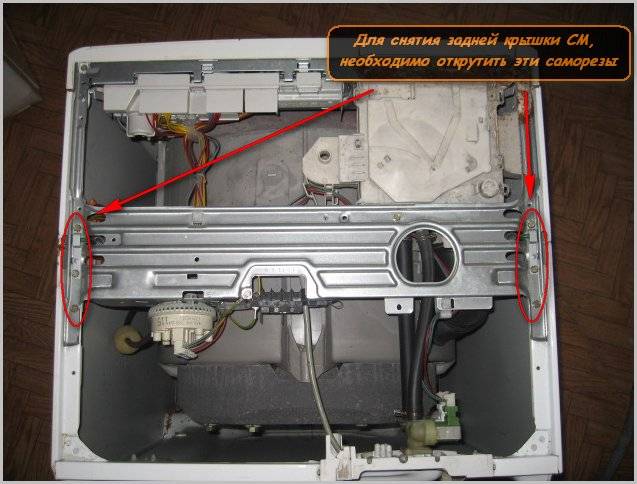
- We unscrew the bolts and remove the top cover and the back half of the case. Please note that some bolts are hidden under decorative caps. At this stage you will need a Phillips screwdriver and a star bit.
- We remove the rubber cuff from the door hatch and insert it into the drum.
- The main goal during disassembly is to remove the tank from the car. Therefore, we disconnect all the hoses from it. First, we need to remove the air vent hose; it simply slides out of the tank from the top of the car.
- We remove the drive belt from the pulley and from the engine.
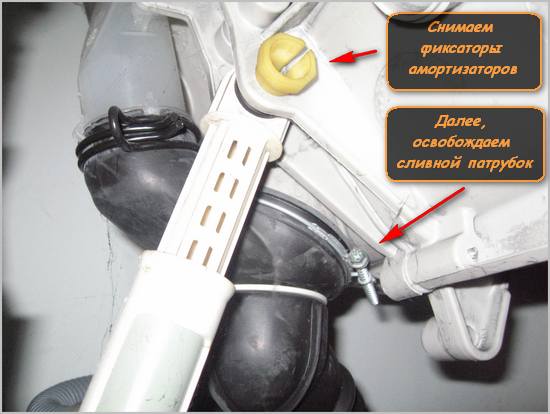
- We remove the fastening (“pin”) from the shock absorber so that we can then pull out the tank. To make the process easier, take a 13mm Allen key and place it on the "finger" from the inside, and pull the head from the outside with pliers.
- Carefully, without bending the wires, remove the sensor from the tank.
- We disconnect the ground wire from the drum pulley.
- We disconnect all wires from the heating element.
- We take out the connector with wires from the washing machine motor and unscrew the motor itself; it is quite heavy and will get in the way.
- Now we disconnect the tube going from the tank to the pressure switch.
- We disconnect the filler pipe using an 8 mm socket to loosen the clamp.
- We remove the drain pipe.
Note! The hose itself is secured to the car body with a bolt, so use an 8mm socket to unscrew it and move it aside.
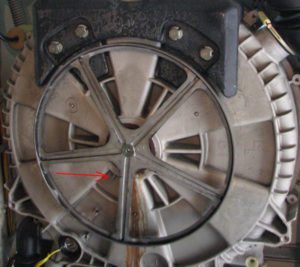
- Immediately unscrew the drum pulley using an 8mm Allen key. To avoid damaging the fastener, lightly tap the center of the pulley with a hammer. Using a metal pipe wrench, loosen the nut.
- Take a 13 mm head and unscrew the upper counterweight from the tank, put it aside.
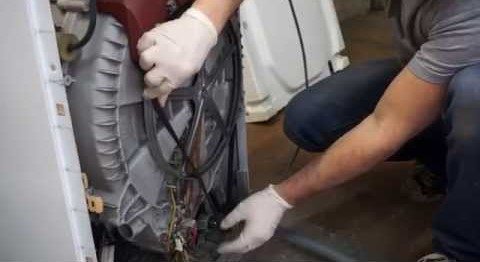
- We remove the tank from the springs and take it out of the housing.
At this stage, preparations for bearing replacement are complete. A lot of work has been done, so be patient, follow the steps in order, and take your time. If possible, take photos so you can see how to reassemble the machine later. With the drum on the floor, unscrew the bolts along the contour, thereby disassembling the drum of the Zanussi washing machine into two halves.
When removing the drum from the rear half of the tank, be careful not to damage the shaft or crosspiece. Avoid hitting the shaft with a hammer.
Next comes the actual process of working with the bearings. You need to do the following:
- Use a flat-head screwdriver to pry the seal from the inside of the tank and pull it out;
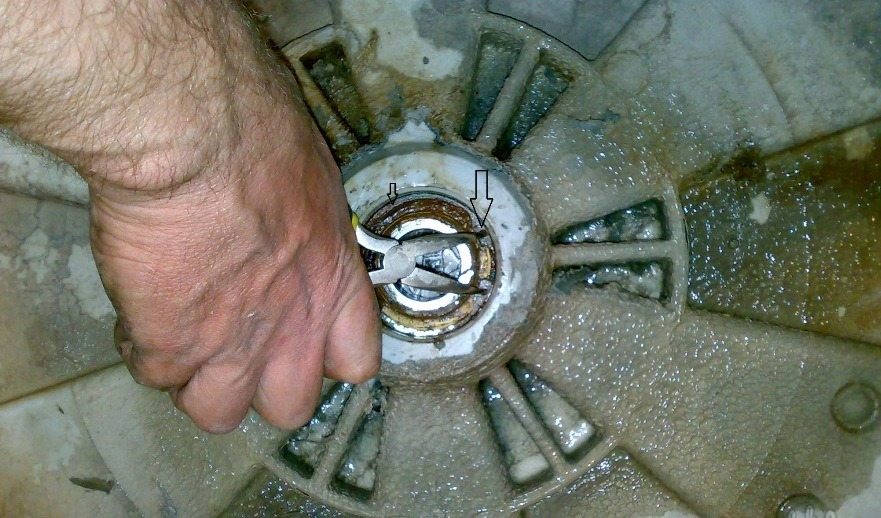
- Using round-nose pliers and a flat-head screwdriver, remove the metal retaining ring;
- spray the bearing with WD-40 liquid and leave for 10-15 minutes;
- We turn the tank over and, using a hammer and punch, begin to knock the bearing outward. We do this carefully, striking alternately in opposite directions of the outer ring, the strikes should be of medium force;
- we clean the seat for the bearing and shaft;
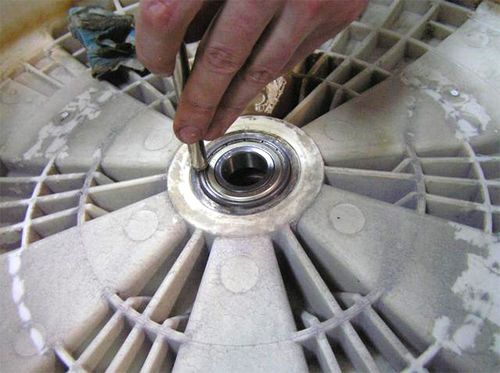
- We take the new part, place it in its seat, and use a flat drift and a hammer to press the bearing in. We move the drift over the outer race of the bearing and tap it lightly.
Important! Do not remove the insert from the new bearing; remove it after installing the part.
- lubricate the retaining ring with Litol and install it on the bearing from above;
- remove excess grease with a napkin;
- We install a new seal on top with our own hands, without using any tools, and lubricate its inner side. special lubricant, lubricate the part of the sleeve on which the bearing is placed.
At this point, the bearing replacement will be complete; all that remains is to assemble the tank and return it to the washing machine body. If you can handle this kind of work, then assembling the car will seem like a simple matter to you.
Difficulty in replacement
When disassembling a Zanussi washing machine to replace a bearing, difficulties may arise, which we decided to discuss separately.
The first difficult task arises when you need to remove the rear half of the drum from the washing machine. The shaft doesn't always come out easily. Sometimes it won't budge at all. What should you do? First, soak the shaft in WD-40 and wait about an hour. Then take a wooden block, place it on the shaft, and tap it with a hammer. Another way to knock out the shaft is to first screw an old bolt into the shaft and tap it.
Zanussi machines use different types of bearings. If the bearing is double-row, it will be installed along with the retaining ring, as described above. If the bearing is single-row, there will be no retaining ring, but there will be two bearings. They need to be knocked out one by one, starting from the outer one, the one on the side of the bushing. Then the inner one is knocked out, having first removed the seal.
When knocking out a damaged bearing, be careful, otherwise it will be even more difficult to remove.
Causes and symptoms of failure
 Why does such an important part of an automatic washing machine break down, and how can you tell? Let's list some of the symptoms:
- extraneous noise and rattling during spinning;
- drum play;
- stains from oil seal grease appeared on the laundry;
- system errors appeared on the display;
- When opening the back cover, rusty streaks were found on the tank.
Bearings in washing machines have different lifespans. Some don't need to be replaced after 11 years of use, while others' bearings fail after 4 years. Situations where this part breaks down after a year of equipment operation occur rarely. What are the main reasons?
- Firstly, installation affects wear. If the machine is installed incorrectly, it creates an imbalance, leading to excessive vibration.
- Secondly, a manufacturing error. Installation of a part not designed to support the load of the given machine.
- Thirdly, the part is defective, as well as there is no lubrication in the bearing.
We hope you understand how to repair a front-loading washing machine. However, this manufacturer produces many top-loading models, so we won't cover any differences in operation. You can watch the video below to learn how to replace bearings on a Zanussi top-loading washing machine. Happy repairing!
Interesting:


3 reader comments
Add a comment
Headings
Washing machine repair


For buyers


For users


Dishwasher


Thank you very much for the detailed information.
What if the tank is non-collapsible?
We saw along the gluing line with a metal saw, during assembly we put it on silicone sealant and tighten it with bolts or self-tapping screws prepared in advance.