How to check the water level sensor in an LG washing machine?
 If your washing machine isn't spinning, isn't filling fully, or is threatening to flood your apartment, the pressure switch is 80% to blame. Don't let the problem go unnoticed—you need to call a technician for diagnostics or attempt repairs yourself. Checking the water level sensor on your LG washing machine yourself is easy: just find the device and perform a few simple steps. What exactly should you do?
Verification instructions
Don't tamper with the machine without a good reason. Before diagnosing the pressure switch in your LG washing machine, it's worth checking for certain signs of a faulty water level switch. A breakdown cannot be without consequences, so the unit will alert the owner to the problem with the following signals:
- the drum rotates or the heater turns on without water in the machine;
- insufficient or excessive filling of the tank is observed;
- in the rinse mode, water is pumped out and filled again;
- there is a burning smell;
- the fuse on the heating element is triggered;
- The laundry is not spun.
Even one present "symptom" is a signal to diagnose the pressure switch. However, you can't blame the level switch alone for the problems, as other faulty components can also cause similar issues. To rule out the error, remove the sensor and check its functionality.
For safety reasons, LG washing machine manufacturers install fasteners with special heads near the pressure switch, so it's important to have a special screwdriver with interchangeable bits.
- Unscrew the two screws on the back of the case that hold the top panel.
- Press the cover away from you and remove it.
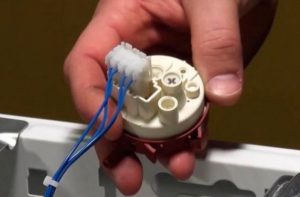
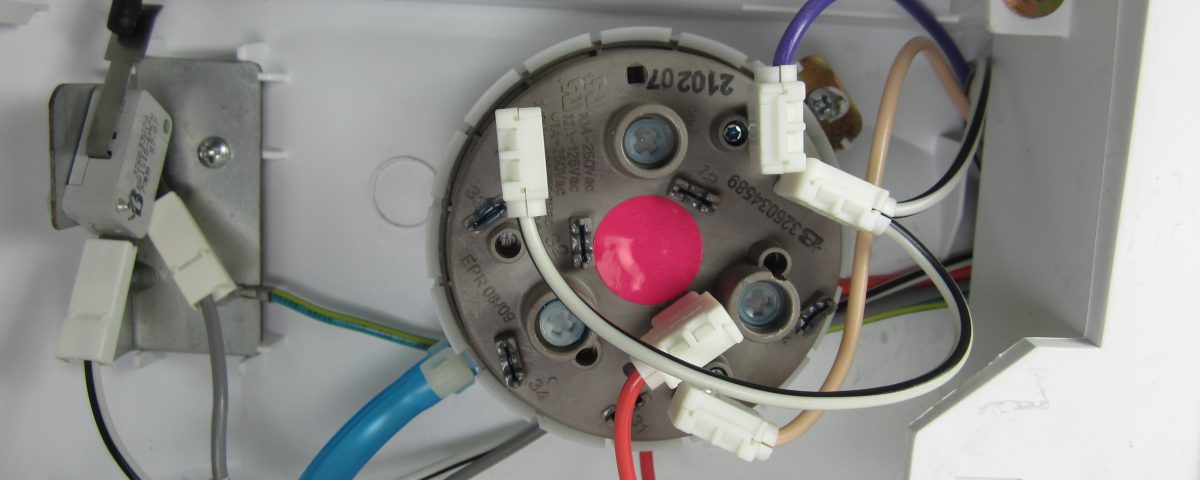
- We find a round plastic box of black or white color near the side wall - this is the pressure switch.
- We disconnect the wiring and pipes from the sensor.
- We loosen the fixing bolts and pull out the housing with a long tube going into the tank.
After removing the sensor, we begin our inspection. First, we visually assess the condition of the tube: there should be no damage or blockages, and the outer fins on the connectors should be clean and free of oxidation. If any problems, such as corrosion, oxidation, or contamination, are visible, the relay is carefully cleaned and rinsed. Then we begin the actual inspection:
- we find a hose or tube proportionate to the opening of the pressure switch fitting;
- we put the tube on the fitting;
- bring the block to your ear and the end of the hose to your mouth;
- Blow into the hose and listen for a click. There are usually two or three clicks, but some models allow for a single click. The key is to avoid silence, which indicates a faulty pressure switch.
Another method is to connect an ohmmeter or multimeter to the sensor terminals. If you close and open the contacts, the device should register a sharp change in resistance. To avoid making mistakes when connecting to the connectors, it is recommended to first study the electrical connection diagram in the factory instructions.
Setting up the pressure switch
A faulty pressure switch can be reprogrammed. To do this, adjust the two adjustment screws to a specific water level, with the center one registering the moment the contacts close, and the outer one registering their opening. There may be several pairs of contacts, as different washing machine models require different drum sizes. For example, a standard or delicate cycle will load the drum full, while an economy cycle will only load half.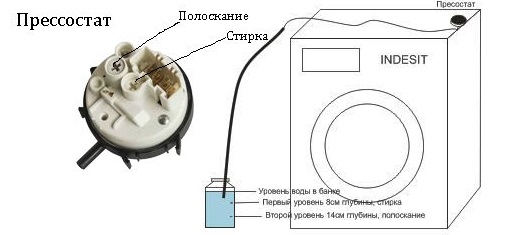
Adjusting the screws yourself is extremely difficult. Professionals perform a full adjustment at the factory, and appropriate marks are applied to the tube. Changing the preset position is strongly discouraged, as tampering with the settings can cause serious imbalances. The situation is further complicated by the fact that the average user doesn't know how many liters of water the machine uses at each stage when running any of the available programs. The more program options a washing machine offers, the more difficult it is to reprogram the pressure switch.
How to change a part?
If there's no doubt the device is faulty, it needs to be replaced. The pressure switch can't be repaired—the relay housing is solid, and attempting to access the box will damage the fragile internal mechanism. Moreover, the device is inexpensive, and most cost no more than $2.
The choice of a new pressure switch must be approached carefully. It must be exactly the same, and must match brand of washing machine, right down to the presence of a direct drive and taking into account the tank capacity. Ideally, a removed relay serves as a sample, after which the sensor is checked by serial number and manufacturerIt wouldn't hurt to pre-test the device's functionality using the method described above. The sensor unit is installed in the same way as it was removed, but in reverse order.
- First, we secure the relay with screws to the mounting location.
- We connect it to the fitting, tightening the clamp.
- We connect the wiring and pipes.
- We return the lid to the washing machine.
Anyone can diagnose and replace a washing machine. The key is to follow the instructions, be careful, and test the machine with a test wash once the repair is complete.
Interesting:


Readers' comments
Headings
Washing machine repair


For buyers


For users


Dishwasher


Add a comment