Checking the Samsung washing machine motor
 No one is immune to breakdowns in household appliances or any other appliance, so it's always best to perform diagnostics yourself to avoid wasting money on analyzing the possible cause. If your washing machine suddenly stops working, the problem could be anywhere from the electronic belt to the wiring or motor. You can check your Samsung washing machine's motor yourself, but only by carefully following the instructions and observing all safety precautions.
We remove the motor and check its functionality.
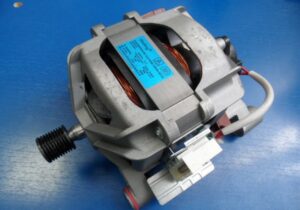
To test a washing machine's motor, you first need to examine its design. Samsung washing machines are typically equipped with a brushed motor, which is distinguished by its compact size and high power. A key component of the motor is the drive belt, which connects to the drum pulley to initiate rotation.
The internal mechanism of the device consists of a rotor, a stator, two electric brushes, and a tachometer that monitors the speed. Before testing the motor, it must be removed from the washing machine.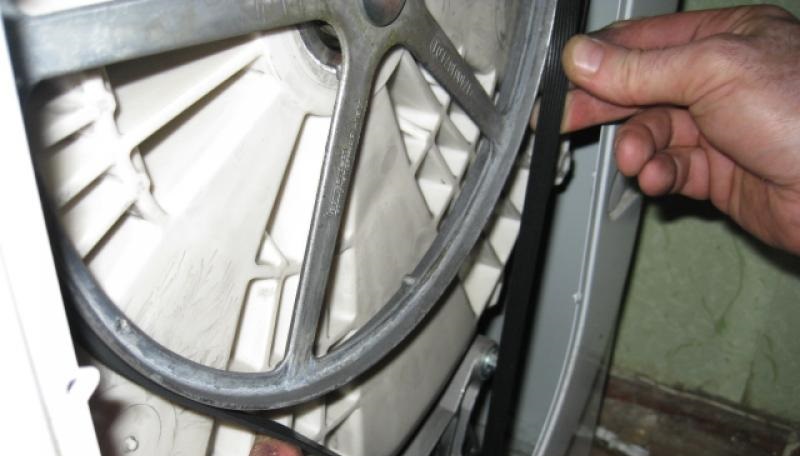
- We disconnect the back panel of the washing machine, for which it is necessary to unscrew all the bolts around the perimeter.
- We remove the drive belt, having first loosened it by rotating the pulley.
- We disconnect the supply line connected to the engine.
For convenience, we recommend taking a photo of the wiring before disconnecting it, so you can later check the photo and avoid mistakes during assembly.
- We unscrew the bolts and then remove the engine, rocking it from side to side.

- Finally, we begin diagnosing the motor. To do this, connect the wires from the rotor and stator windings and then apply 220 volts to them. If the device starts rotating, it's working properly and everything is fine.
This method isn't ideal, as it doesn't allow for a full motor test, especially if it will be operating in more than one mode in the future. There's also a risk of damaging the motor due to a direct connection, which could cause a short circuit. Therefore, to ensure safety during testing, it is first necessary to include a "ballast" in the circuit - a heating element from a washing machine will do. In this case, the heating element will begin to heat up during a short circuit, absorbing any potential shock and protecting the motor. We proceed to the next stages of diagnostics, during which we will check the remaining components of the electric motor.
Are the graphite brushes intact?
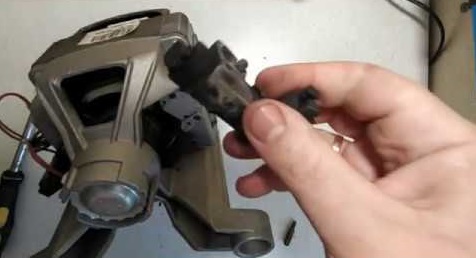
First, check the brushes located on both sides of the housing. Without them, the brushed motor wouldn't work. The carbon tips are subject to friction and therefore tend to wear out relatively quickly. To check them, follow the instructions.
- We unscrew the bolts holding the brushes.
- We compress the spring and remove the electric brushes.
- We disassemble them to assess the tips. If the carbon tip length is less than 1.5 centimeters, it's time to replace them.
Over time, electric brushes wear out and become unusable, so they should be carefully checked and replaced in a timely manner. These parts are always replaced in pairs, even if only one electric brush is damaged. Take the damaged brushes with you as a reference so you can purchase the same or similar ones. For installation, follow the instructions above, but in reverse order.
Testing other engine components
Checking the motor is impossible without testing the lamellas, which are responsible for transmitting the electrical charge to the rotor. These parts are glued directly to the shaft, but if the motor seizes, they can break or peel off. In this case, replacing the motor is not necessary if the peeling is minor and can be removed using a lathe and fine sandpaper.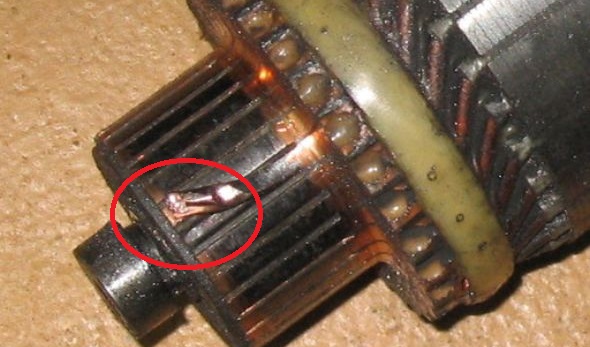
If there's a problem with the winding, the motor will either fail to reach its maximum speed or won't start at all. This occurs due to a short circuit, which causes the electric motor to overheat significantly. The temperature sensor detects the overheating system and immediately shuts off the washing machine. In this situation, there's a risk of damaging the thermistor if the problem isn't corrected promptly. The winding's condition can be checked with a multimeter.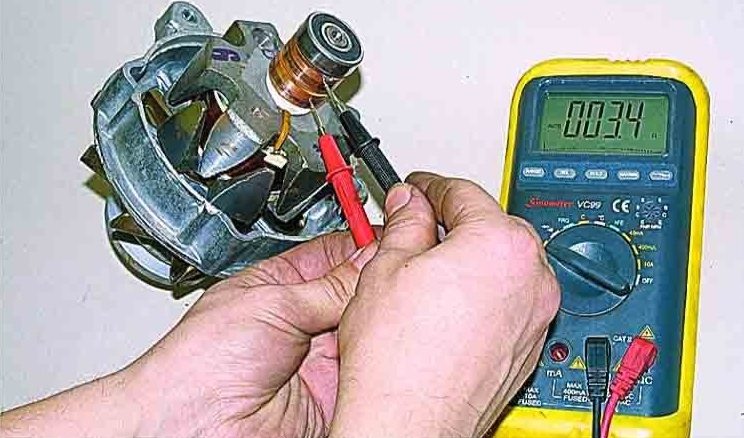
- We turn on the tester to the “Resistance” mode.
- We apply the feeler gauges to the lamella.
- The normal value is considered to be 20-200 Ohms.
If the display shows less than 20 Ohms, then the problem lies in a short circuit; if more than 200 Ohms, then the problem is an open circuit.
It's also worth checking the stator with a multimeter. To do this, use the buzzer mode to alternately touch the probes to the winding. If the multimeter detects no readings, there's no damage. If there's a problem with the winding, it's easier and cheaper to simply replace the motor than to repair it.
Interesting:


Readers' comments
Headings
Washing machine repair


For buyers


For users


Dishwasher


Add a comment