Checking the impeller of a washing machine pump
 If your washing machine periodically struggles to drain or displays a corresponding error code, it's time to check the drain pump impeller. Experience shows that in 99% of cases, it's the impeller that causes difficulty draining the drum. Don't blame the pump for the problem: it's trying to draw water out of the machine, but a blocked or missing impeller prevents it from producing the desired result. Don't ignore the problem; it's best to have it diagnosed and inspected as soon as possible.
Let's examine the impeller without disassembling the machine.
In most cases, checking the impeller isn't a chore. The user doesn't even have to disassemble the machine—all they need to do is empty the drum and carefully inspect the impeller. Therefore, if you hear a suspicious noise in the lower right part of the case, it is better to be on the safe side and carry out a primary diagnosis. It's likely that the impellers of the part in question are damaged. The washing machine pump impeller is checked as follows.
- We use a screwdriver to pry up and remove the cover of the technical hatch at the bottom of the washing machine body.
- We find a round black plug – a trash filter.
- We place a container under the filter to collect water and cover the area around it with rags.
- We take the protruding part and twist the spiral counterclockwise.
Be prepared for dirty water to flow out when you unscrew the drain filter.
- We shine a flashlight through the vacated hole.
- We inspect the impeller and try to spin it.
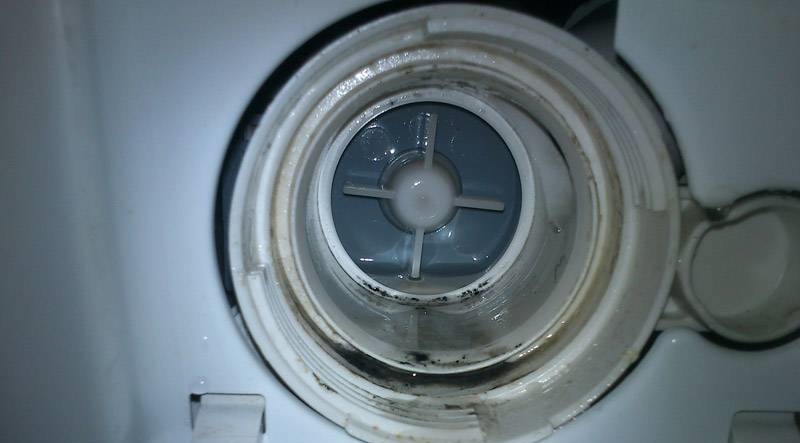
If any foreign objects are found inside the hole, they must be removed. Then, twist a long, thin wire into a hook and try to spin the impeller. Ideally, the blades should spin with difficulty.
If the impeller doesn't spin at all, it's important to inspect the surrounding area more closely. Hair may be caught in the blades, or a coin may be lodged in the wheel. If the part spins completely freely, the impeller may be loose. In this case, you'll need to disassemble the washing machine and repair the pump.
We remove and inspect the pump
If the wire doesn't unlock the impeller or the blades are damaged, disassembling the washing machine is essential. A thorough inspection through the small opening won't be possible, so it's best to remove the pump and perform a full inspection. This should be done through the bottom. The impeller and pump are removed as follows.
Remember safety precautions and disconnect the washing machine from the power supply before performing any manipulations.
- We disconnect the equipment from communications, sewerage, water supply and electricity.
- We drain the water according to the algorithm described above.
- We provide free access to the machine by moving it 1-1.5 meters away from the wall.
- We cover the space with rags.
- Carefully turn the washing machine onto its right side.
- If there is a tray, unscrew the bottom, not forgetting about the wiring located there.
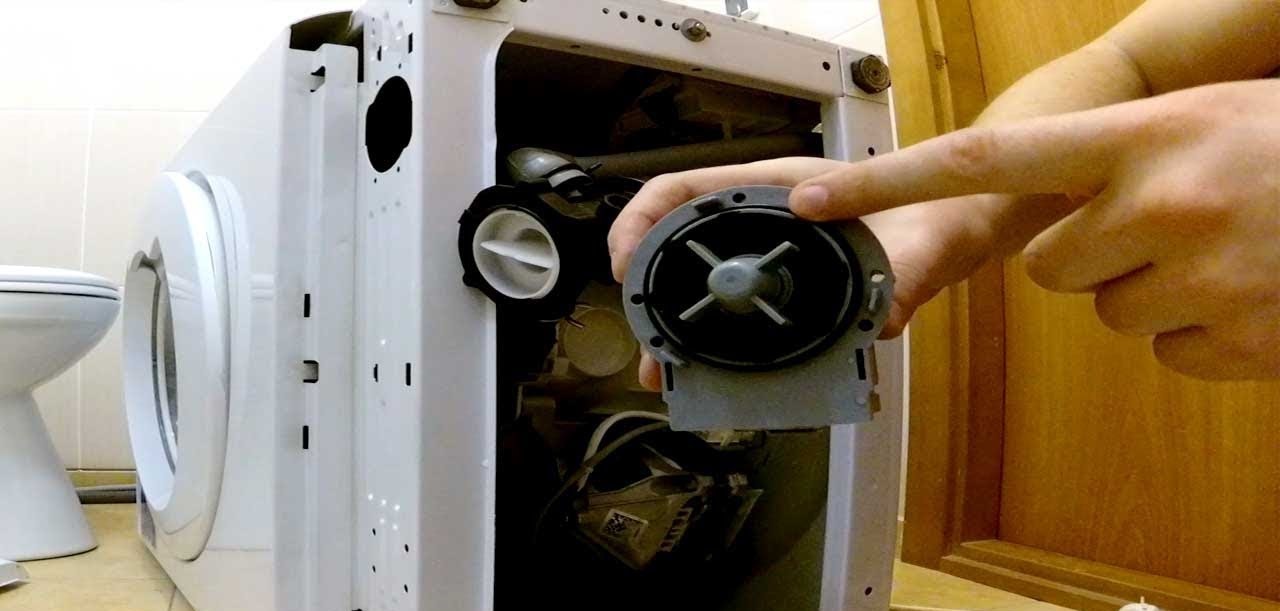
- We unscrew the bolts holding the pump and release the connected wires.
- Carefully rock the pump and, turning it left and right, pull it out of the housing.
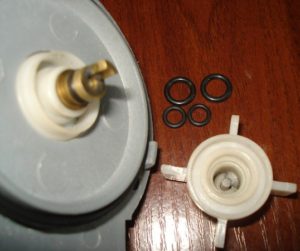
Now we check the impeller's movement and bushing wear. First, we rotate the blades with our fingers, then we rock them from side to side. If play is noticed, the permanent magnet on the rotor has weakened and the part needs to be replaced. If there are no visible faults, we put the pump aside and begin testing the machine.
Let's ring the part
The impeller may be faulty due to an internal winding break in the pump. To rule this out, disconnect the power to the washing machine, disconnect the pump contacts, set the multimeter to ohms, and attach the probes to the motor contacts. Wait a few seconds and compare the readings on the display. Normally, the readings should be between 150 and 260 ohms.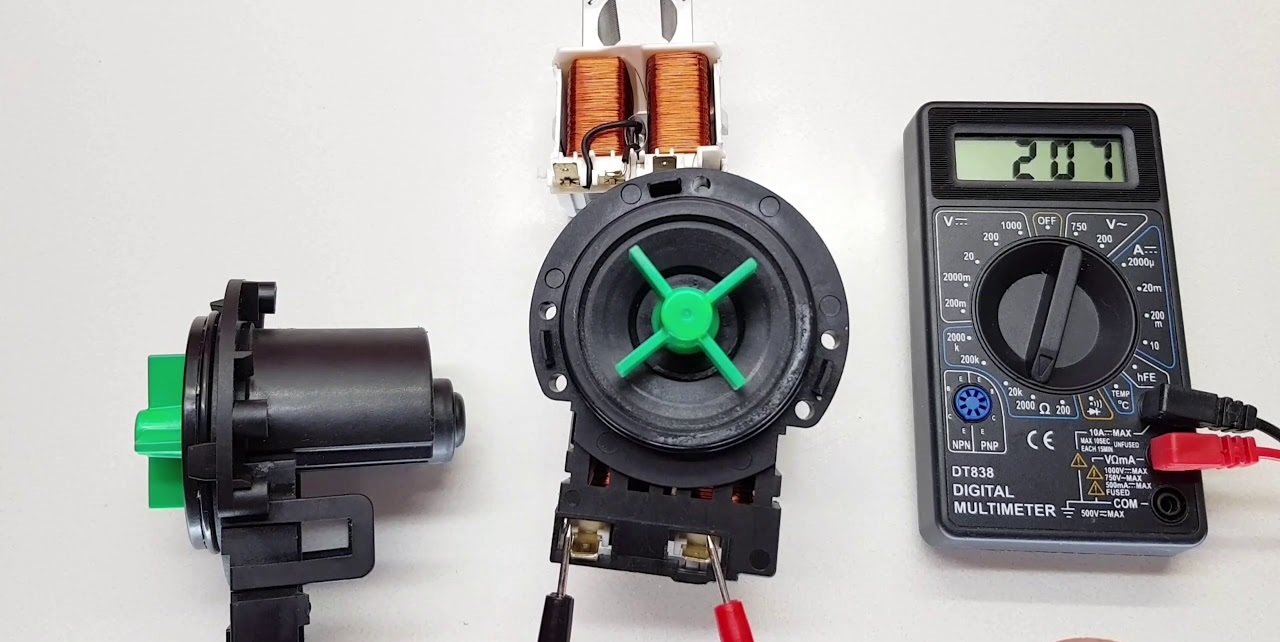
If the display shows "0," there's a short circuit. A significant reading above the normal range indicates a broken winding or a faulty stator. In either case, the pump will need to be replaced. Repairs in this case are too complex and expensive: it's much more cost-effective to remove the old unit and install a new one. But don't rush to replace the pump—there's one more test left.
Testing the pump
Another test can also help identify the problem of a slow drain. This will double-check the functionality of the appliance and, most importantly, ensure the control board is working properly.
We disconnect the machine from the power supply, add water through the dispenser into the tank (or do not drain it initially) to 4-5 cm from the bottom of the drum and begin testing.
First, remove the end of the machine, allowing access to the pump terminals. Then, release the connector and connect a separate wire with a plug to the unit. After checking the secure fit and the contacts for independence, plug the cord into the outlet and observe the machine's response. If the tank empties, the pump is fully functional, and the problem lies in the control board or electronics.
Features of part replacement
A new pump is selected from original spare parts. If a replacement from the manufacturer is unavailable, you'll have to settle for similar alternatives. When selecting, consider the following: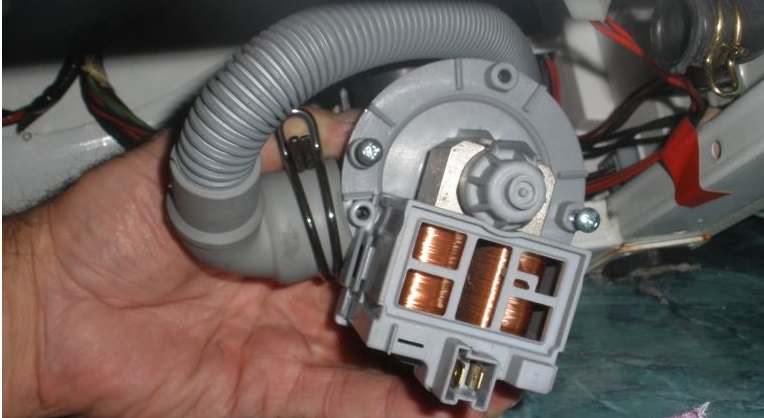
- pump power in watts;
- type of fastening to the snail (latches or bolts);
- number of slots for fixing latches or bolts;
- type of electrical connection (plug or terminal, together or separately, front or back).
We also consider the brand. Leili, Askoll, SKL, and Copreci pumps from China and Italy are considered interchangeable. If in doubt, it's best to consult a professional repairman.
Interesting:


Readers' comments
Headings
Washing machine repair


For buyers


For users


Dishwasher


Add a comment