Is the Candy washing machine's drum detachable?
 Progress never stands still, but advances by leaps and bounds, so it's no surprise that users expect more from their home appliances. In particular, owners of "home helpers" want their machines to break down less often and be easy to repair themselves. The same requirements apply to the washing machine's drum. If it can't be disassembled, you'll have to spend a considerable amount of money replacing the bearings. Today, we'll find out whether the drum of the Candy washing machine is disassemblable.
How are the halves of the Candy washing machine's tank connected?
Almost all modern units from this brand feature a non-detachable tank. This design helps reduce production costs, and the lack of additional fasteners and bolts in cast tanks makes production of these units more cost-effective.
The company also relies on the subsequent sale of components. For example, when bearings fail, many users prefer to purchase a ready-made unit rather than bother with repairs. This generates additional revenue for the manufacturer.
Experts have long since developed a method for disassembling a non-separable tank and reassembling it without losing its seal. This requires a hand saw. The procedure is as follows:
- on the side edge mark holes at intervals of 5-7 cm;
- drill holes;
- carefully cut the tank along the factory seam;
- Using a punch and a hammer, knock out the old bearings;
- install new components;
- assemble the tank.
The plan seems simple enough. However, in reality, the work ahead is quite meticulous. Not only must the tank be carefully separated, but the bearings must also be replaced and new rings installed. Therefore, we will examine each step in more detail.
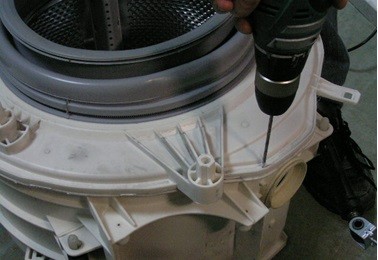
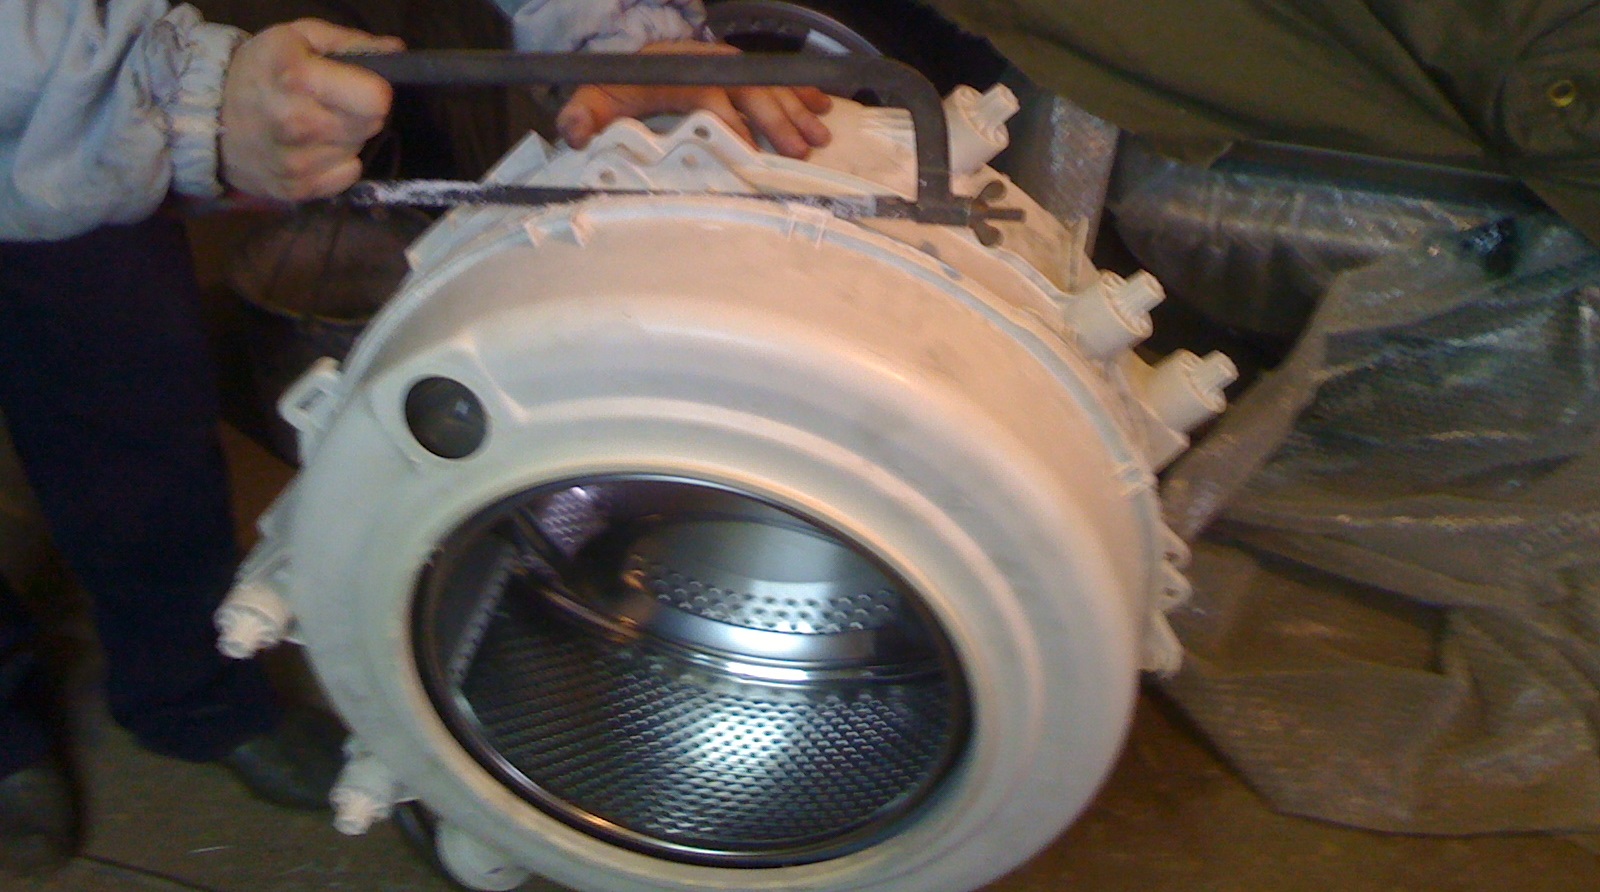
First, you'll need to wipe the tank with a damp cloth and mark dots along the perimeter of the factory weld. It's important to space the holes 5-7 cm apart, using a drill bit with a diameter of 3-5 mm. Then, grab a hacksaw and carefully cut the tank along the weld. At the rear of the structure, you'll find the drum, bearings, and seal. This "half-tank" is what we'll be working with.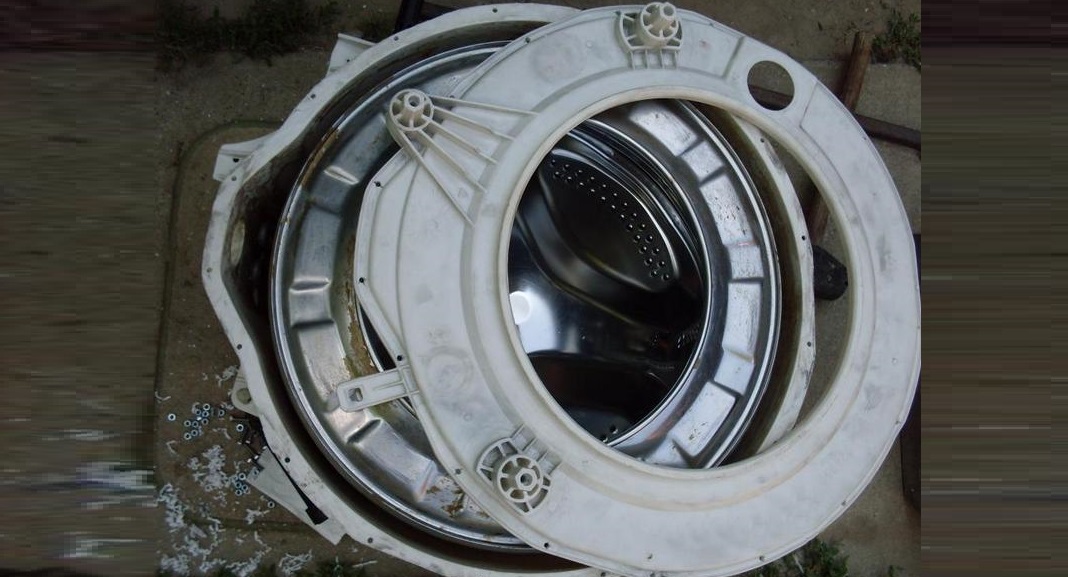
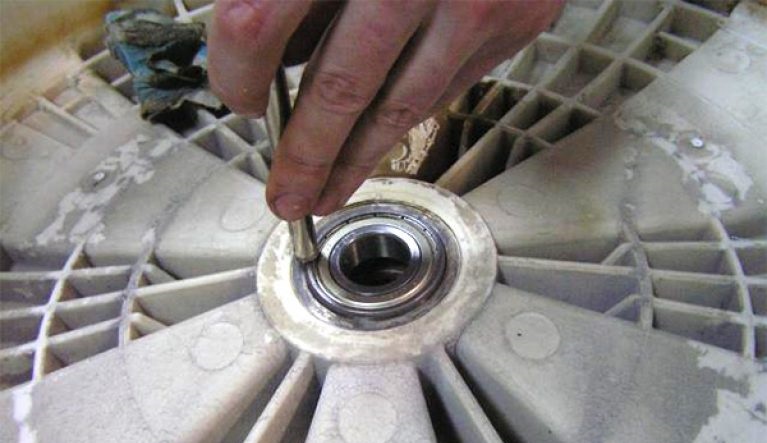
After these manipulations, you need to remove the drum from the plastic half. To do this, you will need to unscrew the pulley and knock out the shaft. The next step is to remove the broken bearings. They are knocked out using a drift and a hammer. The drift is placed on the inner race, and each bearing is tapped in a circle.
If the parts are difficult to remove, spray them with WD-40 and leave for 15 minutes – this will make removing the rings easier!
Once the pressing process is complete, clean the bearing surface of any dirt. The drum shaft will also need to be cleaned and polished. Only then should we install the new bearings.
Rings should always be replaced in pairs. The sealing rubber is equally important. Before installing the bearings and seal, be sure to generously coat them with special grease.
After the bearing has been lubricated, it will need to be placed in the bearing seat and pressed in with a drift. Tap the element along the outer edge. When the ring is in place and presses against the flange, a dull sound will be heard.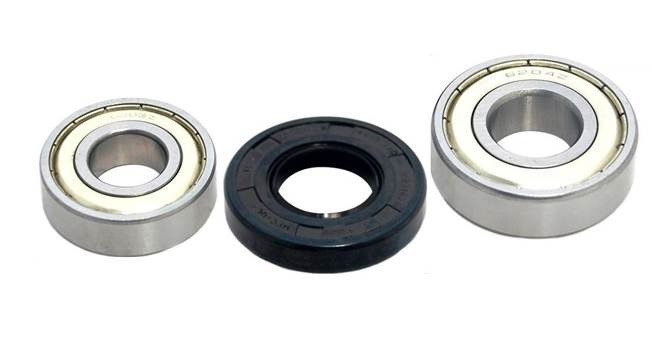
The oil seal is placed on the inner bearing. The rubber seal also needs to be generously lubricated. This will prevent water from entering the unit, extending the life of the new parts.
Next, we secure the drum to the rear half-tank. After replacing the pulley, tighten it with a screw. To ensure the two halves of the plastic tank are glued together, you'll need a high-quality, water-resistant silicone sealant. Apply it around the perimeter of the halves and press them together. The drilled holes will serve as screws to secure the two half-tanks together.
Now you can begin reassembling the machine. Replace the plastic container and reconnect the heating element, motor, and drain hose. Then reinstall the rear and front panels, dust filter, and other components.
Based on the above, the answer to the question of whether Candy's tank is collapsible or not is no. The company does not use such tanks. The reason for this is that such a design does not provide sufficient strength.
On the reliability of components and assembly quality
Most Candy washing machines are assembled in China, but this shouldn't be a concern, as the brand strictly controls the quality of its products, ensuring a long service life for their "home helpers." These machines are distinguished by high-quality components, reliable assembly, and are renowned for their well-thought-out design and construction. Their body is reinforced, the internal metal is painted, the wiring does not sag anywhere and is securely fixed.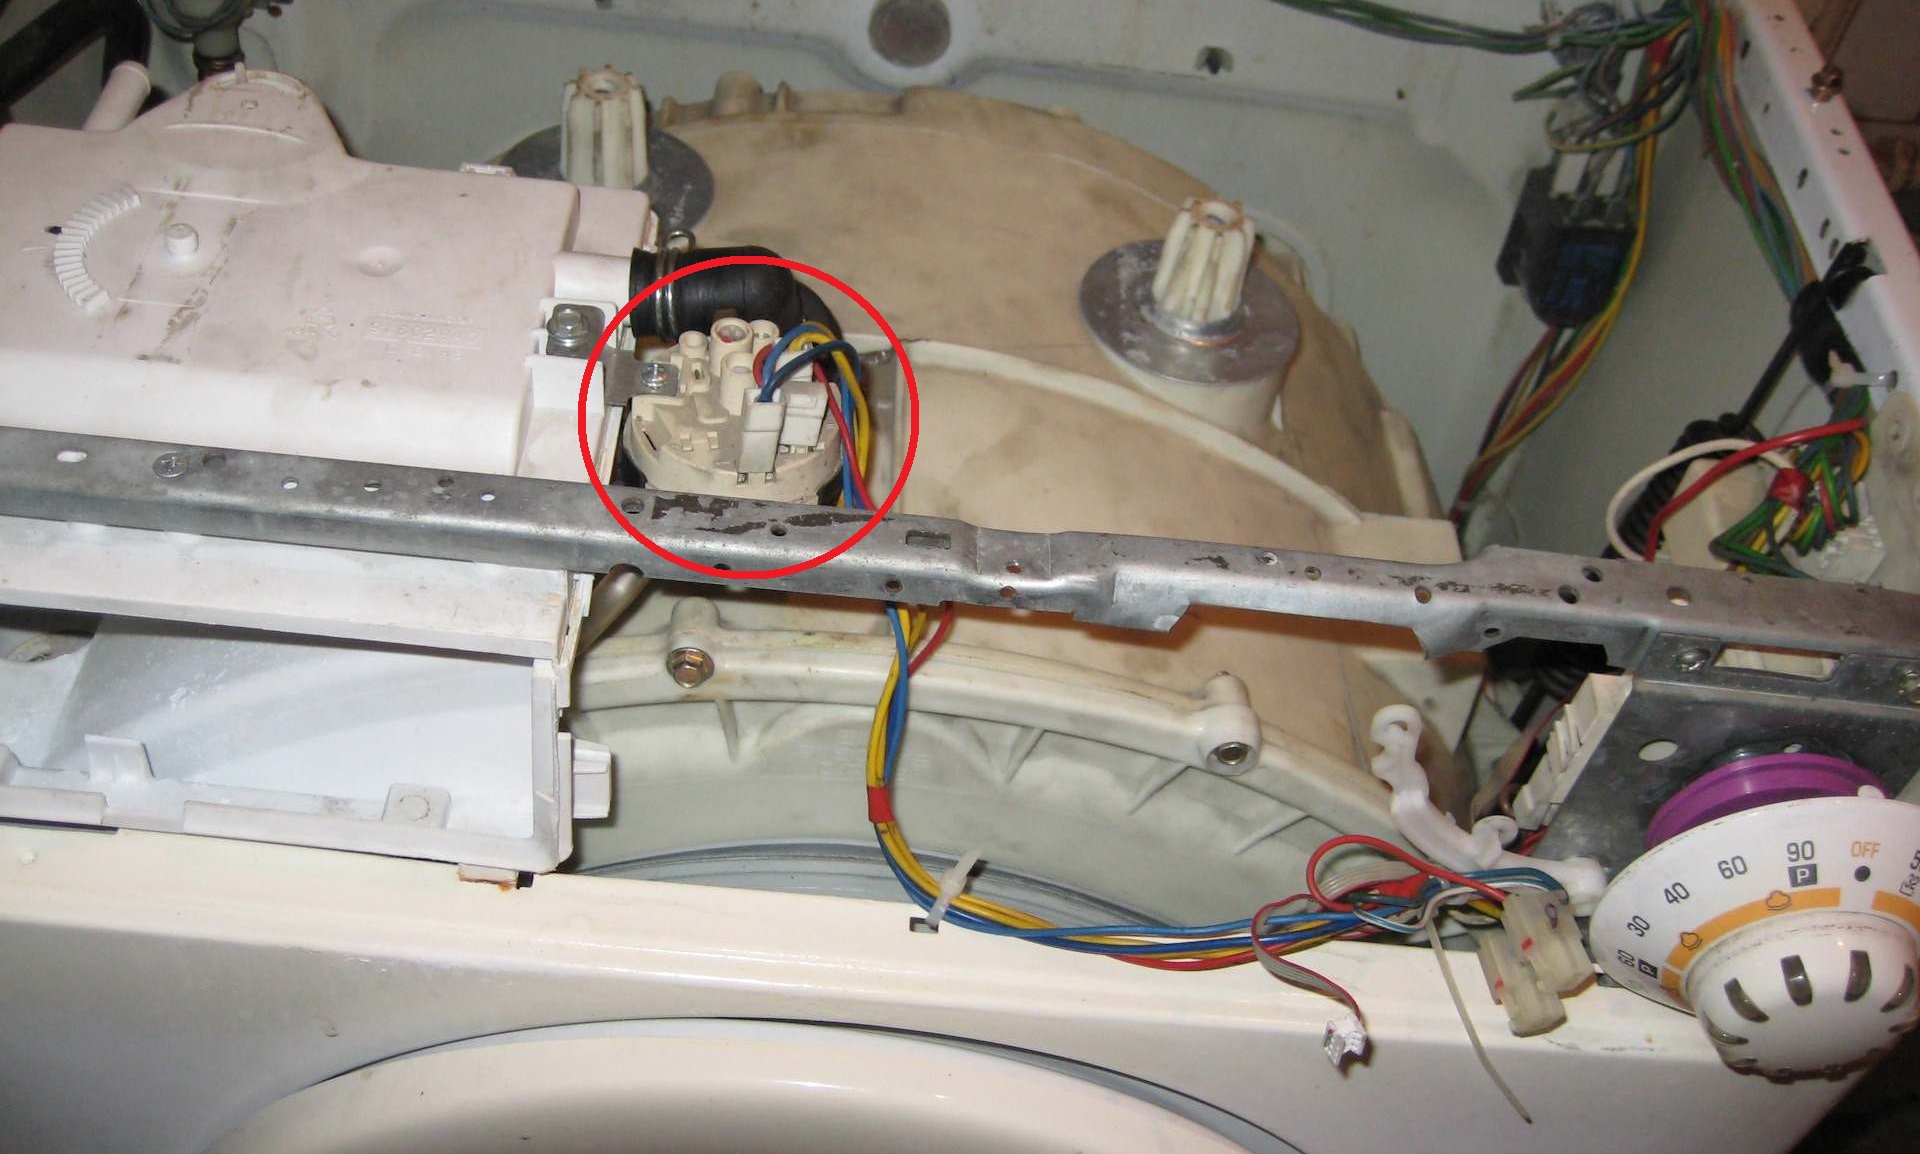
The control module in this type of washing machine is located on top of the unit and is mounted on a printed circuit board (PCB) without a compound. This thermoplastic resin has become a source of controversy among service center specialists, as the potting material ensures the control module's airtightness, while at the same time impeding heat dissipation, which can lead to overheating and failure of the circuit board components. However, this component is widely used by appliance manufacturers such as LG and Samsung.
Candy washing machines do not use compound!
The unit features a metal pulley, belt drive, and a standard brushed motor. The advantage of this drive mechanism design is that its components are not only high-quality but also inexpensive. Furthermore, they are readily available, so if a breakdown occurs, the unit can be easily repaired. Brushed motors have long proven themselves, offering long service life and easy DIY repair. If the problem persists, a new component can be purchased.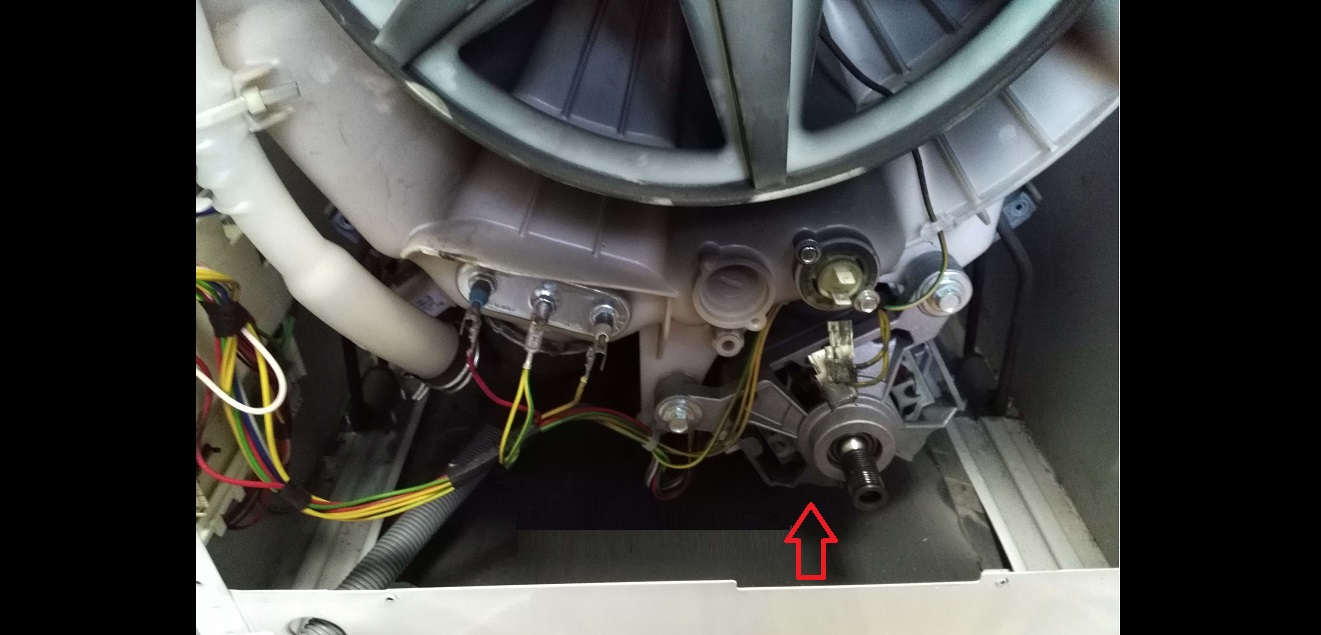
The drain pump is a Chinese-made part. It can easily outlast the washing machine itself if you carefully monitor the contents of the dirty clothes pockets. Never allow keys, paper clips, coins or other objects that may damage the internal components of the appliance to fall into the drum.
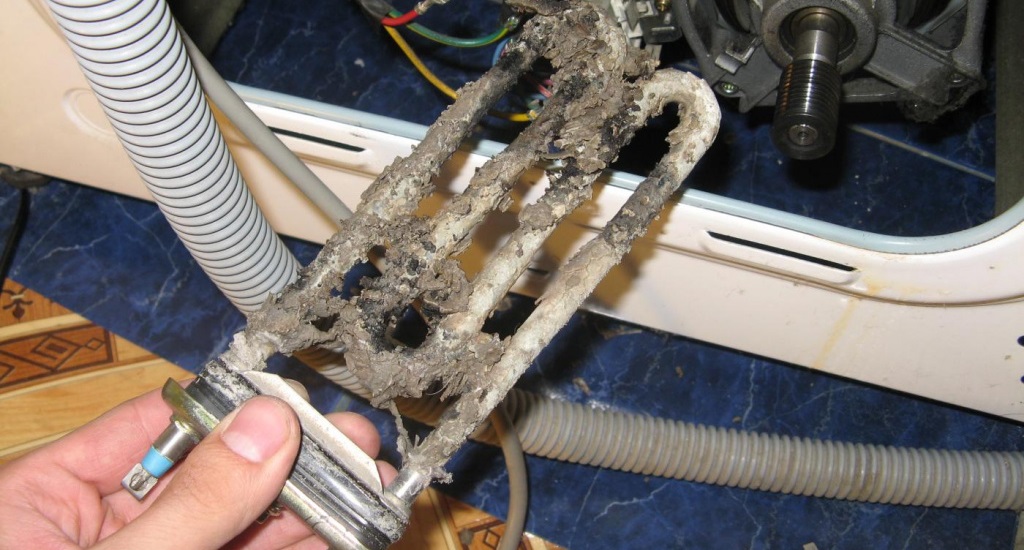
The elements responsible for heating the water are located at the rear of the unit. This allows for easy access, making them easier to repair and replace. Due to the poor quality of tap water, even modern heating elements can often fail, so it's important that they are easily accessible and repairable. Locating the heating element is quite simple: simply open the rear panel of the unit, and the heating element will be right in front of you. To replace it, you'll need:
- clean the drum from water and things, and then disconnect the washing machine from all communications;
- move the unit so that it is easy to access;
- remove the rear panel and drive belt;
- disconnect all connectors connected to the heating element and press the clamps with a screwdriver;
- Unscrew the nut located in the middle and carefully remove the element from the seat.
In addition to all of the above, Candy devices are equipped with a high-quality drain hose seal that protects the hose from strong vibration, as well as a reinforced bar for securing the drain pump. The manufacturer even took a special approach to packaging its products, featuring additional seals to ensure convenient and safe transportation.
We haven't reviewed the electronics of the newest models, as these machines are relatively new to our market. Only time will tell how reliable the Candy washing machine's "brains" are. However, it's already clear that the circuit board tracks are well-soldered and free of defects, so nothing should prevent the appliance from functioning properly for many years to come.
Interesting:


Readers' comments
Headings
Washing machine repair


For buyers


For users


Dishwasher


Add a comment