Disassembling an Ardo washing machine
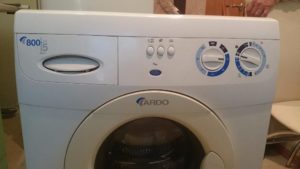 If any component of your washing machine fails, you may need to disassemble it. Modern appliances are manufactured using cutting-edge technology, so disassembling them can be quite challenging for someone with absolutely no technical knowledge. Furthermore, Ardo washing machines have certain design features that can also present challenges. Let's look at how to disassemble a washing machine yourself.
Let's get ready for disassembly
Before you start disassembling your washing machine yourself, you need to be sure to prepare for the work. First of all, you need to disconnect the unit from the power supply. Next, turn off the water supply valve and remove the inlet and drain hoses. Once the washing machine is disconnected, move it to a location convenient for disassembly. To disassemble the washing machine, you'll need the following tools:
- two types of screwdrivers (flat and Phillips);
- small hammer;
- wrenches of different sizes;
- pliers and pliers;
- puller (if bearings need to be removed);
- screwdriver;
- heads for loosening nuts and unscrewing bolts.
With all the above tools in hand, you can begin the work. This is not a quick process, so we recommend stocking up not only on patience but also on time.
Let's get started
Disassembling the Ardo machine begins with removing the top cover. The platform is attached to the body with two screws. After removing them, the cover slides back slightly and lifts up with little effort. The disassembly process then proceeds as follows: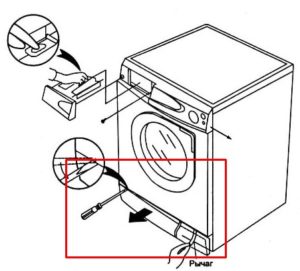
- remove the washing machine counterweight by unscrewing the 3 bolts holding the load;
- remove the detergent drawer;
- remove the machine control panel; to do this, unscrew all the screws holding the part in place, and also unfasten the plastic fasteners located around the perimeter;
- disconnect the terminals and filling pipe from the dispenser, remove the dispenser box from the housing;
- Remove the metal clamp holding the sealing cuff. To do this, pry the ring with a screwdriver, unclip the lock, and pull out the wire;
- tuck the cuff inside the drum.
Now we can move on to disassembling the rear of the unit. The procedure is extremely simple.
- We remove the back wall of the case by unscrewing all the mounting screws.
- We remove the drive belt.
- We disconnect the contacts leading to the heating element and the washing machine's electric motor.
- Unscrew the bolts holding the motor and remove the engine from the unit (you may need to tilt the washing machine to do this).
- We lay the washing machine on its side and begin removing the shock absorbers.
- We detach the pipe from the drain pump and all the wiring leading to the pump.
- We install the machine vertically and remove the tank with the drum from the housing.
By following these steps, you will have almost completely disassembled your Ardo washing machine. If the bearings or seal need to be replaced, you will have to additionally remove the pulley from the drum and disassemble the tank. Only after this will you gain access to the mounting location of the bearings and seal.
As you can see, doing the job yourself is easy. You can replace the main parts and components of your washing machine yourself, without the help of professional repairmen.
Interesting:


1 reader comment
Add a comment
Headings
Washing machine repair


For buyers


For users


Dishwasher


Crack in the drum on the right side at 4 o'clock