Disassembling the drum of an Indesit washing machine
 The washing machine drum contains vital parts that allow the moving parts to rotate smoothly. When these parts wear out, they can cause unusual noises during the spin cycle, as well as play. Unfortunately, failure of these parts is not uncommon, so we'll cover their repair in this article. For example, we'll learn how to disassemble the drum of an Indesit machine and replace the bearings.
Is it worth undertaking repairs?
Bearing wear is one of the most common causes of washing machine malfunction. Because they allow the drum to rotate, they are subject to high loads, causing them to wear out faster than other parts. The bearings are located on the drum lid, so we need to not only access the drum but also completely disassemble it. Essentially, this requires a complete disassembly of the entire washing machine.
However, even disassembling the drum isn't as difficult as disassembling a non-detachable tub. Some manufacturers fold the tub into the drum, making it impossible to disassemble manually. In these cases, repair shops and service centers typically offer a tub replacement. The problem is that its cost can account for up to 70% of the cost of the washing machine, so it's more practical to buy a new "home helper."
If you don't want to spend the money on replacing the drum, let alone replacing the entire washing machine, you can try cutting the drum apart with a metal saw (and then gluing it back together after replacing the parts). You can save a significant amount of money, but doing the repair yourself will require time and skill. If you're still eager to give it a try, we'll tell you everything you need to know below.
Let's gather everything we need
Before you begin, you need to gather (or purchase) the necessary tools. Incidentally, the tools required for repairing Ariston cars are the same, as Indesits and Aristons are similar in internal design. So, you'll need:
- hacksaw/hacksaw for metal;
- marker;
- pliers and pliers;
- open-end wrenches 8-18 mm;
- set of heads with ratchets;
- Phillips and straight head screwdrivers;
- set of socket wrenches;
- hammer;
- multimeter;
- awl.
If you need to repair the electrical components of your washing machine, you can skip the multimeter and use a regular tester.
Before starting disassembly
First, we'll need some space. If the machine is in a combined bathroom, there might be enough space, but if the bathroom is only a few feet wide, disassembling and repairing it will be a huge hassle. The best option is to move the machine to the garage or outside (if you're renovating at your dacha). If that's not possible, move the washing machine to any room with at least 2 square meters of free space. Next, you'll need to complete the following tasks.
- Cover the work area with scrap fabric or newspapers.
- Move the washing machine to the work area, having first disconnected the hoses and wires from it.
- Remove the powder container from the machine – it will only get in the way.
- Drain the remaining water from the tank by unscrewing the drain filter (located at the bottom).
Also, prepare a separate place for small parts and detachable components. You can even put the powder container and filter there.
We get to the tank
Once the preparation is complete, we can begin disassembling. First, remove the cover. To do this, unscrew the bolts on the back panel where the cover is attached, then pull it toward you and up. It's not that difficult.
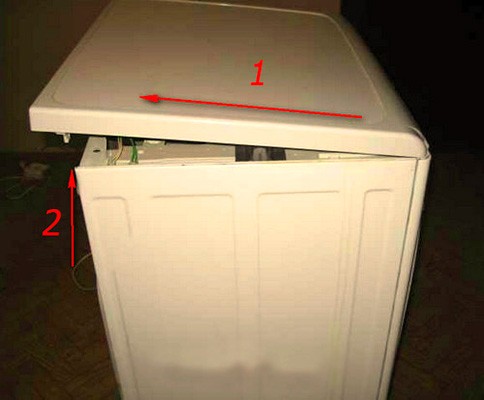
Next, you need to remove the hatch from the rear of the machine. It's held in place by several bolts, which need to be removed with a suitable screwdriver. We remove the front and rear panels, revealing the internal components of the machine. Once these are removed, we can access the fuel tank itself.
Let's start with the drive belt. To remove it, hold the pulley with one hand and the belt with the other. Then, turn the pulley and wait for the belt to slide off.
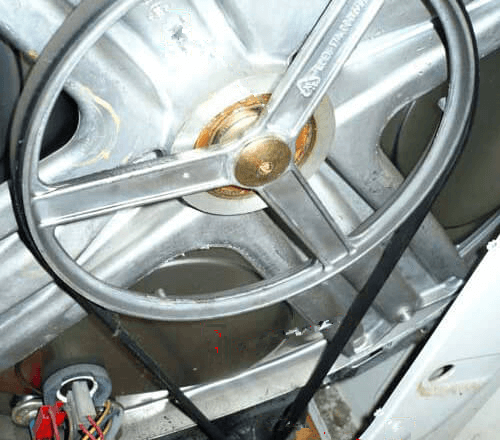
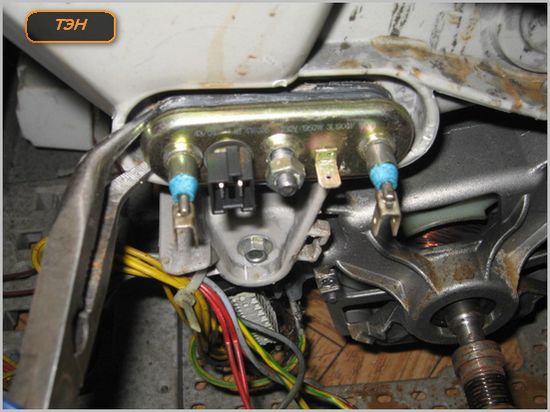
Look at the wall behind the pulley. If there are rust stains or oil spots, the bearings will definitely need to be replaced. So, let's continue disassembling. You need to find the heating element (tubular electric heater); its tail is visible under the tank. Remove all wiring from the heating element, then remove the nut located in the center of the tail between the contacts. Next, remove the heater from its groove.
Technically, it's possible to disassemble the washing machine without removing the heating element. However, this could result in damage to the contacts during disassembly, which would necessitate a complete replacement.
Next, we remove the electric motor. We unplug the connectors and wiring, unscrew the bolts, and then remove the motor and set it aside. Now we move on to the top section. Manufacturers place a counterweight under the top wall to absorb centrifugal force during washing and spinning. It looks like a large stone. In fact, the counterweight is simply a large stone. You can remove it with a socket wrench by removing the bolts that hold it in place. Set the counterweight aside.
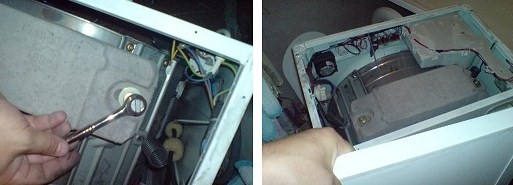
The counterweight is quite heavy, so be careful when removing it.
We're almost to the tank itself. Next, we need to remove the control panel. Follow these steps:
- remove the fasteners located near the powder dispenser;
- go to the front of the washing machine, there is another fastener on the left, remove it as well;
- Now the block is held only by latches, to detach the block from them, pull it upwards (act smoothly and carefully, otherwise there is a risk of breaking the wiring);
- disconnect the wires connecting the control panel and the inlet valve;
- put the part away with the other removed parts, if there is a service hook, it will be even better.
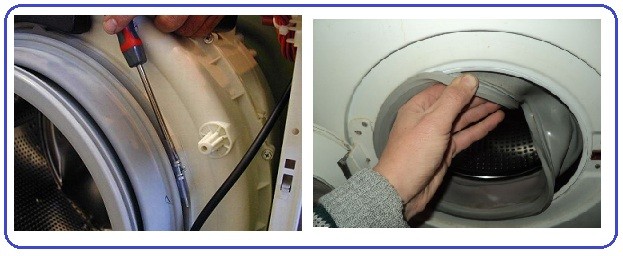
Now you need to access the tank from the front. Start removing the seal. Find the clamp that holds the rubber seal in place. Pry it up with a screwdriver (it's best to use the thinnest one you have). Run the screwdriver along the clamp until you feel it engage. Unscrew the clamp. Remove the clamp. Insert the rubber seal into the drum.
At the back of the machine, next to the inlet hose, there's a fastener that needs to be unscrewed. Next, remove the inlet valve and the detergent receptacle.
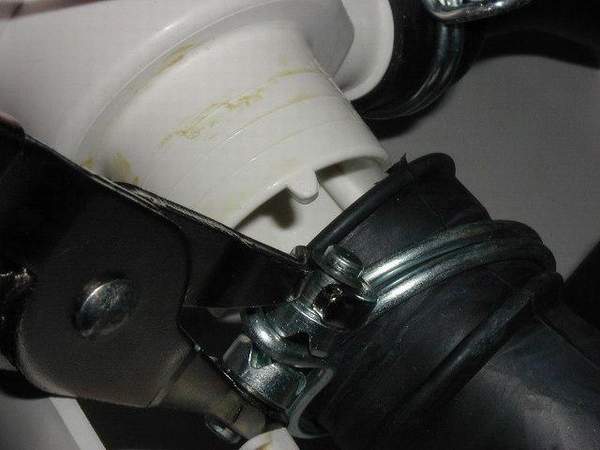
To access the receiver niche, disconnect the pipe by loosening the clamp.
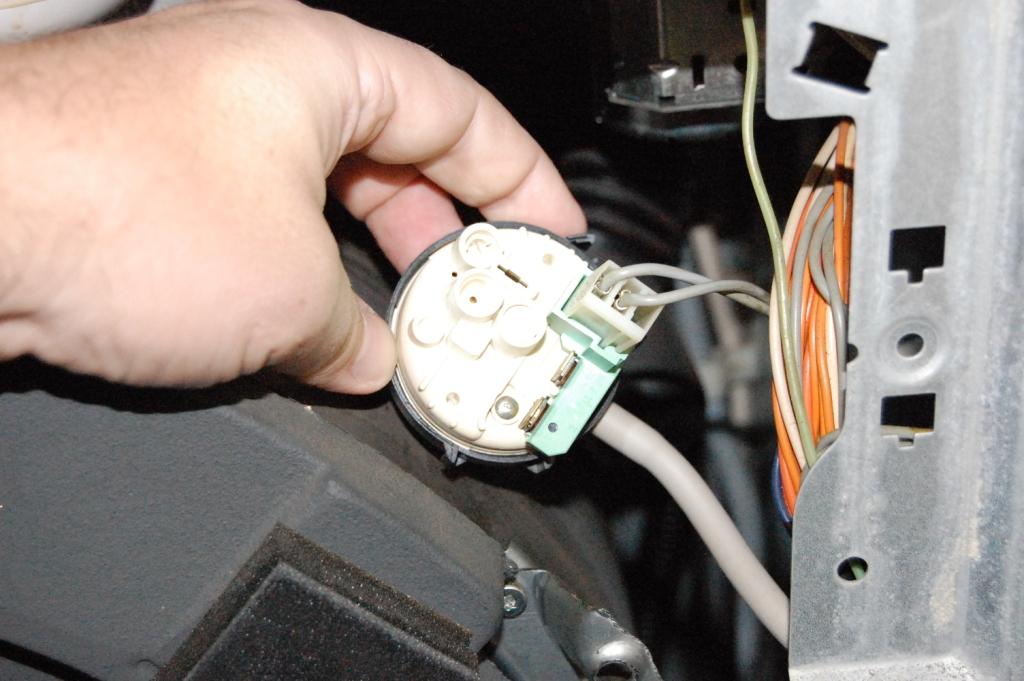
Now let's move on to the pressure switch. Disconnect the wiring from it, and then detach the sensor from its mount. The mount itself is plastic, so be careful when removing the sensor—it's easily damaged.
Before removing the rack and drain hose, lay your "home helper" horizontally. Indesit models typically have no bottom, so you'll see the part right away. Remove the hose clamps. To do this, simply loosen the fastener.
Using a 10mm socket wrench, loosen the fasteners holding the struts in place and then remove them. Now you can turn the car upright again—we've reached the fuel tank and can begin cutting it.
We're sawing off the tank
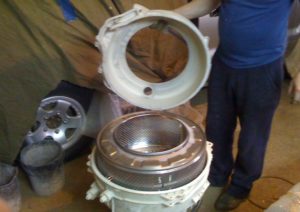
Naturally, you can't cut the tank inside the housing—you'll need to remove it first. You may not have the strength to do this alone, so bring in another pair of hands for the repair. Once the tank is separated from the main housing, carefully cut it in half along the seam, being careful not to damage the drum or other components. To do this, follow these steps: Place the tank upright, with the seam you'll be cutting along facing you. You can mount the tank on a tire for added stability.
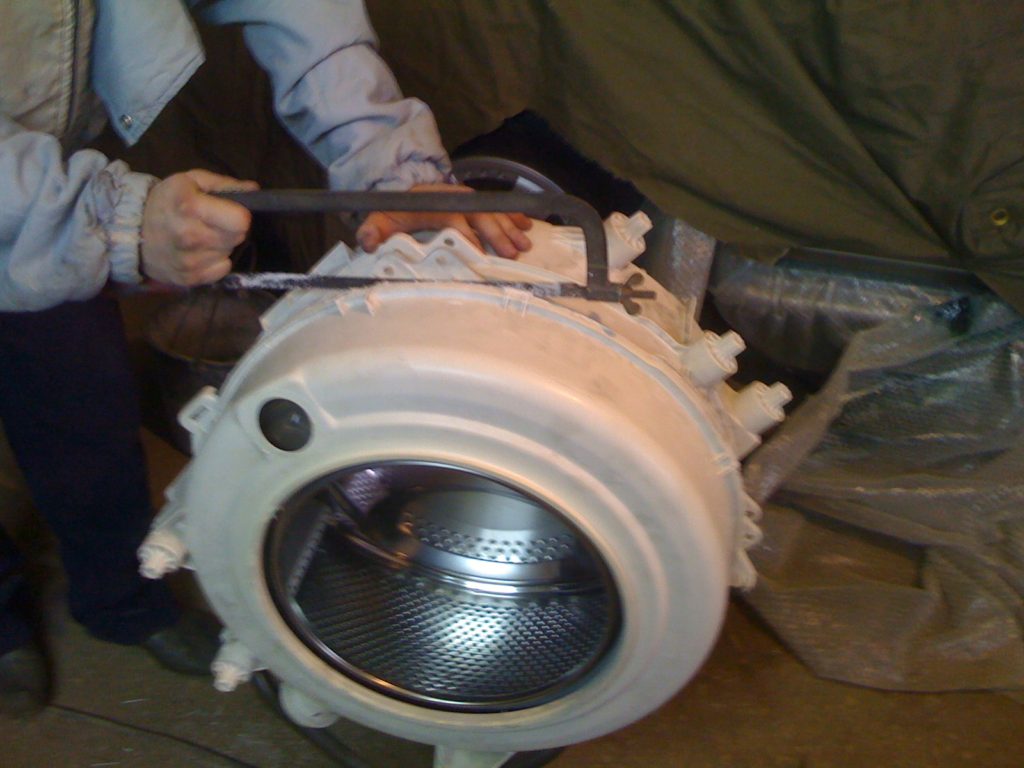
Make sure the tank is soldered and that cutting is truly necessary. If so, cut the tank strictly along the seam. After cutting, remove and set aside the top section of the tank. The rear section remains attached to the drum for now. This is where the bearings are located, so it will also need to be removed.
Getting to the bearings
Unlike the upper part of the tank, the lower part isn't as easy to remove after cutting—it's a complex process. First, unscrew the nut holding the drum pulley. Next, follow these steps:
- remove the pulley;
- screw the bolt into the thread (you don’t need to use the bolt from the machine – the screwed bolt will most likely get damaged);
- Place the rubber part of a mallet on the bolt. If you don't have one, you can use a wooden block or something similar;
- Tap the block or mallet with a hammer until the bottom half moves. If it doesn't, wet the area around the bolt with WD-40 and tap again with a hammer.
Once you've removed this half of the drum, you'll have full access to the drum. The bearings are located on the shaft. You can remove them using an automotive puller. If you don't have one, take the drum to an auto repair shop—they can help you disassemble the washing machine drum.
Once the bearings are removed, you can install new ones and reassemble the washing machine. To reconnect the tub, use sealant and bolts. We won't describe how to reassemble the machine—it's the same as disassembling, but in reverse order.
Interesting:


1 reader comment
Add a comment
Headings
Washing machine repair


For buyers


For users


Dishwasher


Everything is extremely clear and understandable. Thank you for your help.