Disassembling the drum of a Bosch washing machine
 Problems with bearings and seals require almost complete disassembly of a Bosch washing machine. However, the initial easy removal of components near the drum becomes difficult: the unit is heavy, there are numerous fasteners, and the process requires a lot of work. Despite the difficulties, anyone can disassemble a washing machine drum at home. You just need to have the tools ready and follow a specific procedure. We'll explain in more detail what, how, and why.
Let's take everything we need
The beauty of the Bosch machine is that it's easy to repair. Moreover, the manufacturer has made disassembling the housing as easy as possible, making the job quick and easy. All system components are connected with screws, bolts or clamps, so a minimum of tools are required for the work. It's enough to have screwdrivers and pliers ready, but it's better to simplify the task and additionally find:
- round-nose pliers;
- set of wrenches;
- chisel;
- hammer;
- awl;
- stationery knife;
- universal key.
Before disassembling your Bosch washing machine, we strongly recommend that you read the manufacturer's instructions!
Once we've prepared our tools, we begin the paperwork—reading the manufacturer's instructions. Generally, all Bosch models have identical designs, but it's best to rule out any potential errors. Pay special attention to the type of motor installed. An inverter motor is directly connected to the drum, while a commutator motor requires transmission via a belt and pulley. We also look at the location of the heating element, pump, and hoses.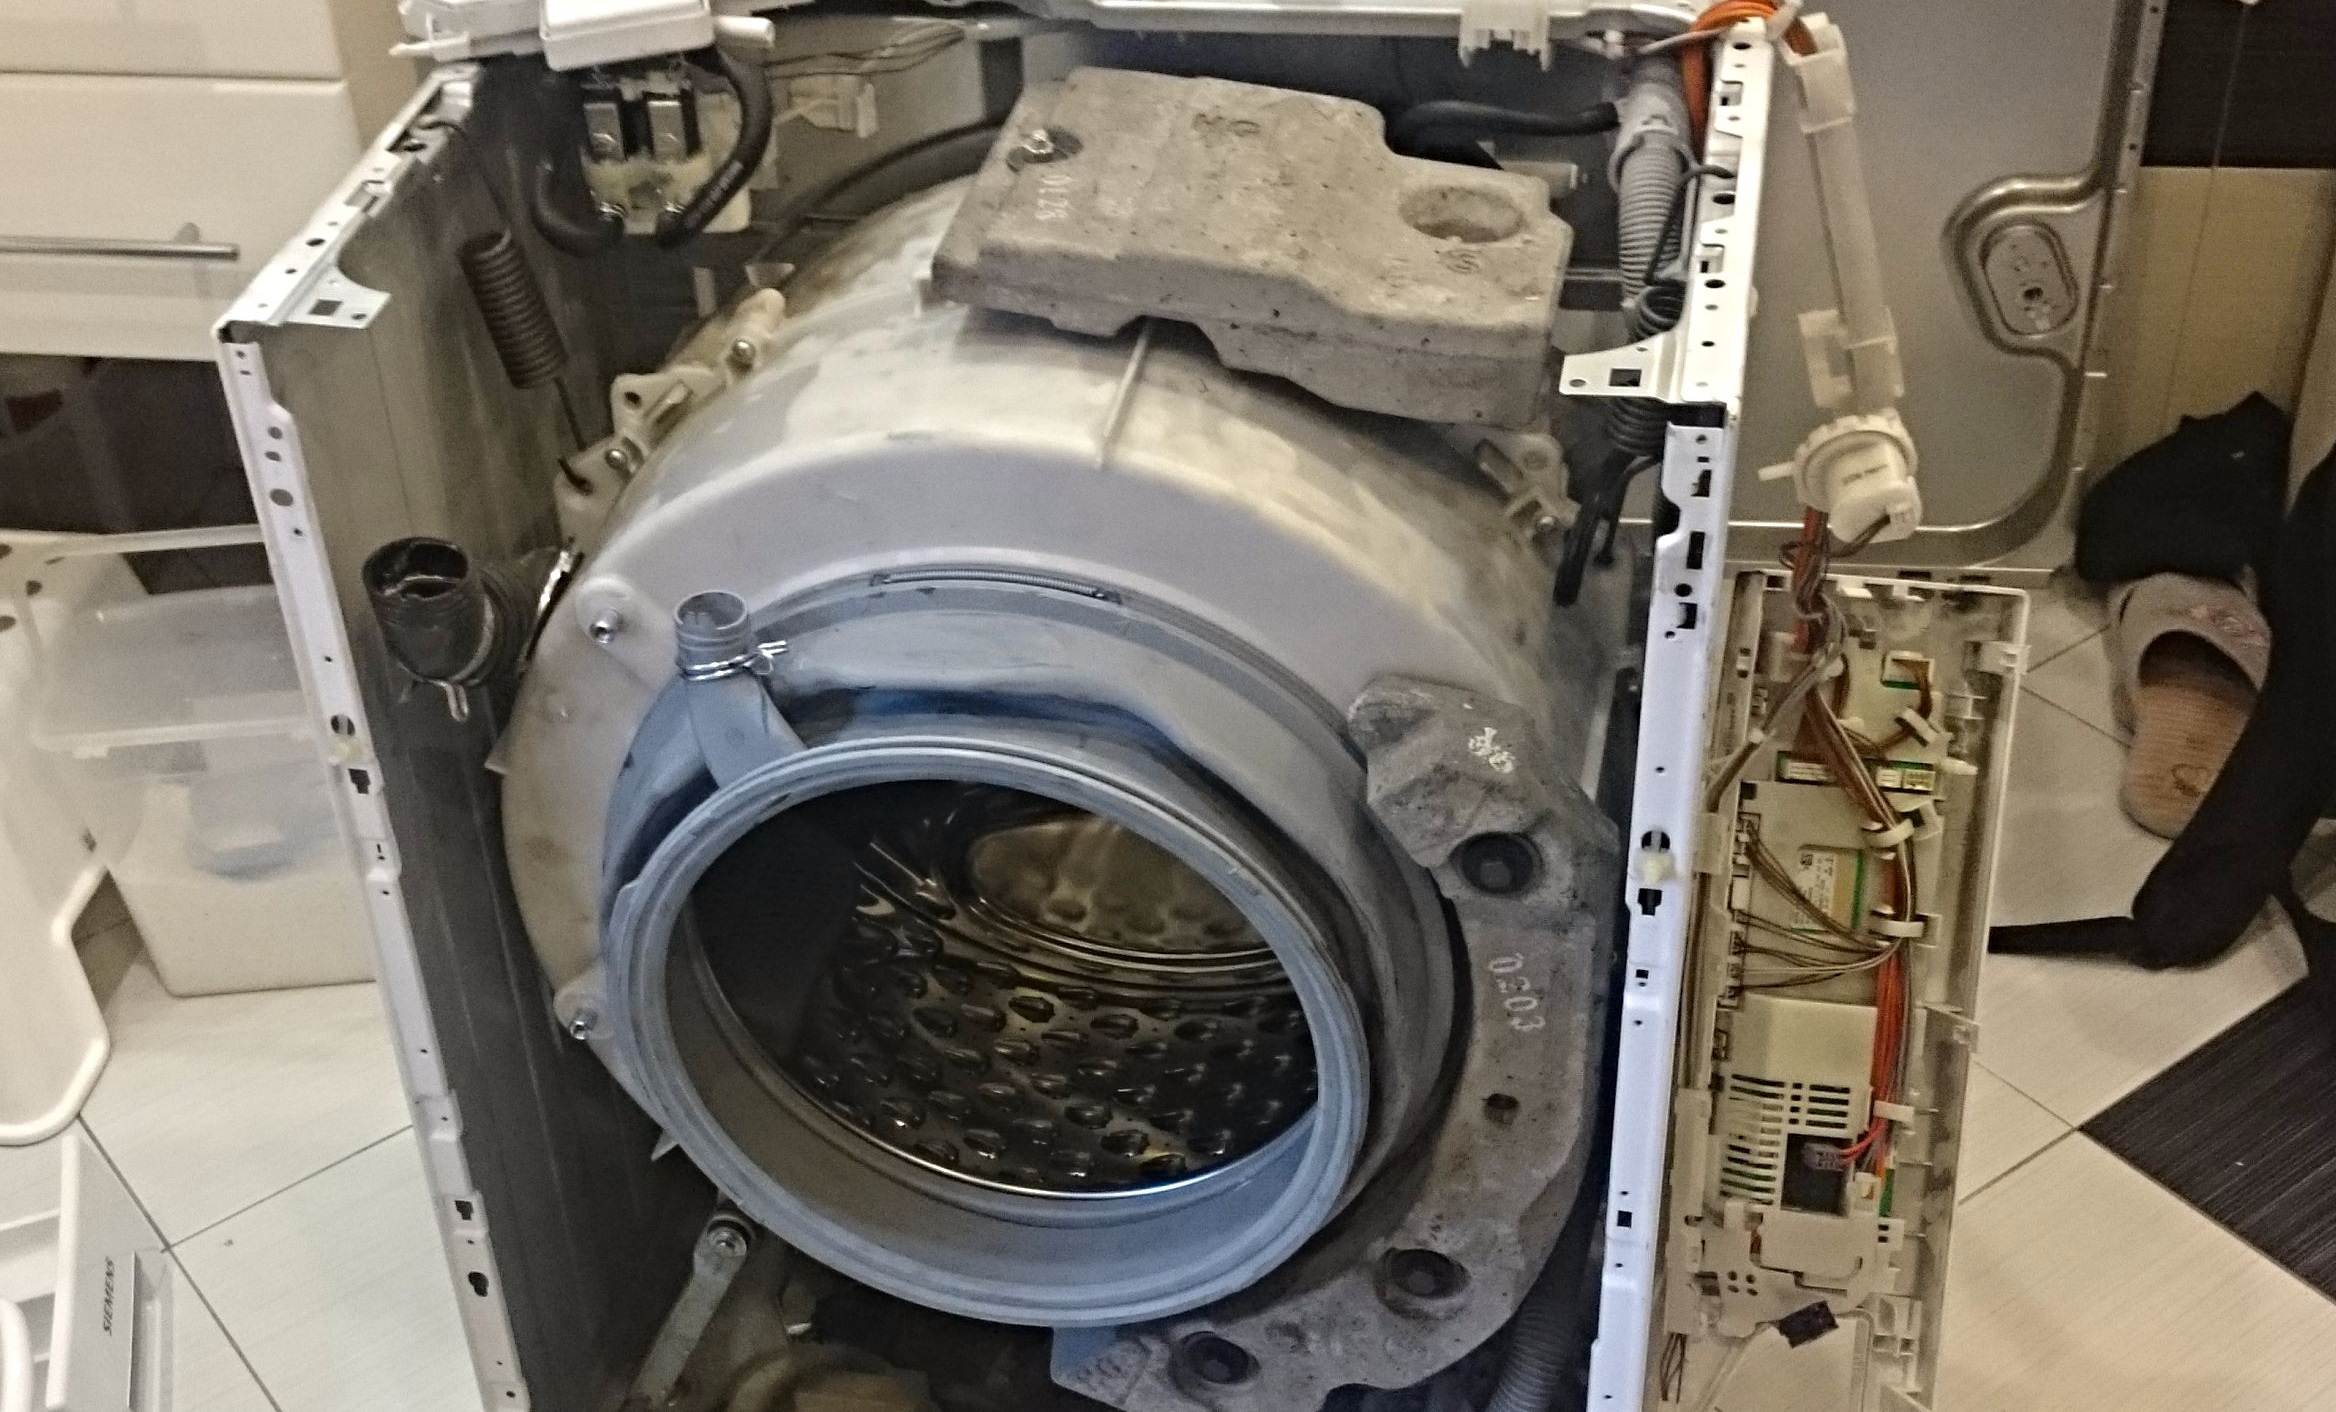
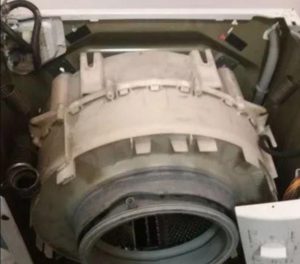
We get to the tank-drum unit
To begin disassembling the drum, you first need to access it. This requires removing almost all the washing machine components from the body. Doing this yourself is easy, as long as you follow the instructions.
- Disconnect the machine from communications.
- Empty the drum (first activate the “Drain” program, then unscrew the debris filter).
- Make sure there are no items in the drum.
- We turn the washing machine so that the back panel is facing us.
- We remove the back and top panels.
- We disconnect the counterweights by unscrewing the holding bolts.
- We detach the instrument panel and the powder applicator.
- We remove the pressure switch from the housing.
- We remove the hatch cuff and the door.
Before performing any manipulation, the Bosch must be de-energized and disconnected from the water supply – otherwise, there is a high risk of electric shock!
Next in line is the tank, which needs to be cleared of all connected wires, elements and fittings. First, we disconnect the hoses from the plastic, then remove the engine, dampers and springs. All that's left to do is grab the drum, lift it up, and remove it from the housing. This isn't easy, so it's best to call someone for help.
We divide the tank into two halves
Place the removed tank on a dry, flat surface and begin disassembling. To make the process easier, it's best to clean the surface of the tank to remove any soap residue. Next, put on gloves and follow these instructions: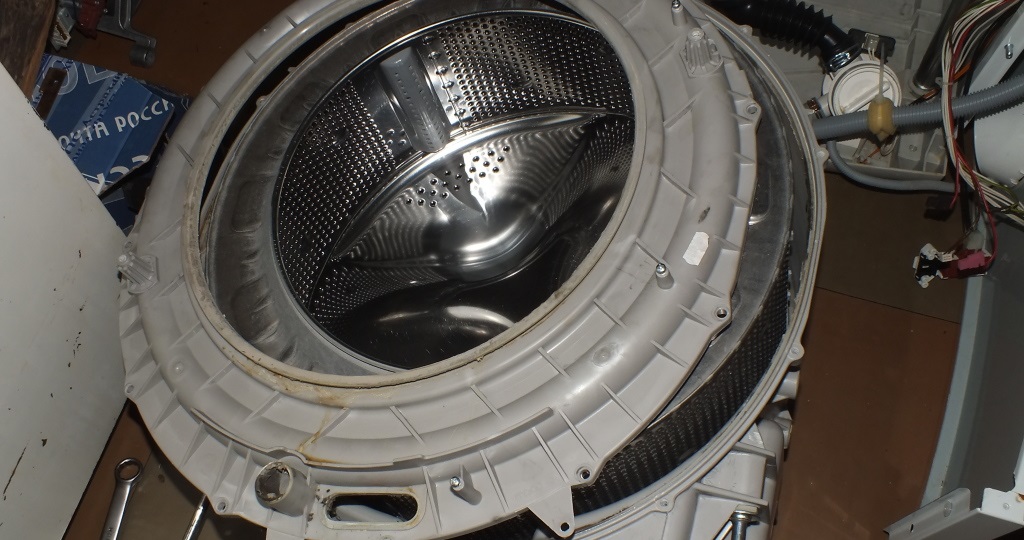
- break the blade of a stationery knife into pieces 1-3 cm long (any thin plates will do);
- Using a thin flat-head screwdriver, pry up the latch on the seam, lift it up and insert a piece of the blade under the plastic;
- repeat the procedure until there is a blade under each latch;
When working with blades, be sure to wear gloves!
- we unscrew all the existing screws;
- insert a screwdriver into the middle of the seam along the entire perimeter and slowly try to split the tank in half;
- remove one half of the tank;
- turn the tank over with the crosspiece facing up;
- We grab the shaft with a universal wrench and unscrew the axle;
If the shaft is stuck, the joints are treated with WD-40 cleaner.
- We disconnect the second half of the tank from the drum.
Service center repairmen often take a more treacherous approach, not placing plates under the latches but simply breaking them. This speeds up disassembly of the tank, but weakens its structure. The problem is that without the plastic fasteners, the tank is held in place solely by screws. This is acceptable, but still unreliable.
Once the drum is free, you can begin repairing the unit. Typically, the final step in disassembling a Bosch washing machine is replacing the bearings. In this case, first remove the seal and unscrew the universal joint, then knock out both "rings" with a chisel and hammer. Next, thoroughly clean the seat with WD-40. Then install the new components, and seal the joint with silicone sealant. Reassemble the drum in the same manner, only in reverse order.
Interesting:


Readers' comments
Headings
Washing machine repair


For buyers


For users


Dishwasher


Add a comment