How to disassemble the water inlet valve in a washing machine?
 Impurities in tap water can clog the inlet valve of a washing machine so much that cleaning it requires complete disassembly. When a novice is faced with the task, they might think it's easier to install a new part than to clean the machine. This isn't true; with the right skills, you can literally "revive" the old part in 15-20 minutes, restoring the machine's functionality.
Is it better to clean the valve or replace it?
Certain internal components of washing machines require periodic cleaning. These include filters, the pump, hoses, and other components. Disassembling the washing machine's valve for cleaning isn't as difficult as it seems.
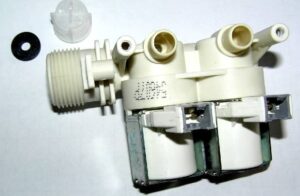
Water is poured into the machine through the inlet valve. Most of the impurities: sand, debris particles, rust, settle on the input filter and membrane. It's therefore not surprising that after a few years of use, your washing machine will begin to fill more and more slowly, indicating a clogged component. Different washing machine models have different valves. Older Samsung and Indesit models have single valves. Modern washing machines typically have dual valves. Triple and quadruple valves are also common.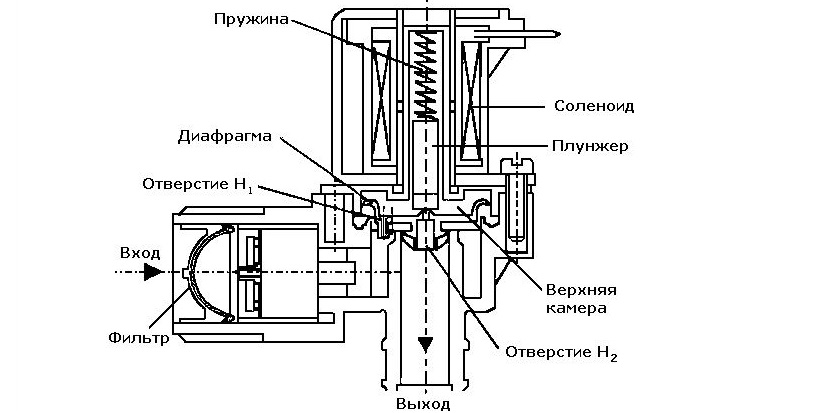
The fill valve consists of a coil, a sensing membrane, a stem, a spring, and a mechanism that actuates the plug. The structure operates using water pressure. To check the component's functionality, you'll need a multimeter. Set the tester to ohmmeter mode and place its probes across the contacts of the element. A working "solenoid" will indicate a resistance of 3-4 kOhm.
If you notice that the solenoid valve coil is deformed, immediately replace the entire element, otherwise the machine's control board may burn out.
What else can happen to the inlet valve? When the machine is stored in a cold room, the water inside the unit sometimes freezes, and the plastic housing of the element cracks. In this situation, a new part is essential.
If only the inlet filter of the water supply valve is clogged, things are even simpler. Simply detach the inlet hose from the housing, use pliers to pull out the clogged strainer, rinse it thoroughly, and reinstall it. If the clog is deeper, you'll have to disassemble the component.
Disassembly progress
It doesn't matter whether your washing machine has a single, double, or triple inlet valve. The disassembly process is the same in all cases. The only difference is that you'll need to remove not just one coil, but, for example, two, and so on. You'll need the following tools:
- slotted screwdriver;
- pliers.
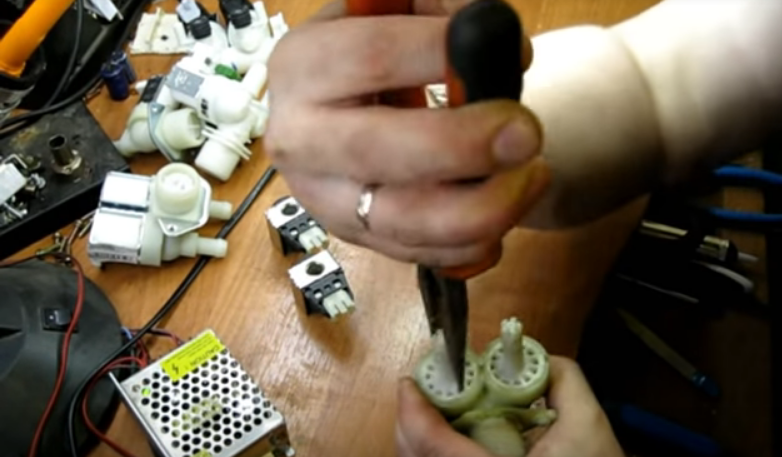
To disassemble the washing machine valve, you need to:
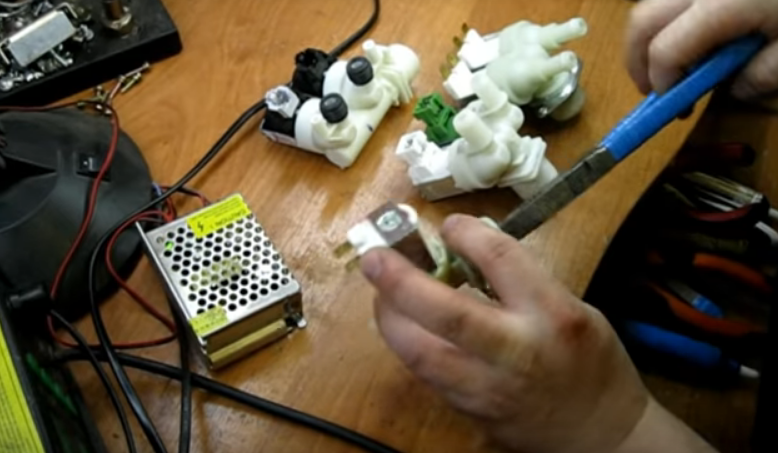
- Using a screwdriver, remove the coil (or coils, if the device is double or triple type), prying it from the bottom up;
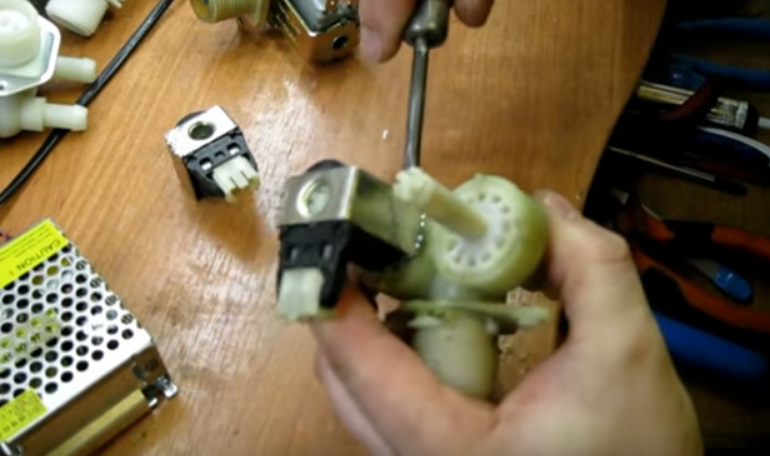
- Use pliers to remove the housing containing the stem and spring. It's important to proceed carefully to avoid damaging the valve components;
If the rods do not budge, spray them with WD-40 spray lubricant, wait 5-10 minutes and try again.
- Detach the membrane from the piston rod body. It should be clean; if there are any traces of rust, be sure to clean them off;
- Remove the stem and metal spring. Sometimes these parts of the water inlet valve also become clogged with debris. Inspect the components and clean them.
This completes the disassembly of the SMA intake valve. Inspect the membrane, it should be intact, without any damage. Once all components have been cleaned, you can reassemble the part and test it for functionality. Reassembly is performed in reverse order. 
The spring is replaced, the membrane is placed, and the stem is screwed in. Then the coil is manually attached. To test the device's operation, simply apply 220 volts to the coils.
Older washing machines have slightly different valves, with the coil secured with screws. Therefore, before removing the valve, you must remove all the mounting bolts. The rest of the disassembly process is the same: remove the valve stem and clean the membrane and spring.
Interesting:


Readers' comments
Headings
Washing machine repair


For buyers


For users


Dishwasher


Add a comment