Disassembling a Hansa dishwasher
 No one in their right mind would climb inside a dishwasher just to look at its internal components, as they could accidentally damage the equipment. It's a completely different story if the machine is already damaged and requires repair. Therefore, if a Hansa dishwasher needs to be disassembled, it's usually only for a thorough diagnosis and to restore its functionality. We'll explain this process in detail so you don't break anything during disassembly and can reassemble everything with ease.
First, let's prepare the machine.
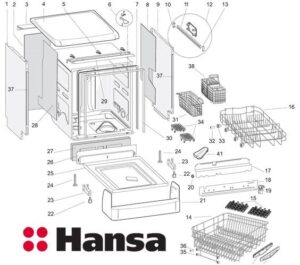
Before disassembling, it's important to understand that the most important components of your "home assistant" are located at the very bottom of the unit. It might seem simpler than simply turning the machine upside down, removing the bottom tray, and thus accessing all the necessary components. However, in reality, things are much more complex, so you definitely shouldn't rush into disassembling.
First, let's move on to preparation, because preliminary preparations are no less important than the actual disassembly of the dishwasher. Without setting up a spacious workspace for yourself in advance, you shouldn't even take on any work. Therefore, first you need to prepare everything you need in your home workshop, and if you don’t have one at home, then we’ll improvise.
- Remove the Hansa dishwasher from the kitchen cabinet niche if you have a built-in appliance, or pull the appliance out of its place if you have a freestanding machine.
- Disconnect the equipment from all utilities by disconnecting the power cord, inlet hose and drain hose.
- Cover the floors of your makeshift workshop with cellophane, rags, or any other soft material that will protect both the floors and the dishwasher itself from damage.
The most convenient place to disassemble household appliances is in the bathroom, since this way there is no danger of a small amount of moisture getting on the floor.
So, in just three steps, you can prepare the unit for further work yourself. All that's left is to gather the tools for disassembly. This can generally be done with almost no additional equipment, but a minimum set is still necessary.
- Minus and Phillips screwdrivers.
- Pliers.
- Awl.
This applies exclusively to disassembling the dishwasher. For subsequent repairs, you may need a whole range of special tools, such as a multimeter, a soldering iron, an adjustable wrench, and many others.
Description of the work process
The tools are ready, the work area is cleared and equipped, and it's time to begin disassembling. Most importantly, don't worry if you don't have the necessary experience or training, as everything can be done strictly according to our detailed instructions.
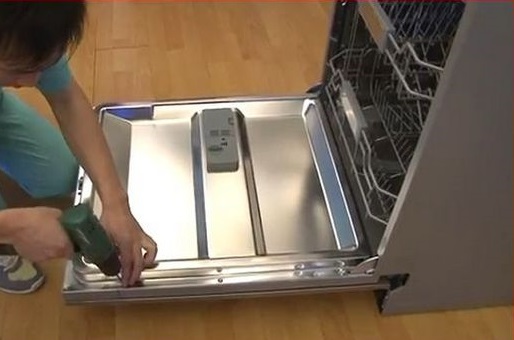
- We use a screwdriver to pry up and remove the bottom panel of the machine.
- We open the door of the washing chamber wide open and then unscrew the fasteners located on the sides.
- Now you need to close the door, firmly grasp its front panel with your fingers, and then, pressing down, remove it.
- Open the door again, this time to remove the screws from its top edge. At this point, you can also remove the dishwasher's control panel electronics.
- The fifth step is to remove the metal plate located directly under the dishwasher door.
- We remove all the soundproofing material located under the door, and then unscrew all the fasteners that connect the base to the body of the "home assistant."
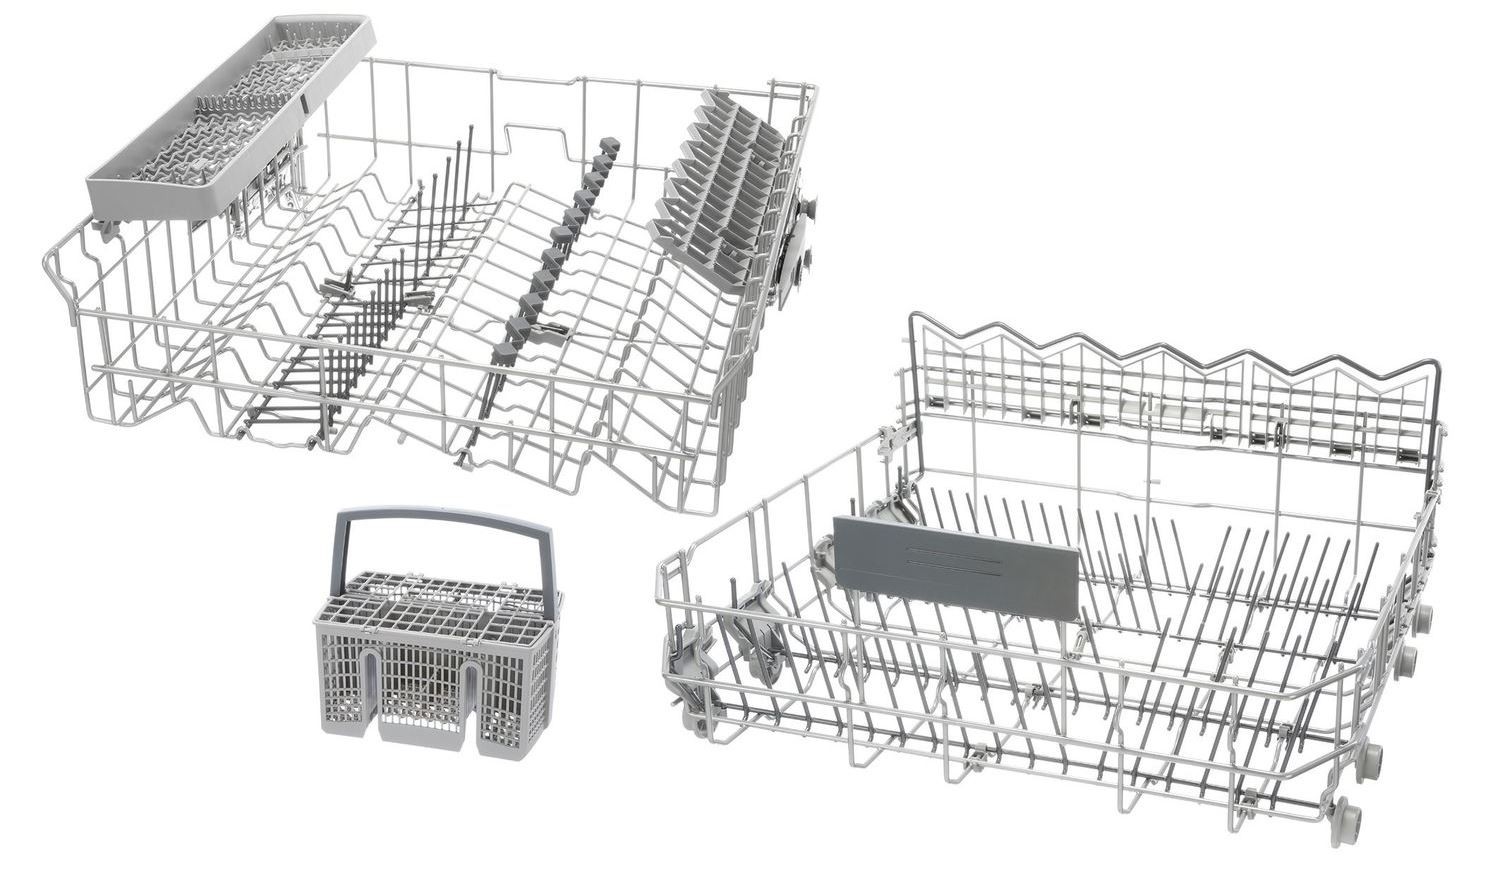
- Carefully remove all dish baskets from the washing chamber.
- We disconnect the sprinkler.
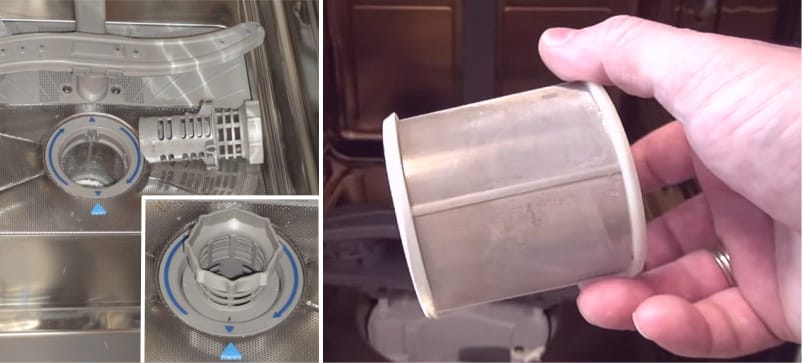
- We find the trash filter at the bottom and, turning it counterclockwise, pull it out.
- We also remove the fine filter, which looks like a flat metal mesh.
- At this point, you'll see four screws securing the lower sprinkler base. These also need to be removed.
During the final stages of disassembly, be prepared for any residual liquid used in the last few cycles to leak from the dishwasher's tray. This isn't a big deal, but it's also why you should cover your work area with plastic wrap or an old blanket beforehand.
- We remove the thermal insulation material along with the side walls of the machine.
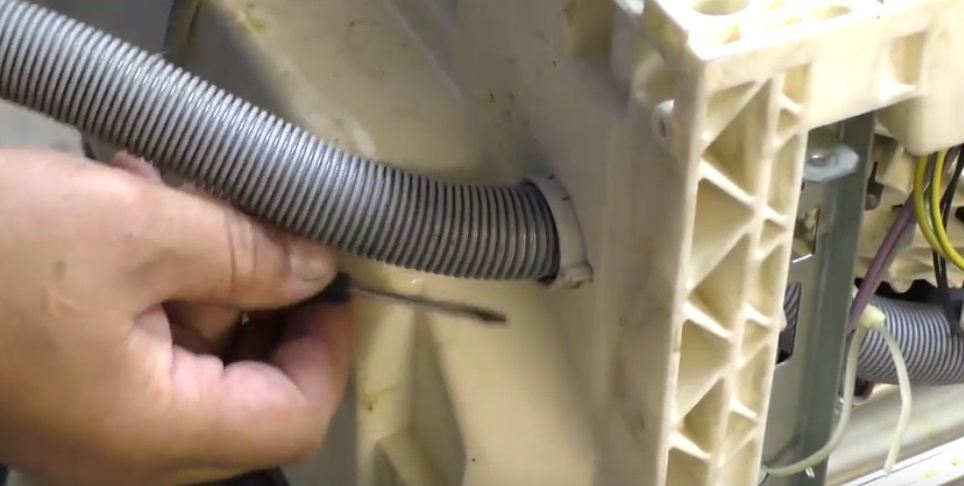
- Only now can the appliance be turned upside down in order to remove the filler pipe located on the side between the tray and the dishwasher body.
- Disconnect the wires in advance to avoid damaging them when you remove the tray.
It's best to take a photo of the wiring first so that you have an example of the correct connection at hand later.
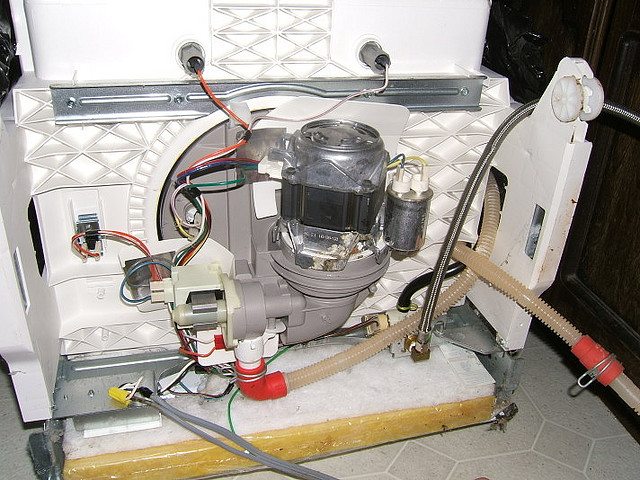
- Don't remove the tray too far, but pay attention to its center – the plastic housing of the circulation pump is located there, with the pump mounted on the side. To remove the pump, first disconnect the power cord and turn the pump counterclockwise to remove it.
- The final step is to remove the circulation pump itself. This requires simply loosening the rubber fasteners on the bottom of the part and then removing the drain hose from the pump body. After this, the circulation pump itself can be disconnected.
Here's how to completely disassemble a Hansa dishwasher with your own hands in 16 steps. As you can see, this is far from the most difficult process, significantly simpler than any repair. However, in a situation where a damaged part cannot be repaired and can only be replaced, you can handle this task perfectly well, because now you can independently access any component of the dishwasher. The main thing is to strictly follow the instructions, and after disassembling, be sure to reassemble the machine in exactly the reverse order, not forgetting the smallest details.
Interesting:


Readers' comments
Headings
Washing machine repair


For buyers


For users


Dishwasher


Add a comment