Disassembling an AEG washing machine
 The need to disassemble an AEG washing machine arises suddenly. The machine begins leaking, knocking, or vibrating heavily, indicating problems with the spider, drum, or bearing assembly. Local repairs are not enough; virtually all system components must be removed. Access to the bearings and drum is possible at home. To ensure complete disassembly without any unpleasant surprises or unnecessary parts, follow the instructions strictly.
How to remove the drum correctly?
Before disassembling your AEG washing machine, you need to prepare. First, take care of the machine: disconnect it from all utilities and move it to a convenient location for disassembly—the center of the room or a workshop. The second step is setting up a work area by covering the floor with plastic sheeting and rags. We immediately collect the tools: screwdrivers, a drill, a hacksaw, a set of wrenches, a hammer and a punch. Once we're prepared, let's begin the repair. Disassembly begins with removing the top cover:
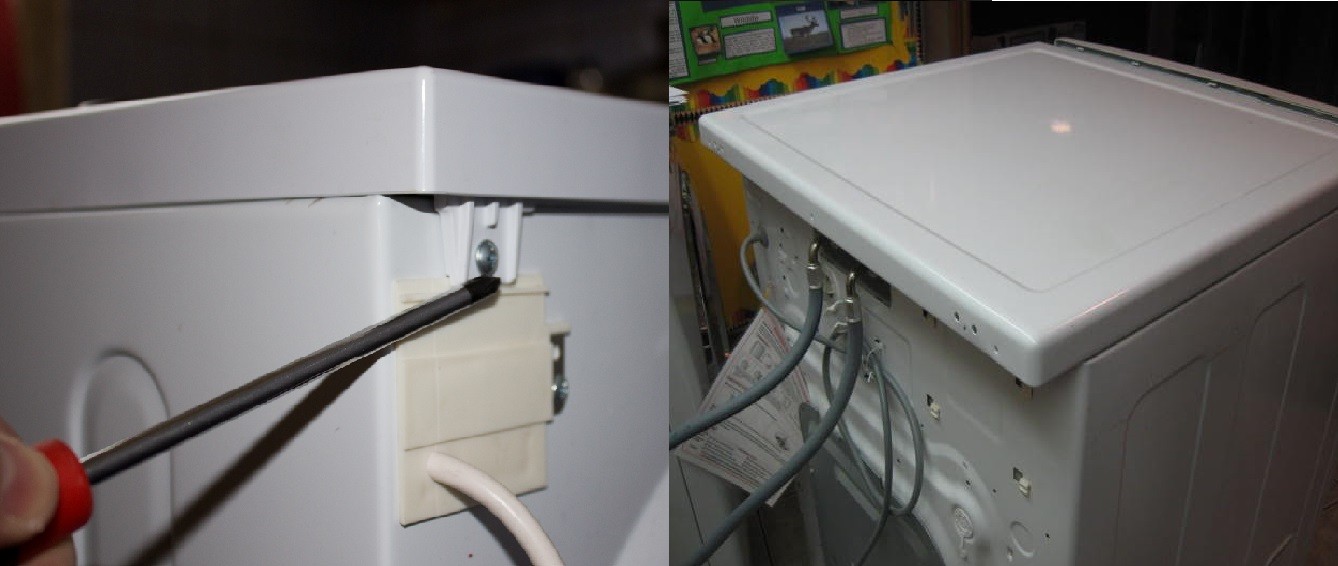
- Using an 8 mm socket head, unscrew the bolts holding the top cover (they are located at the upper corners of the rear panel);
- we move the “top”, pushing it back, and, having removed it from the grooves, we disconnect it from the body;
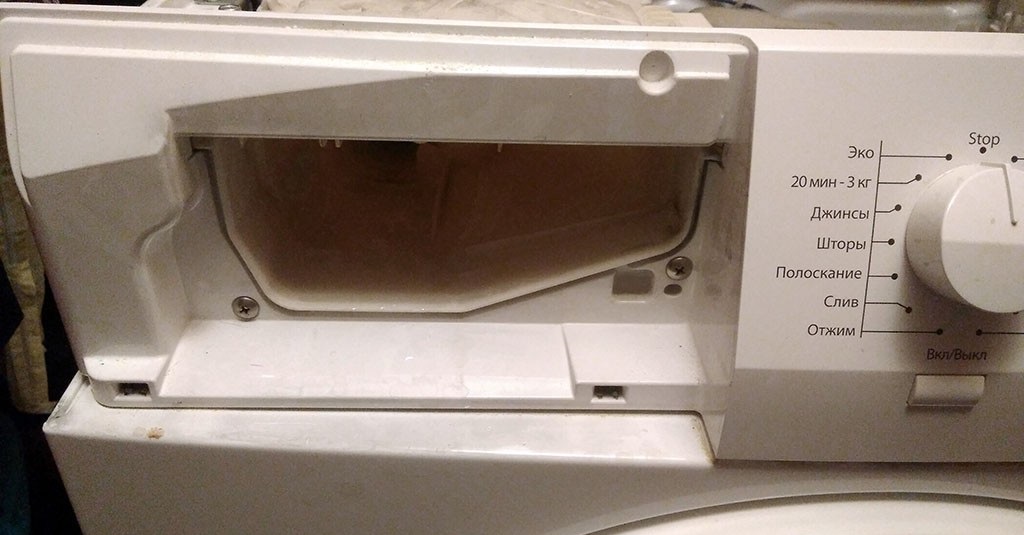
- we take out the powder compartment (you need to press the latch by pressing on the plastic tab in the rinse aid compartment);
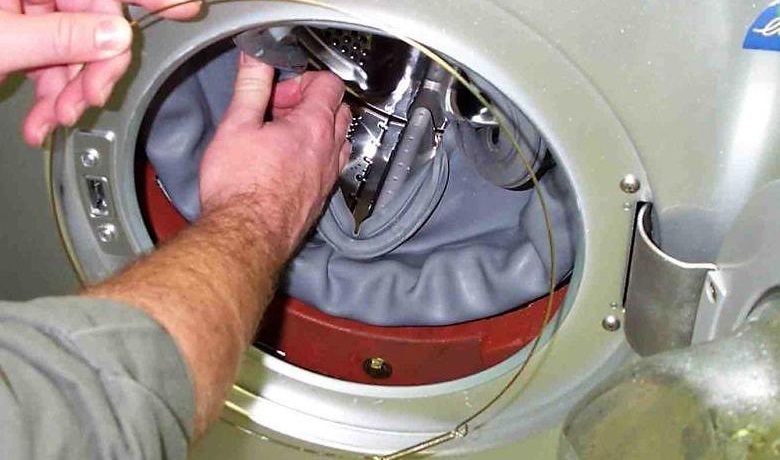
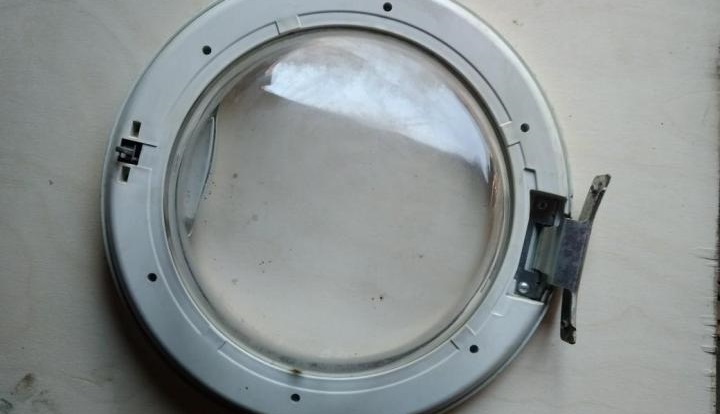
- We use a screwdriver to pry up the outer clamp located on the hatch cuff and, by slightly stretching the spring, pull it off;

- remove the rubber band and insert it into the drum;
- we release the screws that were “hidden” behind the powder receptacle;
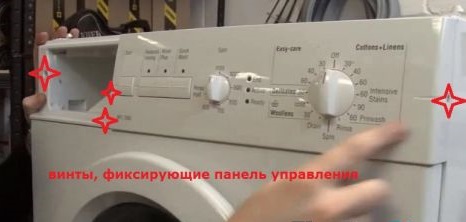
- Using a 7 mm socket head, unscrew the bolts securing the instrument panel from the sides of the front panel;
- Using a screwdriver, disconnect the board from the case;
- remove the technical hatch door and unscrew the bolts holding the front panel;
When disconnecting the drain pipes, be careful - any water remaining in the pipes will flow out!
- we detach the bottom panel from the body, not forgetting to release the drain pipe;
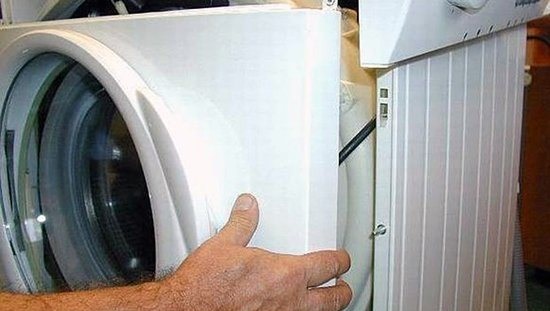
- remove the front panel by first pulling it towards you and then lowering it, thereby releasing the latches;
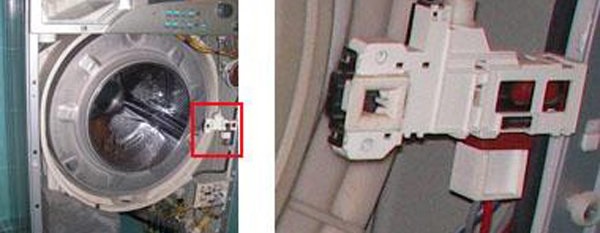
- disconnect the wiring from the UBL;
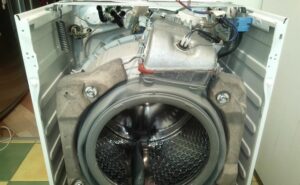
- loosen the fasteners on the central and upper counterweights, remove the blocks;
- disconnect the drain pipe;
- we dismantle the shock absorbers, interference filter and intake valve;
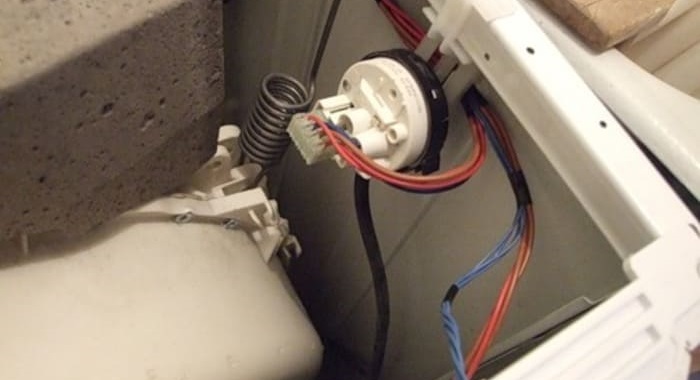
- we detach the pressure switch hose from the drum and remove the level sensor itself;
- we unscrew the bolts holding the metal bar and put it aside;
- We remove the dispenser from the housing by unscrewing the screw, loosening the clamp in the lower left part and unhooking the pipe.
We're done with the front and top. Now we need to turn the machine over and work on the back. Using a 7mm socket, remove the screws around the perimeter of the panel, then remove the "door" to gain free access to the universal joint and drive. Then, be sure to:
- we pull the drive belt off the pulley;
- disconnect the wiring from the heating element;
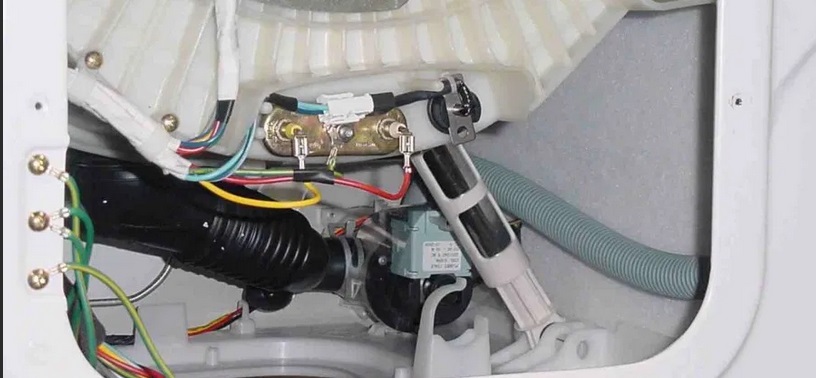
- We remove the wires from the engine connector.
Once the tank is freed from its pipes, wires, and components, it can be completely removed. To remove the container, you'll need to loosen the structure by lifting the tank from its latches and slots. There is no need to worry about the weight of the drum – without counterweights it is quite light.
"Halving" the tank
The complete disassembly of an AEG washing machine doesn't end with removing the drum. The removed drum should be placed on a soft support, such as an old car tire. It's important to position the part with the cross-shaped part facing upwards, allowing for subsequent cutting and removal of the shaft.
AEG washing machines often have one-piece tanks that need to be cut apart manually when disassembling.
Before you begin cutting the tank in half, you must completely remove any remaining parts from the tank. This is done to avoid damaging any components or mechanisms while cutting it yourself. For safety reasons:
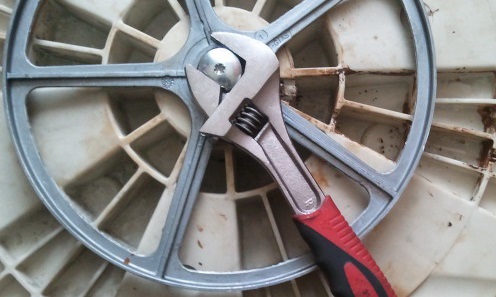
- the pulley wheel is unscrewed using a 17 mm head;
- the electric motor is released from the fasteners using an 8 mm head;
- the heating element is removed using a 10 mm tool;
- the shock absorbers are removed from the grooves;
- the branch pipe is unhooked.
The next step is cutting. For this procedure, you'll need a drill, a drill bit, bolts, screws, a degreaser, a heat-resistant sealant, and a saw with the smallest possible thickness. You'll also need a marker to mark the locations for the new fasteners. Here's what to do next:
- we drill holes in the marked places, aligning the drill;
- turn the tank over so that the drain hole is at the bottom;
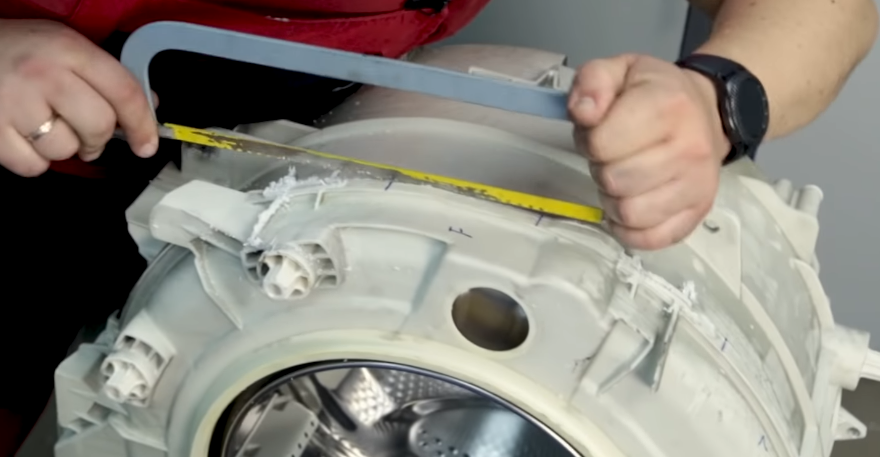
- carefully saw the tank exactly along the center of the seam (it is important to saw to the middle, then return to the starting point and start sawing in the opposite direction);
- we remove the drum.
Now we remove the seal and knock out the bearings with a drift and hammer. Then, thoroughly clean the bearing area with WD-40. That's it – the AEG disassembly is complete.
Interesting:


Readers' comments
Headings
Washing machine repair


For buyers


For users


Dishwasher


Add a comment