Disassembling a Gorenje washing machine
 Unfortunately, any appliance, including Gorenje washing machines, sometimes malfunctions, and some users immediately despair and opt for new units rather than repairing old ones. However, sometimes the problem can be fixed, even on your own. To do this, you need to understand how to disassemble a Gorenje washing machine. This article will explain the tools needed for this procedure, as well as all the possible nuances of the process that are useful to know.
What are we going to use to analyze it?
Typically, any home has a set of tools that will be sufficient for disassembling a Gorenje washing machine yourself. Initially, a screwdriver may be sufficient, but for a complete disassembly, you'll also need:
- pliers;
- a mallet or, if you don’t have one, a small hammer;

- set of wrenches (open-end and socket);
- round-nose pliers;
- drill;
- awl;
- car puller;
- other tools as appropriate.
Important! Just in case, stock up on WD-40 penetrating anti-corrosion lubricant!
If corrosion has accumulated on the fasteners, removing them will be extremely difficult, but the lubricant will help soften the scale and make it easier to disassemble stubborn parts.
You should also prepare a large container, preferably a basin, to drain the dirty water from the hose, and a mobile phone with a camera or a camera. Properly disassembling the washing machine is only half the battle, as you'll have to reassemble everything afterward. A step-by-step photo report will help you reconstruct the events.
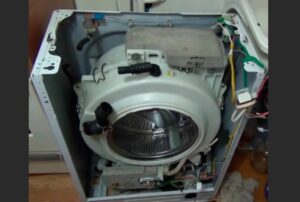
We remove the parts around the tank
First, disconnect the washing machine from all utilities. Unplug it from the wall outlet and turn off the water supply. Disconnect the inlet and drain hoses, placing the latter in a prepared basin to prevent flooding the area around the washing machine.
Now you need to remove the top cover of the CM. It is secured with several screws that can be removed with a Phillips-head screwdriver. The screws are located at the top of the CM's rear panel. Once you have them removed, slide the cover back, pushing it slightly, and then lift it up, after which the cover will come off easily.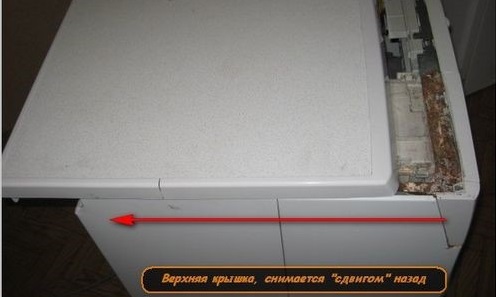
Next, remove the detergent drawer by pressing the plastic button in the center of the tray and sliding it toward you. After this, you can remove the control panel. Be careful, as it is quite fragile. The panel is attached to the body with two screws located on the right and left sides (one directly under the detergent drawer). You definitely won't need the control panel until reassembly, so put it somewhere safe (on a windowsill, on your bed, or hanging it on a hook) to avoid accidentally damaging it during installation.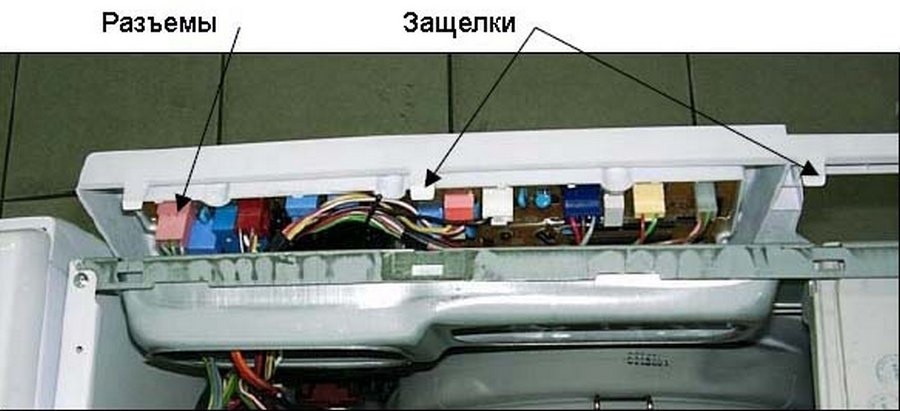
Next, remove the service panel by simultaneously pressing the two clips located on the sides, and then the latch in the middle.
The next element to remove is the front panel of the washing machine. To remove it, you need to loosen the door seal. Take one of the screwdrivers and, bending the edge of the seal, pry up the clamp holding it in place. Working around the perimeter, feel for the spring, loosen it, and the clamp will come off automatically. You won't be able to remove the seal completely because it's held in place by another clip, but you can bend it back and position it inside the drum. If you try to remove the cuff, it may tear, or the internal fastening element may come off, so be extremely careful and attentive. To further remove the front wall, follow a number of steps.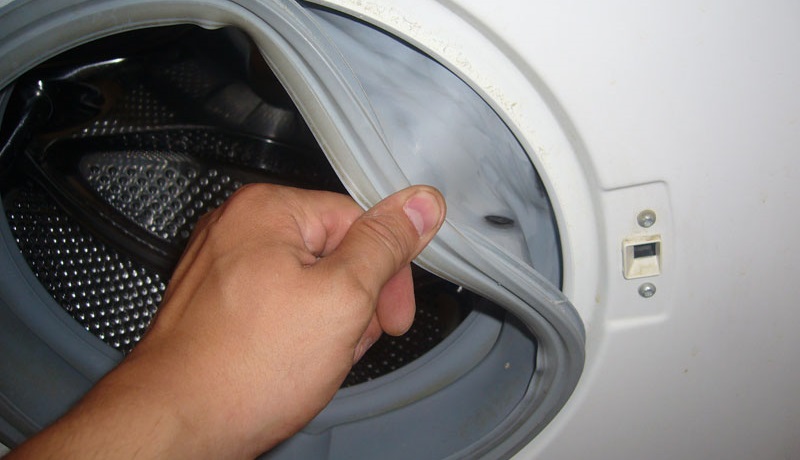
- Remove the front panel.
- Remove the protective cover by unlatching the clips.
- Lift the panel and remove the hooks that hold it in place.

All that's left to remove is the back panel of the washing machine. To do this, use a screwdriver to unscrew the bolts located around the perimeter of the panel. There are quite a few of them. This panel essentially protects the "core" of the washing machine—the drive mechanism—which is why it's so securely mounted.
Removing and disassembling the tank
The washing machine tub and drum are not a lightweight assembly, so if you can get help removing it, it's best to do so. The tub is held in place by springs, which must be removed from the springs. Use a screwdriver to remove the front counterweight and store it away. Now you can lay the tub face down to access the drive mechanism.
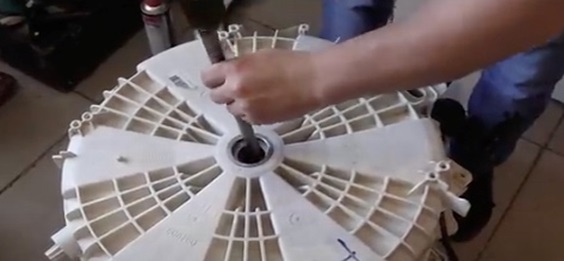
Now you need to remove the pulley, but if the pulley and drum shaft are spinning, they will be difficult to work with, so wedge them with a block. Then, use an Allen key to remove the center bolt holding the pulley in place.
Please note! The bolt is extremely difficult to remove because it is filled with a special compound during production that increases the strength of the fastening.
This is because the drum's shaft system bears the heaviest load during the spin cycle. If the pulley isn't secured with additional material, the entire module will simply fall apart from the numerous vibrations.
Some mechanics recommend heating the bolt with a gas torch before removing it, but this requires extreme caution as it can damage other components. Instead, use a prepared anti-corrosion lubricant. Soak the fastener in it, wait a bit, and then try removing it. The bolt is unscrewed strictly clockwise!
Once the bolt is removed, grab the pulley with both hands and begin pulling it toward you, rocking it from side to side. Once the pulley is removed, disassemble the tub into two halves. Not all tubs are a swivel assembly, but most Gorenje washing machines are. They are connected with long screws. How do you remove the tub?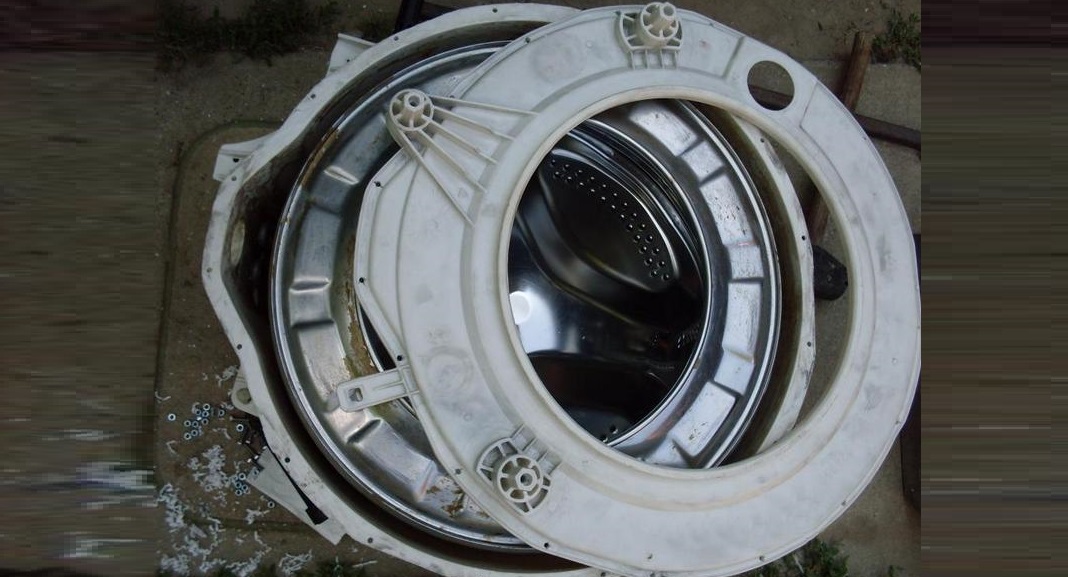
- Take an 8mm screwdriver and remove all the fasteners holding the tank halves in place.
- After this, the tank will split into two parts, but its rear part will still be connected to the drum via shaft bearings.
- Find an old bolt that fits the threads in the hole that connects the pulley to the drum shaft.
- After screwing it in, take a hammer and a block. Place the block under the bolt and lightly tap it with a hammer until the tank comes loose from the bearing.
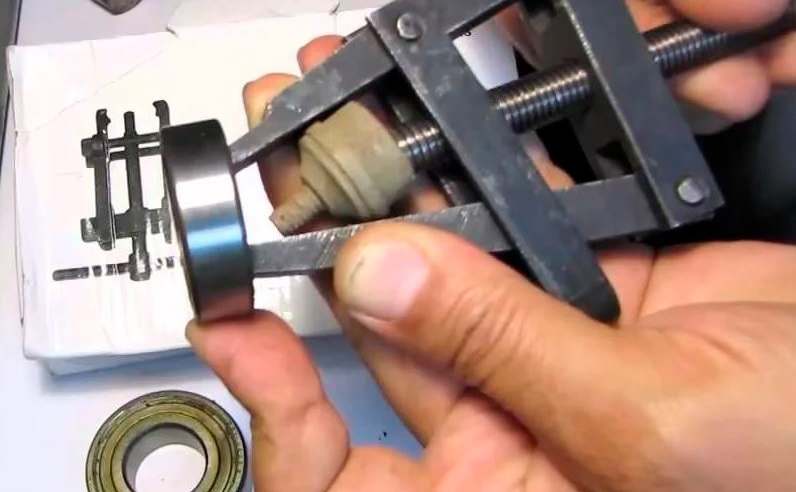
The last thing we need to remove is the drum section with the shaft and spider. The shaft contains a rubber seal and a bearing.
- Take a puller and grab the bearing with it.
- Gradually turn the thread until a certain level of tension is created.
- Apply grease to the bearing.
- After 30 minutes, continue unscrewing the threads until the bearing and seal are removed.
After this step, you can confidently say that you've completely disassembled your Gorenje washing machine yourself. Reassembly is done in reverse order, following the photo instructions you created yourself.
Interesting:


Readers' comments
Headings
Washing machine repair


For buyers


For users


Dishwasher


Add a comment