Disassembling an Electrolux top-loading washing machine
Many washing machine problems can be fixed at home. To diagnose and replace faulty components, you'll need to get inside the machine. How do you properly disassemble an Electrolux top-loading washing machine? What tools might you need? Where do you begin?
Preparatory stage
You need to prepare for the upcoming work. First, you need to turn off the power to the washing machine and disconnect it from the water supply and sewer. Next, ensure easy access to the washing machine by moving it away from the wall and surrounding furniture.
The ideal option is to move the washing machine to a garage or empty room so nothing gets in the way. If that's not possible, a few square meters of free space in a hallway, bathroom, or kitchen will suffice.
The next step is preparing the tools. For disassembly, you'll need:
slotted and Phillips screwdrivers;
open-end wrenches of different sizes;
set of socket heads;
pliers.
You'll also need a small, large container to collect the water and a few dry rags. It's also a good idea to have a smartphone with a camera handy. When disassembling the machine, it is best to take photographs of the contact connection diagrams and wire locations to avoid making mistakes during reassembly.
The scope of the work will depend on the nature of the problem. Replacing the drive belt may require simply removing the side panel of the machine. In more serious cases, the entire machine will need to be disassembled. It's best to first review the machine's manual to understand the location of each component.
Disassembling an Electrolux upright dryer also requires patience and time. It's important to proceed carefully, following the instructions carefully. Incidentally, if your machine is still under warranty, don't attempt to repair it yourself – contact a service center immediately for a free diagnostic.
We dismantle the unit
Although top-loading machines have the same components as front-loading machines, they are disassembled differently. Before tinkering with your washing machine, consult the user manual. The instructions include a diagram showing the layout of the washing machine's components, which will help you understand the location of the washing machine's main components.
Before disassembling, be sure to disconnect the washing machine from the power supply.
Before starting work, unplug the washing machine's power cord from the outlet to avoid electric shock. Then, close the shut-off valve before the washing machine's inlet hose and disconnect the machine from the water supply and sewer system. Follow these steps:
Move the machine to a free space so that you can access all sides of its body;
prepare the necessary tools;
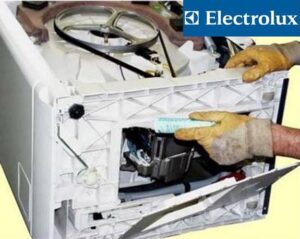
Remove the instrument panel. On some Electrolux models, you'll first need to unscrew the bolts around the perimeter; on others, simply pry the instrument panel up and bend the clips. The disconnected part can either be removed completely, disconnecting the wiring, or hung on the side of the washing machine.
Find the fasteners holding the case cover, unscrew them and remove the panel;
loosen the clamps on the inlet valve pipe, disconnect the hoses, unhook the wires connected to it and push out the solenoid valve;
remove the side walls of the case, having dealt with their fasteners;
remove the front wall fasteners, opening access to the main internal elements of the vertical rack;
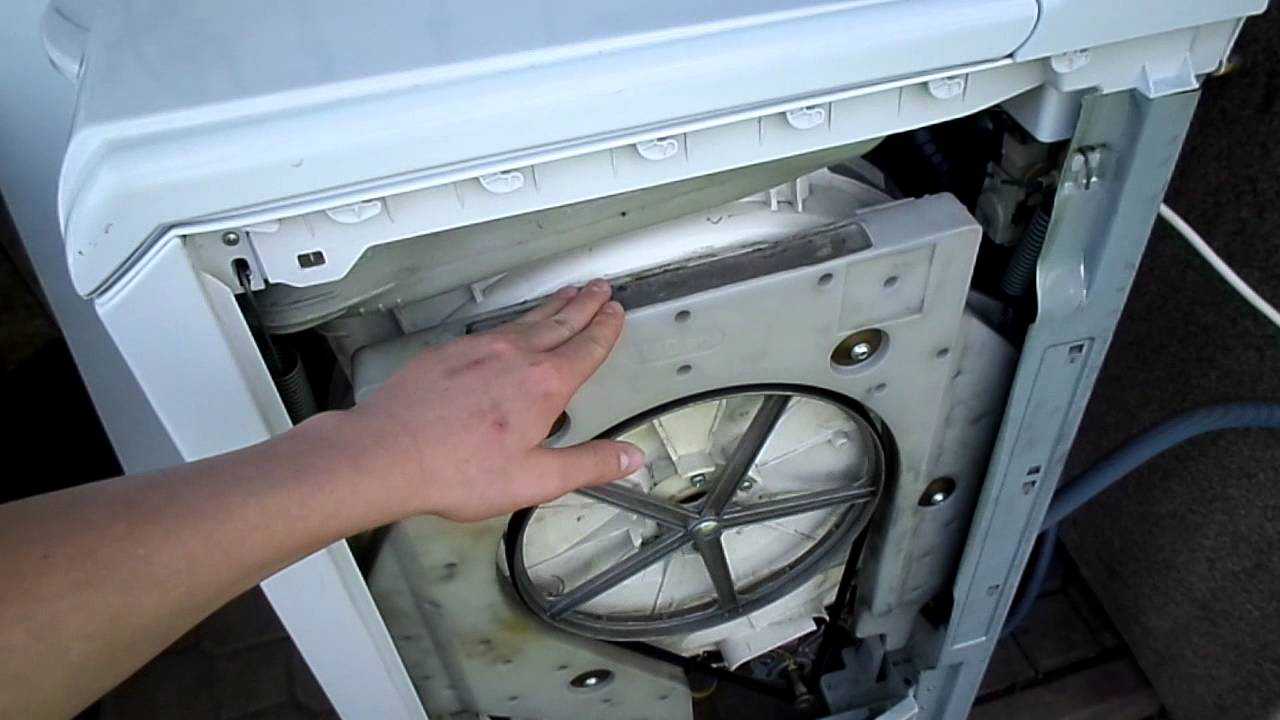
disconnect the wiring from the tank (for Electrolux vertical heaters, there is no need to remove the tank from the housing even when replacing bearings - the rings can be installed directly in place);
remove the drive belt from the pulley;
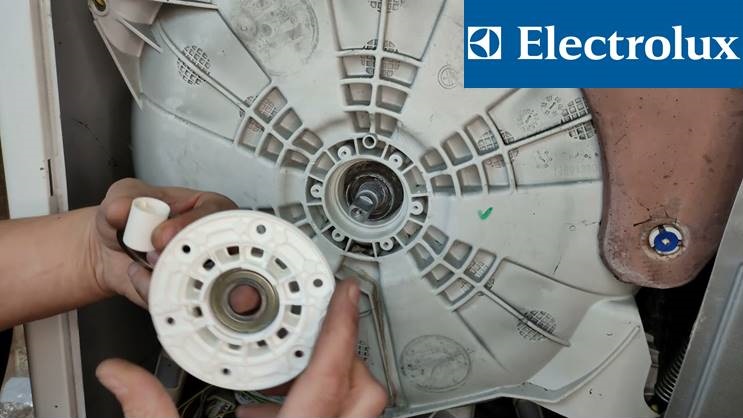
disconnect the contacts from the heating element, unscrew the central nut, press the bolt inward, and pull the heater itself out of the socket;
reset the contacts from the motor, remove the bolts securing it and pull the motor out of the housing;
Loosen the clamps on the pipes connected to the pump, then remove the drain pump by turning it counterclockwise.
The lid of a vertical washing machine requires additional disassembly. Place the panel on a flat surface. First, remove the powder compartment by pulling the drawer toward you until it clears its slot.
Next, you'll need to press the top latch, remove the button, and unscrew the two screws hidden behind it. Then, flip the door over, locate the handle, and unfasten the holders, thereby "separating" the element.
A top-loading washing machine is easier to disassemble than a front-loading one. You don't have to remove the drum from its shock absorbers. Now you can begin diagnosing and repairing the machine. Don't forget to clean the washing machine components to remove dirt and limescale.
Common problems
All washing machines have their own weak points, which most often cause breakdowns. What problems are common with Electrolux vertical washers? What malfunctions do users encounter most often?
Destruction of drum bearings.
Failure of the main control module.
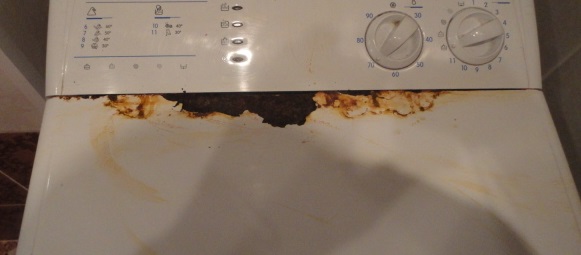
Corrosion damage to the body. Low-quality metal is eaten away by rust over time, leaving the machine looking unsightly.
Scrolling the tank with the flaps down.
Damage to the heating element.
Many Electrolux washing machine breakdowns are easier to prevent than to fix.
For example, this applies to the control module. Knowing that Electrolux electronics are weak, you can install a voltage stabilizer. This device will protect the machine from power surges and prevent damage to the control module.
Heating elements in washing machines burn out primarily due to scale buildup on the surface. Therefore, washing machine users should monitor the hardness of their tap water and soften it if necessary. It's also essential to periodically clean the washing machine of dirt and limescale.
Not all problems require complete disassembly of the washing machine. Sometimes, simply removing one of the side panels or the control panel is sufficient. Therefore, perform your washing machine diagnostics step by step, checking the most difficult-to-reach parts last.
 Many washing machine problems can be fixed at home. To diagnose and replace faulty components, you'll need to get inside the machine. How do you properly disassemble an Electrolux top-loading washing machine? What tools might you need? Where do you begin?


Add a comment