Bosch washing machine drum repair
 If your washing machine's drum starts squeaking or clanking loudly during operation, it's most likely due to faulty bearings. However, don't rush into buying new parts, as repairing a Bosch washing machine's drum always begins with disassembly, which will reveal exactly what's wrong. If, after disassembly, you discover that the problem lies not with a damaged universal joint, but with the bearings, that can be easily fixed.
Making room to remove the tank
Replacing the bearings themselves isn't difficult, but the preparatory steps are a whole other story. This is because you first need to remove any elements from the washer's body that could interfere with the drum-tank assembly, which is a very time-consuming process. Before disassembling, be sure to prepare a working screwdriver, as well as a Phillips and flat-head screwdriver - three tools that will be sufficient for disassemblingPlease follow our instructions carefully to ensure the entire procedure goes smoothly.
- Disconnect the Bosch washing machine from all communications.
- Unscrew the 2 screws that secure the top panel of the washing machine at the back, and then remove the cover itself.
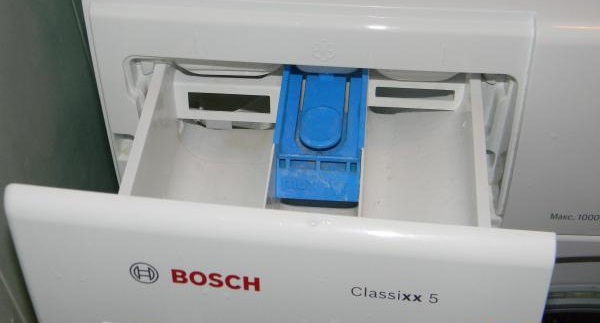
- Remove the powder container from the appliance.
- Remove the control panel after unscrewing the screws.

- Remove the decorative panel installed on the front part of the case from below.
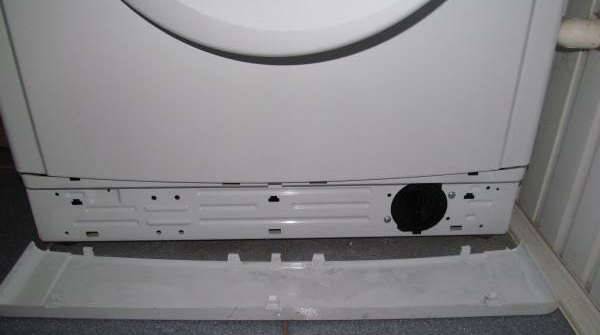
- Remove 3 more screws located directly behind the trim panel.
- Loosen and remove the wire clamp holding the cuff, and tuck the cuff itself into the drum.
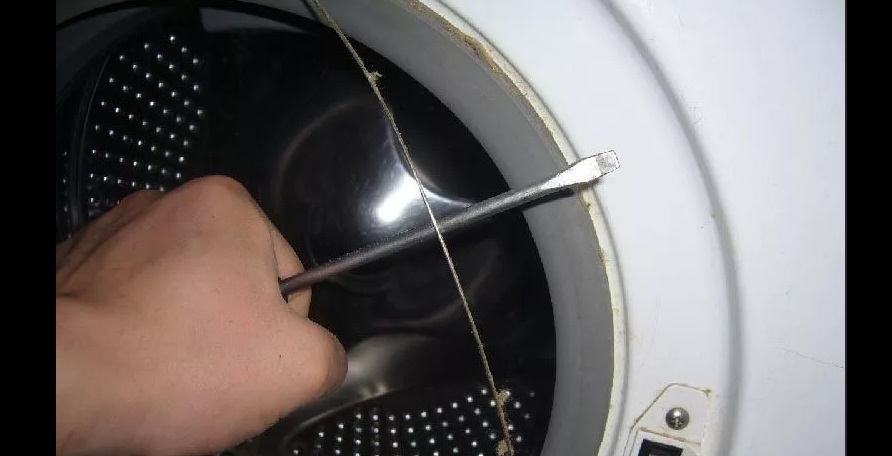
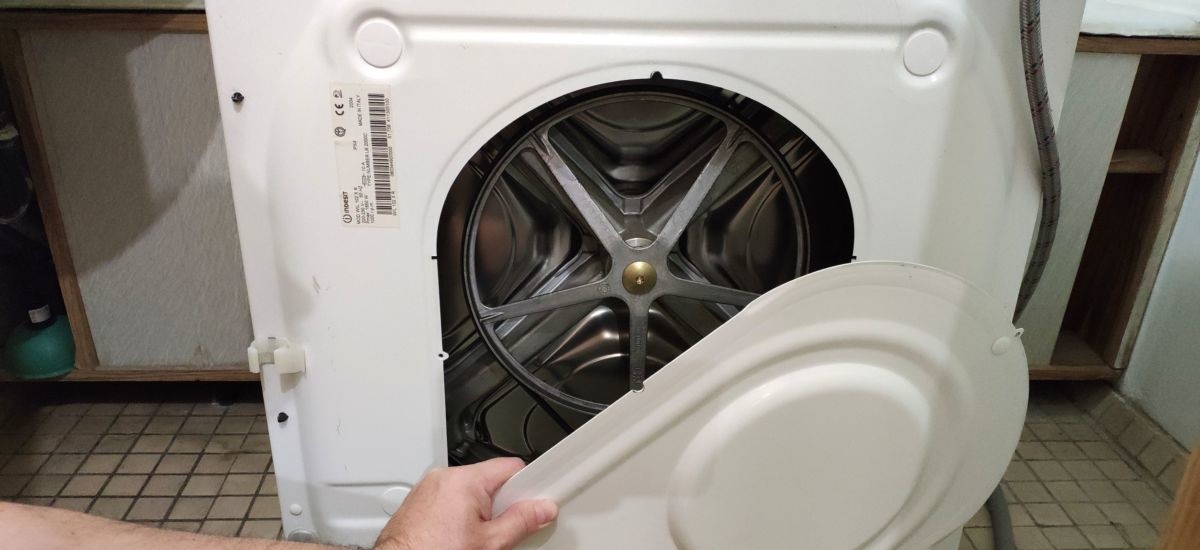
- Remove the front wall, behind which you will find the UBL, not disconnected from the main part of the washing machine.
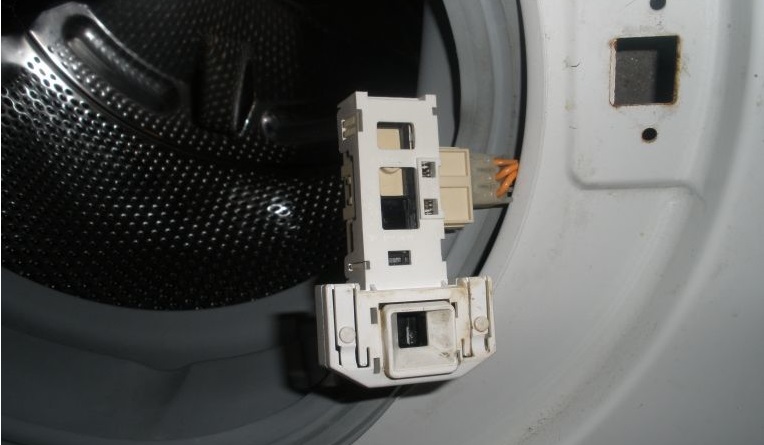
- Carefully remove the lock chip or simply remove the door lock without damaging the wires or contacts.
- Remove the filler neck.
- Disconnect the wire that goes to the dispenser and then remove the tray from the housing.
It's a good idea to take photos of all the wiring that needs to be disconnected during disassembly. This way, you'll have a clear example of how the wires are connected, which will be helpful during reassembly.
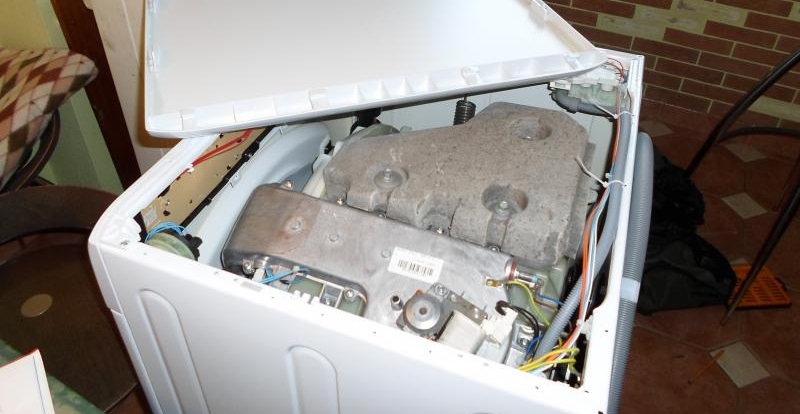
- Remove the top metal trim panel that you accessed after removing the machine's control panel.
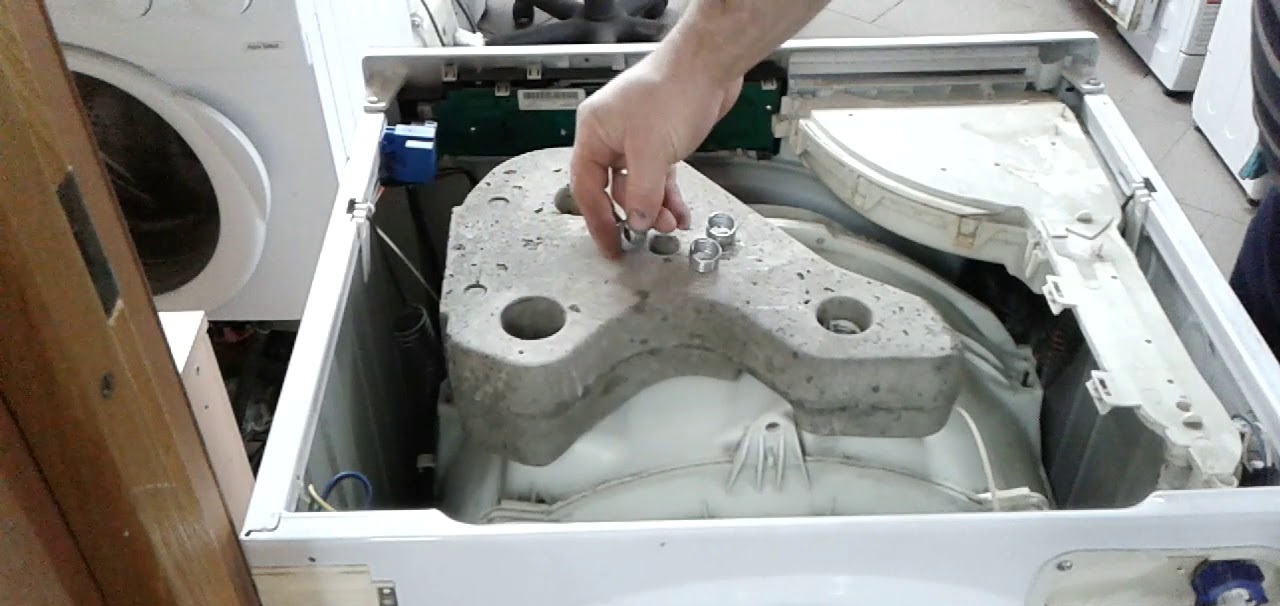
- Lower the counterweight slightly by loosening its mounting bolts.
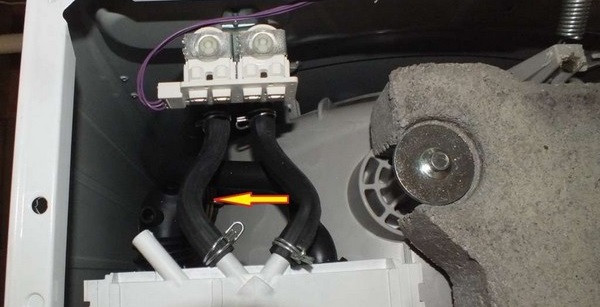
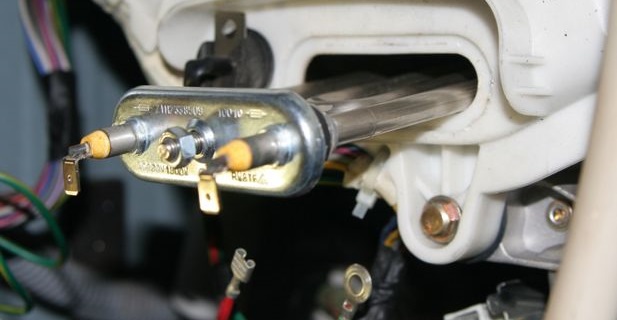
- Remove the terminals from the thermistor and disconnect it.
- Disconnect the power and ground wires that are connected to the tubular heater.
- Remove the heating element from the machine.
- Remove the clamps that secure the plastic cover of the CM tank, and move the cover itself to another room for now so that it does not interfere during the main work.
This completes the disassembly of the washing machine. As you can see, dismantling isn't all that difficult and can be done with a minimal set of tools, so you can save money and avoid sending your equipment to a service center. All that is required next is to replace the damaged elements, which we will discuss in the next two points.
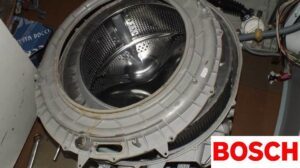
Removing the drum, worn bearings, and seals
Now that you can remove the drum-tank assembly, you can begin the main repair process. Proceed carefully, following our instructions carefully.
- Remove the back panel of the Bosch washing machine, which is secured with five screws.
- Remove the drive belt.
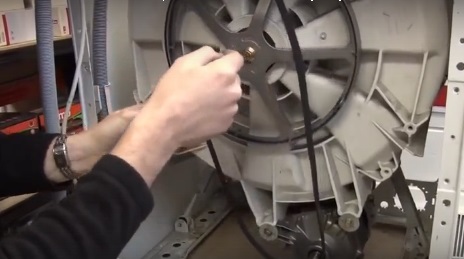
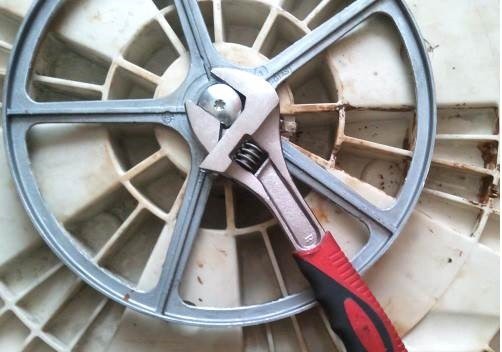
- Unscrew the nut that holds the pulley.
- Carefully remove the drum and spin it.
Now it's crucial to check for damage to the drum's spider. If there are no signs of wear on the shaft, you can return to replacing the bearings. If the spider is in poor condition, you'll have to first purchase a new one and install it, and then continue the repair.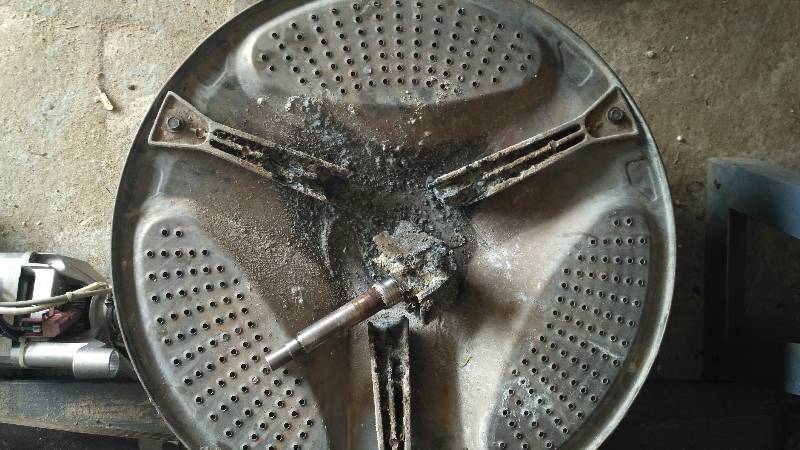
At this stage, you need to work very carefully to avoid damaging anything. You need to knock the bearings out of the tank, which requires a special punch and a regular hammer. Here are the instructions:
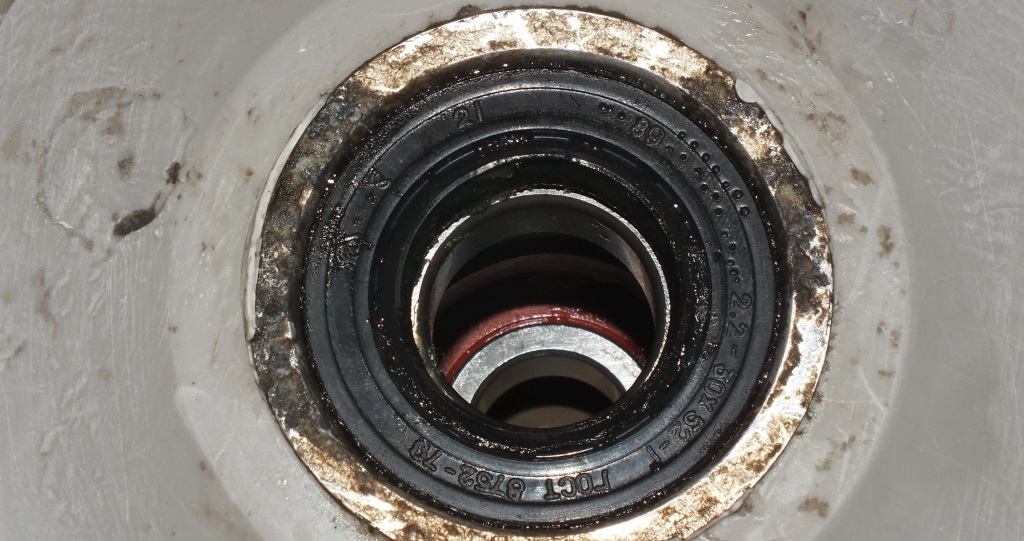
- remove the seal, that is, the rubber seal in the shape of a ring;
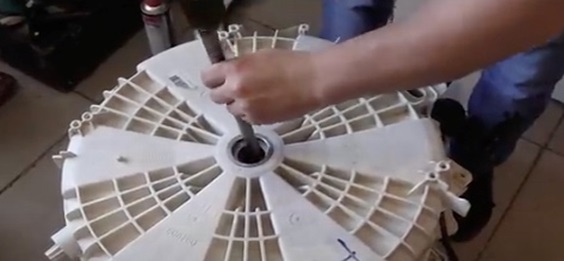
- Place one end of the drift in the center of the rear bearing and begin tapping the other end with a hammer
Always change the position of the punch so as not to constantly hit the same spot.
- Once the first bearing is finished, move on to the second element.
Once everything is ready, remove any liquid, rust, scale, or other contaminants from the seat, and clean the drum shaft. All that remains is to replace the bearings.
Installation of bearings and seals
You should never buy parts based on memory, as there is a risk of making a mistake in your choice. The easiest way is to remove the old bearings and use them as an example so that a specialist can select an identical product for you. You can also write down the exact name of your Bosch washing machine to search for components specifically for that model.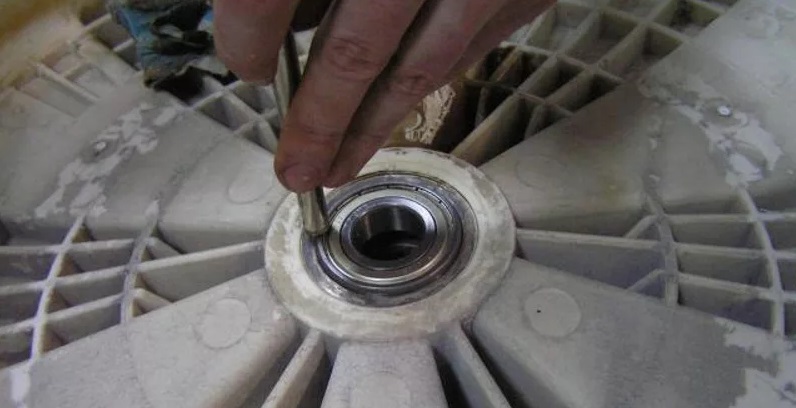
The smaller diameter bearing should be installed on the outside of the drum, which can be done by first removing the back wall of the machine. It's also best to drive it in with a hammer and drift, alternating the strikes. Place the drift on the outer race of the bearing and slowly tap the part into its seat in the drum.
Never hit the inner bearing race, as this can accidentally damage it, which will require you to buy another one.
The second bearing should be installed in the same manner, carefully tapping it into the hole. Once the main work is complete, replace the seal, pre-treated with grease, to extend its life and improve performance. Grease can also be applied to the drum bushing, improving its water resistance, ensuring heat resistance of the joint, and generally increasing the life of the bearings and seal.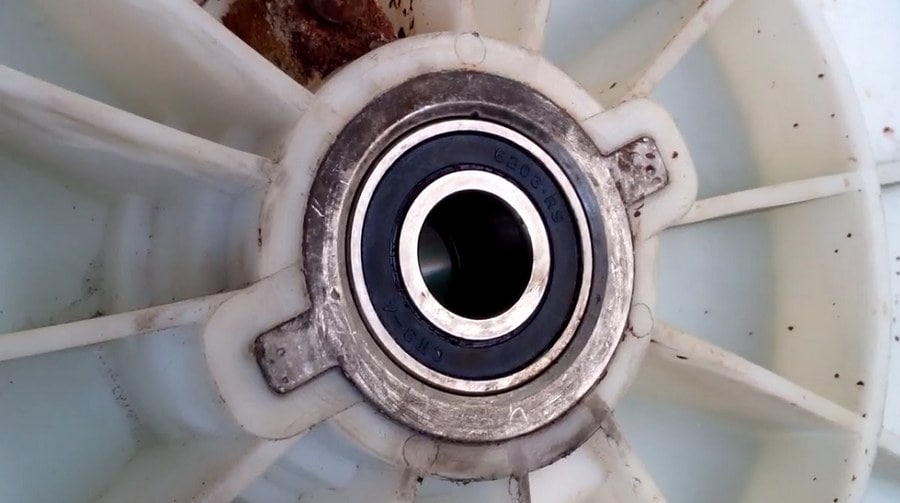
The repair is now complete; all that remains is reassembly. Follow our instructions in reverse order, starting with installing the drum, pulley, and drive belt, moving to the back of the washing machine, and then on to the internal components. Take your time, consult our recommendations if you're unsure, and you'll be sure to be able to restore your beloved "home helper" to working order on your own.
Interesting:


Readers' comments
Headings
Washing machine repair


For buyers


For users


Dishwasher


Add a comment