DIY washing machine motor repair
 A washing machine's motor is the heart of the machine, the most important component without which all the others won't work. Naturally, when a motor burns out, the problem needs to be addressed as quickly as possible, but buying a new part can be quite expensive. Just like buying a new machine, in fact. But what if you could repair a washing machine motor and give it a second life? Let's see if this is possible, and if so, how?
First, the engine needs to be removed
There are three types of washing machine motors: inverter, commutator, and asynchronous. Currently, most washing machines worldwide are equipped with commutator motors, so we'll use them as an example to illustrate the entire procedure.
Naturally, you need to start by disassembling the washing machine and removing the motor itself. Disconnect your home assistant from all utilities and position it so you can easily access it from all four sides. Get started.
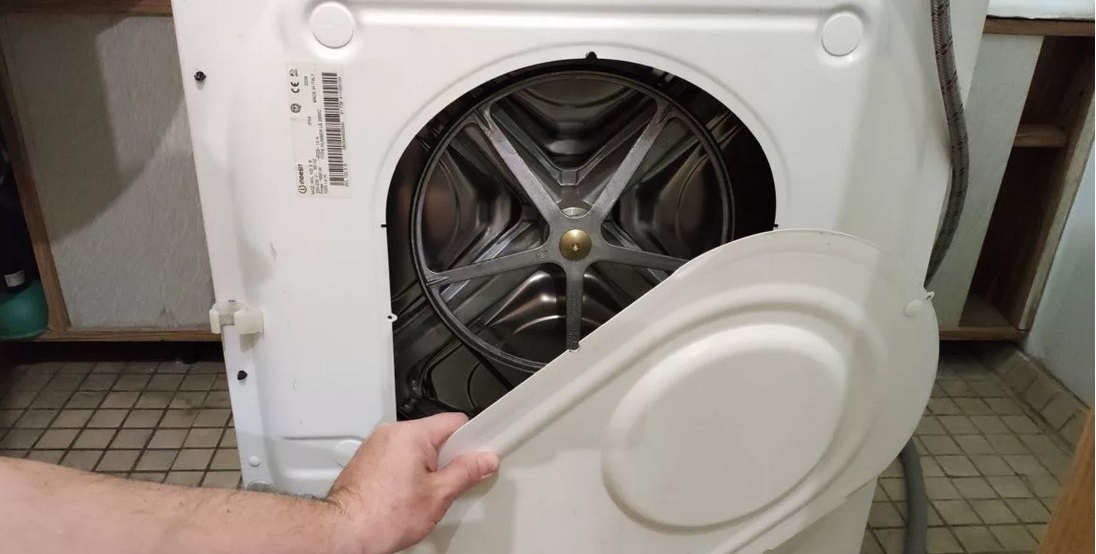
- Remove the panel hiding the utility lines. For front-loading machines, this is the rear panel; for top-loading machines, it's the side panel. Unscrew the bolts and slide the panel down.
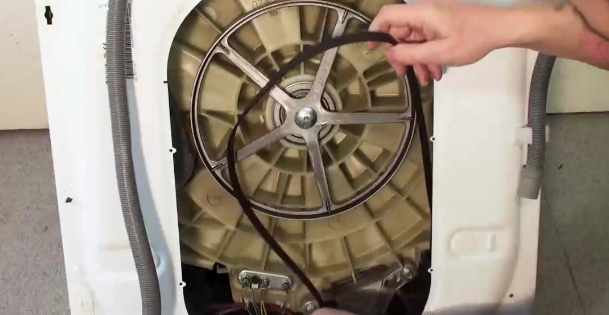
- Locate the pulley (the large wheel next to the drum) and the drive belt that goes onto it. Grasp the belt at this point, turn the pulley and remove the belt. The procedure is similar to replacing a bicycle chain.
- Remove the wiring from the motor.

- Using a socket wrench or other suitable tool, remove the screws holding the motor in the socket.
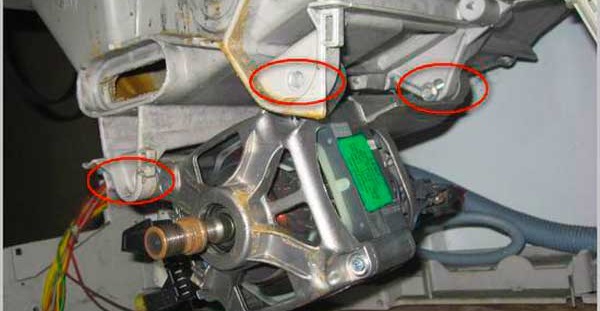
- Remove the engine. It's held in place by straight studs, so you'll need to gently rock it back and forth to remove it. Experienced mechanics may tap it lightly with a hammer to make the job easier, but it's best not to take any risks; you don't want to accidentally damage the part.
The disassembly process is usually easy for users. Now that you have the electric motor in your hands and in front of you, you can begin diagnostics.
Test launch of the extracted engine
The engine needs to be run in test mode. To do this, find a 220-volt AC power source. Connect the rotor and stator windings in series, and connect the AC power source to the remaining terminals.
Important! To protect yourself from a short circuit in the motor, you should also connect an electrical appliance with a power output of approximately 500 watts to the circuit. A washing machine's heating element or a powerful lamp will do. If a short circuit does occur, the heating element will quickly heat up, and the lamp will glow brightly.
You'll be very lucky if you find a powerful car transformer, over 500 watts, as it will power the circuit very well. It will be easier to control the RPM of the running engine. Fuses with a current rating of 5-10 Amp can be included in the circuit for greater safety.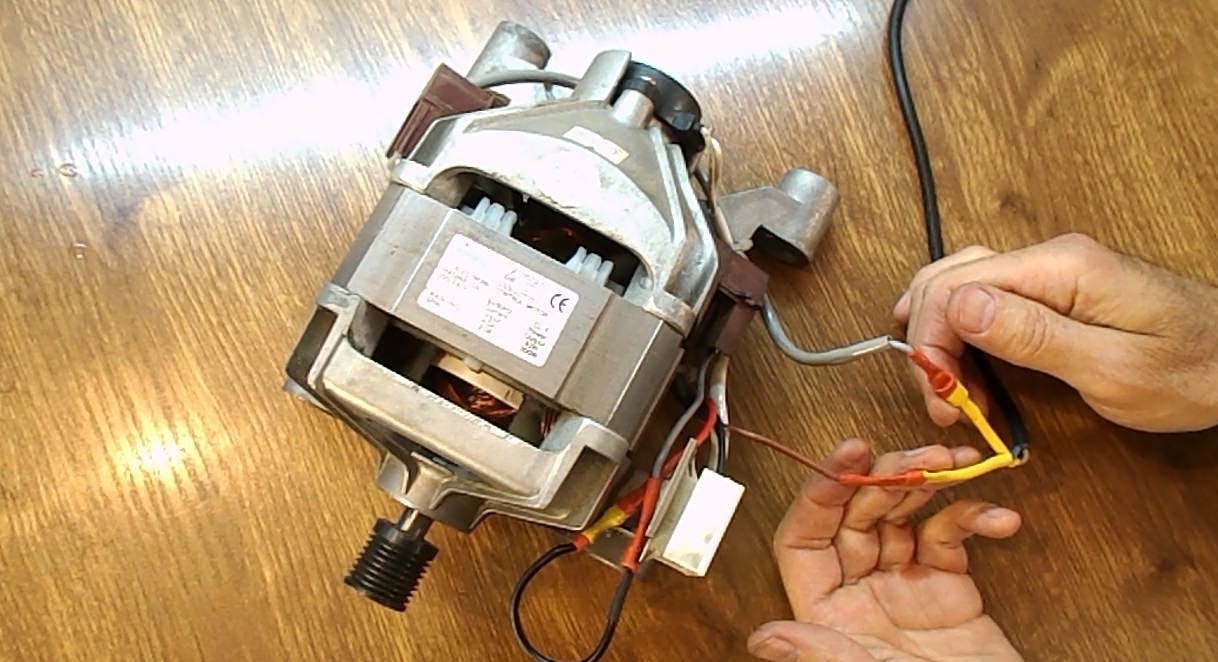
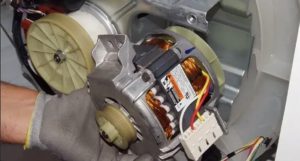
Once the motor starts turning and picks up speed, check for strong sparking where the brushes and commutator meet. If there is strong sparking, the electric motor is likely faulty. Generally, the brushes, commutator fins, and rotor and stator windings are the most vulnerable parts of the motor and are the most likely to fail.
We check engine components with a tester
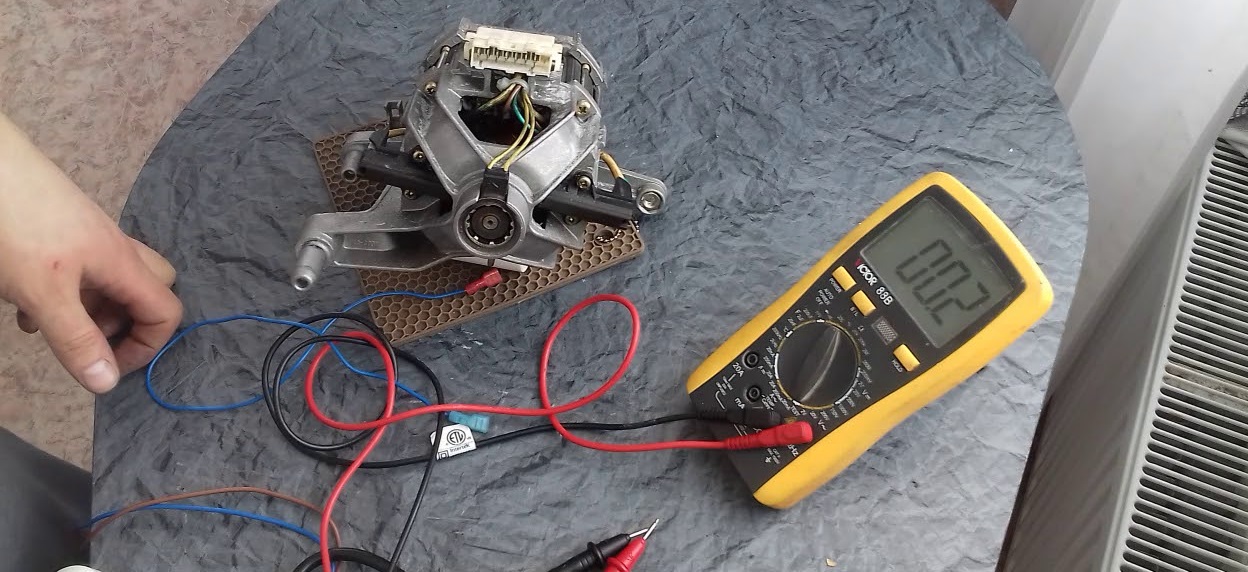
If the problem lies in the rotor or stator winding, this can be determined by the motor's operating characteristics: low power, unusual noise, and excessive heat during a test run. A multimeter can help confirm this. Set it to measure resistance. Now proceed as follows:
- Find the engine data sheet, which provides reference measurement values. Then, sequentially apply the multimeter probes to the rotor fins. The differences in values should not be more than 0.5 Ohm, and the values themselves should correspond to the reference values. If there is a deviation, there is an interturn short circuit;
- If you don't have a data sheet, you can try tactile and olfactory methods of identifying the problem. If the resistance in the fins is insufficient, the current will increase, causing the fins to heat up. You'll feel this with your fingers. A characteristic burning smell will also appear.
- if, on the contrary, the resistance goes off the scale during the test, this indicates a break in one of the windings;
- Now, using the same procedure, you need to test the motor stator. Measure the resistance between the winding contacts;
- Now you need to check the windings' connection to the stator housing. Place one multimeter probe on the stator's iron part, and the other on each slip ring in turn.
If the stator is operating without interruption, the resistance value will be very high, most likely reaching hundreds of Mega Ohms.
Are the slats intact?
The rotor fins are held in place by a special adhesive material. When the rotor jams or shorts between turns, intense heat builds up and the fins begin to peel off. It's also possible that contact has broken in the rotor section.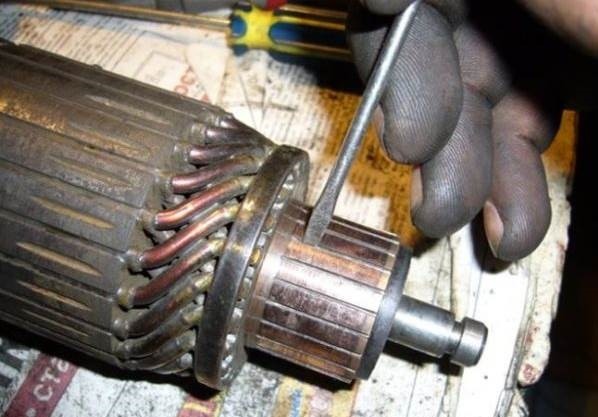
Sometimes small nicks appear on the brush fins, causing them to wear out faster and spark excessively. This failure can be caused by the rotor jamming or starting a wash cycle with the drum flaps open in top-loading machines.
Are the brushes intact?
The brushes are part of the motor, so they need to be removed for diagnostics. Let's look at the procedure using a Bosch top-loading washing machine as an example. Bosch manufacturers use standard brushed motors in all their models, so the information below will be relevant to the vast majority of washing machine owners.
- Remove the engine and position it so that it is convenient to work with.
- In older motor models, the brushes were located under the top cover, requiring the motor to be removed to access them. If your motor is of this type, mark the location of the retaining screws on the housing and stator before disassembling them. You can use a bright marker or scratch the marks with a sharp object.
If you reverse the sides during subsequent assembly, the tachogenerator coil will burn out as soon as you start the car. The tachogenerator is responsible for the engine speed, and the coil itself is wound on a hair-thin wire. If you do this incorrectly, voltage will be supplied to the coil instead of the brushes, causing the coil to burn out.
Please note! While you can certainly replace the stator coil, you won't be able to adjust the engine speed, even though the engine itself will still function quite well.
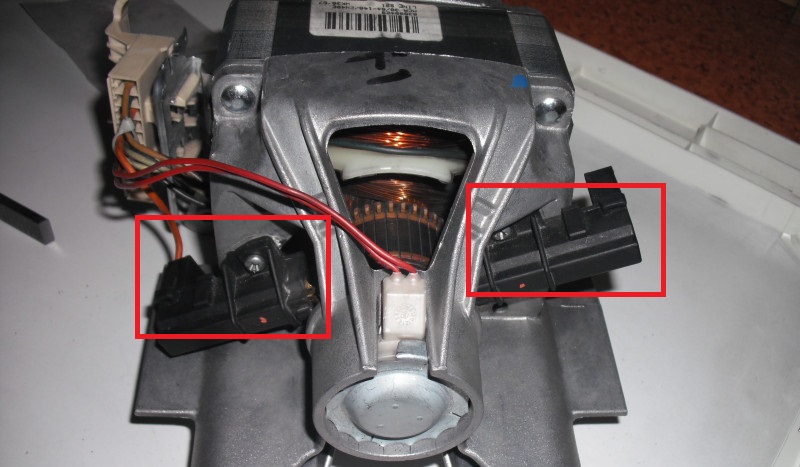
- In modern motors, the brushes can be removed without disassembling them. Find the side of the electric motor opposite the shaft. There you'll see special pads, each with a single wire connected to it. To remove the brush, remove the terminal from the pad by prying it off with a sharp object.
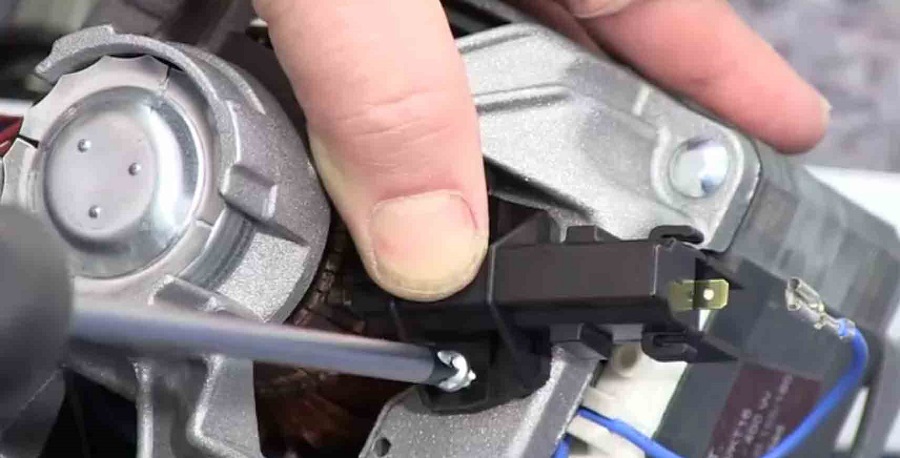
- You'll see two small recesses on the platform. Slide the platform to the left until the recesses align with the metal brush holder edges.
- Use something to lift the brush and remove it.
Now take a close look at the product. New wiper blades are approximately 35 millimeters long, while those that have been in use for a long time are 5-10 millimeters. Based on this information, determine whether your blade is still fit for service.
Engine Troubleshooting
All the problems described above are easily repairable at home. In the guide below, we'll work our way from simple to complex, starting with the brushes.
There's no point in describing the installation process in detail, as it's fairly straightforward. If necessary, simply reverse the steps described above. However, a few details are worth mentioning.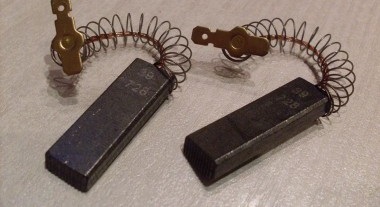
Almost all brushes produced in factories are glued, and few people manage to find original spare parts in retail stores.
But solid components from third-party manufacturers are plentiful on store shelves, which is confusing for ordinary users. Moreover, some experts online actively urge people to use glued brushes because of their softness. However, it's simply impossible to verify this in practice, so don't worry: just take what you can find.
The next most difficult repair is the rotor fins. If the problem is severe and the fins are peeling too much, the rotor cannot be repaired. However, if the fins have peeled off by only +/- 0.5 mm, a lathe turn will help.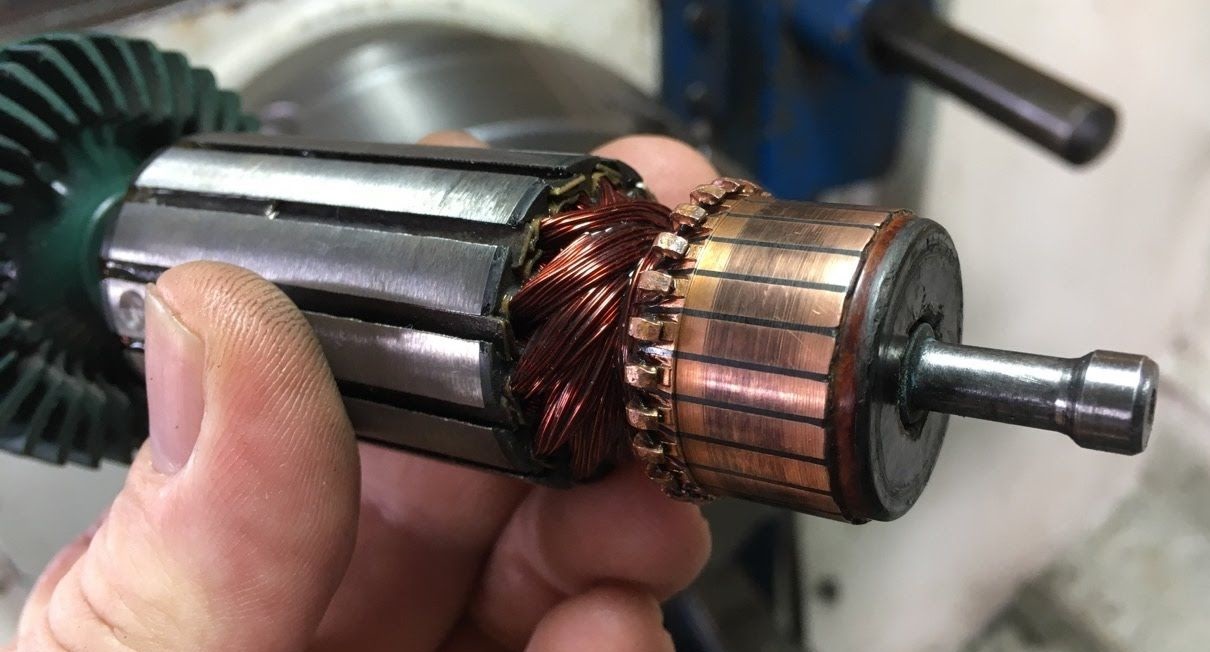
- Fix the rotor securely to the machine.
- Start the machine.
- Make alignment by thickness.
- Once the procedure is complete, it is necessary to thoroughly clean the gaps between the slats so that not a speck of dust remains there.
- Next, test the fins for resistance with a multimeter. If the short circuit still persists, repeat the stripping procedure until it's completely eliminated.
Caution! This repair method is short-lived, as it addresses the symptom of the problem, not the problem itself or its cause. A repaired old manifold will certainly not perform better than a new factory manifold.
What should you do if the slats have peeled off more than 0.5 mm or have completely come off? You can safely discard the old rotor. It's practically irreparable. In rare cases, something can be done, but it won't be possible without specialized, expensive equipment. As for the stator and rotor windings, repairs are possible, but this is not economically feasible. You can't do it yourself; you'll need to find someone willing to rewind the winding, but they'll charge such a price that it's easier to buy a new motor and even pay a technician for installation.
Interesting:


Readers' comments
Headings
Washing machine repair


For buyers


For users


Dishwasher


Add a comment