Bosch dishwasher heating element repair
 The heating element of dishwashers fails quite frequently. This is due to the poor quality of tap water in most Russian regions. In modern Bosch dishwashers, the heating elements last about two to three years, after which they require repair or replacement.
Let's figure out how to repair a Bosch dishwasher's heating element. Is this a job for the average user, or is it better to take it to a service center? Would it be easier to install a new heating element? Let's explore the nuances.
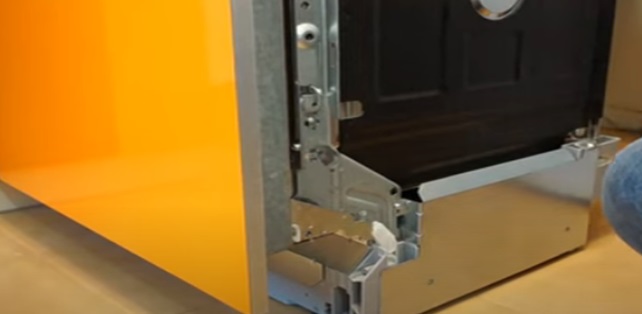
We disassemble the machine and remove the heating element.
It's easier to buy and install a new heating element for a Bosch dishwasher. However, the cost can be quite high. Therefore, many users, wanting to save money, decide to have their dishwasher's heating element repaired.
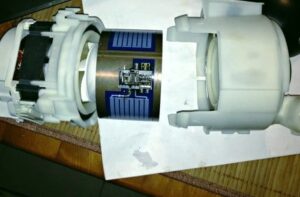
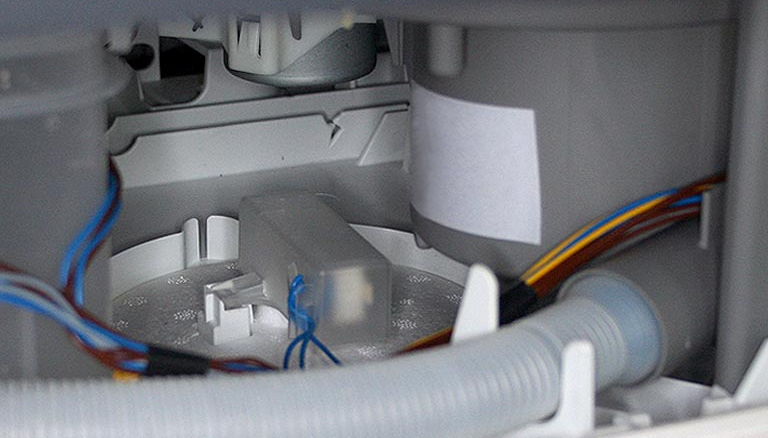
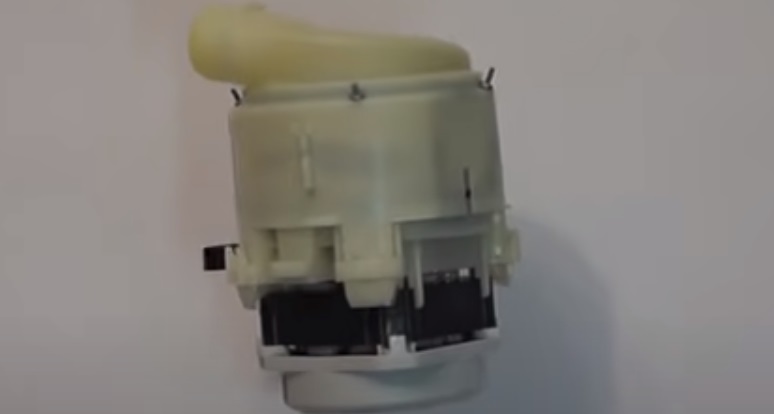
The heating element in modern Bosch dishwashers is housed in the same housing as the recirculation pump.
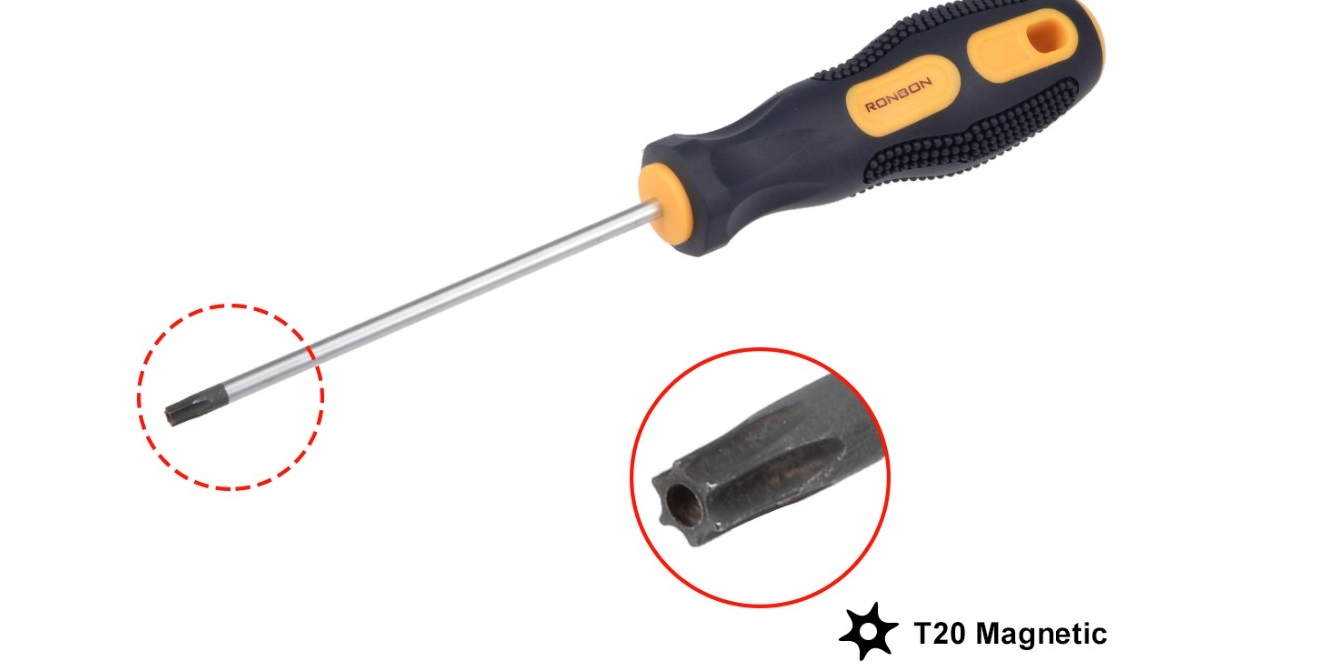
To access the heater, you will need to remove the recirculation pump from the dishwasher. During the dismantling of the heating element, it will be necessary to almost completely disassemble the dishwasher body.You will need to have the following tools on hand:
- TORX T20 screwdriver;
- TORX T15 star screwdriver;
- 17 mm wrench;
- Phillips screwdriver;
- pliers;
- soldering iron.
Once you've gathered your tools, you can begin disassembling your Bosch dishwasher. First, unplug the appliance from the power outlet. Next:
- disconnect the machine from utilities (water supply and sewerage);
- open the dishwasher door and remove all the dish baskets from it;
- Unscrew the bolts that secure the dishwasher to the kitchen unit (they are located on the side walls of the washing chamber);
- close the dishwasher door;
- remove the lower false panel of the furniture set;
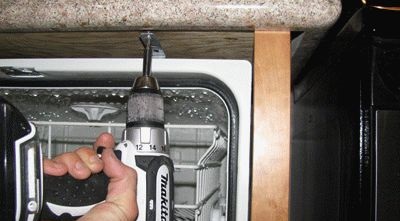
- Use a 17 mm wrench to tighten the dishwasher legs so that the machine body lowers down;
- remove the machine from the furniture;
- Unscrew the trash filter located at the bottom of the dishwasher compartment;
- remove the filter unit and use a dry cloth to blot the water in the opened hole;
- remove the decorative cover of the door opening mechanism;
- remove the screws securing the dishwasher's side false panel and set it aside;
- pull the door tensioner cables of the washing machine and remove them from the mechanism;
- turn the dishwasher over to the other side, also remove the false panel and tensioners;
- turn the machine upside down;
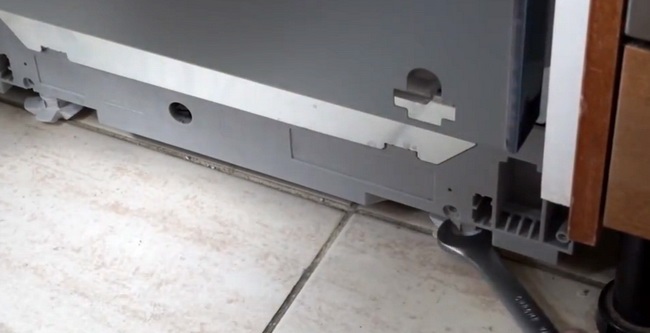
- unscrew the two screws securing the lower false panel of the dishwasher, located at the front of the case, remove the part;
- Using pliers, loosen the clamp on the filler pipe and disconnect the hose;
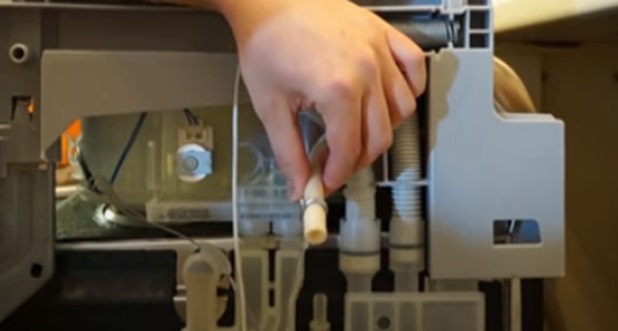
- unhook the drain and inlet hose mounting panel from the housing;
- disconnect the Aquastop connector;
- At the bottom of the dishwasher, unhook the end cap of the Aquastop system float;
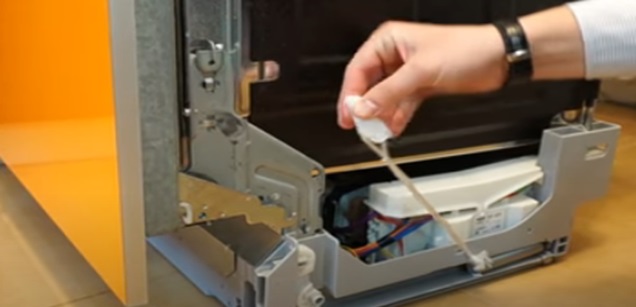
- remove the lower part of the dishwasher body by releasing the latches;
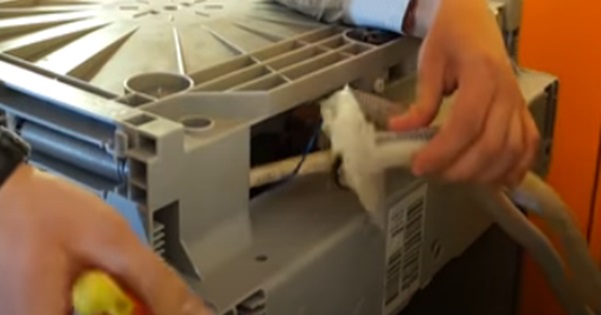
- loosen the water and sewer hoses;
- disconnect the contacts from the circulation pump;
- disconnect all pipes from the pump;
- remove the circulation pump.
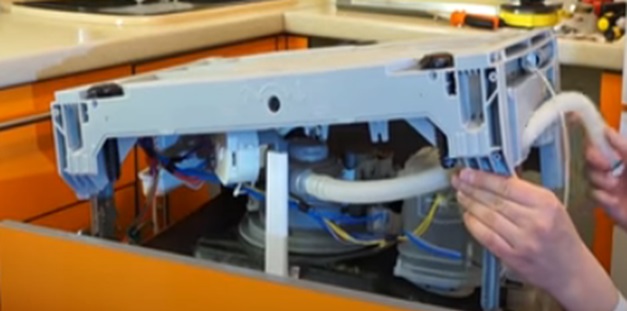
It's a good idea to take photos as you work to avoid mistakes during reassembly. The recirculation pump is well hidden, so disassembling it is quite labor-intensive. If you feel you can't handle even this step, it's best to seek professional help.
Disassembling the circulation pump and checking the heating element
There are several signs that your dishwasher's heating element is failing. First, the machine will wash dishes poorly. Second, it won't dry cutlery. If you notice these symptoms, it's time to check the heating element.
The failure of the heating element is also indicated by the error E1 (depending on the Bosch dishwasher model, the code E01, F1, F01 may be displayed).
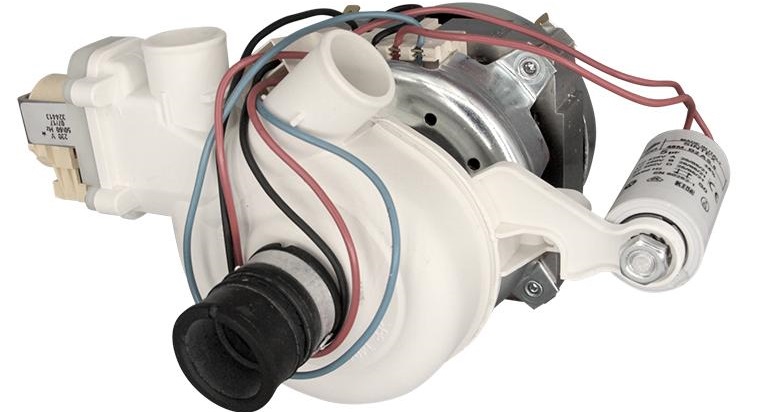
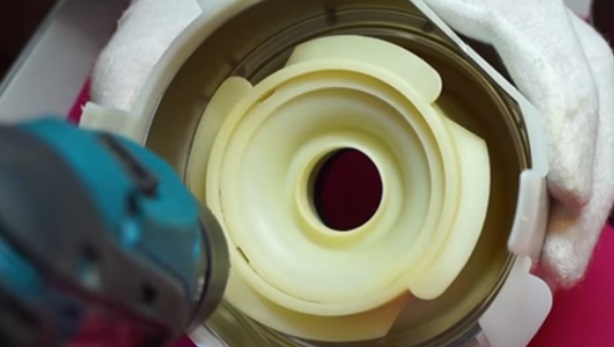
So, now the pump is ready for diagnostics. The recirculation pump in Bosch dishwashers consists of two parts, connected around the perimeter by latches. One of them contains the heating element. Further work will be performed on this half of the structure.
The next step is to check the heating element. The heating element is tested using a multimeter. The device must be switched to resistance measurement mode.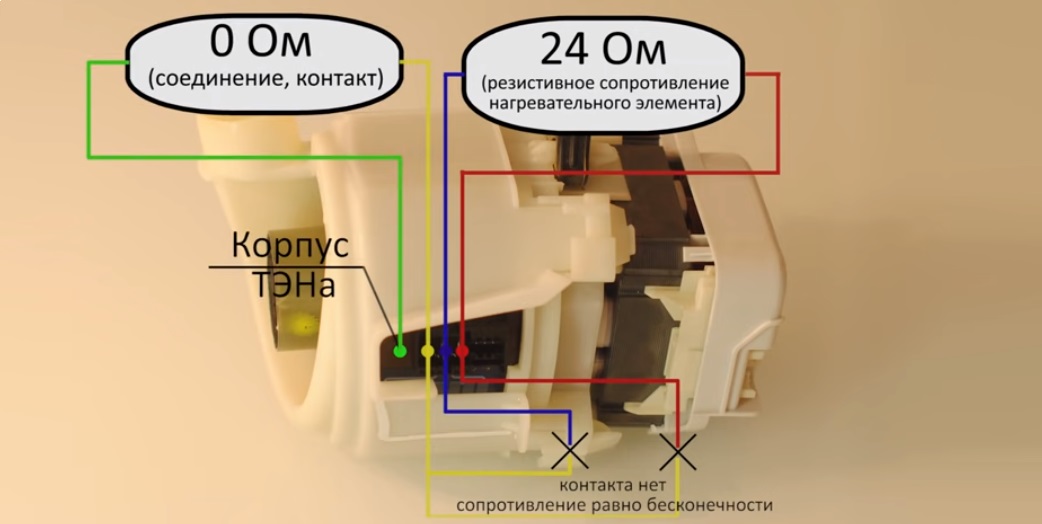
Next, the resistance produced by the heater is measured. The multimeter probes are applied to the different terminals one by one. Considering that the heating element's power is approximately 2 kW, the resistive resistance between the power contacts should be approximately 24 ohms.
There should be no resistance between ground and any power contact.
If there's no resistance between the power contacts, there's a break. Inspect the heating element's wires near the terminal block. One of them may be burned out; this will be visible to the naked eye.
During repairs, soldering the track will be sufficient. However, it's not that simple – the soldering point is hidden by the heating element's protective covers: plastic and metal. Therefore, it will be necessary:
- Using a 3.5 mm diameter metal drill, remove the rivets on the steel casing;
- release the heating element from the metal casing.
The figure below shows the complete composition of one part of the circulation pump: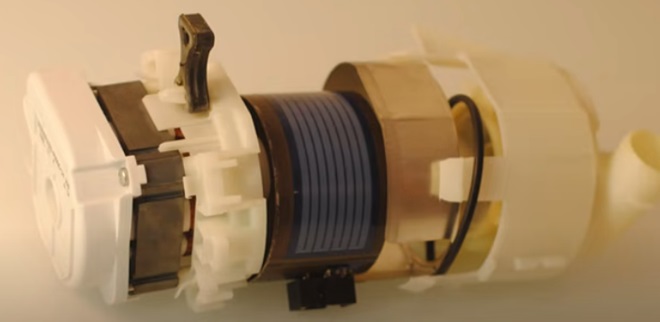
The heater is a ring-shaped element with multiple tracks. This is what we'll be working on later. To restore the heating element's functionality, it will need to be soldered. This can be done yourself. We'll explain how to repair the element.
Soldering the heating element
The idea behind repairing a heater is to strip its tracks of the insulation and solder a new conductor there, restoring contact. This requires sandpaper. Use it to carefully remove part of the heating element's top coating.
For ease of use, it's recommended to wrap a ruler in sandpaper. It's best to use a grade higher than zero sandpaper. After that, begin removing the top insulation layer from the track.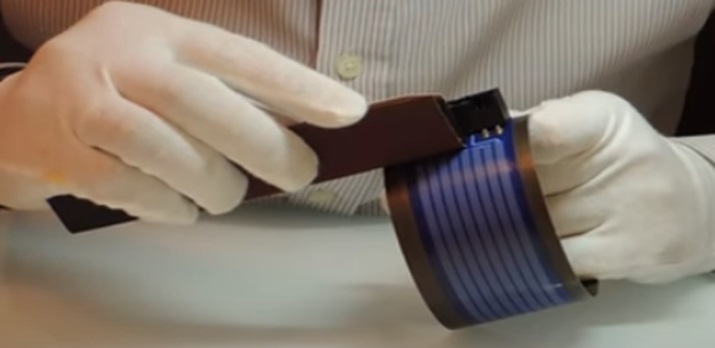
Removing the insulation from the heater tracks is quite difficult. The job can be labor-intensive and take 10-15 minutes. Once the area is cleaned, you can move on.
After the insulating layer has been removed from the contact track, it must be filled with solder to restore the connection between the contacts. It's essential to use a high-melting solder; any other type simply won't withstand the temperatures generated by the heater during operation. Of course, under standard conditions, the temperature won't exceed 100 degrees, but it's still necessary to allow some extra heat.
It's important to choose your solder with the utmost care. It's best to buy lead-free solder with a high melting point (at least 200 degrees Celsius). You can order suitable solder online.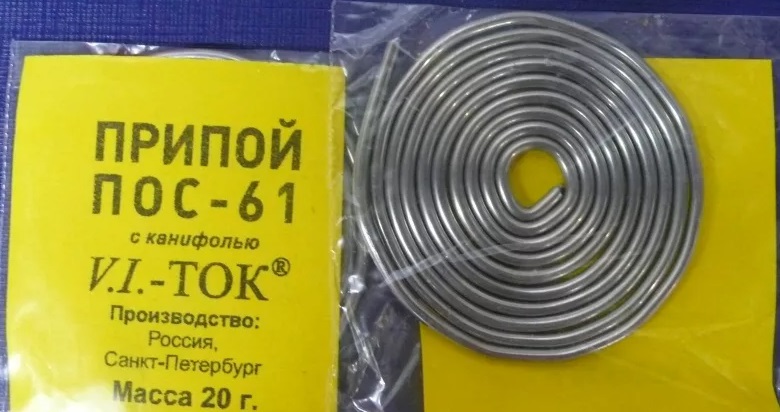
The next step is to purchase a special soldering iron for lead-free solder. You can order:
- soldering station;
- Adjustable soldering iron with ceramic heating element.
Standard soldering irons manufactured according to GOST 1969 or 1977, with a power output of 65 watts, are also suitable for lead-free soldering. Once you've gathered everything you need, you can begin:
- secure the heating element between two pliers;
- remove all grease and dirt from the area to be treated;
- Apply soldering acid to the feed path;

- Fill the entire area of the old contact track with lead-free solder;
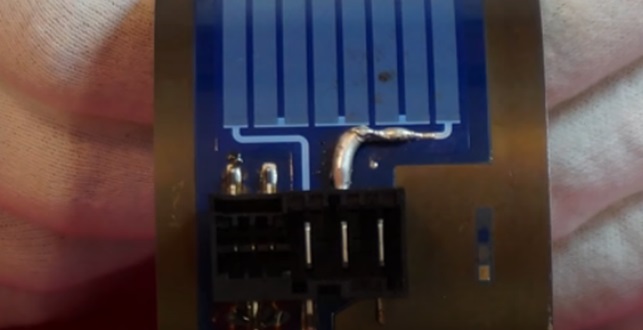
- Check the thermal stability of the dielectric (the soldering iron should not melt it).
At this point, the soldering process is complete. Next, you'll need to test the heating element for functionality. This is also done using a multimeter.
Checking the heating element after soldering
To understand whether soldering helped, it is necessary to re-measure the resistance between the power contacts of the heating element. Attach the multimeter probes to the corresponding terminals - normally the values on the device screen should be 22-25 OhmsAlso check for ground resistance.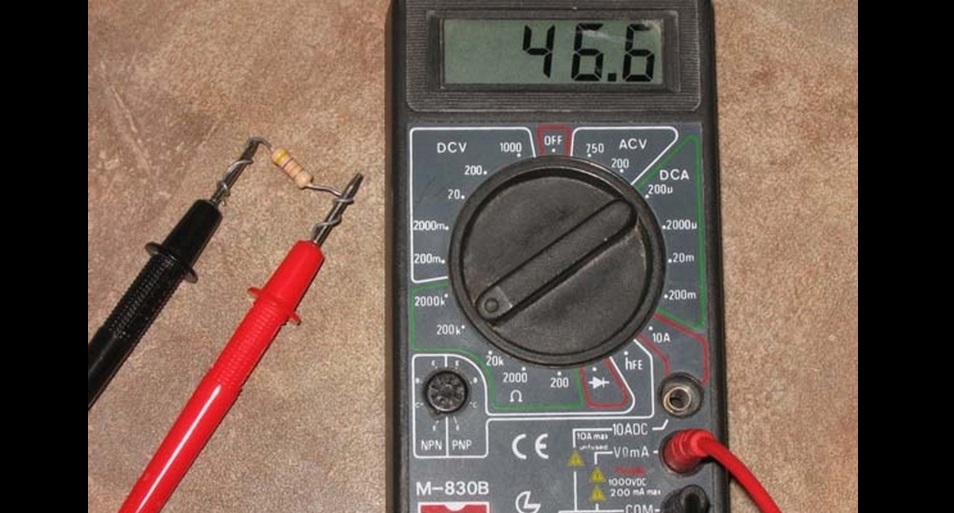
Next, check the thermocouple's functionality. Measure the resistance between the first and second, second and third, and first and third contacts. This is also done with a multimeter.
The sum of the resistances between contacts 1 and 2, 2 and 3 must correspond to the resistance between the first and third terminals.
If the ohmmeter readings match the standard, the heater repair is complete. All that remains is to reassemble the recirculation pump and the Bosch dishwasher itself. We'll explain how to do this and what challenges you might encounter.
We assemble the circulation pump back
First, assemble the part of the recirculation pump that houses the heater. First, secure the metal housing to the plastic casing. Since the rivets were drilled out, screws will be used to connect these two components.
The algorithm of actions will be as follows:
- insert the metal casing into the plastic case;
- drill holes through in three places to screw in the bolts;
- lubricate the rubber seal with vegetable oil;
- put the ring on the base of the heating element (if you first put the seal on the bottom of the housing and then install the heater, the element will not “seat” properly);
- insert the heating element with the sealing ring into the pump body;
- blunt a flat-head screwdriver with sandpaper so that you can push the seal deeper into the housing without damaging the gasket itself and the heating element;
- Using a screwdriver, evenly “sink” the rubber seal into the base of the housing;
- screw the screws into the pre-prepared holes to connect the casings, secure them with nuts;
- Connect the two halves of the Bosch dishwasher recirculation pump together.
If you're having trouble connecting, try removing the seal from one half and sliding it onto the half with the heating element. The latches should then engage. Inspect the assembly to ensure it's tight. The pump terminal blocks should be aligned.
After this, the Bosch dishwasher must be reassembled. First, the recirculation pump is installed, and the water supply lines and electrical connectors are connected to it. Then, the dishwasher base is replaced.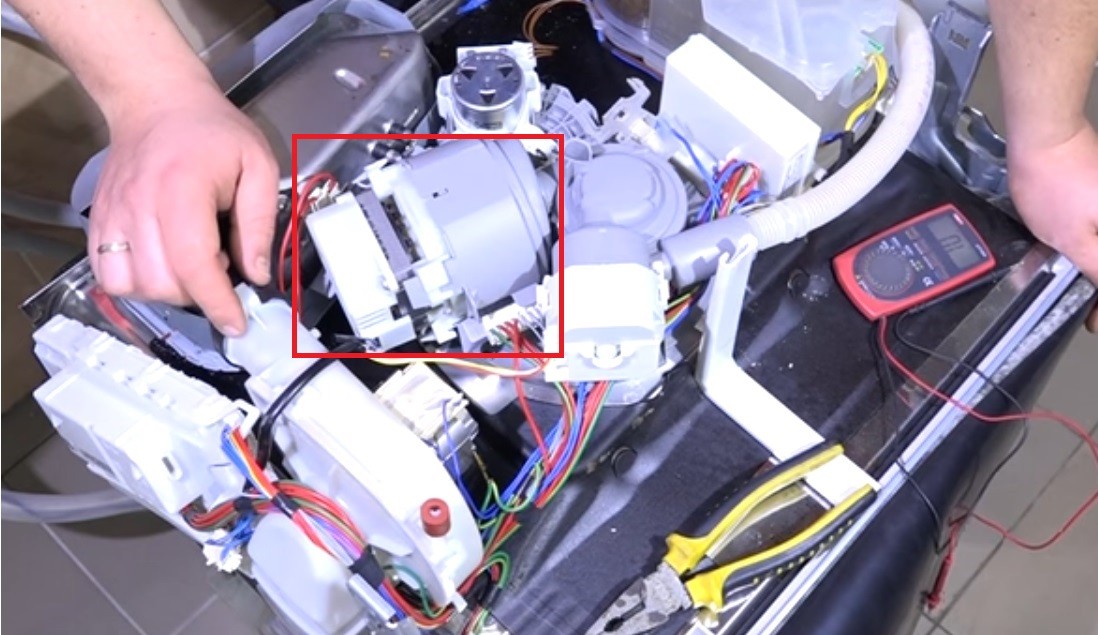
After replacing the water and wastewater hose panel, reattach the lower housing panel. After this, you can turn the machine over to its normal position.
Once the dishwasher is fully assembled, run a test cycle. The machine should wash and dry the dishes without any errors. In this case, you can reattach the dishwasher to the dishwasher and continue using your "home helper" as usual.
Interesting:


1 reader comment
Add a comment
Headings
Washing machine repair


For buyers


For users


Dishwasher


You say the solder is lead-free?
POS-61 - tin-lead solder!
61% tin, 39% lead!!!