What can you make from an old dishwasher?
 Thrifty people don't rush to throw away a dishwasher that's reached the end of its useful life. After all, old dishwashers can be turned into extremely useful household appliances. For example, DIYers construct freezers, incubators for hatching chicks, and boiler cleaning devices from various dishwasher parts. Let's explore how you can use a non-working dishwasher.
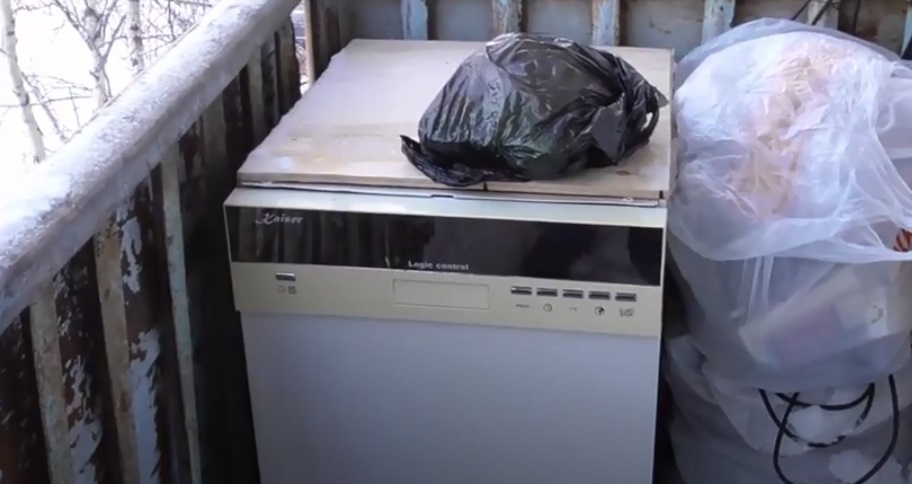
Winter freezer
The first useful DIY project from a dishwasher is a food storage chest. You can make a freezer from a dishwasher for storing semi-finished products, berries, meat, poultry, and fish. This box is placed on the balcony and serves as a second refrigerator when the temperature outside is below zero.
In summer and fall, this chest freezer can be used to store fresh produce, not frozen, such as vegetables. For example, you can store potatoes, zucchini, eggplant, and carrots in the container on the balcony. This means the freezer can be used year-round.
The interior of the dishwasher is made of stainless steel, so it can be used for storing food.
First, you need to disassemble the dishwasher. Remove all internal components:
- control module;
- sprinklers;
- pipes;
- wires;
- engine;
- tubular water heater;
- centrifugal and drain pump;
- filters;
- Detergent hopper;
- salt tank, etc.
Ultimately, the dishwasher should be empty and "clean" inside. You can leave the dish racks in the chamber and store food there, if you prefer. To create more storage space, it's best to remove the containers and create a shelf on the pull-out rails.
The dishwasher's sealed body is ideal for storing food. Dust and rainwater will not enter the chamber. The dishwasher is equipped with special ventilation holes, ensuring proper ventilation.
Boiler cleaning device
What else can you make from an old dishwasher? Someone might find a boiler cleaning device useful. It can be assembled from a few parts:
- circulation pump;
- engine;
- water heater;
- filter element (it’s better to take one from a washing machine rather than a dishwasher).
You also need to additionally prepare: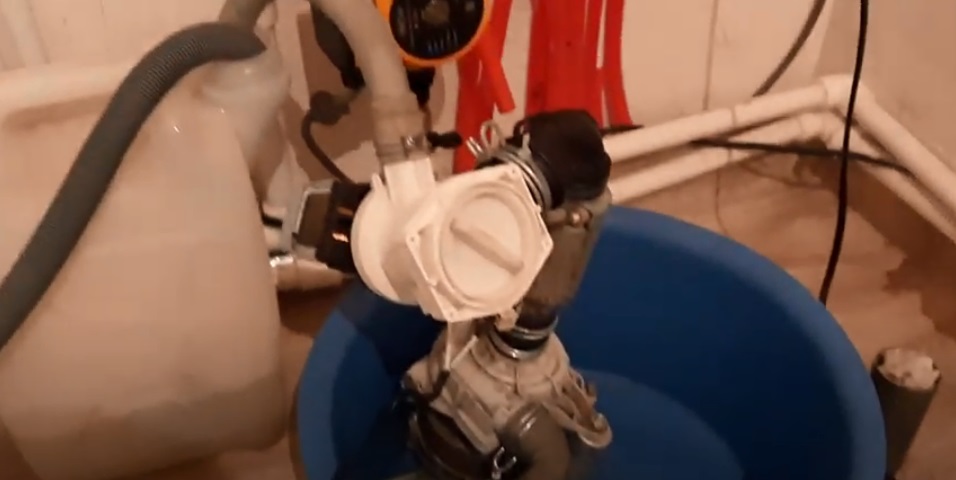
- hoses for pumping water (you will need two long corrugated pipes for connecting to the boiler and pump, and a separate one for connecting to the circulation pump);
- flushing liquid;
- canister.
First, assemble the homemade device. The engine and water heater power lines are connected to the pump, and the hoses for transferring the fluid are attached. A sufficient amount of "flushing solution" is poured into a canister. One end of the corrugated hose is lowered into the container containing the chemical, and the other is connected to the pump.
Another hose is also connected to the pump outlet and to the boiler. A third corrugated hose is connected to the boiler's outlet pipe, and its other end is lowered into the canister. This arrangement ensures water circulation in the system.
The pump draws the liquid from the canister and sends it to the boiler, flushing it. The same chemical is then drained back into the tank through another hose. The process repeats, filtering the solution and returning it to the heating boiler.
It's important to follow basic safety precautions during operation. After cleaning, disassemble the unit and store the parts. If cleaning is necessary in the future, reassemble the unit.
Incubator from a washing chamber
The next DIY project using a dishwasher is an egg incubator. Egg hatchers are expensive, and an old dishwasher is a great way to save money. Judging by user experience, this design works just as well as a store-bought one.
First, remove all internal components from the dishwasher. This includes the control module, motor, circulation pump, drain pump, spray arms, filters, wires, and hoses. The dishwasher chamber should remain empty.
Egg baskets are placed inside, spaced approximately 20-30 cm apart. Plastic pipes can be used as a frame, and the edges can be made of wood or wire mesh. The number of tiers will depend on the size of the dishwasher. It's important to leave enough space to ensure free air circulation within the bin.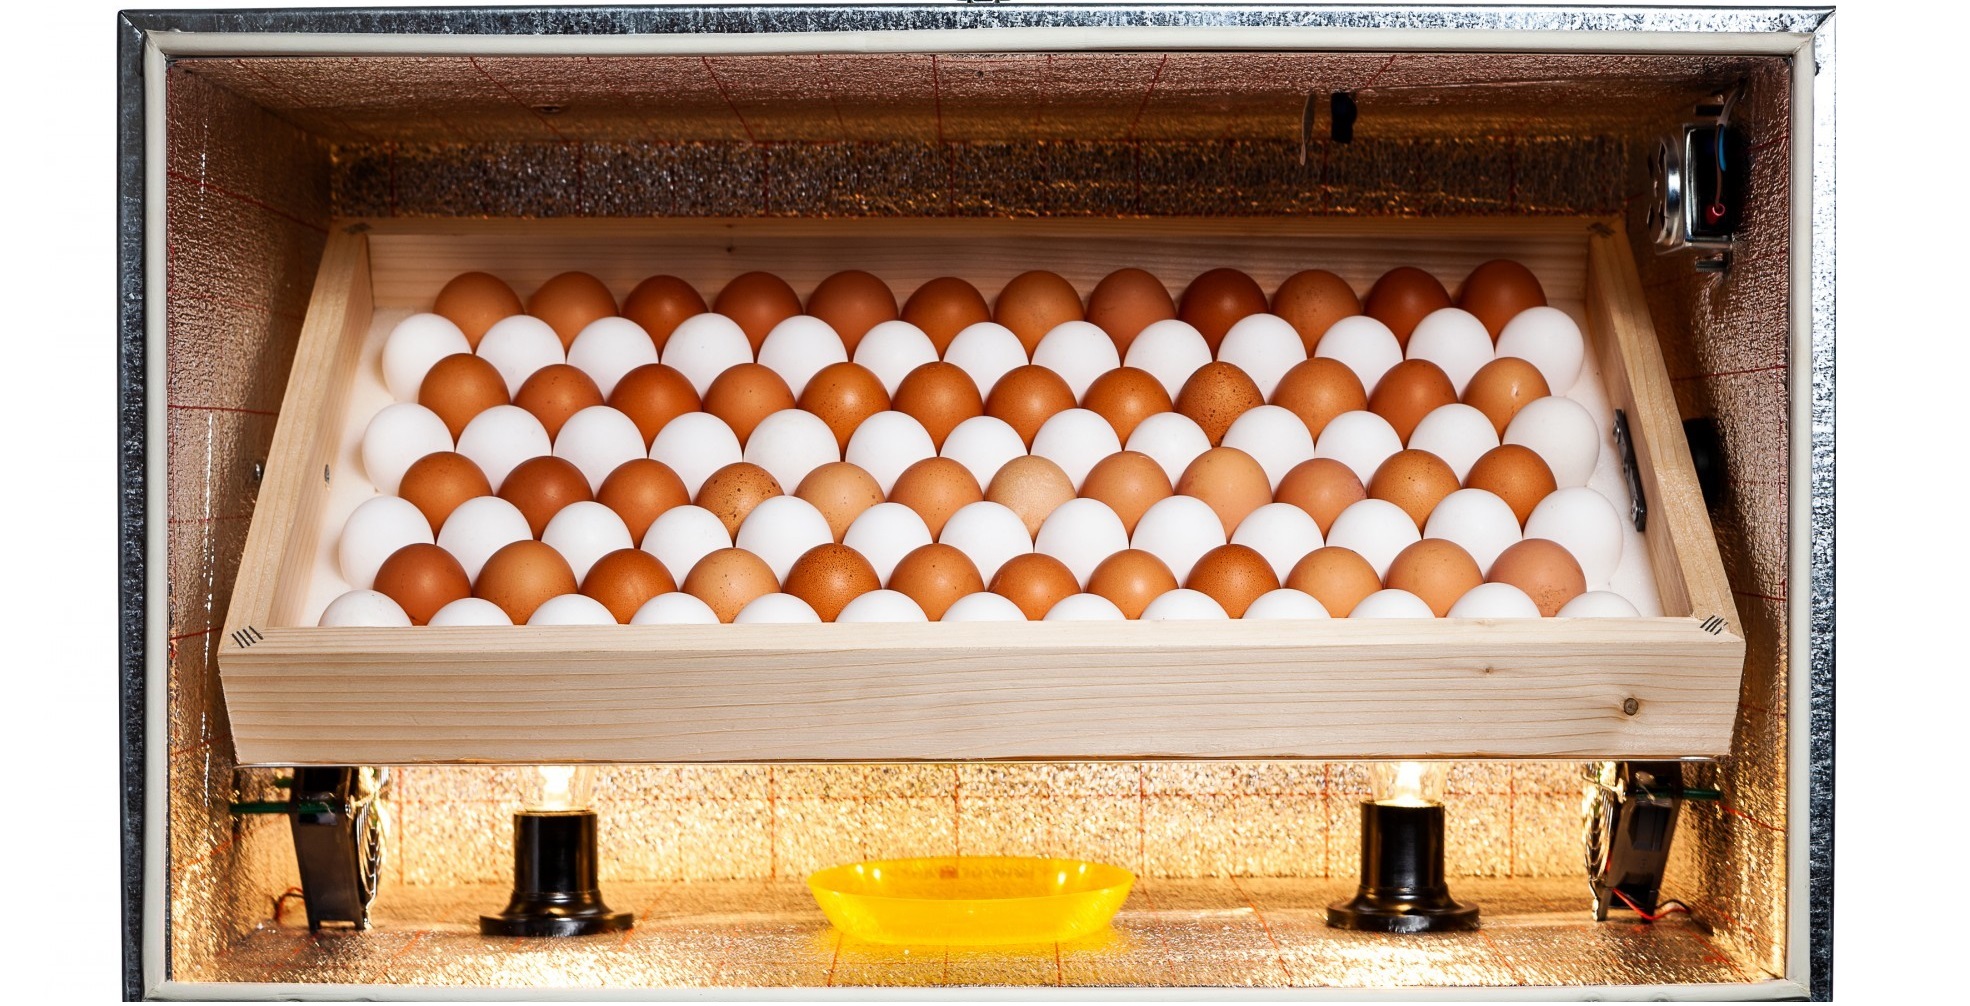
You also need to install two 12-volt fans inside the chamber and connect them to a power supply. Warm air rises, and the fans will mix the air masses.
Several incandescent lamps should be installed at the very bottom of the working chamber. The incubator should be maintained at a temperature of 37.6-38.3 degrees Celsius. The number of bulbs will depend on their power (60 or 40 watts) and the size of the bunker itself.
Commercial incubators are equipped with a system for turning eggs. Therefore, the shelves in the incubator chamber should also tilt. This can be achieved using two gears and chains.
Two gears are attached to the top, inside the chamber, on both walls. A handle for turning them is provided on the outside of the housing. The shelves must be connected (linked). A chain is attached to the "sprockets," allowing the user to adjust the tilt of the baskets containing eggs in the homemade incubator with a single movement.
The most difficult part is ensuring proper control of the incubator. For this purpose, a thermostatic controller is required. It's best to purchase two devices—one as a backup, in case the first one fails.
The controller's manual contains detailed information on how to configure, install, and connect it.
The controller must first be configured to measure an accurate value. Use a standard mercury thermometer to measure your body temperature and calibrate the device based on this data. The sensors are then inserted into the working chamber. The controller requires a 12-volt power supply.
A "window" should be cut in the dishwasher door to avoid having to open the incubator unnecessarily. The opening is sealed with glass from the inside and sealed with sealant. This will prevent heat from escaping from the incubator.
Interesting:


Readers' comments
Headings
Washing machine repair


For buyers


For users


Dishwasher


Add a comment