DIY Washing Machine Cabinet
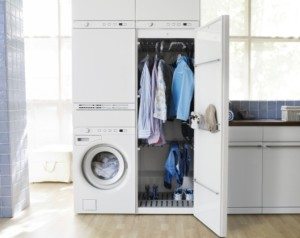 It's often the case that a bathroom is very small, but you want to fit a lot in there, including appliances and various accessories. So, to avoid tripping over various interior items while still having everything you need at hand, you can build a cabinet for the washing machine, thereby partially solving this problem.
And if you're really creative, you can even install a drying rack above the cabinet, freeing up extra space in your bathroom. Ideally, the cabinet should be built-in, and you can even build a special triangular shelving unit for it.
What to make a wardrobe from?
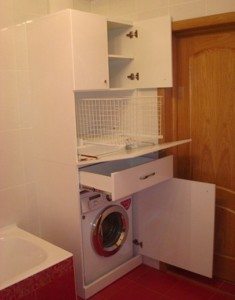
Ideally, your cabinet should consist of a frame and a drawer located in the very center.
You'll need to place a second drawer on top to house the drying rack. It's best to build the furniture from specially prepared fiberboard sheets. This will ensure your furniture is strong and stable. To ensure your design is as perfect as possible, hire a professional to cut the sheets to your specified dimensions.
The only thing left for you to do is paint the blanks in the color of your choice.
Assembling a wardrobe
 The first step is to drill holes for the shelves in the sides of the cabinet. A 5mm drill bit is ideal for this purpose. You should also drill holes at the top, 7mm from the edges. This will ensure that the shelves don't crack when you screw the cabinet together.
Now it's time to start fastening the cabinet. This is done using metal corners. After that, all that's left to do is glue the pieces together and secure them with screws. You can use M8 machine screws for the legs. To prevent the cabinet from wobbling or standing at an angle, it's best to screw a sleeve with internal threads into the board. Only then can you adjust the cabinet at any time until it sits perfectly. Put plastic caps on the cabinet legs to prevent them from scratching the floor.
Now it's time to install the cabinet in the designated place. Don't rush this process: since there will be another cabinet on top, you need to make sure the bottom one is level. The final step is to attach the two cabinets together. First, clamp them together and then screw them in place. The screws shouldn't be too large, otherwise the sharp end will stick out from the back of the board.
Finally, install the door stop. This is ideal for preventing the door from closing when you don't want it to. The spring-loaded hinges prevent this. You can buy this stop at any hardware store.
Making a pull-out drawer
Once the main work is done, you can begin assembling the drawer.
First, you need to determine the location of the handle on the front side. To do this, measure the distance vertically and horizontally and ensure that the handle is installed in the exact center. If the handle ends up offset to the left or right edge after installation, it won't look very appealing.
Once you've finished marking, you can screw the front panel to the side panels. Make sure it's wide enough to completely enclose the drawer's contents, leaving no gaps. Now it's time to screw in the cabinet slides. This requires precise measurement to ensure that the hardware installed on the side panels isn't screwed in at different heights.
We are constructing a rack
In order to install a triangular shelving unit, you will also need precise markings. If the walls in your apartment are straight, you'll only need to measure the corner, then make the sides and a couple of triangular shelves of the same size.
If you live in older buildings, it is best to double check the dimensions to ensure they are accurate.
It's recommended to use a hand router to finish the front edges of the shelves. If you don't have one, sandpaper will do just fine.
Once the rough work is complete, screw the shelves to one of the side panels using pre-drilled holes and screws. Then repeat the same procedure with the other side panel. The final step is to secure the back panel. This gives you one last chance to adjust the corners of the cabinet. If you're confident everything is perfect, nail the wall in place with nails spaced 10 cm apart.
Interesting:


Readers' comments
Headings
Washing machine repair


For buyers


For users


Dishwasher


Add a comment