The drum is attached to the tub using a spider. This part experiences tremendous stress during each wash cycle. Over time, it can become deformed or crack. If the spider in your washing machine breaks, it should be replaced immediately. Trying to repair it isn't practical—the machine may not break again after a couple of washes. We'll explain how to access the broken part and where to look for it.
We get to the damaged crosspiece
If the drum spider is cracked, the part will need to be replaced. Do not operate the washing machine with this type of damage, as it could lead to complete failure. To get to the damaged crosspiece, you need to almost completely disassemble the body of the automatic machine.
Before you begin disassembling, be sure to turn off the power to the washing machine and disconnect it from the utilities.
Preparing the machine for disassembly also involves draining any remaining water from the system. To do this, unscrew the waste filter plug. Then, collect the liquid that flows out of the hole in a bowl.
What to do next? Move your "home helper" away from the wall so you can access it from all sides. Next:
remove the top cover of the washing machine by unscrewing a couple of bolts holding it in place;
remove the detergent drawer from the housing;
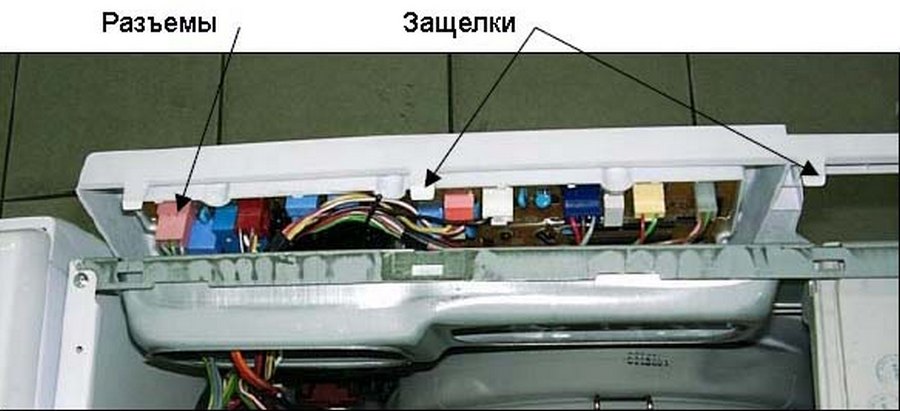
Unscrew the screws holding the control panel;
release the latches securing the instrument panel wiring and remove the control panel;
detach the lower decorative panel from the body;
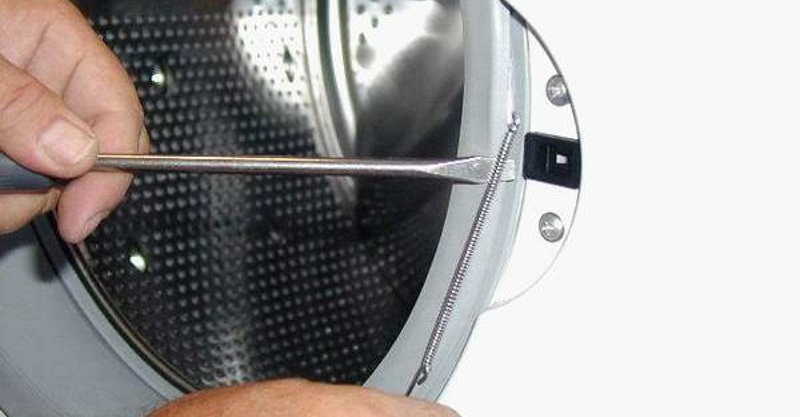
loosen the outer and inner clamps that secure the drum cuff (by unfastening the special “lock” located on both rings);
remove the sealing rubber;
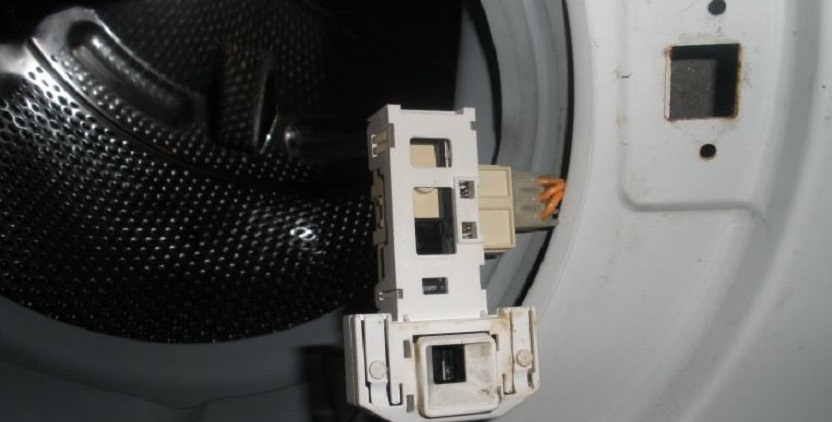
Unscrew the bolts securing the hatch locking device;
remove the safety lock from the machine;
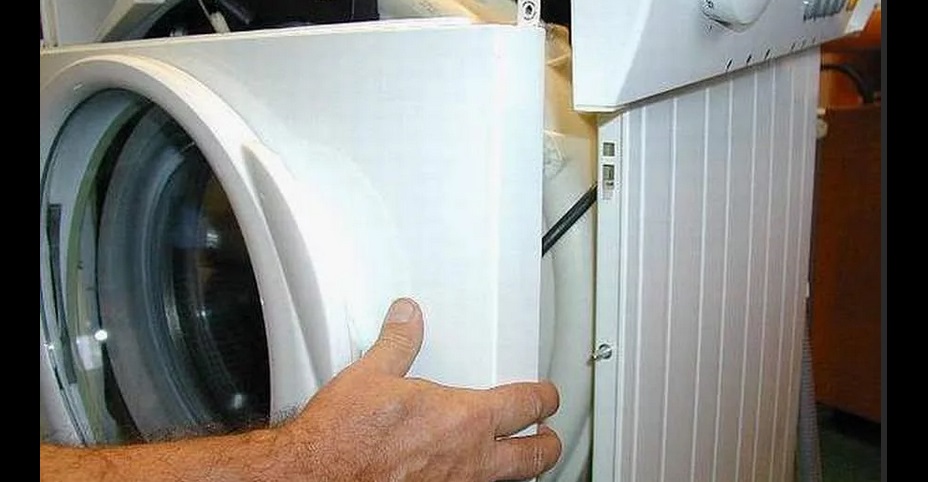
Unscrew the screws around the perimeter of the front wall of the case and remove the panel;
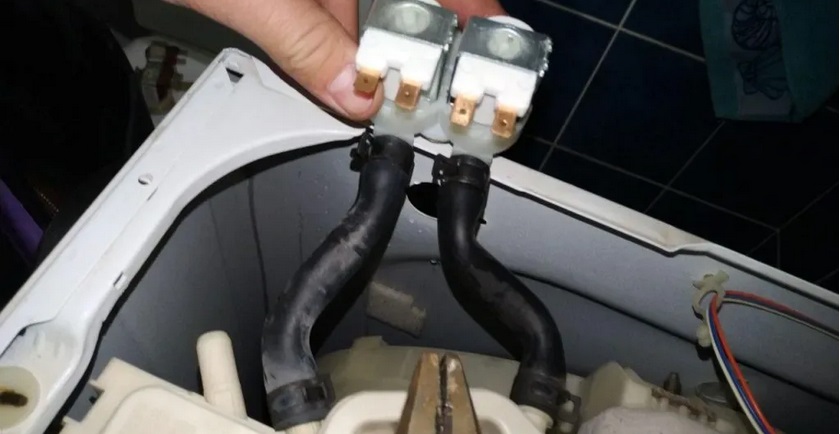
disconnect the filler pipe from the tank;
remove the inlet solenoid valve from the washing machine by unscrewing several bolts holding it;
remove the counterweights (these are heavy concrete blocks designed to give the machine stability);
Unscrew the screws securing the back wall of the case and move the panel to the side;
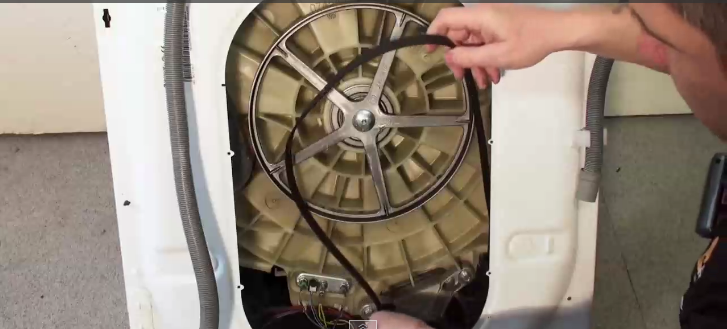
remove the drive belt from the pulleys;
disconnect the wiring from the heating element and the engine;
unhook the pressure switch hose and drain pipe from the tank;
remove the electric motor;
remove the shock absorbers.
During disassembly, it's best to take photos of how the wires and pipes are connected, and remember which bolts were used to hold the parts in place, so you don't make any mistakes later.
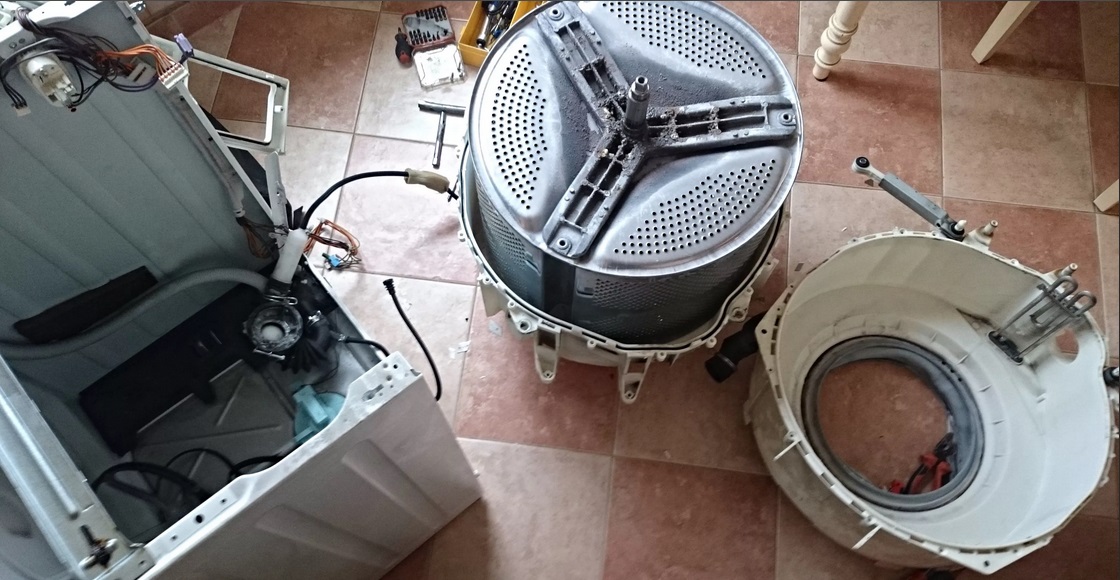
Now, nothing will interfere with removing the tank—it will remain hanging on special hooks. The plastic tank is most easily accessed from the front of the washing machine. Simply lift the unit slightly and pull it toward you.
Let's disassemble the tank
What to do next? The crosspiece is inside, so the container will have to be cut in half. If the washing machine is equipped with a detachable tank, then it is enough to remove all the screws around the perimeter of the tank and gain access to the drum. First, remove the pulley from the tank. To do this, unscrew the screw holding the drum wheel. Next, remove all the screws around the perimeter of the plastic tank, release the latches, and separate the tank. This will allow you to access the drum.
Some machines are equipped with non-detachable tanks. In this case, you'll need to cut the tank with a grinder along the weld seam. The structure is then assembled, with the tank halves fastened together with waterproof sealant and screws.
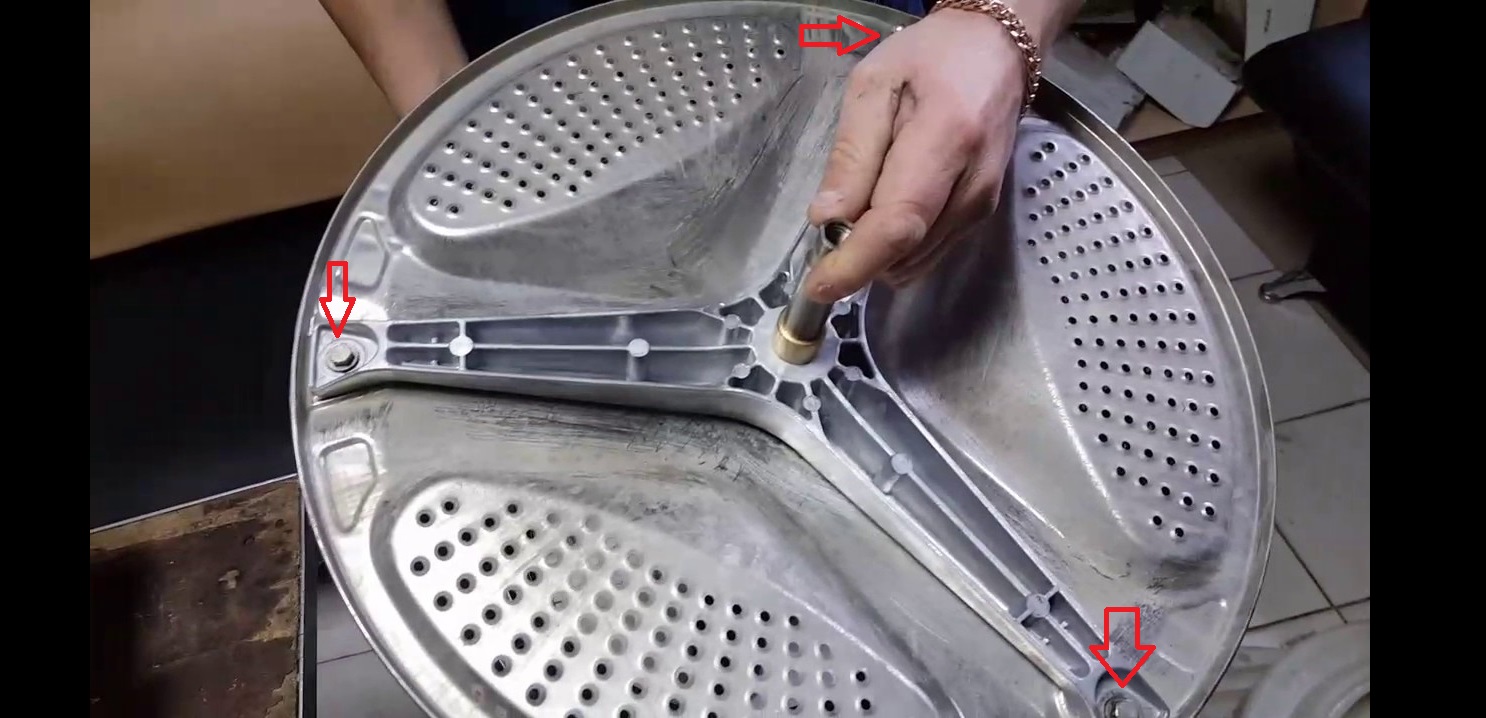
Once you've gained access to the drum, inspect the spider. You'll likely discover that the part doesn't need replacing at all. In that case, the washing machine's malfunctions may be caused by broken bearings—check them too. If the spider is indeed broken, it will need to be replaced. Buy a new part that's exactly the same as the one you're removing. It's important to select components specifically for your specific washing machine model.
Replacing a broken part
The spider is secured to the drum with three bolts. After prolonged use, the screws can become stuck, making them very difficult to remove. WD-40 spray lubricant can help loosen stuck screws. Apply the solution to the affected area and let it sit for 20-30 minutes. This will dissolve the scale and buildup, allowing you to easily remove the screws.
To remove the crosspiece, use a small hammer and a flat-head screwdriver. Gently tap the piece, prying it up. This will release the element from the grooves.
Install the new crosspiece, then reassemble the tub, return it to its original position, and reconnect all previously removed wires, hoses, sensors, and components. Secure the control panel and reattach the front, back, and top panels. Run a test wash cycle and observe how your "home helper" performs after the repair.
 The drum is attached to the tub using a spider. This part experiences tremendous stress during each wash cycle. Over time, it can become deformed or crack. If the spider in your washing machine breaks, it should be replaced immediately. Trying to repair it isn't practical—the machine may not break again after a couple of washes. We'll explain how to access the broken part and where to look for it.
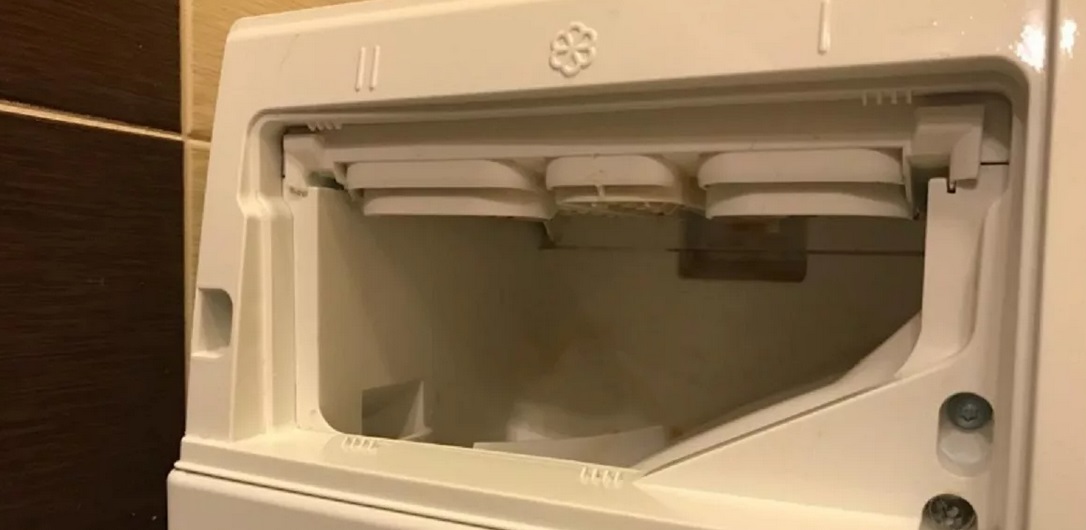


Add a comment