Electrolux washing machine does not heat water
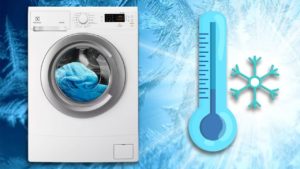 When your Electrolux washing machine isn't heating, the first thing that comes to mind is replacing the heating element. However, washing machine repair technicians advise against rushing to buy a new heating element, as this problem can sometimes be caused by other faults. Let's explore the possible causes of the malfunction and how to restore the washing machine's functionality.
What could have broken?
It's easy to notice that there's no heat during washing. Condensation forming on the door glass when the high-temperature cycle is activated should alert you. Small droplets on the door are the first sign that the water in the drum is cold. Furthermore, the laundry will give away the washing machine. It won't wash properly, and stains will remain.
Usually, the machine, despite the lack of heating, continues to operate in normal mode; only in rare cases does the equipment “freeze” and display an error.
The following may cause the Electrolux washing machine to not heat up: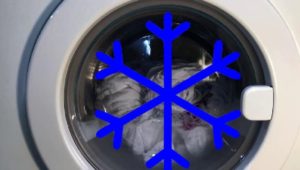
- failed heating element;
- open circuit in the heating element;
- broken temperature sensor or broken wiring;
- damaged pressure switch;
- faulty control module.
Even an experienced technician won't be able to pinpoint the exact reason why your machine isn't heating water. A machine diagnostic will be necessary. Let's look at how to properly and safely check your machine.
Heater electrical circuit
In any case, it is worth checking the heating element first. The heating element is located behind the rear wall of the machine, immediately under the plastic tank. Use a Phillips-head screwdriver to remove the back panel. It's best to move the washing machine away from walls or furniture—this will make it easier to diagnose.
Before starting the inspection, be sure to unplug the washing machine from the outlet and turn off the water supply tap.
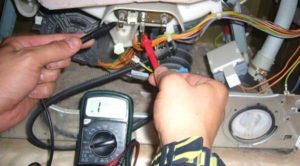 After removing the rear panel, you'll see the heater tube, temperature sensor, and all the wires connected to them. It's a good idea to take a photo of the wiring diagram—this will help you avoid mixing up the phases during reassembly. The rest of the procedure is as follows:
- disconnect the wiring;
- take a multimeter, set it to resistance measurement mode;
- place the tester probes against the heating element terminals;
- Check the value displayed on the device's display. The working heating element will display a resistance of 26-28 ohms. A one on the display indicates an open circuit within the device, while a zero indicates a short circuit in the heater.
If the multimeter display shows "1" or "0," the heating element will need to be replaced. In this case, the tubular heater cannot be repaired.
If the resistance values match the standard, the heater is tested for breakdown. The tester should be set to buzzer mode. Next, place the device's probe against the heating element. If the multimeter beeps, the element must be replaced.
To replace a heating element, you need to remove the faulty unit from its "socket." Sometimes a dried-out heater gasket can complicate the task. To remove the element, follow these steps: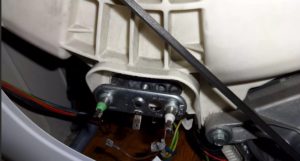
- treat the rubber seal with WD-40 lubricant;
- wait 15-20 minutes;
- disconnect the thermostat;
- unscrew the screw securing the heating element;
- Remove the heater using rocking movements.
When purchasing a replacement heating element, be sure to provide the salesperson with the serial number stamped on the part. Ideally, remove the heating element and take it to the store to find a replacement.
Before installing the new tubular heater, clean the "nest." It's also a good idea to reach into the opening and remove any foreign objects that may have fallen into the tub during use. Reassembly is done in reverse order. When connecting the wiring, be sure to refer to the photographs taken so as not to mix up the phases.
Water level control element
A broken pressure switch may be the cause of a lack of heating. At first glance, there's no direct connection between the heating element and the level sensor, so owners of the machine are unaware of its involvement.
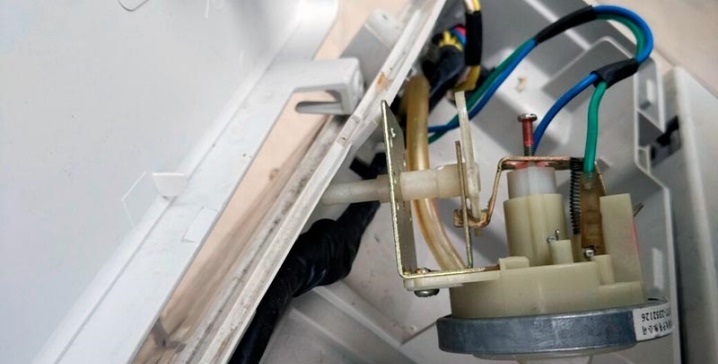
The pressure switch is located just under the housing cover. It resembles a regular washer. Removing the top panel of the machine is easy—just unscrew a couple of screws. A thin tube extends from the plastic housing of the water level sensor—this is the first thing to check. A clogged tube can cause the machine to malfunction.
To "blow out" the tube, you need to carefully remove it. Once you have it in your hands, inspect the surface for cracks and other defects, and feel the hose. If the problem isn't a clog or damage to the hose, check the resistance of the level sensor coil with a multimeter. If a fault is detected, the entire pressure switch will need to be replaced. The new part must be an exact duplicate of the one removed.
Electronic "brain"
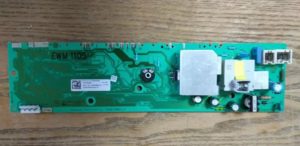 Having checked the heating element, thermistor, their wiring, and the fluid level sensor, and found no faults, we can assume the problem lies with a damaged control board. This likely indicates an electronics issue.
It's impossible to accurately determine the nature of the control module damage without diagnostics. It could be a loose contact, a burnt-out busbar, or a broken track. The firmware may have crashed, and a simple reset of the washing machine and resetting all parameters will fix the problem.
Comprehensive testing of the control board should be performed by professionals.
Such complex work must be entrusted to specialists. It’s better not to get into the “brain” of the machine without having the necessary knowledge and experience. Otherwise, you could only make the situation worse, further damaging the microprocessor. Then, repairs will definitely cost a pretty penny.
A full diagnostic of the electronic unit is inexpensive. Based on the results, the technician will determine whether the board can be repaired or whether the component needs to be replaced. Modules are usually successfully repaired, so don't worry too soon.
"Big Wash" without heater
Of course, it's best to get your machine repaired immediately if you realize it's not heating. However, if the technician promises to return in a week, and the dirty laundry is piling up in the basket, you can find a temporary solution. We'll tell you about an unusual method that will help you wash your laundry effectively, even if the machine isn't heating.
First, decide at what temperature you'd like to wash your laundry. If your apartment has a water heater, set it to the desired temperature, for example, 60°C. If your home has hot water, it's simpler—just adjust the water temperature using the faucet.
Next, turn off the water supply to the washing machine. Then, load the machine with laundry as usual, add the appropriate amount of detergent, and add fabric softener. Once the machine is ready for washing, turn it on and start the desired program. Afterwards, immediately take the shower head, insert it into the powder dispenser and turn on the hot water supply. The liquid will begin to flow into the tank, washing away and dissolving the detergent.
Keep an eye on the tank's fill level. When there's enough water, your Electrolux machine will begin the main wash. It's important to remember this moment: stop the water supply and close the drawer. Then, simply open the shutoff valve so the washer fills automatically during the rinse cycle. You can leave your "home helper" behind. After washing in hot water, it will drain, refill, rinse, and spin your laundry. All these cycle stages will be completed without your intervention.
Even if your home doesn't have hot water or a water heater, you can still use this method. Heat a couple of buckets of water yourself, perhaps with a kettle, and gradually pour it into the machine's tank using a mug or ladle. The effect will be similar.
Interesting:


Readers' comments
Headings
Washing machine repair


For buyers


For users


Dishwasher


Add a comment