My LG washing machine is leaking from the bottom.
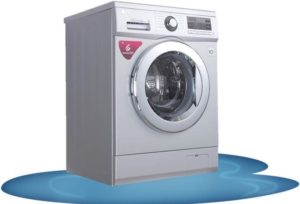 One of the most common problems with LG washing machines is leakage. The leak can be barely noticeable or catastrophic. In any case, if your LG washing machine is leaking from the bottom during a wash cycle, it's important to address the issue immediately. You can call a technician to investigate the cause of the leak, or you can try fixing it yourself. We hope this information will help you repair your "home helper."
Where did it leak from and why?
Before repairing your washing machine, be sure to disconnect it from the power supply. This will ensure safety when working on the appliance.
Pay attention to the stage of the washing machine's cycle at which the leak occurred. This information will significantly facilitate diagnostics and allow you to quickly determine the cause of the breakdown.
Afterwards, inspect the washing machine from all sides, tilting it if necessary to examine the bottom. It's a good idea to remove the back or side panel of the machine to allow for a more complete inspection. It is important to determine the location of the leak as accurately as possible; this will help in further work.
The washing machine's tank may be leaking, in which case a major repair is needed. The drain hose may have a hole, in which case a simple replacement will solve the problem. If the leak is coming from under the door, it's likely a damaged door seal. Therefore, it's crucial to determine the source of the leak and plan the repair accordingly. In most cases, a machine leaks from below due to:
- violation of equipment operating rules;
- use of low-quality detergents for washing;
- manufacturing defects allowed during the manufacture of units and components;
- failure of any element of the system.
We'll explore the possible causes of the malfunction and where to begin diagnostics. We'll also explain the steps to take to fix the leak in any given situation.
Filter and drain hose connection
A leak at the bottom of a washing machine doesn't always indicate a faulty component. It's often caused by simple user error. If you notice water on the floor some time after starting the wash, check that the dust filter cover is tightly screwed on and that the emergency drain hose is in place. This advice is especially relevant if you cleaned your washing machine's dust filter the day before. It's possible you simply didn't secure the element securely.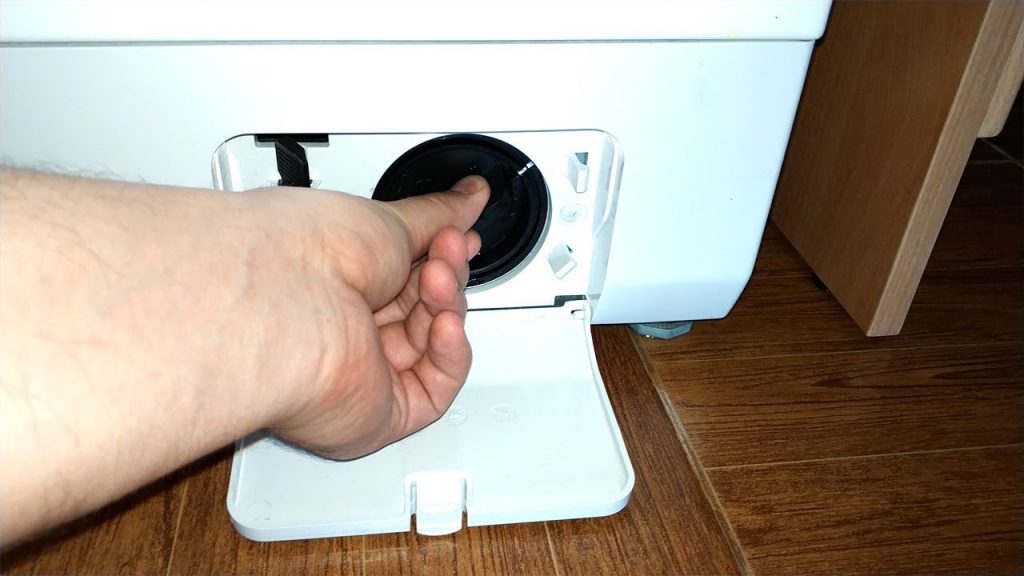
If the dust filter cover is screwed on tightly, inspect the connection between the drain pump and the drain hose. This requires looking underneath the machine. The connection between these two components often leaks due to a loose clamp or cracks in the fitting. Sometimes, treating the cracked area with a waterproof sealant is sufficient. However, replacing the entire snail assembly is much more reliable.
Dispenser and nozzle
Although water collects underneath the washing machine, the source of the leak may be much higher. Inspect the detergent dispenser. The drawer may be heavily soiled, causing the overflow. The water simply gets stuck in the dispenser, unable to flow further, and spills onto the floor. Inspect the dispenser inside and out, paying close attention to its corners, as leaks most often occur there.
It's easy to clean a powder drawer. Fill its compartments with water, wipe the bottom thoroughly with a cloth to ensure it stays dry, and observe. If the drawer is truly leaking, you'll see water begin to leak.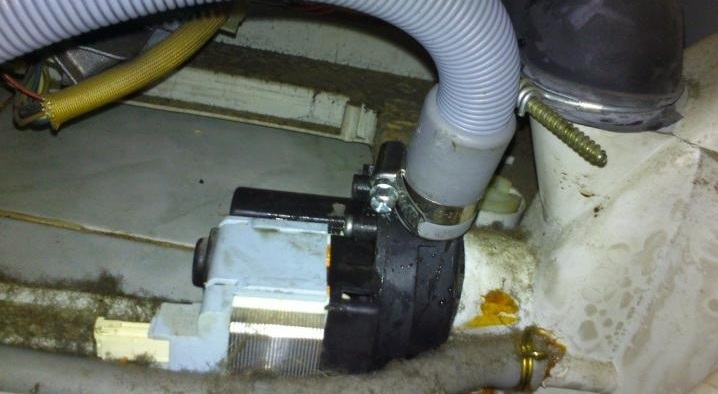
Even on relatively new LG machines, the hose can fail after one or two years of use. This is due to unscrupulous assemblers trying to cut corners on the equipment's components.
If the machine starts leaking while water is being drawn into the system, the cause is most likely in the pipe.
To carry out an accurate diagnosis, you should remove the top wall of the washing machine body.
Sometimes, the drain hose running from the machine's drum to the pump starts leaking. This can be easily verified by tilting the machine and looking underneath. The problem may lie in the inlet hose. You can inspect it by removing the front panel and examining the connection area.
It is better to generously coat the connection point of the pipes with other elements with moisture-resistant glue; this will help eliminate the leak.
Tank or hatch rubber
A crack in the drum is the most common cause of a leak in an LG washing machine. In the vast majority of cases, simply repairing the leak is impossible; a new drum must be installed, which can be quite expensive. A hole in the drum can also occur if you frequently wash shoes. Cracks can also form due to foreign sharp objects getting inside, such as bra underwires, nails, paper clips, buttons, etc.
A leaking tank can also be caused by a manufacturer defect. In any case, it's necessary to completely disassemble the washing machine, remove the tank, and inspect the leak. This repair is best performed by a qualified technician.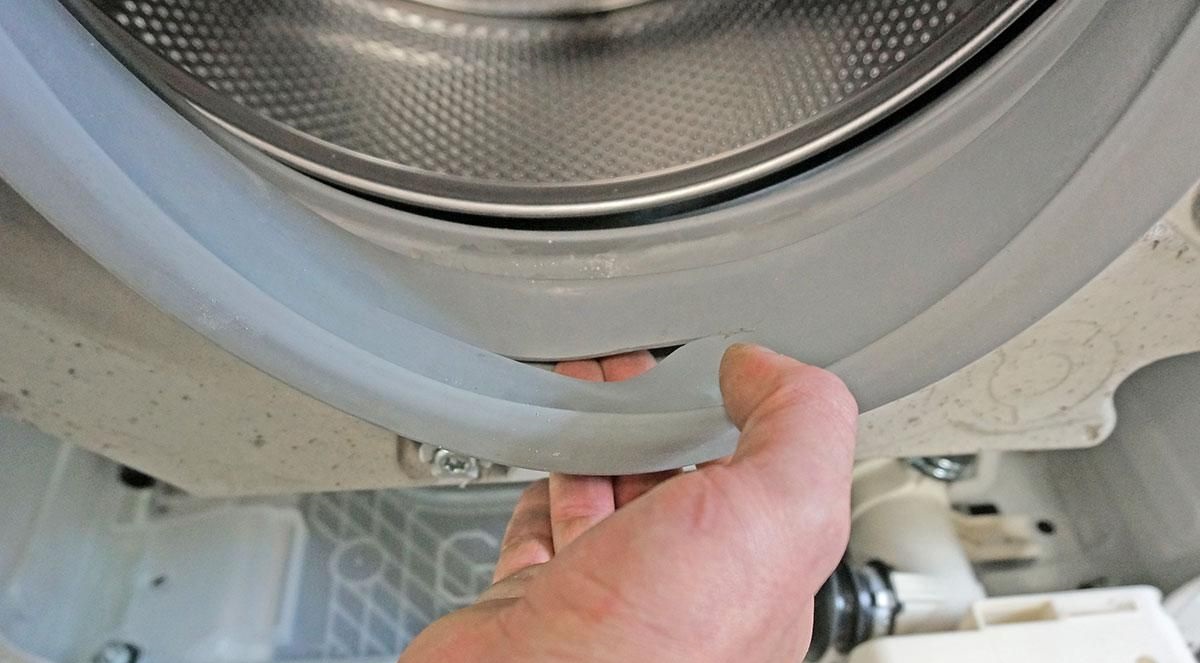
If water is leaking from under the door, the sealing cuff is likely damaged. The rubber seal can be repaired by sealing the crack with waterproof glue or a special patch. The cuff can also be completely replaced; the part is inexpensive, and the reinstallation process is fairly straightforward.
To prevent damage to the door seal, make sure that items that are often forgotten in pockets, such as coins, nails, paper clips, etc., do not fall into the washing machine drum.
Algorithm for finding and fixing the problem
If you decide to fix the leak yourself, without calling a professional, you should proceed with extreme caution to avoid making the situation worse. If your washing machine is under warranty, it's best to contact a service center rather than attempt to repair it yourself. So, let's look at the steps to take to repair the equipment depending on the location of the leak. If the leak is located below, the following steps are recommended:
- Unplug the washing machine. Be very careful when unplugging the power cord, ensuring that no water comes into contact with you. This precaution will prevent electric shock. If unplugging the machine without contact with water is not possible, turn off the power to the room at the electrical panel.
- close the fill valve;
- Open the door and remove the items from the drum. Any remaining water in the drum should be removed from the system using the emergency drain hose. The hose is located at the bottom front of the washer, under a special panel near the waste filter.
- Proceed with troubleshooting. If the hoses are damaged, you can replace them completely or simply treat the leak with waterproof glue and apply a patch. If the cause is a defective seal between the hose and the machine body, a new seal should be installed. After these steps, reassemble the washing machine in reverse order and run a test wash.
If the leak is coming from the left corner, it's likely due to a leaky detergent drawer. Remove the dispenser, inspect it, clean it, and remove any blockages. Then replace the drawer and start the wash cycle. It's also a good idea to check the water pressure; you may need to slightly close the inlet valve to reduce the flow of water entering the system.
If the intake valve is severely damaged, you will need the help of a washing machine repair specialist.
A leak from the front, under the hatch, could be caused by a damaged seal. You can check the integrity and elasticity of the rubber seal yourself. Open the door and carefully inspect the seal for cracks or kinks. Minor damage can be treated with glue containing waterproof components or covered with special patches. It is better to replace a badly damaged rubber cuff with a new one, otherwise the effect of gluing and patching will not last long.
If your machine is leaking while filling with water, inspect the inlet valve hose. To do this, remove the top cover of the LG washing machine and examine the component. If the hoses are clearly damaged or their appearance significantly differs from the original, the parts will need to be replaced.
The washing machine's filler hose often fails. Check to see if liquid is leaking from the connection. If so, disconnect the hose, clean off any excess adhesive, wipe away any water, and dry the connection area. Then, replace the hose, after treating its base with a waterproof adhesive or epoxy mixture.
If the problem is caused by a damaged drum, the LG washing machine will have to be disassembled almost completely. It's very difficult to do all the work alone, so it's best to have a helper for the repair. First, lay the washing machine on its side and inspect it from underneath. Owners of top-loading machines should inspect the insides under the side wall. Once you've confirmed the drum is the problem, you can begin repairs. If the leak is severe, the element will need to be replaced.
Replacing and repairing a washing machine's tank is a technically complex task, for which it is best to invite a specialist.
If your washing machine starts leaking during the spin cycle, the seal is likely damaged or the drum bearings are worn out. Accessing the damaged components is only possible by disassembling the LG washing machine's drum. This type of work is considered complex, so if you're unsure of your capabilities, it's best to seek the help of a washing machine repair technician.
Interesting:


5 reader comments
Add a comment
Headings
Washing machine repair


For buyers


For users


Dishwasher


Thank you! Your experience was helpful and your advice helped fix the leak!
Thank you! The tips are helpful!
Thank you
How can I reduce the jet pressure with the inlet valve? There's splashing.
Try turning off the water supply to the washing machine a little; mine has strong pressure. I had the same problem; I turned off the tap and everything was fine.