Vestel washing machine does not drain water
 If your Vestel washing machine isn't draining, your scheduled wash will have to be postponed. Furthermore, the machine will stop with a full tank, trapping unfinished laundry. The machine will attempt to restart the pump, hum for a couple of minutes, then give up, cancel the program, and display an error code. To complete the cycle and remove the laundry, you'll need to run a system diagnostic and determine the cause of the stoppage. See below for instructions.
We start diagnostics with the filter
It's virtually impossible to immediately determine the cause of a stalled drain, especially without data on the machine's behavior before the failure. It is important to know at what stage the machine “stuck”, whether the pump managed to pump out some of the water, and what sounds it made Vestel when trying to speed up the pump. Then there's a chance to pinpoint the problem based on the symptoms. Otherwise, you'll have to thoroughly inspect the entire drainage system.
Typically, water stops pumping out of the drum due to problems with the waste filter or pump. The former often becomes clogged with debris trapped in the machine, while the latter breaks or becomes blocked by hair tangled around the impeller. In any case, it's recommended to start checking the waste filter to clear the blockage and drain the water from the machine. To check the waste filter, unscrew it from its housing. Here's how:
- disconnect Vestel from the power supply and water supply;
- we move the machine away from the wall or take it out of the furniture set;
- remove moisture-intolerant items (dry detergents, rugs) from the washing machine;
- we spread oilcloth and rags around the machine;
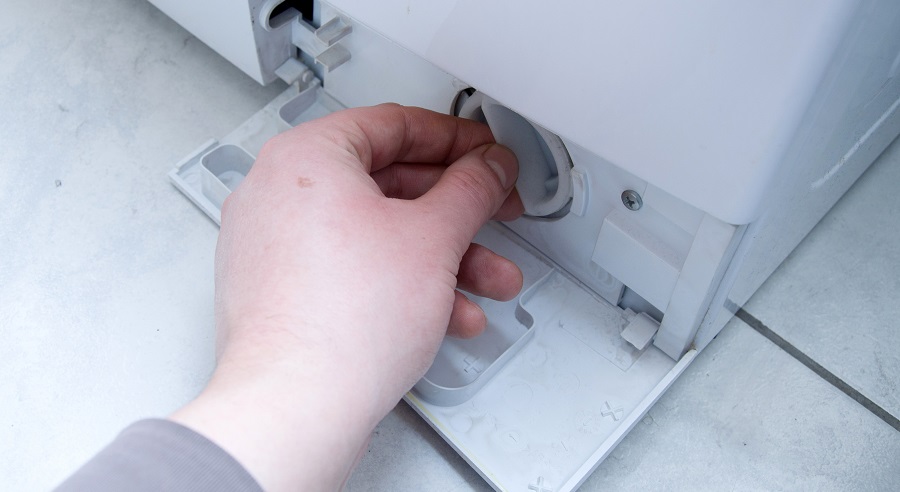
- We use a screwdriver to pry open the technical hatch door located in the lower right corner of the Vestel;
- we find the trash filter – a black plug;
- lean the body against the wall so that the front legs are raised by 5-8 cm;
- We place a container under the filter to collect water.
The next step is to unscrew the dust filter. Grasp the tab on the plug and slowly twist it clockwise. Don't rush, otherwise a stream of dirty water will gush out of the housing. Once the flow dries up and the nozzle loosens, you can completely remove the dust filter from the opening. Some dirt will spill onto the floor, so it's best to use a plastic cloth and a rag.
Do not wash the waste filter in hot water – boiling water will deform the plastic and rubber!
The removed filter needs to be cleaned. If the "crust" of deposits and debris is light, rinsing the nozzle under the tap is sufficient. Stubborn dirt can be removed with a toothbrush and laundry soap. A thick layer of scale cannot be removed so easily by hand; soak the coil in a warm lemon solution. Avoid using boiling water, as the plastic and rubber seal will deform at high temperatures.
Be sure to also inspect the filter housing. It's possible that a thick layer of scale and plaque is blocking water from flowing down the drain. For cleaning, use the same cleaning tools: a toothbrush, soap, and a dish sponge.
We dismantle the drain pump
If the filter housing and the nozzle itself were clean to begin with, the problem should be looked for elsewhere—the drain pump. The pump is supposed to drain water from the tank, but if it's clogged or malfunctioning, this becomes impossible. To fix the problem, you'll need to dismantle the unit, inspect it, and, if necessary, clean and repair it.
When handling Vestel, remember safety rules: disconnect the machine from the power supply and use gloves!
Vestel users are lucky – accessing the "heart" of the drainage system is easier: just look underneath the bottom of the machine. Detailed instructions on how to remove the pump are as follows: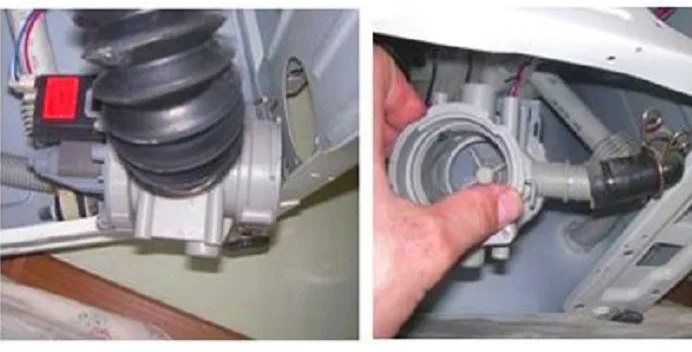
- prepare a key, screwdrivers and a container to collect water;
- disconnect Vestel from communications (unplug the power cord from the socket, turn off the water supply, unhook the drain hose);
- detach the service hatch panel;
- drain the water from the drum by unscrewing the debris filter or using the emergency drain hose;
- turn the washing machine on its side (it is important to choose the side where the powder compartment is located, otherwise there may be a leak on the board);
- disconnect the bottom from the body (some models have “Aquastop” leak protection, which must be disabled by removing the terminal);
- look under the bottom and find the pump;
- loosen the screws holding the pump;
- disconnect the wires and pipes connected to the pump;
- turn the device counterclockwise, and then carefully press its body inward;
- remove the pump from the grooves and take it out.
It is impossible to determine the nature of the malfunction by eye. You will have to carefully inspect the device, disassemble it, clean it and ring it. First, we place the pump on the table, then we begin diagnostics.
Disassembling and cleaning the pump
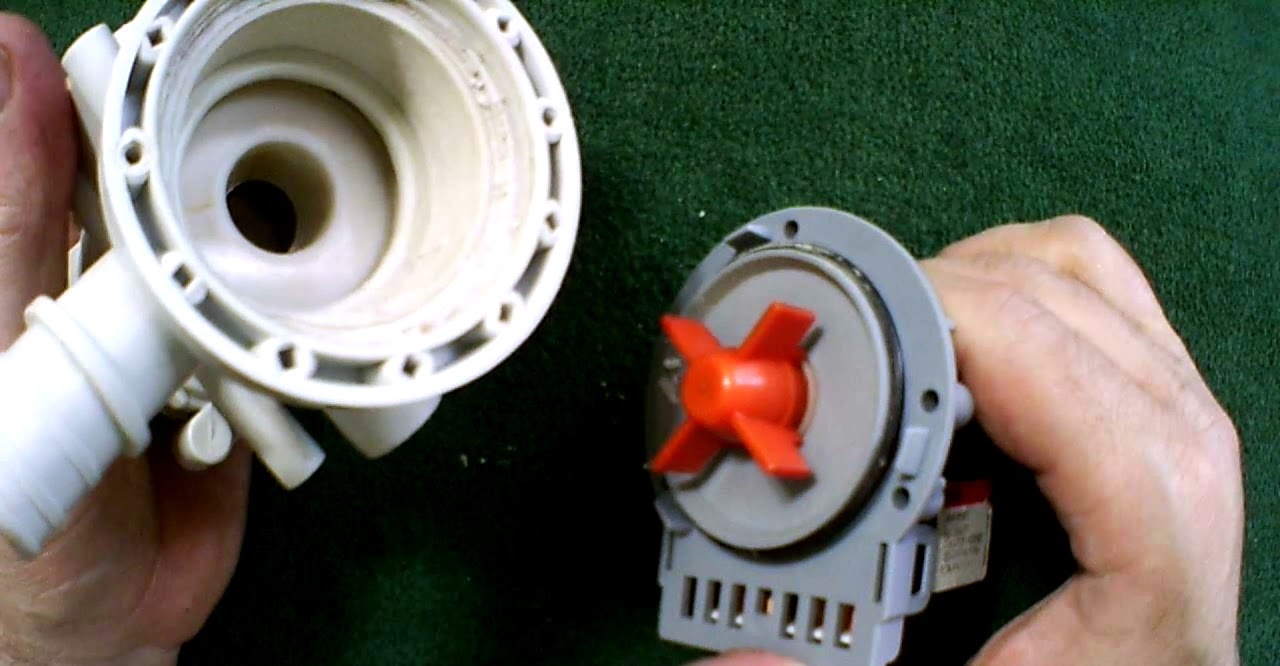
Pump repair involves cleaning it. The pump itself rarely gets dirty; the impeller—a wheel with blades—takes the brunt of the damage. Hair, threads, and lint caught in the washing machine often get tangled around the screw, clogging the entire system. Restoring the drainage system's functionality in this case is easy: simply remove all the accumulated dirt from the part. Here's how to do it:
- unscrew the bolts on the pump body;
- half the body;
- we find the shaft with the impeller;
- We clean hair and other dirt from the blades.
At the same time, we check the impeller itself. It should rotate freely, but not fall off the shaft. If the impeller falls off, then the problem has been detected – the part needs to be secured more securely or replaced entirely. Most importantly, avoid using glue or electrical tape – such “repairs” are useless and harmful.
It's best to clean the pump housing—the so-called snail—right away. Then you can return the unit to its slots and secure it with screws. Next, stand the Vestel upright, reinsert the debris filter, and connect the machine to the utilities. Be sure to run a test cycle and check that the drain is working properly. Is the water draining from the tank? If not, we return to diagnostics.
Coil diagnostics
It's best not to stop after cleaning the pump; instead, test it immediately. Take a multimeter, set it to ohmmeter mode, and connect the probes to the pump terminals. Then, evaluate the results: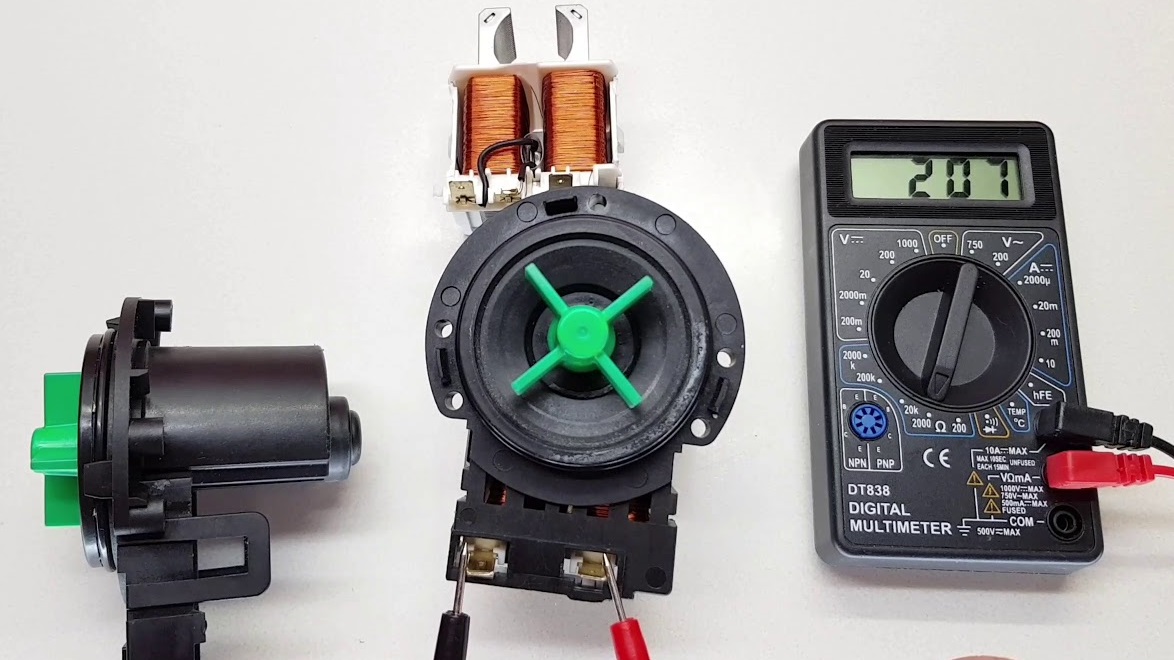
- 150-260 Ohm is normal, the pump is working;
- “0” – failure due to short circuit;
- less than 150 Ohm – open winding.
Repairing a broken winding on a pump or eliminating the consequences of a short circuit is not recommended. It's much easier, faster, and cheaper to purchase a replacement. When purchasing a new pump, refer to the Vestel serial number. You can bring the broken pump to the store and ask them to find a replacement. Installation is the same as removal, only in reverse order. If cleaning the drain and replacing the pump doesn't restore drainage, the problem lies with the electronic unit. Do-it-yourself repairs are prohibited—call a service center only.
Interesting:


Readers' comments
Headings
Washing machine repair


For buyers


For users


Dishwasher


Add a comment