How to remove the drum from an Ardo washing machine?
 In most cases, you can repair a washing machine yourself—you just need to understand how the machine works, where the parts are located, and what they do. For example, you can replace the bearings yourself; to do this, you need to remove the drum on an Ardo washing machine. The same steps will also be necessary if the drum is broken. Let's look at how to remove the centrifuge and what tools you'll need for the job.
Stock up on tools and patience
You don't need any "unique" tools to remove the drum; a standard set found in every home will suffice. During the work you will need a pair of screwdrivers (Phillips and minus), a small hammer, a screwdriver, a drill, a set of Allen keys, pliers, and a hacksaw. In addition, you will need WD-40 aerosol lubricant, silicone sealant (for subsequent assembly of the tank), a marker and several self-tapping screws.
It's best not to purchase components that need replacing in advance, as it's easy to mislabel them. It's much better to first disassemble the washing machine, remove the parts, and only then purchase new ones. Once you've gathered all the tools needed for disassembling the machine, it's time to prepare the machine and your work area. The upcoming repair will be time-consuming, so it's best to set up a fully functional home "workshop" to ensure your work is unimpeded. Ideally, take the machine to an empty garage and perform all maintenance there.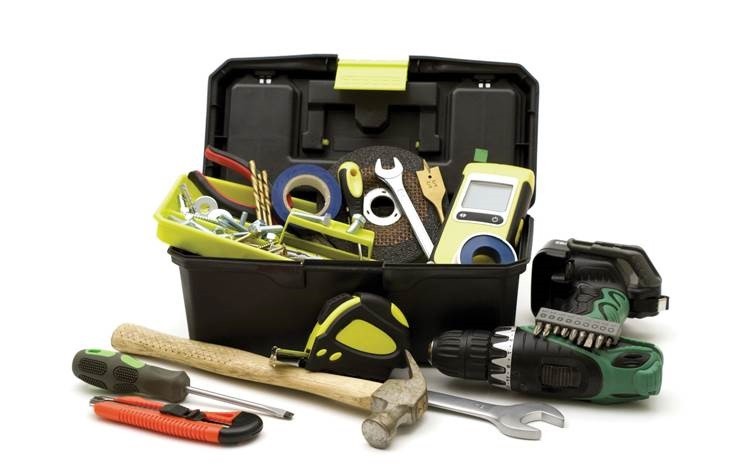
If working in a garage isn't feasible, you can set up a space at home. Move the unit to a spacious room with 3-4 square meters of free space. It's best to cover the floor underneath the machine with plastic sheeting or old rags. Once everything is ready, you can begin disassembling the Ardo washing machine.
We remove the parts around the tank
When working with household appliances, it is important to follow safety regulations. Be sure to disconnect the washing machine from the power supply, turn off the water supply tap, and detach the drain corrugated pipe and inlet hose from the body. Afterwards, it is necessary to drain the remaining water from the system:
- prepare a small container to collect the liquid;
- open the technical hatch in the lower corner of the machine;
- place a basin under the washing machine body, in the area where the waste filter is located;
- unscrew the "plug" of the trash can;
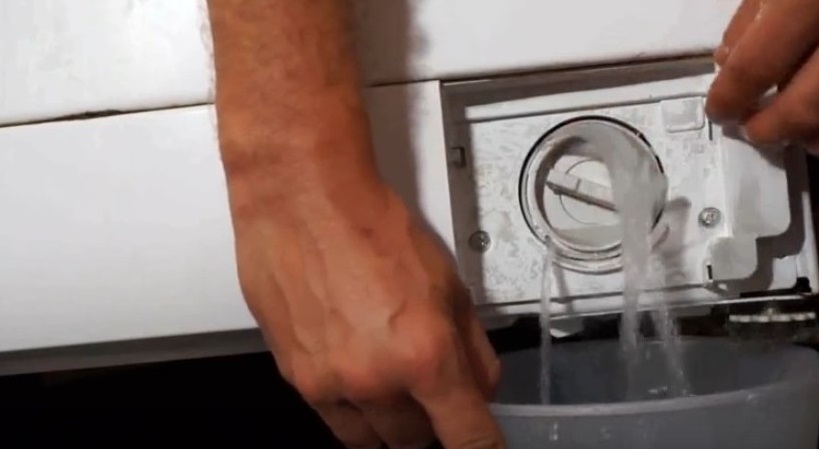
- collect water in a container;
- Rinse the filter under running warm water and dry it. Screw the retaining element back in after the repair work is complete.
When disassembling a washing machine, it is important to photograph the wiring diagram, sensors, and pipes to avoid mistakes during reassembly.
After disconnecting the power and draining the water from the washing machine, you can begin disassembling it. The procedure is as follows:
- Unhook the "top." To do this, you need to unscrew a couple of bolts securing the cover at the back. To remove the panel, slide it slightly back from the control panel and immediately pull it up;
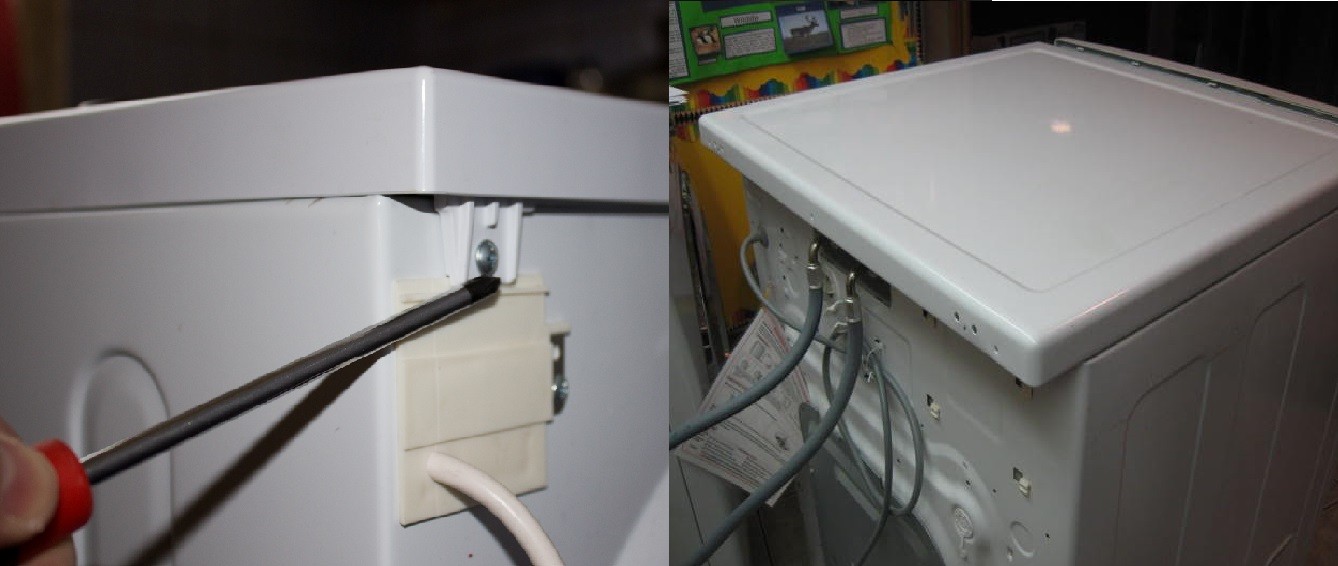
- Unscrew the screws located around the perimeter of the rear panel of the case. Remove the panel and set it aside;
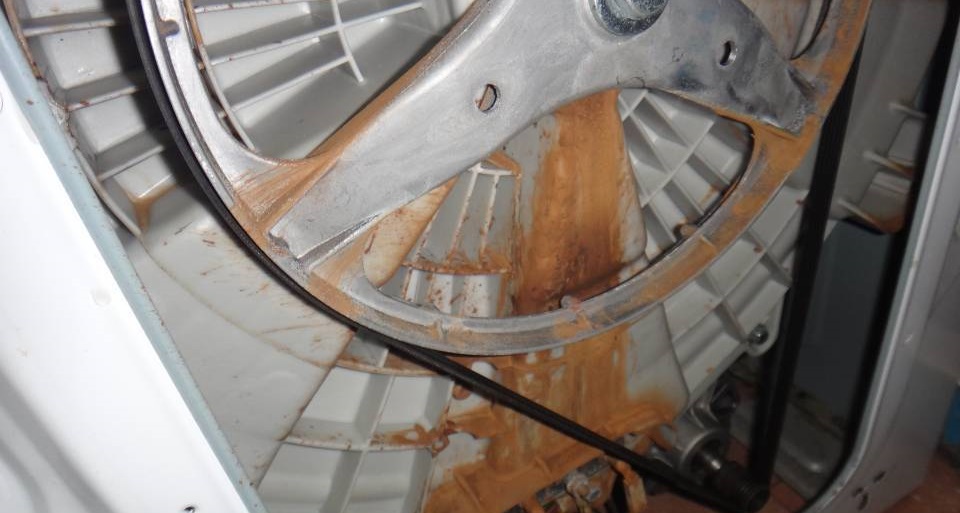
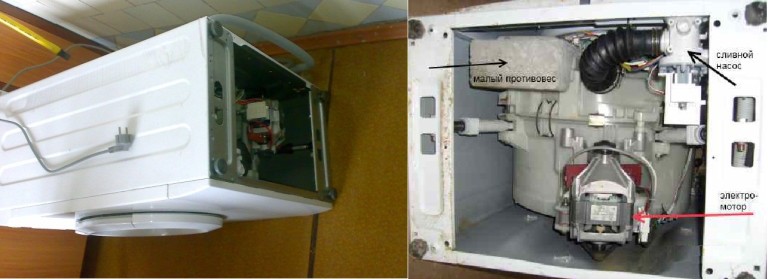
- Inspect the inside of the machine. You'll see the tank, pulley, motor, and drive belt. If there are rusty streaks coming out of the center of the plastic container, it's a safe bet that the seal is worn out and the bearings are damaged.
- remove the drive belt from the pulley;
- Disconnect the wiring connected to the tank. This supplies power to the heating element, thermostat, and motor;
- Unscrew the screws securing the washing machine's electric motor;
- loosen the central nut of the heating element, then remove the tubular heater from the unit;

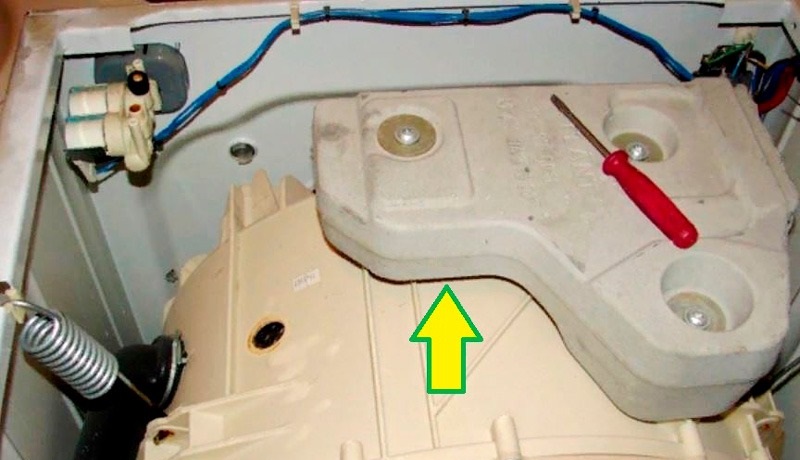
- Remove the counterweight using an Allen key. The concrete block is located on top, just under the machine's lid. It's there to add weight to the washer. The "stone" prevents the machine from bouncing during operation and reduces vibration during the spin cycle.
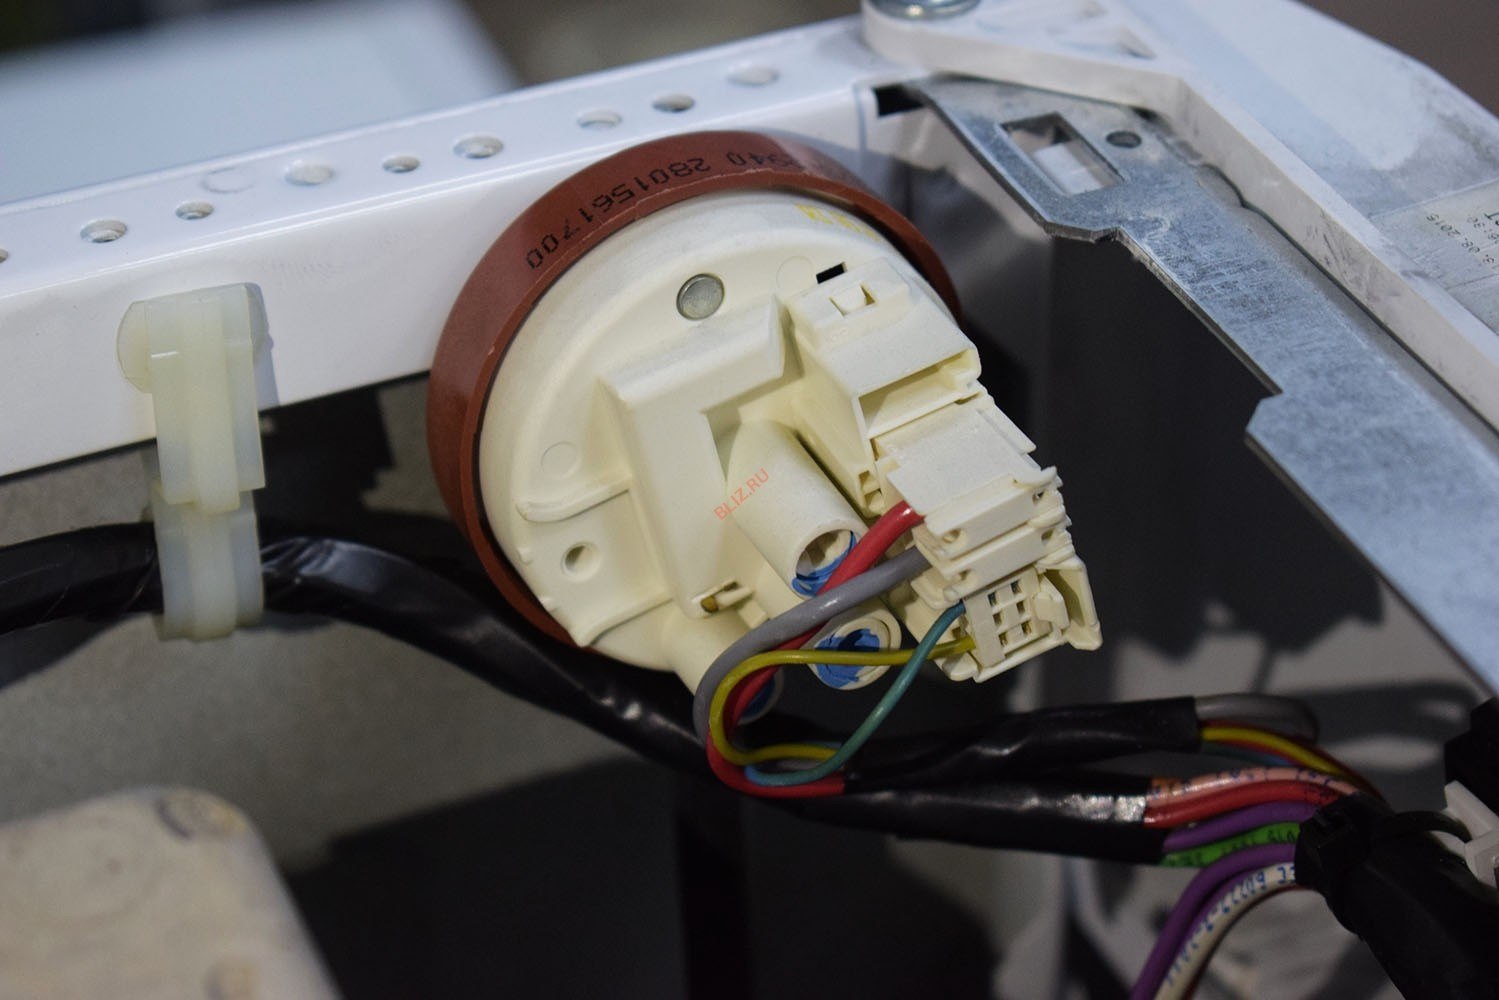
- Disconnect the hose and wiring from the pressure switch. Then carefully remove the water level sensor from the housing;
- remove the powder container;
- Loosen the clamps securing the hoses facing the detergent drawer. Then remove the detergent dispenser hopper from the machine.
- Carefully lay the machine on its right side. If the Ardo has a bottom, unscrew the screws and remove the tray;
- Unscrew the bolts located to the right and left of the trash filter;
- push the snail, where the filter is inserted, into the machine body;
- Disconnect the wiring from the drain pump. Loosen the clamps and disconnect all the hoses from the pump;
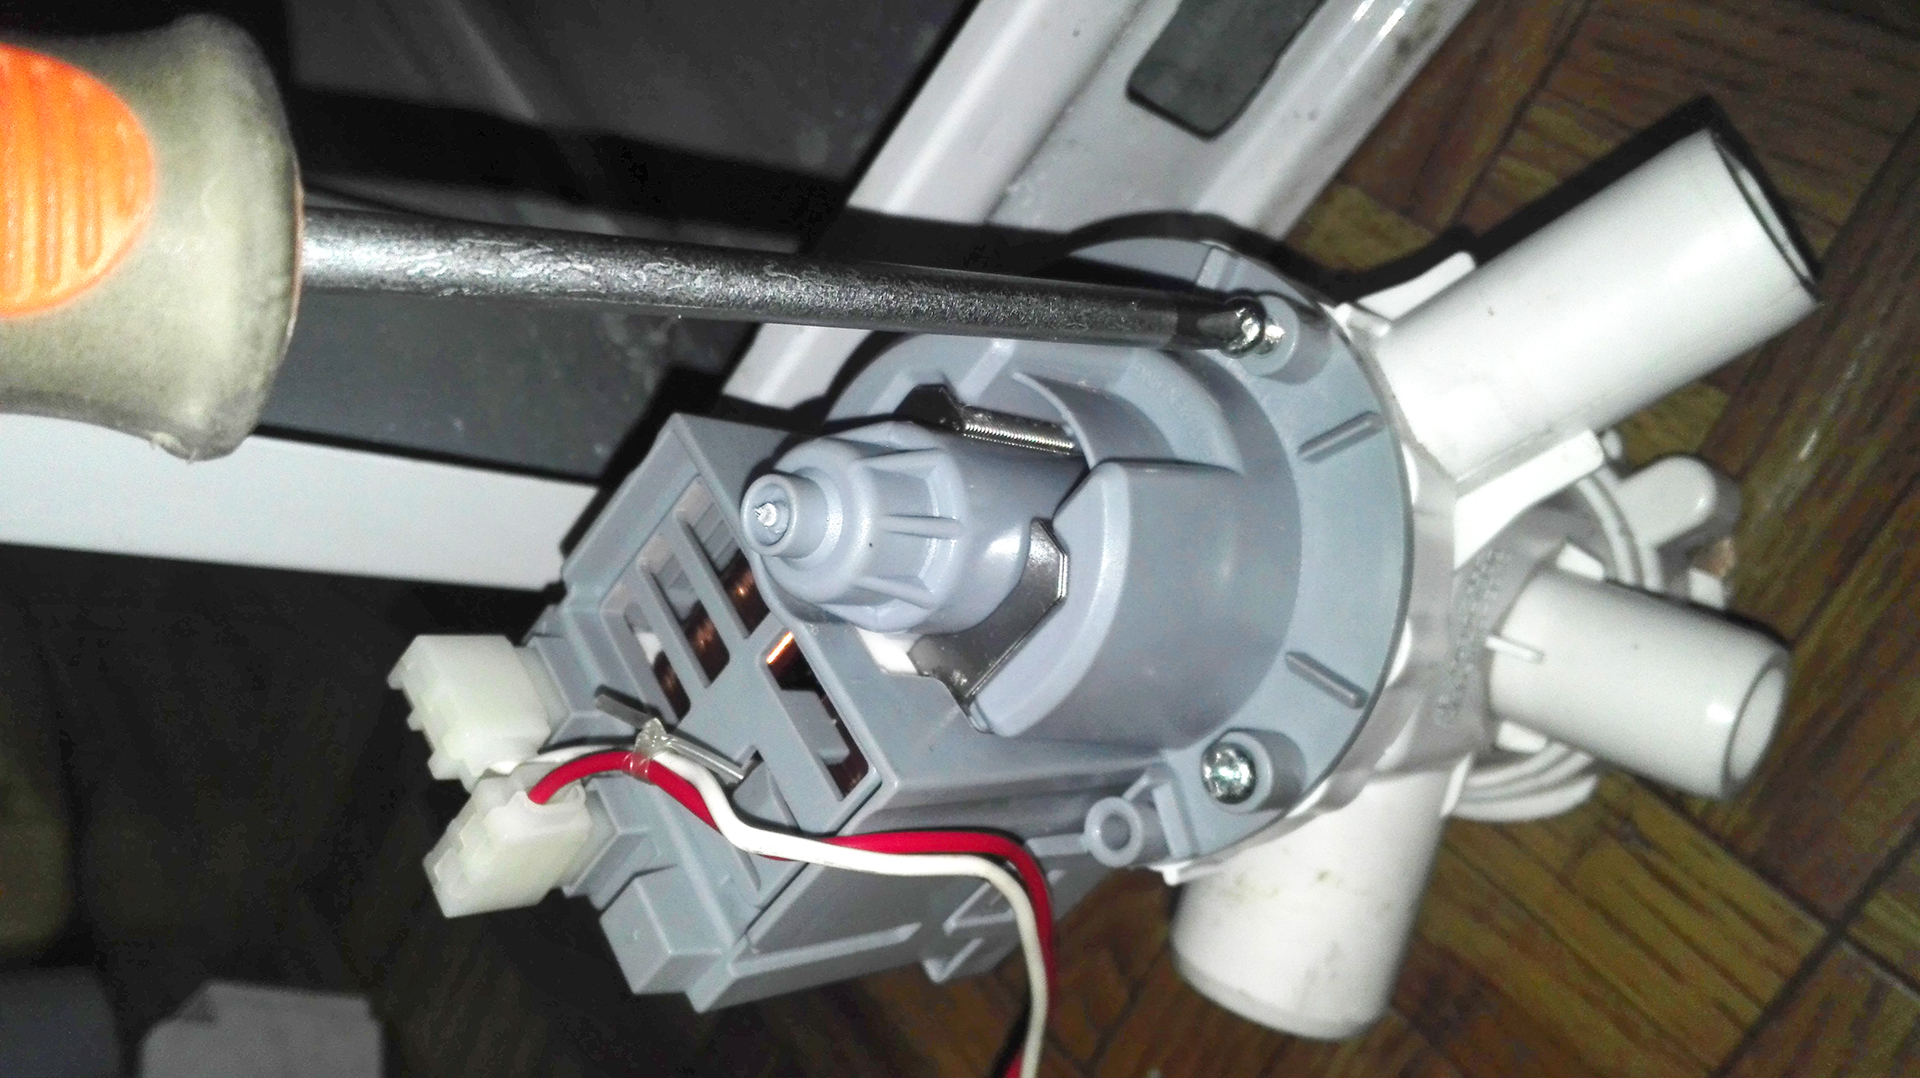
- remove the pump from the washing machine;
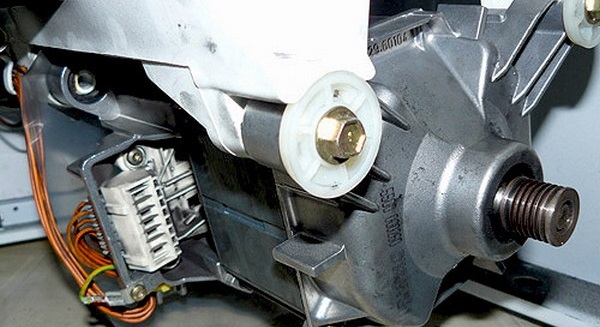
- Remove the washing machine's electric motor. Since its fasteners were already unscrewed, all that remains is to slide the motor back and pull it downwards;
- Unscrew the shock absorbers that support the tank.

Now there's nothing stopping you from removing the tank and drum from your Ardo washing machine. All the main components and sensors are now detached from the plastic container. We'll explain what to do next.
We dismantle and disassemble the tank
At this point, the Ardo washing machine is lying on its side; it needs to be placed on its feet. Returning the machine to an upright position requires great care, as the drum-tub assembly is now held in place by just a couple of springs.
If the control module is preventing the drum from being removed, the board must be removed.
Removing the electronics unit is easy. Simply unscrew the circuit board fasteners and remove the control module by depressing the latches. It's best to have an assistant when removing the plastic container. Removing the drum with four hands is much easier. Grasp the tank, lift it off the shock-absorbing springs, and lift it out of the washing machine through the top.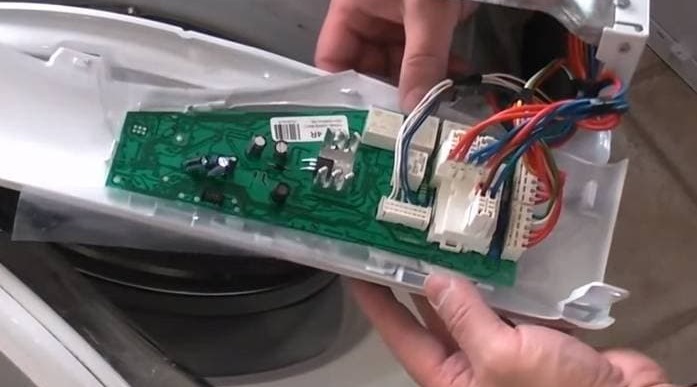
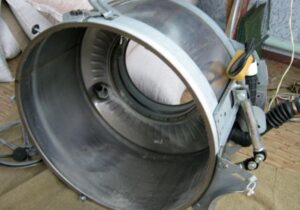
Now all that remains is to “penetrate” inside the plastic tank, which is where the drum is “hidden”. The main difficulty is that Ardo washing machines are equipped with non-detachable tanks. However, such an unpleasant “surprise” will not prevent you from repairing your automatic washing machine.
Of course, monolithic drums complicate washing machine repairs. It's easy to understand why manufacturers equip their machines with these components—it helps reduce the cost of production. Another reason is that the manufacturer hopes that even if a simple bearing failure occurs, the user will have to buy either a complete replacement drum or a new automatic machine. This translates into a healthy profit for the retailer.
However, DIYers and do-it-yourselfers have long since figured out how to repair an Ardo automatic washing machine without purchasing expensive parts. To remove the drum, carefully saw through the tank, replace the necessary parts, and then glue the halves together with a special waterproof compound. The procedure is as follows:
- Inspect the plastic container. Find where the factory connecting seam runs;
- Using a marker, mark a line along which you will cut the tank. It should run directly along the weld seam;
- Using a drill with a thin bit, make several holes along the marked strip, at a distance of 3-5 cm from each other;
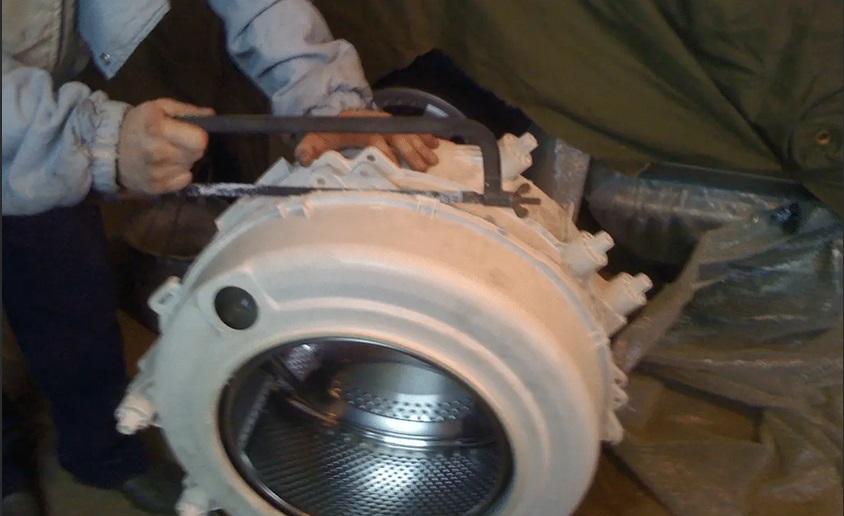
- Use a hacksaw to cut the tank in half, following the marks exactly;
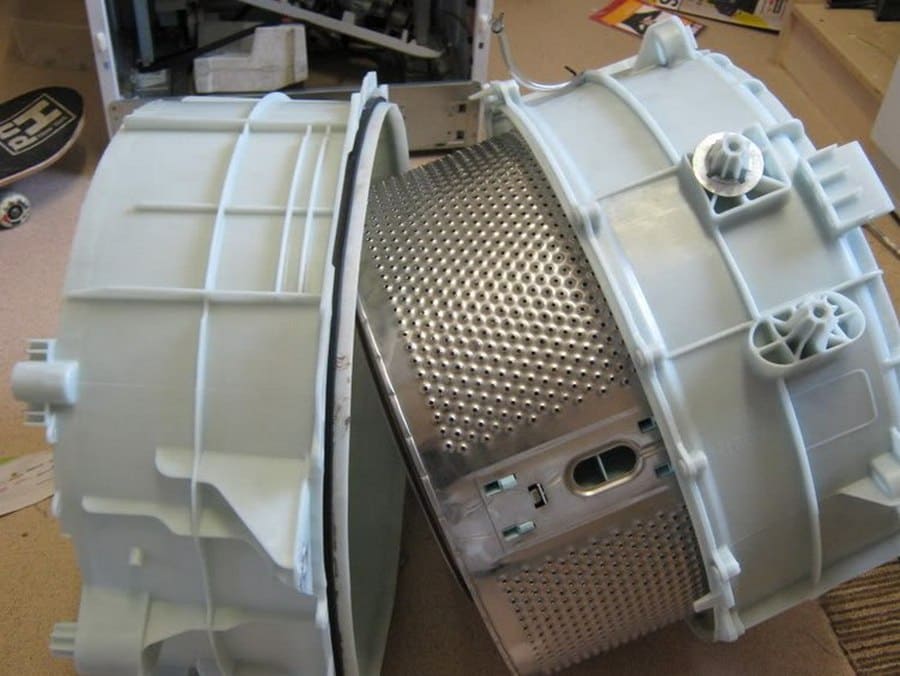
- remove the top of the tank;
- Turn the bottom half of the tank over to find the wheel that secures the drum to the plastic;
- remove the fasteners and take out the drum;
- install the oil seal and bearings (or other elements that need to be replaced);
- Assemble the structure: secure the drum in the tank, then connect the halves of the plastic container together.
To reliably "glue" the sawn parts together, the craftsmen use a moisture-resistant silicone sealant.
The seam should be degreased and a layer of sealant should be applied. After this, place the upper part on the lower part and press the halves together for a few minutes. It is strongly recommended to additionally reinforce the structure with screws. Now all that remains is to reassemble the tank-drum assembly, replace all previously removed parts, and connect the wires and pipes. Photos taken during disassembly will help you do everything correctly.
Removing the drum from a washing machine is quite labor-intensive. However, by doing the repair yourself, you can save a significant amount of money compared to what a service center technician would charge for their services. If you follow the instructions carefully and strictly adhere to the recommendations, even a novice can handle the job, and the machine will function as before.
Interesting:


Readers' comments
Headings
Washing machine repair


For buyers


For users


Dishwasher


Add a comment