How to remove the drum on a Candy washing machine?
 After using your machine for a while, it may require repairs. In some cases, it's necessary to remove the drum of your Candy washing machine. For example, to replace a bearing assembly or remove an object stuck between it and the plastic drum. Removing the drum is quite labor-intensive. But if you're willing, you can easily handle the job yourself. Let's learn how to properly disassemble your washing machine without calling a professional.
Preliminary actions
Surely every homeowner has a small toolbox with the most essential tools: a hammer, a drill, pliers, a screwdriver, screwdrivers, and Allen keys. These tools will be sufficient for disassembling a Candy automatic washing machine. However, to repair the unit, you'll need a hacksaw.
It's best not to order parts that need replacing in advance. You could confuse component markings and end up with the wrong parts. It's best to remove the parts first and only then buy new ones that match the ones you removed. Once you've gathered your tools, you can work on the washing machine itself. The repair process will be time-consuming, so it's best to set up a comfortable workspace right away. Ideally, take the washing machine to a garage or workshop.
If this isn't possible, move the appliance to a spacious room where nothing will interfere with the disassembly process. Cover the floors with a drop cloth. Ensure that all sides of the washing machine are easily accessible. Once the work area is prepared, you can begin the repair.
We will remove the parts that prevent the drum from being removed.
When carrying out repairs, it is important to observe safety precautions. Before starting work, be sure to turn off the power to the washing machine and turn off the water supply tap. Once this is done, you can proceed to further manipulations.
Next, drain the remaining fluid from the system. To do this, prepare a shallow container, place it under the machine, and unscrew the waste filter. The water will drain into the basin. Be sure to rinse the removed filter element, dry it, and set it aside.
When disconnecting components, take photos of the wiring diagram, sensors, and components. This will help you reassemble the automatic machine without errors later.
To remove the drum of a Candy washing machine, follow these steps:
- Detach the top of the case. Unscrew the screws holding the panel in place, then push the cover back slightly and pull it up. Set the element aside;
- Unscrew the screws securing the rear panel of the case. Remove the wall;
- remove the drive belt;
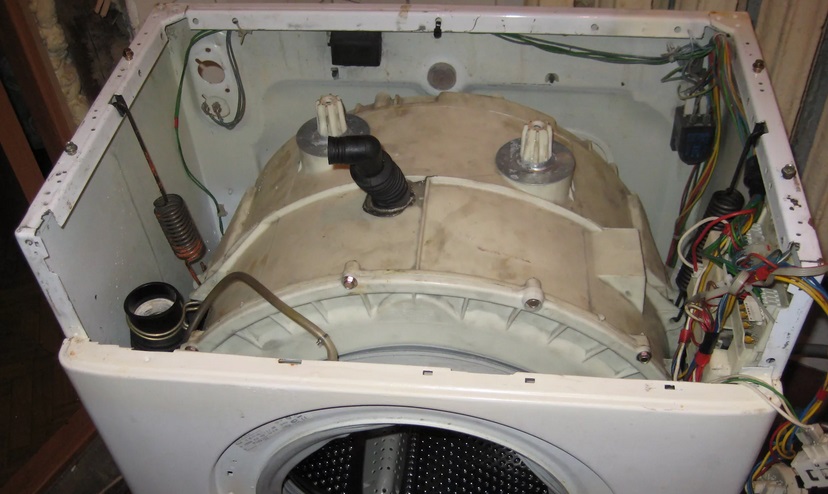
Rusty streaks on the rear surface of the tank indicate a bearing failure.
- Disconnect the wiring from the washing machine's drum. Specifically, the heating element and thermostat contacts;
- Loosen the central nut of the heating element. Using a rocking motion, remove the heater from its socket;
- unscrew the bolts securing the automatic transmission engine;
- Remove the counterweight. The block is located on top and is easily visible once the cover is removed. Keep in mind that it is quite heavy. To remove the element, you will need an Allen key. Unscrew the fasteners holding the part in place and remove the weight from the housing.
- Disconnect the wiring and hose from the water level sensor. Then carefully remove the pressure switch from the machine;
- remove the powder receptacle;
- loosen the clamps of the hoses connected to the detergent drawer, remove them and take the dispenser “hopper” out of the housing;
- Lay the washing machine on its right side. If there's no tray underneath, that's fine. If there is a bottom, you'll have to remove it by unscrewing the mounting bolts.
- Unscrew the screws located on either side of the drain filter. Next, push the snail housing the filter element into the housing;
- disconnect the connector with wires from the drain pump;
- loosen the clamps and disconnect all tubes from the pump;
- remove the drain pump from the washing machine;
- Remove the engine from the housing. Grasp the motor, push it back slightly, and pull it down;
- Disconnect the shock absorbing elements that support the washing machine tank from below.
This will remove all the parts that interfere with drum removal. Next, all that's left to do is remove the tank and cut it open to gain access to the centrifuge. We'll explain the next steps.
Removing and cutting the tank
Now you need to place the washing machine on its feet. Carefully return the machine to its upright position. This should be done carefully, as the drum is now held in place by only a pair of springs.
Carefully inspect your washing machine. The control module may be interfering with the drum's removal. If so, you'll need to disconnect the circuit board. Disconnect the wiring from the module, unscrew the bolts holding it in place, and, once the latches are released, pull the component out.
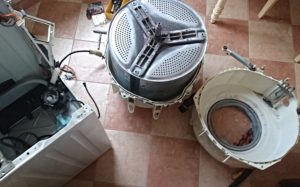
The tank-drum assembly is heavy, so it's best to remove it with two people. With an assistant, lift the mechanism out through the top of the housing, removing the tank from the shock-absorbing springs.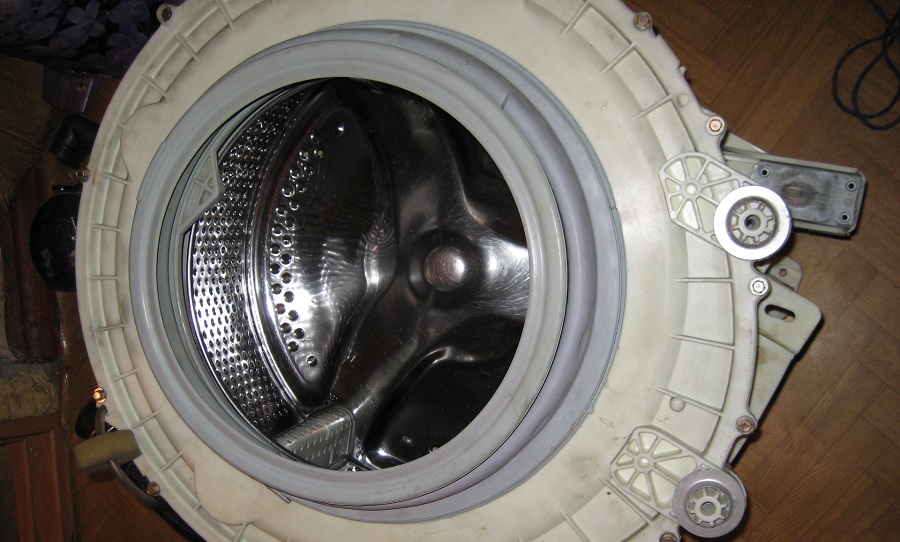
Once the node is removed, it may seem like the job is done. This is not the case. Washing machine tank Candy It is non-detachable, so to get to the drum you will have to saw the container. A problem such as a “monolithic” tank greatly complicates equipment repair.
It's easy to understand why suppliers equip washing machines with a non-disassemblable unit. At a minimum, this reduces production costs, and therefore the cost of production, as well as assembly time. At a maximum, the manufacturer hopes that if the components "hidden" in the drum break, consumers will likely buy the washing machine from a store rather than repair it, as the cost of repair is usually equivalent to that of a new purchase.
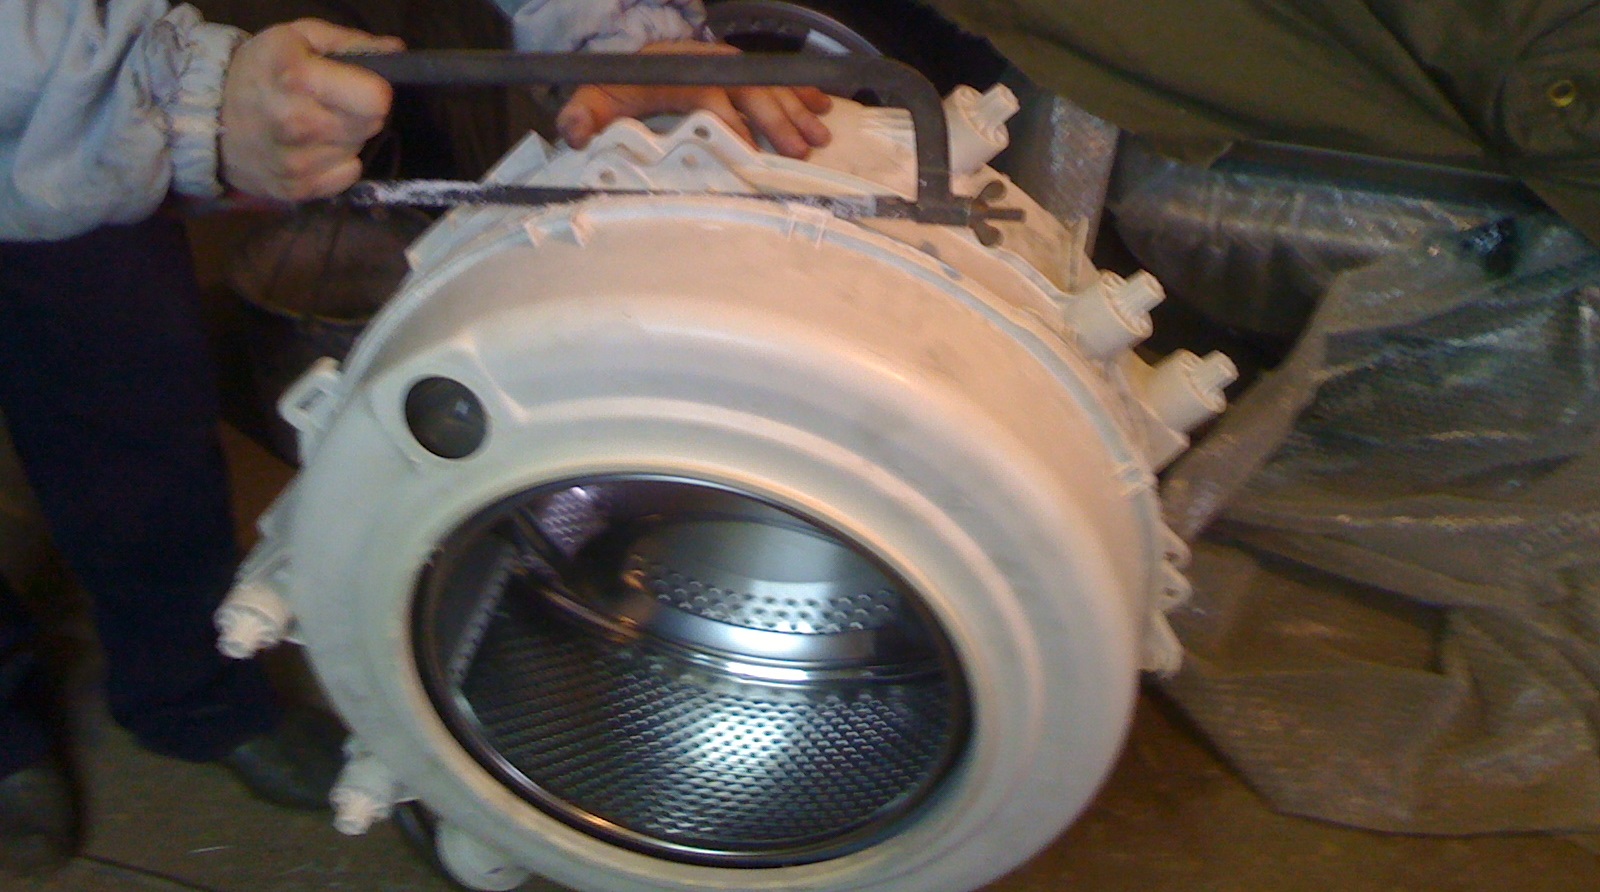
However, the technicians found a way out of this dilemma. They discovered a way to split the tank in half and remove the drum. The tank body is carefully cut with a hacksaw, and after the repairs are completed, it is reattached using waterproof silicone sealant.
To cut apart the non-separable drum of a Candy washing machine and carry out repairs, you need to:
- carefully inspect the container;
- understand where the factory weld is located;
- using a marker or pencil, mark the line along which the cut will be made;
- make small holes in the tank with a drill with a thin drill bit along the entire length of the cut line, at a distance of 3-5 cm;
- cut the plastic container along the marked line using a hacksaw;
- separate the top part from the half with the drum;
- Remove the drum. To do this, turn the tank half over, find the wheel connecting the parts, and remove it;
- Fix the problem. If the bearing assembly is broken, remove the worn components, replace them, and install a new seal. If the process was started due to an object lodged between the tub and the drum, remove the object and ensure the plastic walls are undamaged.
Once all planned manipulations are completed, all that remains is to assemble the container. A moisture-resistant silicone sealant is used to connect the tank halves. First, the area of the new seam should be degreased, then the product should be applied around the entire circumference and the parts should be connected.
Experts recommend not only "gluing" the tank halves together with sealant, but also strengthening the structure with self-tapping screws.
That's where the main challenges end; all that's left is to reassemble the Candy washing machine. The parts are attached to the frame in reverse order. Refer to the photos for guidance. Securely fasten the components inside, connect the wiring and sensors, and carefully check the wiring diagram.
Removing the drum is a labor-intensive process. This is why professional repairs are so expensive. By doing the job yourself, without resorting to service, you can save a significant amount of money.
Interesting:


Readers' comments
Headings
Washing machine repair


For buyers


For users


Dishwasher


Add a comment