How to remove the door of a Samsung washing machine?
 If your washing machine suddenly stops closing or displays a code indicating a lock issue, there's no need to rush to a service center. Almost anyone can remove the door of a Samsung washing machine and diagnose the locking mechanism themselves. You just need to proceed with caution and understand the intricacies of the locking mechanism. This step-by-step guide will help.
Dismantling instructions
You can try to repair the door while it's hanging, but it's best to keep things simple. It's much easier and more convenient to first remove the hatch from the end, including the hinges, and slowly inspect the structure for damage or malfunctions. This is a quick and easy process.
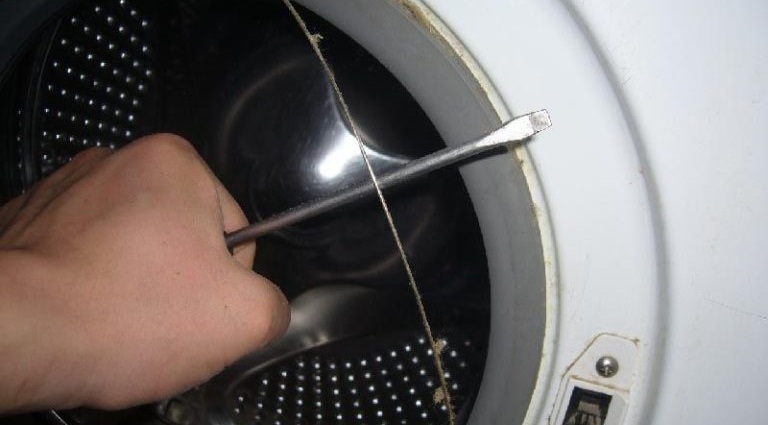
- We loosen the outer clamp on the rubber cuff of the hatch.
There is no need to remove the cuff from the hatch: pulling the elastic back is difficult and time-consuming!
- Carefully insert the elastic band into the drum.
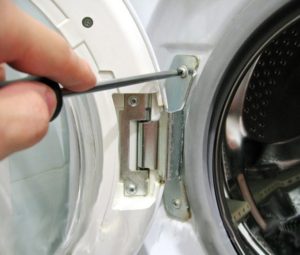
- We unscrew the bolts holding the hinges using a Phillips screwdriver.
That's not all. In addition to the bolts, the door is also held in place by special plastic hook-shaped fasteners. Therefore, you need to lift the door 4-5 mm and then pull it away from the machine. There shouldn’t be any difficulties – the door will “leave” the grooves and remain in the hands of the technician.
Why remove this element?
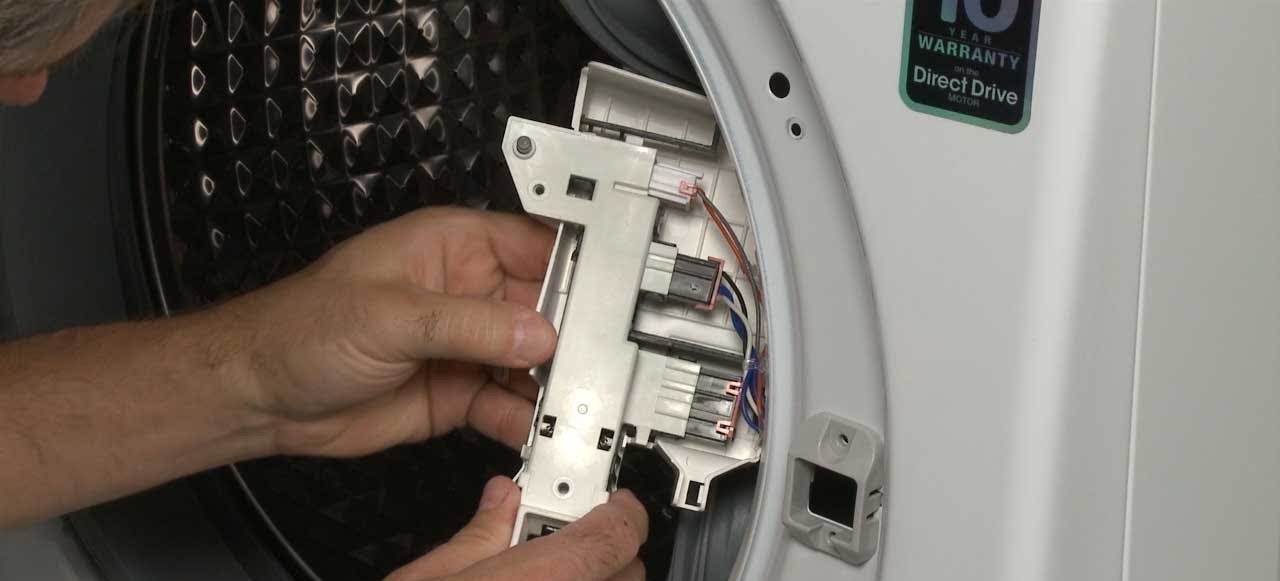
Don't rush into repairs right away. Before you open the door, study its design and the washing machine's electrical diagram. Most Samsung washing machines have a standard design, but it's better to be on the safe side and study the technical documentation first.
Before disassembling, you should also try to determine the cause and nature of the malfunction. Experience shows that door failures are most often caused by the following:
- the glass broke;
- the lock sticks or does not work (the door does not close or open);
- hinges sag;
- the support on the hinge broke.
If there are no visible problems with the glass, hinges, or locking mechanism, the door locking system is likely faulty. The door locking system is an electronic lock that additionally protects the door from accidental opening during the washing cycle. Typical symptoms can help you more accurately determine the cause of the malfunction.
The fixing elements are broken
Most often, problems with the locking mechanism prevent the door from closing tightly. More specifically, the latch lever becomes deformed due to careless or excessive use, causing unevenness and warping. This prevents the door from locking into its grooves. This problem is corrected as follows: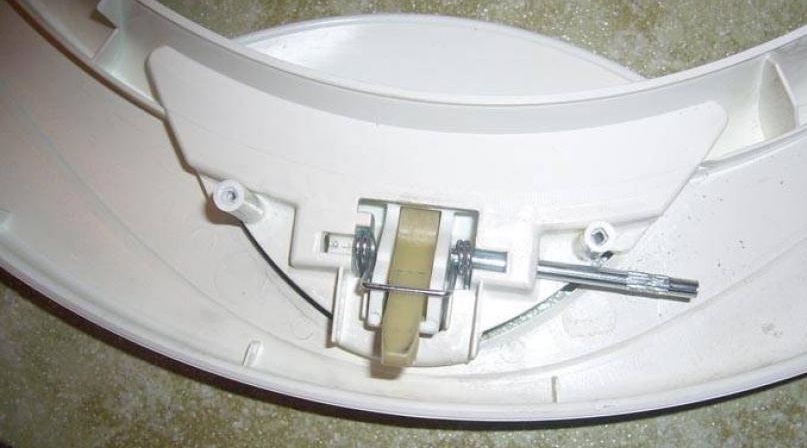
- the door is removed;
- the hatch is placed on a flat surface with the latch facing up;
- all the unevenness on the latch is filed down;
- the latch is treated with graphite lubricant (for preventive purposes);
- The door is installed on the body.
Do not hang wet items on the hatch door or allow children to “ride” on them!
Often, a door won't close tightly due to sagging hinges or loose external fasteners. In this case, the hinges need to be adjusted. However, this will require a "guesstimate"—tightening the fasteners until the latch engages the groove.
The glass is damaged
If the glass on the door is cracked, there won't be any problems with diagnosis—you can start repairing it right away. After removing the hatch from the housing, we get to work. It's important to understand that using a "broken" machine is highly discouraged: if the seal is broken, there's a high risk of leakage and electric shock.
Replacing the glass isn't an option either, as this is only available for a few models. Therefore, the user has only two options: buying a new machine or sealing the gap. The latter is cheaper, but requires some work.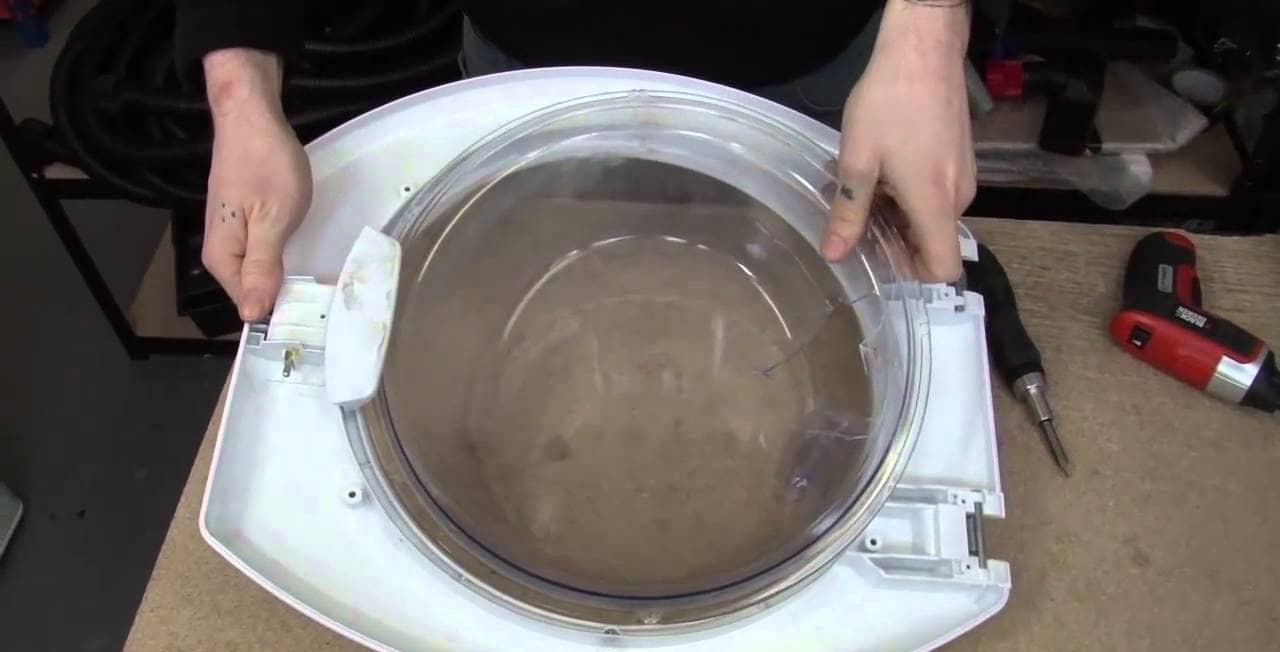
The crack is sealed according to the following instructions.
- Secure the film to the outside of the glass with tape, avoiding any voids or cracks.
- Stick reinforcing tape on the inside.
- Mix the resin and hardener in a 6:4 ratio, adding EDP glue. The result should be a homogeneous mass, similar to thin sour cream. If the mixture is too thick, it is recommended to warm it in a double boiler, stirring regularly.
To seal cracks in the sunroof glass, it is better to use epoxy resin, since tape and sealant provide short-term results.
- Fill the crack with the prepared mixture.
- Leave for 24 hours.
- Remove the polyethylene and sand the glass.
Using tape and sealant instead of epoxy resin solution is not recommended – they adhere less well and provide short-term results. However, it's important to strictly adhere to the proportions. Otherwise, the "protection" won't last long.
Opening mechanism
If the door handle is damaged, the procedure is completely different. After removing the sunroof, you'll need to loosen all the bolts around the perimeter with a screwdriver, pry the door in half, and remove the glass. Next, we'll begin repairing the support:
- drill a hole of 3.5-4 mm;
- we cut the nail down to the depth of the hole;
- heat the nail with a burner for 1-3 minutes;
- insert into the hole;
- We wait for it to harden and check the integrity of the loop.
It's much easier to avoid repairing the door than to prevent problems with its closing. Simply follow the operating instructions, close the hatch carefully, avoid tugging on the handle, and avoid hanging on the door. Otherwise, you'll constantly have to deal with worn-out parts, sagging hinges, and other troublesome problems.
Interesting:


Readers' comments
Headings
Washing machine repair


For buyers


For users


Dishwasher


Add a comment